How to Use Live Gradients in Photoshop 2023
Live gradients in Photoshop 2023 make drawing and editing gradients easier than ever. This step-by-step tutorial shows you how to draw and edit a live gradient, save a custom gradient preset, apply a gradient to your image, and more!
Download PDF: How to Use Live Gradients in Photoshop 2023
In this tutorial, I show you how easy it is to draw and edit gradients using live gradients in Photoshop 2023.
Live gradients are a huge improvement over Photoshop’s traditional gradients, for a number of reasons. First is the new live preview of the gradient as we draw it. Second, live gradients are editable and non-destructive. And third, live gradients include new and intuitive on-canvas controls for adjusting the colors, the size, the angle of the gradient and more. So let’s see how they work.
I’ll start by showing you everything you need to know to draw and edit a live gradient, and then we’ll look at a real world example of how you might use a gradient with your photo.
Which version of Photoshop do I need to use live gradients?
Live gradients were added to Photoshop in the May 2023 update.
You can get the latest Photoshop version here. Or use the Creative Cloud Desktop app to make sure that your copy of Photoshop is up to date.
Let's get started!
The document setup
For this tutorial, I’ve gone ahead and created a new document with a plain white background.

How to draw a live gradient in Photoshop
Here are the steps for drawing a live gradient in Photoshop. Once we’ve drawn the gradient, I’ll show you how to edit the colors, the size, angle, opacity and more.
See Also:
- Add a Vignette to a Photo with Live Gradients
- Fade an Image to Color with Live Gradients
- Find Photoshop's Missing Gradients, Patterns and Shapes
Step 1: Select the Gradient Tool
First select the Gradient Tool from the toolbar (or press G on your keyboard).

Step 2: Set the gradient mode to Gradient
In the Options Bar, make sure the Gradient Mode (a new option) is set to Gradient. Choosing Classic gradient from the menu will draw a legacy gradient without any of the new live features.

Step 3: Choose a gradient preset (optional)
The color swatch next to the Gradient Mode displays the current gradient colors. By default, the gradient uses your Foreground and Background colors (black and white).

I’ll show you how to choose your own custom colors after we draw the gradient. But Photoshop includes lots of gradient presets that we can choose from.
To select a preset, click the color swatch to open the Gradient Preset picker.

Twirl open any of the themes (Blues, Purples, Pinks, and so on), then click on a preset’s thumbnail.
I’ll choose one from the Purples theme. Click outside the Gradient Preset picker to close it.

Step 4: Choose a gradient style
Next to the Gradient Picker are the Gradient Style options. From left to right, we have Linear, Radial, Angle, Reflected and Diamond.
Linear and Radial are the styles we use the most. Linear draws the gradient in a straight line while Radial draws it outward in a circle. You can cycle through the styles from your keyboard using the left and right bracket keys ( [ and ] ).
I’ll use Linear, which is selected by default.
Step 5: Leave the other gradient options at their defaults
Still in the Options Bar, leave the Reverse option unchecked unless you want to reverse the gradient’s direction and swap the colors. You can always reverse the gradient after you draw it, if needed.
Also, leave the Dither option checked, which helps to reduce color banding.

Finally, leave the Method option set to Perceptual, which displays colors in a way that matches how our eyes perceive colors. Linear is the most basic and displays color transitions in a simple straight line, while Classic matches how gradients appeared in previous Photoshop versions.
In most cases, Perceptual is the best choice.

Step 6: Draw your gradient
Then to draw your live gradient, simply click in the document to set a starting point, keep your mouse button held down and drag away from that point. Photoshop displays a live preview of the gradient as you draw it.
To draw the gradient in a straight horizontal or vertical line, hold the Shift key on your keyboard as you drag.
Release your mouse button to complete the gradient.

In the Layers panel, notice that the live gradient appears on its own Gradient Fill layer which keeps the gradient separate and non-destructive.

Editing a live gradient using the on-canvas controls
A great feature of live gradients is that they remain editable even after we draw them. And the easiest way to edit a gradient is with the new on-canvas controls. Here’s how to use them.
Scale
To adjust the scale (the size or length) of the gradient using the on-canvas controls, click and drag one of the round color stops on either end of the gradient.

Angle
You can also drag a color stop to rotate the gradient’s angle.
Hold Shift to rotate the angle in 15 degree increments.

Position
To reposition the gradient on the canvas, click and drag the line that connects the color stops.

Midpoint
And to adjust the midpoint of the gradient, drag the diamond icon above the line.

How to change a gradient color
To change a color, double-click on its color stop. I’ll change the color on the left.

Then choose a new color from the Color Picker.

Or, while the Color Picker is open, you can click anywhere along the gradient to sample that color.
Here I’m sampling the purple color on the right, which temporarily makes both colors in the gradient the same.

Then drag the Hue slider in the Color Picker to choose a slightly different color.
Gradients often work best with colors that are fairly similar, with transitions that are more subtle, as opposed to using colors at opposite sides of the color wheel.
Click OK to close the Color Picker when you’re done.

How to add a new color to the gradient
To add a new color to the gradient, hover your mouse cursor just above or below the line at the spot where you want to add the new color.
A plus sign will appear next to your cursor.

Then click to add a new color stop at that location.
Photoshop will use your current Foreground color as the new color, which in my case is black.

Double-click on the new color stop to choose a color from the Color Picker.
I’ll choose white just to make it easy to see.

You can then drag the color stop along the line to reposition it.

Or drag the diamond icons on either side of the new color stop to change the midpoint locations.

How to delete a color from the gradient
To delete a color from the gradient, click on its color stop to select it.
Then either drag the color stop away from the line until it disappears, or press the Delete key on your keyboard.

Editing a live gradient from the Properties panel
Another way to edit a live gradient in Photoshop is from the Properties panel. Here you’ll find the same options that we can edit using the on-canvas controls, plus more.
Presets
Use the Presets option at the top of the Properties panel to choose a different gradient preset.
Click the color swatch to open the Gradient Preset picker, twirl open a color theme and click on a thumbnail to choose a preset.
I’ll reset my gradient back to the same preset from the Purples theme that I chose earlier in the Options Bar.

Style
Next we have the same Style options (Linear, Radial, Angle, Reflected, and Diamond) that we saw in the Options Bar, so you can change the style for your gradient after you draw it.
I’ll leave mine set to Linear.

Angle
To adjust the angle of the gradient, you can enter a specific value, or click the arrow next to the value box and choose a preset angle.
You can also click and drag across the word Angle to adjust the value using the scrubby slider. While dragging the scrubby slider, hold the Alt (Win) / Option (Mac) key to adjust the value in smaller increments. Or hold Shift to adjust it in larger increments.

Scale
Use the Scale option to adjust the size or length of the gradient, either by entering a specific value, clicking the arrow next to the value box and dragging the slider, or by clicking and dragging across the word Scale to adjust it using the scrubby slider.
Again hold the Alt (Win) / Option (Mac) key while dragging with the scrubby slider to adjust the scale in smaller increments, or the Shift key for larger increments.

Reverse and Dither
Check the Reverse option in the Properties panel to reverse the direction of the gradient, which swaps the colors on the left and right sides.

And you can turn off Dither from the Properties panel, although I wouldn’t recommend it unless you want color banding to be more obvious.

Choosing a Solid or Noise gradient
The Type option in the Properties panel allows us to switch from a Solid gradient (the more traditional look) to a Noise gradient.

Noise gradients use a random mix of colors to create more of a textured effect.

When Type is set to Noise, the following options appear:
- Roughness
- Color Model
- Restrict Colors
- Add Transparency
- Randomize
Roughness
Roughness controls the smoothness of the noise.
Lower values create smoother, softer variations with less contrast, as we see in the preview bar below the Roughness option.

Higher Roughness values create a sharper, more obvious line pattern. The default value is 50 percent.

Color Model
Color Model lets you switch the noise gradient between RGB, HSB and LAB.
- RGB (the default model) displays colors as a random mix of red, green and blue values.
- HSB creates a random mix of hue, saturation and brightness values.
- LAB uses a random mix of lightness, “a” values (the range of colors between green and magenta) and “b” values (the range of colors between blue and yellow).

You can then use the three sliders to limit the range of colors in the noise depending on your chosen color model.
For example, with the color model set to HSB:
- The H sliders can be used to limit the range of possible hues.
- Use the S sliders to limit the range of saturation values.
- The B sliders limit the range of brightness values.

Restrict Colors and Add Transparency
Turn on Restrict Colors to prevent any of the colors in the noise gradient from becoming oversaturated.
Or turn on Add Transparency to add random amounts of transparency across the gradient.
You may need to scroll down in the Properties panel to find these options.

Randomize
Finally, click the Randomize button to regenerate the noise gradient with new random colors.

Switching back to a Solid gradient
In most cases you’ll want a traditional solid gradient, so I’ll switch the type from Noise back to Solid.

Method
Method allows you to change the way colors are displayed in the gradient, and is the same as what we saw earlier in the Options Bar.
- Perceptual (the default) displays colors that look more natural.
- Linear displays color transitions in a simple straight line.
- Classic is how gradients were displayed in previous Photoshop versions.
In most cases, leaving the method set to Perceptual is the best choice.

Smoothness
The Smoothness value controls the smoothness of the transition between colors in the gradient.
To make it easier to see, I’ll temporarily switch to the Black, White gradient preset.

The default Smoothness value is 100 percent.

And notice that at 100 percent, most of the transition between the colors happens closer to the middle.
This creates a higher contrast gradient, which is usually what we want and is great for creating a high contrast black and white photo.

If we lower the Smoothness to 0 percent:

The transition is more evenly spread out.
It can be tough to spot the difference sometimes, but leaving Smoothness at 100 percent usually looks best.

I’ll switch back to my Purples gradient preset.

Editing the gradient colors
Below the Smoothness option is the main gradient preview bar showing the current gradient colors.
Here we can edit the colors in much the same way that we did earlier using the on-canvas controls.
- Double-click on a color swatch to choose a new color from the Color Picker.
- Click below the bar to add a new color stop, then double-click on it to change the color.
- Drag a color stop left or right to change its location in the gradient.
- Drag the diamond icon between two color stops to change the midpoint location.
- Delete a color stop by dragging it away from the preview bar.

If you moved the midpoint between two color stops and want to reset it back to the exact middle, click on its diamond icon to select it, then set the Location value to 50 percent.

Adding opacity to the gradient
To add transparency to a live gradient, we can’t use the on-canvas controls. Instead we need to use the Opacity controls in the Properties panel. You may need to twirl open the Opacity controls to view them.

Below the preview bar is an opacity stop on either end of the gradient (similar to a color stop).
Click on a stop to select it. I’ll select the one on the left.

Then to add transparency at that location, either:
- Enter a specific value into the Opacity option, or
- Click the arrow next to the value and drag the slider, or
- Click and drag across the word Opacity to adjust it using the scrubby slider.
I’ll lower the opacity for the left side of the gradient to 0 percent.

Notice that the left side now appears white on the canvas. But that’s because it’s transparent, and the white is from the Background layer below it showing through.

If I turn off the Background layer in the Layers panel:

We see the transparency, indicated by the checkerboard pattern.
So I now have a gradient that runs from transparent on the left to purple on the right.

You can click below the opacity preview bar to add more opacity stops, drag to reposition them, set the opacity for each stop separately, or drag the diamond icon between two opacity stops to adjust the midpoint.
To delete an opacity stop, either drag it away from the preview bar until it disappears, or click to select it and then click the trash bin icon.

I’ll reset the opacity for the left stop back to 100 percent.

Reset Alignment
The Reset Alignment button in the Quick Actions section will realign the gradient to the canvas.
This resets the gradient angle to 90 degrees and stretches the gradient across the canvas from top to bottom.

How to save a custom gradient preset
Finally, to save a gradient with your custom colors, click the Save Preset button.

Give the new preset a name. I’ll name mine Transparent to Purple
.
Then click OK to save it.

Once the gradient is saved, open the Gradient Preset picker, either in the Options Bar or at the top of the Properties panel.

Then scroll down below the default themes and you’ll find your new custom preset at the bottom.

Example: Using a live gradient with an image
And that’s everything you need to know to draw, edit and save live gradients in Photoshop.
So let’s look at an example of how you might use a live gradient with your photo.
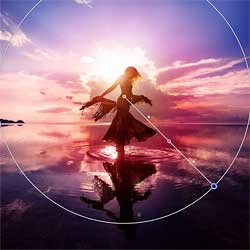
For this part of the tutorial, I’ll use this image from Adobe Stock, and I’ll use a live gradient to quickly change and enhance the colors.

Selecting the Gradient Tool
First I’ll select the Gradient Tool from the toolbar.
Choosing a gradient preset
Then in the Options Bar, I’ll click the color swatch to open the Gradient Preset picker and I’ll choose a preset from the Reds theme.

Choosing a gradient style
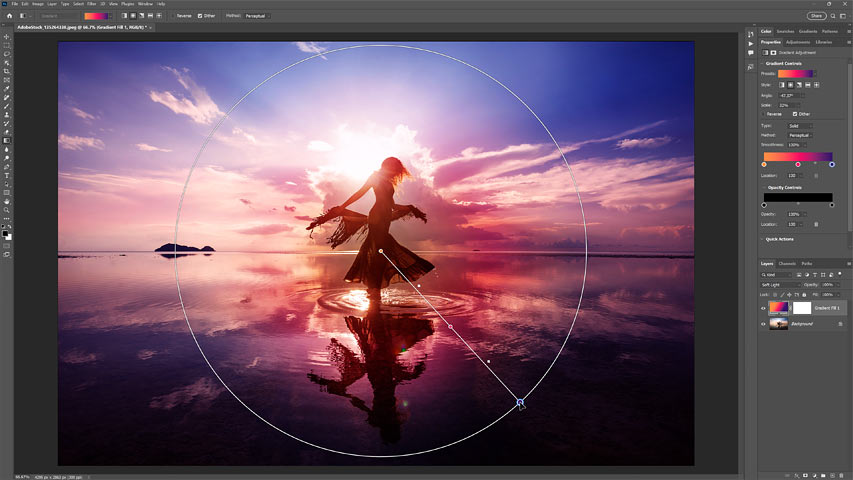
Since we’ve only looked at linear gradients so far, this time I’ll set the gradient style to Radial.

Drawing the initial live gradient
Then I’ll click on the image and drag out an initial gradient.
Since the style is set to Radial, the gradient appears in a circle extending outward from the starting point.

Changing the gradient’s blend mode
Of course, there’s an obvious problem. The gradient is blocking the image from view. So to fix that, I need to change the gradient’s blend mode.
In the Layers panel, the gradient appears on a new Gradient Fill layer above the image. So with the Gradient Fill layer selected, I’ll change its blend mode from Normal to Soft Light.

And now the colors from the gradient are blending with the image.
The Soft Light blend mode also enhances contrast, making the effect really pop.

Adjusting the live gradient
Since we’re working with a live gradient, all of the gradient properties remain editable.
For example, I can reposition the gradient by dragging the line that connects the color stops. Or since this is a radial gradient, I can also drag the color stop in the center.

Or I could scale and resize the gradient by dragging the color stop on the outer edge.
I could also change the colors by double-clicking on a color stop, or add a new color stop by clicking just above or below the line. And I could drag the color stops to reposition the colors or drag the diamonds to adjust the midpoints.
But in this case, I like the colors the way they are.

How to hide or show the on-canvas controls
To hide the on-canvas controls and get a better view of the image, just select any other tool in the toolbar. I’ll select the Move Tool.

And now we see how the gradient looks without the on-canvas controls in the way.
To bring the on-canvas controls back, reselect the Gradient Tool (and make sure the Gradient Fill layer is active in the Layers panel).

Lowering the opacity of the gradient
Finally, if the gradient colors are too strong, simply lower the Gradient Fill layer’s opacity in the Layers panel. I’ll lower it to 60 percent.

Here once again is the photo with the original colors.

And here is the final result after lowering the opacity of the gradient.

And there we have it! That’s how to use live gradients in the latest version of Photoshop.
More Photoshop Gradient Tutorials:
- How to color grade images using gradient maps
- Instant high contrast black and white photos with gradient maps
- How to warp a gradient inside text
- Find the missing gradients, patterns and shapes in Photoshop
Don't forget, all of my Photoshop tutorials are now available to download as PDFs!