How to Add a Vignette in Photoshop with Gradients
In this tutorial, I show you the newest and easiest way to add a vignette to your photo using Photoshop and its new Live Gradients feature in Photoshop 2023.
Download PDF: Add A Vignette To A Photo With Live Gradients
Vignettes are a timeless and classic effect that darken the edges of a photo to bring focus and attention to your subject. Vignettes can also give photos a vintage or nostalgic look, or add a sense of mystery or drama.
And with live gradients in Photoshop 2023, creating a vignette has never been easier. The term live gradient means that all of the gradient’s properties, including the colors, size and position, remain editable after the gradient is drawn.
By combining a live gradient’s flexibility with Photoshop’s classic Foreground to Transparent gradient, we can add a vignette with complete control over how it looks.
As we work through the steps in this tutorial, you’ll learn how to:
- Add a vignette using a Foreground to Transparent gradient;
- Edit the vignette using Photoshop’s live gradient controls;
- Choose different colors for your vignette;
- Blend the vignette more naturally with your image;
- And more!
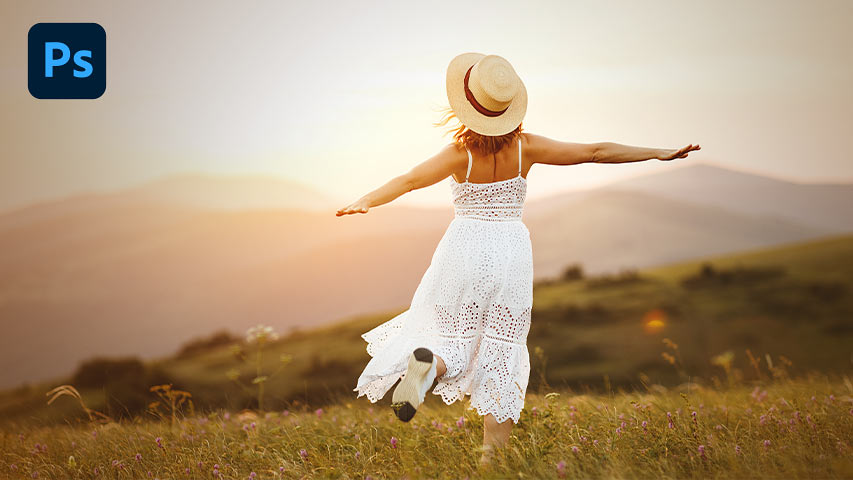
Here’s an example of the basic vignette effect we’ll create. I’ll also show you how to customize the vignette, including how to choose colors that match your image and how to restore brightness in the highlights.
Which Photoshop version do I need?
Live gradients were added to Photoshop in the May 2023 update.
You can get the latest Photoshop version here. Or if you are already an Adobe Creative Cloud subscriber, make sure that your copy of Photoshop is up to date before you continue.
Let's get started!
The document setup
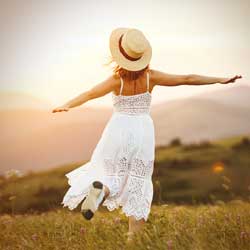
I’ll use this photo from Adobe Stock but you can easily follow along with your own image.

How to create a vignette in Photoshop
Here are the steps for adding a vignette to your photo using using Photoshop and live gradients.
See Also:
- Learn more about Live Gradients in Photoshop
- Fade an Image to Color with Live Gradients
- Find Photoshop's Missing Gradients, Patterns and Shapes
Step 1: Zoom out from your image
First, zoom out to add some extra room around your image. We’ll need the room when we draw the gradient.
To zoom out, go up to the View menu in the Menu Bar and choose the Zoom Out command.

You should see some grey pasteboard area around the photo.


Step 2: Select the Gradient Tool
Next, select the Gradient Tool in the toolbar.

Step 3: Set your Foreground color to black
Still in the toolbar, make sure your Foreground color is set to black.
If it’s not, press D on your keyboard to reset your Foreground and Background colors to their defaults (which are black for the Foreground and white for the Background).

Step 4: Set the Tool Mode to Gradient
Then in the Options Bar, make sure the Tool Mode (new as of Photoshop 2023) is set to Gradient, which it should be by default.
Gradient
is the setting we need to draw a live gradient. The other option, Classic gradient
, forces the Gradient Tool to behave like it did in earlier Photoshop versions, which won’t work for our vignette effect.

Step 5: Choose the Foreground to Transparent gradient
To create the vignette, we need Photoshop’s Foreground to Transparent gradient.
So click on the gradient swatch to open the Gradient Preset picker.

Twirl open the Basic folder and choose the Foreground to Transparent gradient (the thumbnail in the middle).
Then press Enter on a Windows PC, or Return on a Mac, to close the preset picker.

Step 6: Set the Gradient Style to Linear
Next to the gradient preview bar are the Gradient Style icons.
For this vignette effect, choose the Radial style (the second icon from the left), which will draw the gradient outward from its center.

Step 7: Turn on the Reverse option
Also in the Options Bar, and very important, turn on the Reverse option by clicking its checkbox.
If you skip this step, the vignette effect won’t work. I’ll show you what I mean in a moment.

Leave Dither turned on and the Method set to Perceptual. Both are the default settings. And now we’re ready to draw the gradient.

Step 8: Draw a radial gradient to add the initial vignette
Click and hold on your image in the spot where you want the center of the vignette to appear. Don’t worry about getting the spot exactly right because with live gradients, we can reposition the gradient after we draw it.
Then with your mouse button still down, drag away from that spot to extend the gradient outward.
The center of the gradient is transparent, allowing the image below it to show through as the gradient gradually fades to black on the outer edge.

If you see black in the center and transparency around the edge, it’s because you forgot to turn on the Reverse option in the previous step. So go ahead and turn it on.

Then continue drawing the gradient outward. You’ll usually want to extend the gradient beyond the edges of your image so that the corners don’t appear too dark (which is why we zoomed out in Step 1).

In the Layers panel, the gradient appears on its own Gradient Fill layer. This keeps the gradient and the image separate so we can edit the gradient, which we’ll do next.

Step 9: Reposition the vignette around your subject
Now that the gradient is drawn, you can reposition it by dragging the round color stop in the middle. This makes it easy to center the vignette around your subject, or place it anywhere you want.
I’ll drag the center of my gradient a bit to the right.

After moving the gradient, you may need to readjust its size by dragging the color stop on the outer edge.
I’ll drag it outward a bit more.

Step 10: Expand the transparent area in the center
If the vignette is making your subject too dark, you can expand the transparent area in the center of the gradient.
Go to the Properties panel and scroll down to the Opacity Controls. You may need to twirl them open.

Then click on the white transparency stop on the right and begin dragging it to the left while keeping an eye on your image.

The further you drag, the more the transparency will push outward from the center, forcing the dark areas closer to the edge and restoring the original brightness of your subject.

Step 11: Change the color of the vignette
Using black for the vignette color can make the effect look dull.
To choose a different color, double-click on the color stop on the outer edge of the gradient.

Then either choose a new color from the Color Picker, or click on an area of the image to sample the color.
I’ll click on the mountain in the background to sample a shade of brown.

Then, since I’m using this color for a darkening effect, I’ll choose a much darker and more saturated version of it in the Color Picker.
Click OK to close the Color Picker when you’re done.

With my gradient now fading to dark brown instead of black, the vignette looks a bit more subtle and natural.
The new color I chose is still too dark for my taste, but it will make the next step easier to see as I show you how to hide the vignette in the highlights.

Step 12: Restore the brightness in the highlights
One problem with the vignette is that it’s darkening the highlights. With my image, it’s very noticeable in the sky.
To reduce the vignette effect in the highlights, click the fx icon at the bottom of the Layers panel.
Then choose Blending Options from the top of the list.

At the bottom of the Layer Style dialog box, look for the Underlying Layer slider bar (the bottom of the two bars).

Below the right side of the bar is a white highlights slider.

Hold the Alt key on a Windows PC, or the Option key on a Mac. Then with the key down, split the slider in half by clicking and dragging the left half away from the right half.

Keep an eye on your image as you continue dragging the left half of the slider towards the left. The further you drag, the more the highlights will be restored, so adjust the slider as needed.

Click OK to close the Layer Style dialog box when you’re done.
And now the vignette is barely noticeable in the sky (the highlights) while still darkening the edges and corners in the lower half of the image.

Step 13: Change the blend mode to Soft Light
Another way to help the vignette look more natural is by changing its blend mode in the Layers panel.
With the Gradient Fill layer active, change the blend mode from Normal to Soft Light.

While the Normal (default) blend mode simply darkened the image, Soft Light is more of a lighting effect and does a better job of blending the vignette and the image together.

Step 14: Adjust the size or position of the vignette if needed
Make any final adjustments to the size or position of the gradient by dragging the color stops.
I’m happy with its size, but I’ll drag the center of the gradient higher to help darken the bottom of my image.

Step 15: Fade the vignette by lowering the opacity
Finally, if the vignette looks too strong, you can fade it by lowering the Opacity of the Gradient Fill layer in the Layers panel.
I’ll lower the opacity to 80 percent.

How to hide the live gradient controls
To hide the gradient controls and get a better view of your vignette, select the Background layer in the Layers panel to deselect the Gradient Fill layer.
Reselecting the Gradient Fill layer will bring the gradient controls back.

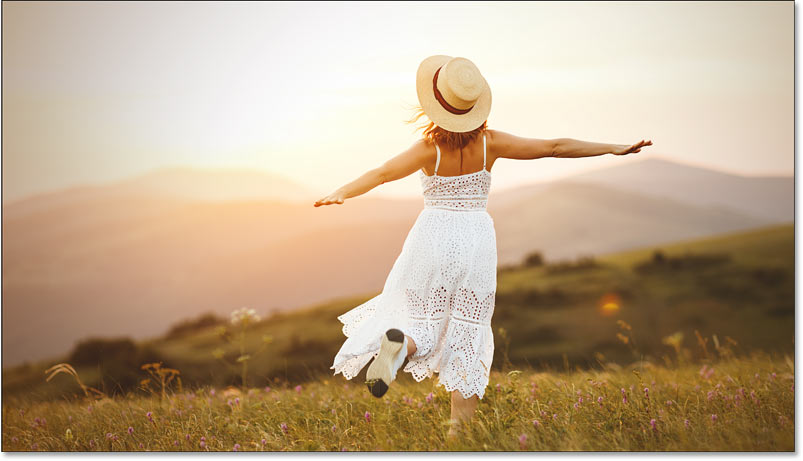
And here, with the controls hidden, is my final vignette effect.

And there we have it! That’s how easy it is to add a vignette to your photo using Photoshop and the new live gradients in Photoshop 2023.
Related tutorials:
- Learn more about Live Gradients in Photoshop
- Fade an Image to Color with Live Gradients
- Find Photoshop's Missing Gradients, Patterns and Shapes
Don't forget, all of my Photoshop tutorials are now available to download as PDFs!