
How to Warp a Gradient in Text with Photoshop
Bending and warping text is easy in Photoshop. But if you try to warp text that has a gradient applied to it, the letters bend but the gradient stays perfectly straight. Here is the simple trick to lock your gradient to your text so they warp and bend together. (For Photoshop 2026 or earlier).
Download PDF: How To Warp A Gradient In Text
Filling text with a gradient is a great way to add color and life to your designs. But if you try to bend or warp that text, you'll run into a frustrating problem: the letters bend, but the gradient does not.
In this tutorial, I'll show you a simple, hidden trick to lock your gradient to your letters so they warp and bend perfectly together.
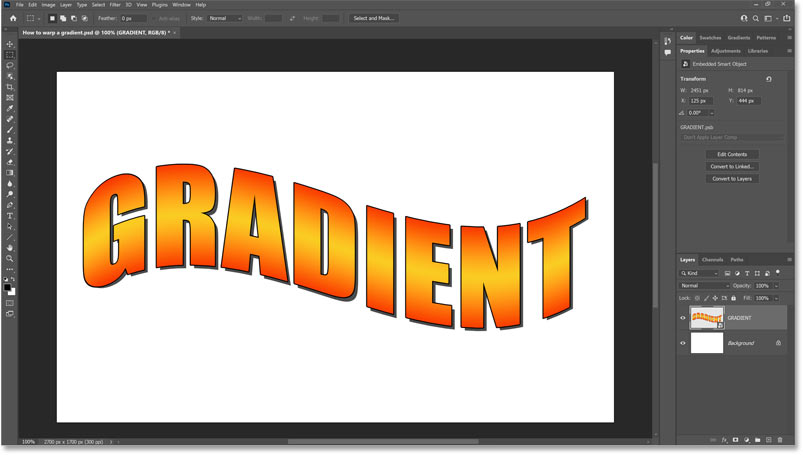
Here's an example of the result we'll achieve. Notice how the angle of the gradient bends along the word to match the warp of the text.
Let's get started!
Which Photoshop version do I need?
I'm using Photoshop 2026. You can get Photoshop here or use the Creative Cloud Desktop app to make sure Photoshop is up to date.
Step 1: Add your text
Start with a document containing some text. I’ve added the word GRADIENT
. The text is currently filled with white, with a couple of layer effects (a thin black stroke and a drop shadow) applied so it's visible against the white background.
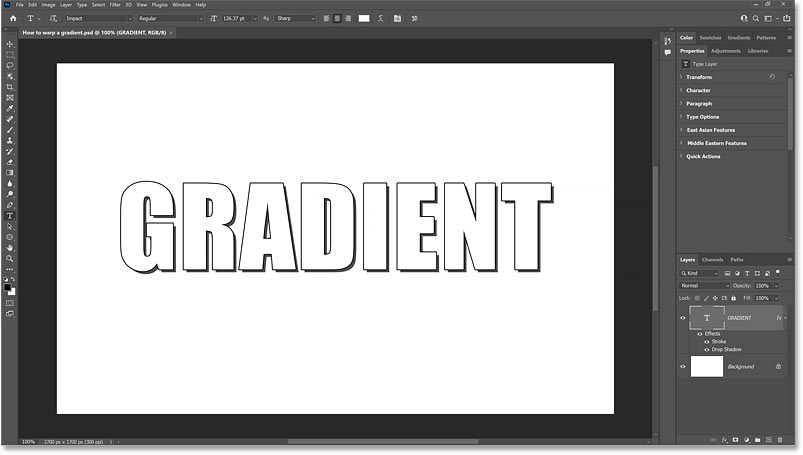
In the Layers panel, notice how the Stroke and Drop Shadow layer effects are listed under the Type layer.

Step 2: Add a Gradient Overlay to the text
Click the fx icon at the bottom of the Layers panel.
Choose Gradient Overlay from the menu.

Choosing a gradient
In the Layer Style dialog box, click the small arrow to the right of the gradient swatch to choose a new gradient.

Gradients are divided into folders based on their color theme.
Open the Oranges folder and double-click the orange-to-red gradient to select it.

Photoshop instantly fills the text with your selected gradient.

Related: The New Gradients and Gradients Panel in Photoshop
Setting the gradient’s Angle and Style
Leave the Angle set to 90 degrees, but change the Style from Linear to Reflected.

Changing the style to Reflected moves the bright orange part of the gradient to the exact middle of the letters. This makes it much easier to see that the gradient is currently running in a straight, flat line.

Closing the Layer Style dialog box
Click OK to close the Layer Style dialog box.

Here is the text with the gradient applied. So far so good.

How Photoshop applies layer effects
Back in the Layers panel, notice that the Gradient Overlay sits between the Stroke and Drop Shadow effects below the Type layer.
Photoshop applies layer effects in a specific order: the Drop Shadow goes on the bottom, the Gradient sits on top of the shadow, and the Stroke is applied above everything else.

What normally happens when we warp the text
Let’s see what happens when we use Photoshop's default text warp.
Go to Type > Warp Text in the Menu Bar.

Or select the Type Tool in the toolbar:

Then click the Warp Text icon in the Options Bar:
Choosing a warp style preset
In the Warp Text dialog box, click the Style drop down and choose Arch.

Adjusting the Bend amount
Leave the direction set to Horizontal, but lower the Bend value to 30%. Click OK.

The gradient does not bend with the text
Look closely at the result. The text itself is bending upward, and the stroke and drop shadow are bending right along with it.
But the gradient is not. It's completely ignoring the warp, running in a straight, horizontal line through the arched letters.

To make this even easier to see, double-click Gradient Overlay in the Layers panel

Lower the Scale to 10%.

You can clearly see the gradient has no warp applied to it at all.

Click Cancel to close the dialog box without saving.

Undoing the Warp Text command
Go to Edit > Undo Warp Text to return your text to normal.

Step 3: Convert the type layer into a smart object
So, how do we force the gradient to bend with the text? The trick is to convert the Type layer into a smart object.
Make sure your Gradient Overlay and all other layer effects are applied exactly how you want them. The effects need to be applied to the Type layer before converting it to a smart object.

Select the Type layer.

Click the menu icon in the upper right corner of the Layers panel.
Choose Convert to Smart Object:

It won’t look like anything happened to your text on the canvas. But in the Layers panel, your text and effects have been baked into a smart object, indicated by the smart object icon in the lower right of the thumbnail.

Step 4: Choose the Warp command
Because your text is now a smart object, the standard Warp Text icon in the Options Bar is grayed out and unavailable.

So is the Warp Text command under the Type menu:

Instead, go to Edit > Transform > Warp.

Choose a warp style preset
Photoshop will place a warp grid around your text.

Go up to the Options Bar. You'll find all the same warp styles available in the Warp drop down menu (which is set to Custom by default).

Click the drop down and choose Arch.

Because we converted the layer into a smart object, the gradient is now locked to the text.
The gradient and the letters finally bend perfectly together.

Using the Bend handle
If you want to adjust the arch, you can enter a specific value into the Bend field in the Options Bar.

Or, simply click and drag the Bend handle (the small square at the top of the grid) up and down to adjust the curve manually.

Choosing a different warp style
You can try out other styles from the Warp menu, like Flag.

No matter which style you choose, the gradient and the text will always warp together.

Step 6: Commit the warp
Click the checkmark in the Options Bar to accept the warp, or press Enter (Win) / Return (Mac).

And there we have it! That’s how to fill text with a gradient and warp them perfectly together using the power of smart objects in Photoshop.
Don't forget, all of my tutorials are available to download as PDFs. Check out my Text Effects or Photo Effects tutorials for more creative ideas!