A Better Way to Add Multiple Strokes to Text in Photoshop

Trying to add multiple strokes to your text using Layer Effects, only to watch the rounded corners end up flat? You aren't doing anything wrong; that's just how Layer Effects work. In this step-by-step tutorial for Photoshop 2026, I'll show you a much better way. Learn how to use Shape layers to build endless strokes that keep your letters perfectly round.
Download the PDF: A Better Way To Add Multiple Strokes To Text
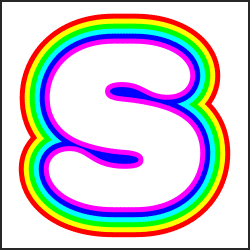
In a previous tutorial, I showed you how to add multiple strokes around text using Photoshop’s layer effects. We used them to create these rainbow color strokes.
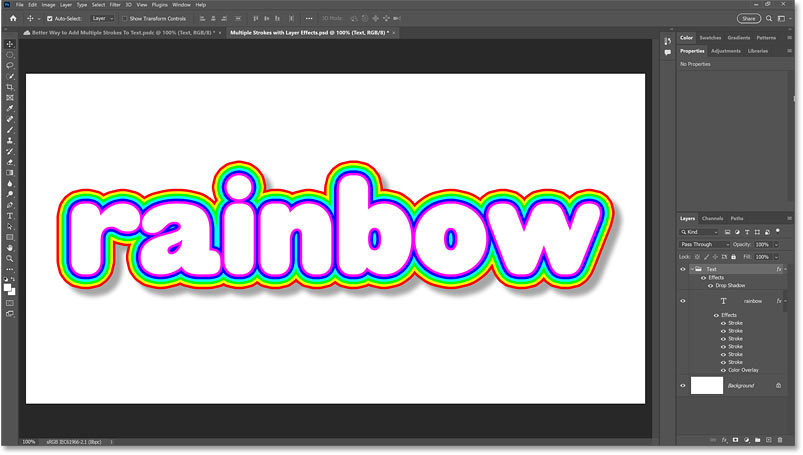
In the Layers panel, I used a total of six strokes, all listed as effects under the type layer. Each stroke is set to a different color and size.

The problem with adding strokes using layer effects
While layer effects make it easy to add strokes, they have one big problem.
Look closely at the text. The letters have rounded edges, but as the strokes extend outward, they lose that roundness. By the time we reach the outer stroke, the corners have flattened out into hard, straight lines.

A better way using shape layers
Unfortunately, this is simply how layer effects work. To fix it, we need a completely different approach.
In this tutorial, I’ll show you how to recreate the exact same multiple-stroke effect using Shape layers. This method preserves the perfect roundness of your letters, no matter how many strokes you add!

Which version of Photoshop do I need?
I’m using Photoshop 2026. Get Photoshop here or use the Creative Cloud Desktop app to make sure Photoshop is up to date.
Let's get started!
The document setup
I’m starting with black text in front of a white background. The font I’m using is HWT Gothic Round, available through Adobe Fonts.
My type color set to black for now so I can see it in front of the background.

Related tutorial: How to place multiple images in text
Step 1: Convert the Text Into a Shape
Look at the Layers panel. Right now, the text is a standard Type layer. We need to convert it into a shape.
Click your Type layer to select it.

Go to Type > Convert to Shape.

Photoshop converts the letters into a shape. If your Type Tool is still active, you will see a path outline and anchor points around the letters.

In the Layers panel, a small shape icon appears in the lower right corner of the layer thumbnail, telling us we now have a shape layer.

Step 2: Select the Path Selection Tool
Select the Path Selection Tool from the toolbar, select the Path Selection Tool (located directly below the Type Tool).

Click anywhere on the document background. This hides the blue path outline around your letters so you can see your work clearly.

Step 3: Choose a Stroke Color and Size
With the Path Selection Tool active, the Options Bar displays your Shape options. Leave the Fill color set to black for now.

Click the Stroke color swatch.

Click the Custom Color icon in the upper right of the panel to open the Color Picker.
I'm recreating the same rainbow effect I made using layer effects in the previous tutorial, so my first color is magenta.
Set the R (Red) value to 255, the G (Green) value to 0, and the B (Blue) value to 255. Click OK.

Click anywhere on the document background to close the Stroke Color options box.
Enter a width for the stroke in the Size box. I’ll enter 12 px. (Note: Remember this number! We'll be adding this exact value to every new stroke we create.)

Step 4: Set the Stroke Alignment to Outside
We want the stroke to wrap around the outside of the letters.
Click the Stroke Options box.

Set the Align option to Outside (the bottom of the three icons).

If you aren't sure which icon is which, click the More Options button.

This dialog box shows the exact same alignment options, but with helpful text labels. Choose Outside and click OK.

Click anywhere on the document background to close the Stroke Options box. Your first stroke now wraps around the text!

Step 5: Duplicate the Shape Layer
We can't add a second stroke to the same shape layer without using layer effects. Instead, we need to duplicate the shape itself.
Drag your shape layer down onto the New Layer icon at the bottom of the Layers panel.

You now have a second shape layer, with its own stroke, sitting directly above the original.

Step 6: Select the Bottom Shape Layer
For this multi-stroke effect to work, always apply the new stroke to the bottom shape.
Click the bottom shape layer to make it active.

Step 7: Change the Stroke Color and Size
Go to the Options Bar and click the Stroke color swatch.

Click the Custom Color icon to open the Color Picker.

My second stroke needs to be blue. Change the R value to 0, leave G at 0, and set B to 255.
Click OK, then click the background to close the Stroke options.

Right now, the new blue stroke is hiding completely behind the magenta stroke because they are the exact same size.
To make the blue stroke visible, it needs to be wider than the original.
Add the size of your original stroke (12 px) to your current size (12 px), which gives us 24 px. So enter 24 px in the Size box and press Enter (Win) / Return (Mac)
The second stroke appears! Because we applied it to the bottom layer and doubled the width, both strokes look the same size.

Step 8: Duplicate the Bottom Shape Layer
Let’s add the third stroke. The process is exactly the same.
Drag the bottom shape layer onto the New Layer icon to duplicate it.

Step 9: Select the Bottom Shape Layer
Click the new bottom shape layer to make it active.

Step 10: Change the Stroke Color and Size
Click the Stroke color swatch in the Options Bar.

Click the Custom Color icon.
My third color is cyan. Set R to 0, G to 255, and B to 255. Click OK.
Press Enter (Win) / Return (Mac) to close the Stroke Color options.

Add your original stroke size (12 px) to your current size (24 px), which gives us 36 px.
Enter 36 px in the Size box and press Enter (Win) / Return (Mac).
Your third stroke wraps beautifully around the text.

Step 11: Repeat to Add More Strokes
To finish the effect, just repeat Steps 8 through 10. Duplicate the bottom layer, select the new bottom layer, change the stroke color, and add 12 px to the previous size.
Here are the settings for the remaining rainbow strokes:
- Fourth Stroke (Green): R: 0, G: 255, B: 0. Size: 48 px (36 + 12).
- Fifth Stroke (Yellow): R: 255, G: 255, B: 0. Size: 60 px (48 + 12).
- Sixth Stroke (Red): R: 255, G: 0, B: 0. Size: 72 px (60 + 12).
You now have six strokes, each set to a different color, surrounding the text.
Each stroke looks the same size as the others.

Look in the Layers panel. We see all six shape layers, each set to a different stroke color and size.

Step 12: Change the Fill Color of the Original Shape Layer
Now that the strokes are in place, let's change the actual text color from black to white.
Double-click the thumbnail of the top shape layer in the Layers panel.

This opens the Color Picker specifically for that shape's Fill color.
Choose white, then click OK.

Photoshop updates the text color instantly.
Click on the background to hide the blue path outline around the letters.

The strokes keep the roundness of the letters
At this point, I have the same number of strokes around the text as when I created this effect using layer effects.
But there is one big difference.
Here again is the result using layer effects. Notice how the edges of the strokes flatten out even though the letters are rounded (ignore the drop shadow for now because we’ll add it in a moment).
But by using shape layers, the strokes appear just as smooth and rounded as the text itself no matter how many strokes we add.

Step 13: Place the Shape Layers Into a Layer Group
Let's place the shape layers into a layer group. This keeps your Layers panel organized and allows us to apply a single drop shadow to the entire effect.
Your top shape layer should already be selected. Hold the Shift key and click the bottom shape layer to select all of them at once.

Click the menu icon in the top right corner of the Layers panel.
Choose New Group from Layers.

Name the group Text and click OK.

All of your shape layers are now neatly tucked inside the group folder.

Step 14: Add a Drop Shadow to the Group
With the Text layer group selected, click the fx icon at the bottom of the Layers panel.
Choose Drop Shadow.

In the Layer Style dialog box, apply the following settings:
- Angle: 135 degrees
- Distance: 50 px
- Size: 25 px
Click OK to close the dialog box.

In the Layers panel, the Drop Shadow appears as an effect applied directly to the group itself, rather than the individual layers.

And here, with the shadow added behind the text and the strokes, is my final effect.
And there we have it! That's a better way to add multiple strokes around text using shape layers in Photoshop.
Don't forget, all of my Photoshop tutorials are available to download as PDFs!
Related tutorials:
- How to flip and rotate letters in Photoshop
- Create a split color text effect
- Create spray painted text