
Shape Cluster Photo Display With Photoshop CC
Learn how to create a shape cluster effect in Photoshop where a single image is displayed as a collage of shapes! Now fully updated for Photoshop CC!
In this Photoshop tutorial, we'll learn how to take a photo, divide it into multiple smaller sections and display it as a cluster of shapes, similar to larger "wall cluster" displays where several photos, usually in different shapes and sizes, are arranged together on a wall to form a larger design. In this case, we'll use Photoshop to create something similar but on a smaller scale using just a single image.
In this version of the tutorial, we'll be using Photoshop's New Guide Layout feature to help us divide the photo into smaller sections. The New Guide Layout feature is only available in Photoshop CC and was first introduced in the 2014 Creative Cloud updates. To follow along with this tutorial, you'll need to be an Adobe Creative Cloud subscriber and you'll want to make sure your copy of Photoshop CC is up to date.
If you're using an older version of Photoshop (CS6 or earlier), check out our original Shape Cluster Photo Display tutorial for step-by-step instructions on how to create this same effect.
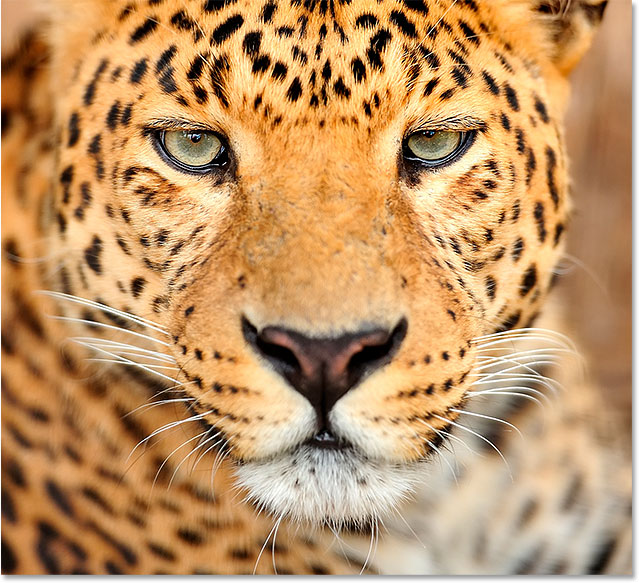
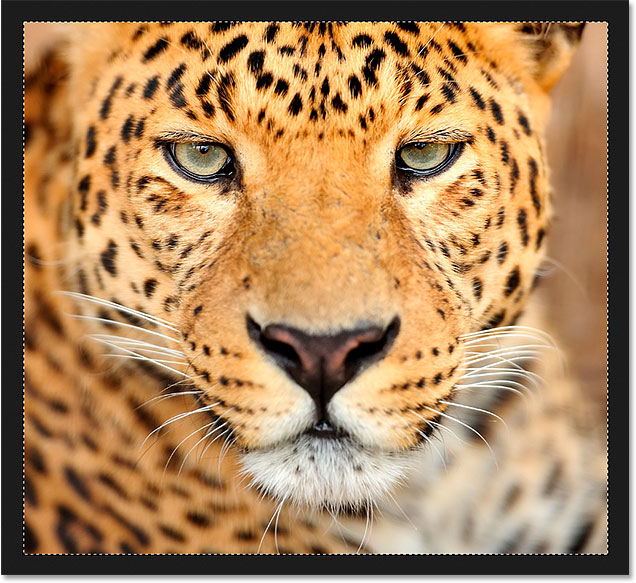
Here's the original photo I'll be starting with (leopard portrait photo from Shutterstock)
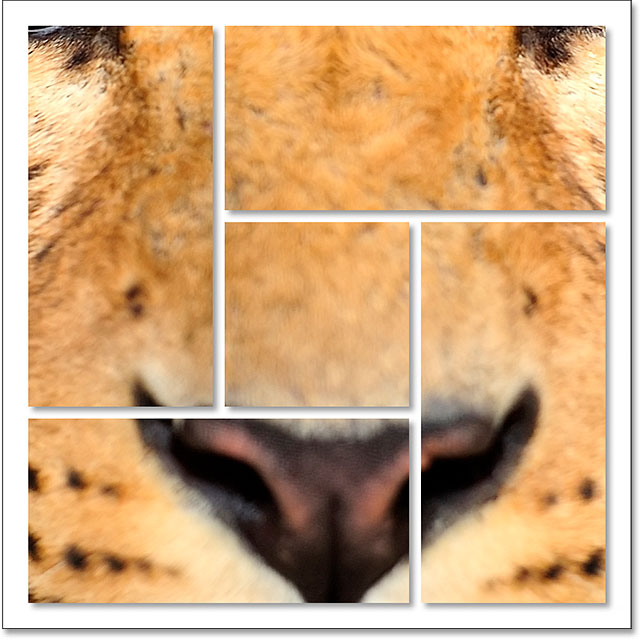
And here's what the final "shape cluster" effect will look like:

How To Create A Shape Cluster Photo Display
Step 1: Create A New Document
Let's begin by creating a new Photoshop document. Go up to the File menu in the Menu Bar along the top of the screen and choose New:
This opens Photoshop's New dialog box. You can use whatever dimensions you need for your effect, but a square-shaped document works best. For this tutorial, I'll set both the Width and Height of my document to 1000 Pixels, and since I'm not planning on printing this, I'll leave the Resolution value set to 72 Pixels/Inch. If you're creating this effect for print, you'll most likely need a larger document with a resolution of around 300 pixels/inch. Set the Background Contents to White, then click OK to close out of the dialog box. A new document, filled with white, will appear on your screen:
Step 2: Add A New Blank Layer
Next, we'll add a new layer to hold the various shapes we'll be using to divide up our image. Press and hold the Alt (Win) / Option (Mac) key on your keyboard and click on the New Layer icon at the bottom of the Layers panel:
This opens the New Layer dialog box, giving us a chance to name the new layer before it's added. Name the layer "Shapes", then click OK:
A new blank layer named "Shapes" appears above the Background layer:
Step 3: Select "New Guide Layout"
Let's add some guides to the document to help us create the shapes. To do that, we'll use Photoshop CC's New Guide Layout feature. Go up to the View menu at the top of the screen and choose New Guide Layout:
Step 4: Create A 3 x 3 Guide Layout
This opens the New Guide Layout dialog box which lets us easily add rows and columns, gutters, and margins to our document. We'll use it to create a simple 3 by 3 grid. First, in the Columns section on the left, set the Number of columns to 3, leave the Width field empty (so Photoshop will space the columns equally) and set the Gutter (the space between the columns) to 20 px.
Then, in the Rows section on the right, first click inside the Rows checkbox to enable rows (they're turned off by default), then set the Number of rows also to 3. Leave the Height field empty to let Photoshop space them out equally, and set the Gutter (the space between the rows) to 20 px:
Here's what the guide layout should look like so far in the document, with three columns, three rows, and a gutter between each column and row of 20 pixels:
If you're not seeing your guide layout updating on the screen, make sure the Preview option in the dialog box is selected:
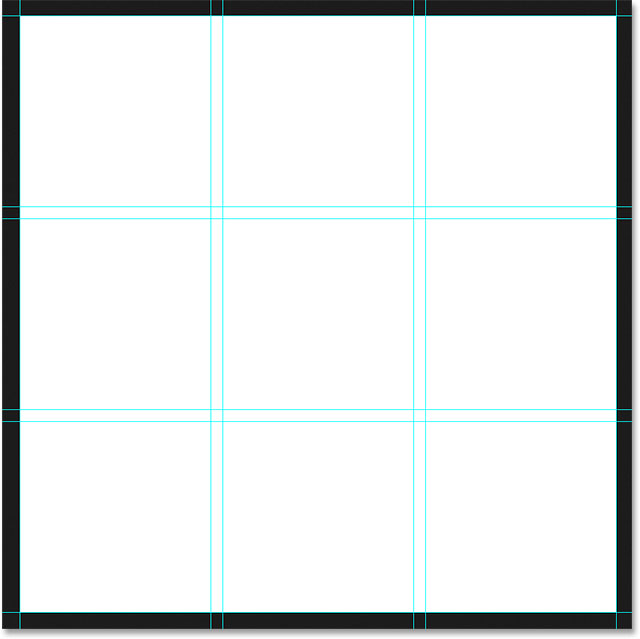
Next, let's add some margins around the edges of the document. Click in the Margin checkbox to enable the margins, then set each of the four options (Top, Left, Bottom, and Right) to 40 px:
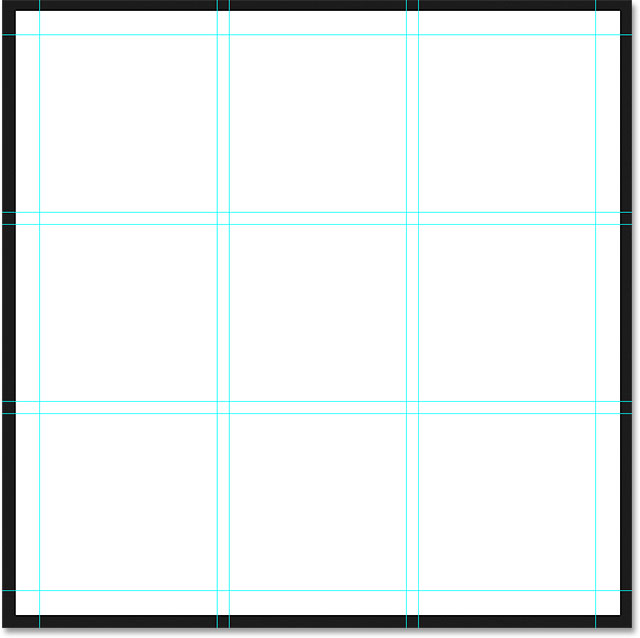
When you're done, click OK to close out of the New Guide Layout dialog box. Here's what the final guide layout should look like with the margins added. Note that if your Photoshop document is larger (or smaller) than the 1000 x 1000 pixel document I created, you may need to try different Gutter and Margin values to get the same results. Generally, I like to use a margin value twice the size of the gutter value, but feel free to experiment:
Learn all about the New Guide Layout feature in Photoshop
Step 5: Select The Rectangular Marquee Tool
With the guide layout added, select Photoshop's Rectangular Marquee Tool from the Tools panel along the left of the screen:
Step 6: Select Different Sections Of The Grid
We'll use the Rectangular Marquee Tool, along with our guide layout, to draw our shapes. To do that, we need to drag selections around different squares in the 3 by 3 grid. Start by clicking in the top left corner of the square in the upper left of the grid (ignore the margins around the edges of the document) and, with your mouse button held down, drag to the bottom right corner of the square directly below it. Include the gutter between the squares in the selection. To make things easier to see, I've highlighted the area to select in yellow:
Next, press and hold the Shift key on your keyboard. This will add the selection we're about to create to the selection we've already created (you'll see a small plus sign ( + ) appear in the lower right of your mouse cursor letting you know you're in Add to Selection mode). With your Shift key held down, click in the top left corner of the square in the bottom left of the grid and, keeping your mouse button held down, drag to the bottom right corner of the square beside it. Again, include the gutter between the squares in the selection. You should still see your original selection outline around the first two squares, plus now we have two more squares added:
With your Shift key still held down, click in the bottom left corner of the square in the bottom right of the grid and drag up to the top right corner of the square directly above it. You should now have three sections of the grid selected:
We're almost done. Still pressing and holding the Shift key, add the top right and top center squares to the selection by clicking in the bottom right corner of the square in the top right and dragging over to the top left corner of the square in the top center:
Finally, add the square in the center of the grid by pressing and holding Shift, clicking in the top left corner of the square and dragging down to the bottom right corner:
Step 7: Fill The Selection With Black
Let's fill all of the shapes we've selected with black. For that, we'll use Photoshop's Fill command. Go up to the Edit menu at the top of the screen and choose Fill:
This opens the Fill dialog box. Set the Contents option at the top to Black, and make sure the Mode option is set to Normal and Opacity is at 100%:
Click OK to close out of the Fill dialog box. Photoshop fills the selection with black:
Step 8: Remove The Selection And The Guides
We're done with the selection outlines and the guides, so let's clear them from the document. To remove the selection outlines, go up to the Select menu at the top of the screen and choose Deselect, or press Ctrl+D (Win) / Command+D (Mac) on your keyboard:
To remove the guides, go up to the View menu and choose Clear Guides:
With the selection outlines and guides now gone, we see just our black-filled shapes against the white background:
Step 9: Add A Drop Shadow
To make the effect pop out a bit from the background, we'll add a shadow behind the shapes. With the "Shapes" layer selected, click on the Layer Styles icon (the fx icon) at the bottom of the Layers panel:
Choose Drop Shadow from the list that appears:
This opens Photoshop's Layer Style dialog box set to the Drop Shadow options in the middle column. I'll set the Angle of my shadow to 135° so the light source appears to be in the upper left, then I'll set both the Distance and Size values to 10 px. Distance controls how far away the shadow appears from the object, while Size controls the hardness of the shadow edges. You may want to experiment with these two values if the size of your document is different from mine. Finally, I'll set the Opacity of the shadow to 40%:
Click OK when you're done to close out of the Layer Style dialog box. Here's my shapes with the drop shadow applied:
One of the great things about layer styles in Photoshop is that they remain fully editable even after we've applied them. If we look again in the Layers panel, we see the Drop Shadow effect listed under the "Shapes" layer. If you decide, either now or later on when you've added the photo, that you're not happy with how the shadow looks, simply double-click on the words Drop Shadow to re-open the Layer Style dialog box and make whatever changes you need:
Step 10: Select And Copy Your Photo
If you haven't done so already, open the photo you want to use for the effect. It will open in its own, separate tabbed document. You can switch between documents by clicking the tabs along the top. Here, I'm switching over to my photo's document by clicking on its tab:

We need to copy and paste the photo into the shape cluster effect's document. Go up to the Select menu at the top of the screen and choose All, or press Ctrl+A (Win) / Command+A (Mac) to choose Select > All from the keyboard:
This places a selection outline around the photo:
With the photo selected, go up to the Edit menu and choose Copy, or press Ctrl+C (Win) / Command+C (Mac) on your keyboard:
Step 11: Paste The Photo Into The Shape Cluster Document
Switch back over to the shape cluster's document by clicking on its tab:
To paste the photo and center it in the document, go up to the Edit menu, choose Paste Special, then choose Paste in Place, or press Shift+Ctrl+V (Win) / Shift+Command+V (Mac):

Photoshop pastes and centers the photo in the document. If we look in the Layers panel, we see that Photoshop has placed the photo on a brand new layer named "Layer 1" above the "Shapes" layer. Don't worry if your photo is too big for the effect. We'll see how to resize it in a moment:
Step 12: Create A Clipping Mask
Currently, the photo is blocking the shapes on the "Shapes" layer from view. We want the photo to appear inside the shapes, and we can do that easily using a clipping mask. With the photo layer ("Layer 1") selected, click on the small menu icon in the upper right corner of the Layers panel:
Choose Create Clipping Mask from the menu that appears:
This "clips" the photo to the contents of the layer directly below it, creating the illusion that the photo is now inside the shapes. Here, we see that my photo is too big to fit properly within the shapes, but I'll fix that next:
Learn all about clipping masks in Photoshop
Step 13: Resize And Reposition The Photo With Free Transform
To resize and reposition the photo inside the shapes, make sure "Layer 1" is selected in the Layers panel, then go up to the Edit menu at the top of the screen and choose Free Transform, or press Ctrl+T (Win) / Command+T on your keyboard:
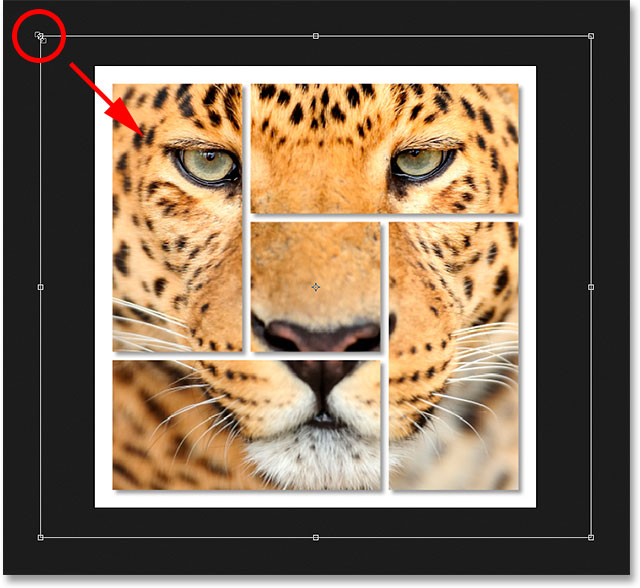
This places the Free Transform box and handles (the little squares) around the photo. Even though we can only see the parts of the photo that are inside the shapes, the Free Transform box appears around the photo's actual dimensions. If you can't see the entire Free Transform box because your photo is so large it extends off the screen, go up to the View menu and choose Fit on Screen, or press Ctrl+0 (Win) / Command+0 (Mac). Photoshop will instantly zoom the image out so everything, including the Free Transform box, is visible:
To resize the image, press and hold your Shift key as you click and drag any of the four corner handles. Holding Shift as you drag will lock the aspect ratio of the photo in place as you resize it. If you press and hold Shift+Alt (Win) / Shift+Option (Mac) as you drag the corner handles, you'll not only lock the aspect ratio in place but will also resize the photo from its center rather than from the corner, which is often easier.
To move the image around, simply click and drag anywhere inside the Free Transform box. Here, I'm dragging the top left corner handle in towards the center of the document to make the image smaller and fit more of it within the shapes:
When you're done, press Enter (Win) / Return (Mac) on your keyboard to exit out of Free Transform mode. And with that, we're done! Here, after resizing my photo, is my final "shape cluster" effect: