Working With Tabbed Documents And Floating Windows In Photoshop
Photoshop gives us two main ways to view our images on the screen as we're working. We can view them as tabbed documents or as floating document windows. In this tutorial, we'll learn the difference between tabbed and floating document windows in Photoshop. We'll also learn how to switch between tabbed and floating documents. And we'll learn how to set up Photoshop's Preferences to automatically open future documents in whichever style you like best. I'll be using Photoshop CC but this tutorial is fully compatible with Photoshop CS6.
This is lesson 6 of 10 in our Learning the Photoshop Interface series.
Let's get started!
Opening Images Into Photoshop
Before we look at tabbed and floating documents, let's first open some images into Photoshop. Here I've used Adobe Bridge to navigate to a folder containing three photos. I want to open all three of them at once into Photoshop. To do that, I'll click on the image on the left to select it. Then, I'll press and hold my Shift key and I'll click on the image on the right. This selects all three images at once, including the one in the middle. Then, to open all three into Photoshop, I'll double-click on any one of the thumbnails:

Tabbed Documents
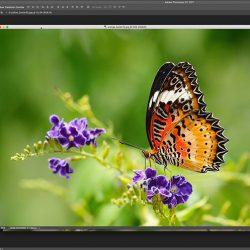
By default, Photoshop opens our images as tabbed documents. We'll look at what that means in a moment. But at first glance, something doesn't seem right. I've opened three photos, but where are they? Only one of the three is displayed on the screen (swallowtail butterfly photo from Adobe Stock):

The Tabs
It may not look like it, but the other two images are open as well. We just can't see them at the moment. That's because Photoshop opened the images as a series of tabbed documents. If we look along the top of the photo, we see a row of tabs. Each tab represents one of the open images. The name of each photo appears in its tab. The tab that's highlighted is the one that's currently active, meaning it's the one we're seeing on the screen. The other tabs are hiding behind it and not currently visible:

Switching Between Tabbed Documents
To switch between tabbed documents, simply click on the tabs. At the moment, my third image (the tab on the right) is active. I'll click on the tab in the middle to select it:

And now we see a different image on the screen. By default, we can only view one image at a time. So the image that was visible a moment ago is now hiding in the background (butterfly on flower photo from Adobe Stock):

I'll click on the tab on the left to select it and make it active:

And now we see the other image I've opened (blue butterfly photo from Adobe Stock):

Switching Between Tabbed Documents From The Keyboard
Along with clicking the tabs, we can also switch between tabbed documents from the keyboard. On a Windows PC, press Ctrl+Tab to move left to right from one tab to another. On a Mac, press Control+Tab. To move between tabs in the opposite direction (from right to left), press Shift+Ctrl+Tab (Win) / Shift+Control+Tab (Mac).
Changing The Order Of The Tabs
To change the order of tabbed documents, click and hold on a tab and drag it to the left or right of other tabs. Release your mouse button to drop the tab into place. Make sure, though, that you drag straight across horizontally. If you drag diagonally, you may accidentally create a floating document window. We'll look at floating windows next:

Floating Document Windows
The other way to view your open images in Photoshop is by displaying them as floating document windows. Let's say you have multiple images open as tabs, as I do here. To turn one of the tabs into a floating window, click on the tab and, with your mouse button held down, drag the tab down and away from the other tabs:

When you release your mouse button, the image appears in a floating window in front of the other tabbed documents. You can move floating windows around on the screen by clicking in the gray tab area along the top of the window and, with your mouse button held down, dragging it around with your mouse:

Displaying All Open Images As Floating Windows
If you want to switch all of your tabbed documents into floating windows, go up to the Window menu in the Menu Bar along the top of the screen, choose Arrange, and then choose Float All in Windows:

And now all three of my images appear in floating windows, with the currently active window displayed in front of the others. Again, we can move the windows around on the screen to reposition them by clicking and dragging the tab area along the top of each window. To make a different window active and bring it to the front, just click on it:

Viewing A List Of Open Documents
One of the main advantages to viewing our images as floating documents is that we can see more than one image at a time. But that can also cause problems. Too many floating windows open at once can clutter up the screen. Also, some of the windows can completely block others from view. Fortunately, there's an easy way to select any image that's open in Photoshop, even if you can't see it.
Go up to the Window menu at the top of the screen. Then, look down at the very bottom of the menu. You'll see a handy list of every image that's open. The currently-active image has a checkmark beside it. Click on any image in the list to select it, which will make it active and bring it to the foreground:

Switching Back To Tabbed Documents
To switch from floating windows back to tabbed documents, go up to the Window menu, choose Arrange, and then choose Consolidate All to Tabs:

And now my images once again appear as tabbed documents, with only one image visible at a time:
Setting Photoshop's Preferences
Once you decide which viewing style you like best (tabbed documents or floating windows), you can tell Photoshop to open all future images in that style using an option found in the Preferences. If you're using Photoshop CC, then on a Windows PC, go up to the Edit menu at the top of the screen, choose Preferences, and then choose Workspace. On a Mac, go up to the Photoshop CC menu, choose Preferences, then choose Workspace:

If you're using Photoshop CS6, then on a Windows PC, go up to the Edit menu, choose Preferences, and then choose Interface. On a Mac, go up to the Photoshop menu, choose Preferences, then choose Interface:

Open Documents As Tabs
This opens the Photoshop Preferences dialog box set to either the Workspace (Photoshop CC) or Interface (Photoshop CS6) category. Look for the option that says Open Documents as Tabs. By default, this open is checked, which means that all of your images will open as tabbed documents. If you'd prefer to have them open as floating windows, uncheck this option:

Enable Floating Document Window Docking
There's a second option directly below it that's also important. Enable Floating Document Window Docking (say it five times fast) controls whether or not we can drag one floating window into another and nest them together, creating tabbed documents inside a floating window:

To show you what I mean, here I have two of my images open side by side as floating windows. I'll click on the tab area along the top of the window on the left and begin dragging it into the window on the right. As I drag up towards the top of the window on the right, we see a blue highlight box appearing around its edges. This highlight box tells me that if I release my mouse button at this point, Photoshop will dock both of the images together inside the same floating window:

I'll release my mouse button, and now both of my images are grouped together as tabbed documents inside a single floating window. This can be a handy feature for keeping related images organized on the screen. Just as with normal tabbed documents, I can easily switch between them by clicking on their tabs. To separate the images again and place them back into their own floating windows, all you need to do is click and drag one of the tabs away from and outside of the window, then release your mouse button:

The Enable Floating Document Window Docking option is enabled (checked) by default. If you decide you don't like this feature, you can easily turn it off by unchecking the option in Photoshop's Preferences.
Closing A Single Tabbed Document Or Floating Window
Finally, to close a single image that's open as a tabbed document, click on the small "x" icon on the edge of its tab. On a Windows PC, the "x" is on the right of the tab. On a Mac (which is what I'm using here), it's on the left:

To close an image open in a floating window, on a Windows PC, click the "x" icon in the top right corner of the window. On a Mac, click the red "x" icon in the top left corner:

Closing All Open Documents
To close all open images regardless of whether you're viewing them as tabs or floating windows, go up to the File menu at the top of the screen and choose Close All:

Where to go next...
And there we have it! That's a quick look at the differences between tabbed documents and floating windows in Photoshop! In this tutorial, we learned that by default, Photoshop only lets us view one image at a time. But there is a way to view more than one image. In the next lesson, we'll learn how to view and work with multiple images at once using Photoshop's multi-document layouts!
You can jump to any of the other lessons in this Learning the Photoshop Interface chapter. Or visit our Photoshop Basics section for more topics!