
Shape Cluster Photo Display Effect With Photoshop
In this Photoshop tutorial, we'll learn how to display a single photo as a cluster of shapes, similar to larger "wall cluster" displays where several photos, usually in different frame shapes and sizes, are arranged together on a wall to form a larger design. In this case, we'll use Photoshop to create something similar but on a smaller scale using just a single image.
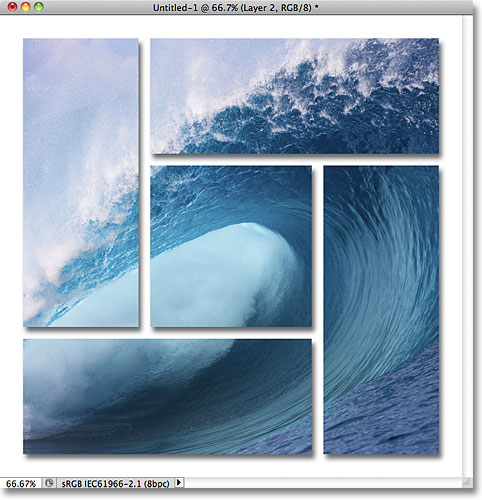
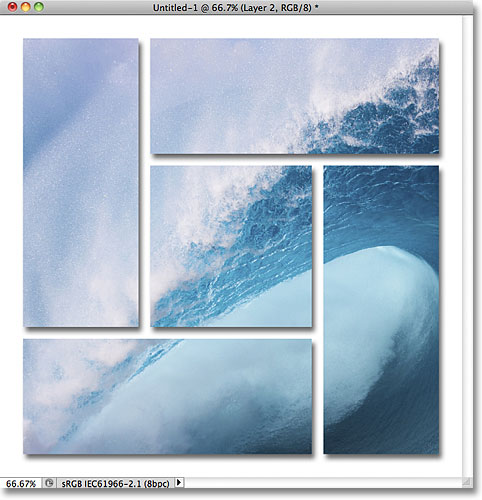
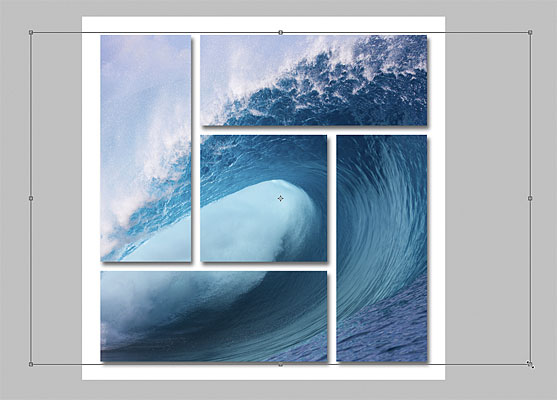
Here's what the final result will look like:
How To Create A Shape Cluster Photo Display Effect
Step 1: Create A New Document
Let's begin by creating a new Photoshop document. Go up to the File menu in the Menu Bar along the top of the screen and choose New:
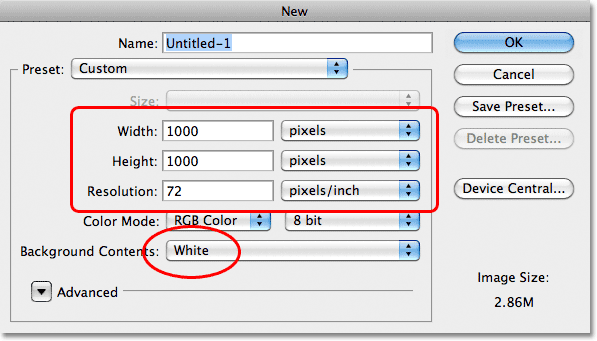
This opens Photoshop's New Document dialog box. A square-shaped document works best for this effect, so I'll set both the Width and Height of my document to 1000 pixels, and since I'm not planning on printing this, I'll leave the Resolution value set to 72 pixels/inch. The dimensions and resolution you need may be different, especially if you're creating this for print. Set the Background Contents to White, then click OK to close out of the dialog box. A new document, filled with white, will appear on your screen:
Step 2: Change The Grid Size In Photoshop's Preferences
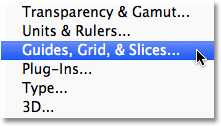
We're going to use Photoshop's grid to help us create our shape design, but first, we need to make a change to the size of the grid, and we do that in the Preferences. On a PC, go up to the Edit menu at the top of the screen, choose Preferences, then choose Guides, Grid, & Slices. On a Mac, go up to the Photoshop menu, choose Preferences, then choose Guides, Grid, & Slices:
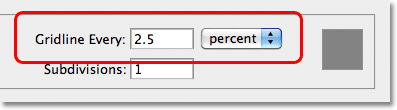
This opens the Preferences dialog box set to the Guides, Grid and Slices options. In the Grid section, set the Gridline Every option to 2.5 percent. Leave the other options set to their defaults. Click OK when you're done to close out of the dialog box:
Step 3: Turn On The Grid
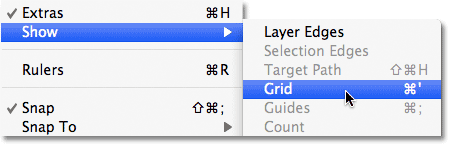
We've changed the size of the grid, but we still need to turn the grid on in our document. To do that, go up to the View menu at the top of the screen, choose Show, then choose Grid:
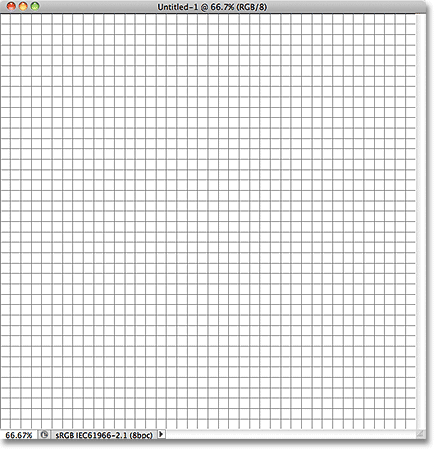
The grid is now visible in the document. Even though we can see it, the grid isn't actually part of the design. It's just there for visual reference to help us out:
Step 4: Add A New Layer
Click on the New Layer icon at the bottom of the Layers panel:
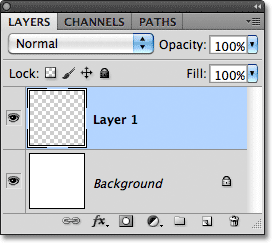
This adds a new blank layer named "Layer 1" above the Background layer:
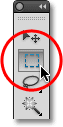
Step 5: Select The Rectangular Marquee Tool
Select the Rectangular Marquee Tool from the Tools panel:
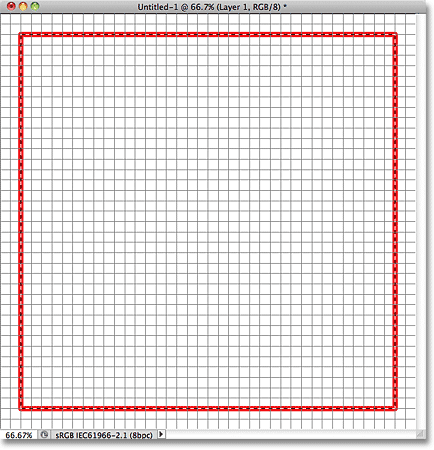
Step 6: Draw An Initial Selection Around The Grid
With the Rectangular Marquee Tool selected, draw an initial selection outline around the grid, but leave a border the width of two squares between the selection outline and the edges of the document. The selection outline can be a bit hard to see in a screenshot, so I've highlighted mine in red just to make it easier to see that I've left a border two squares thick around it:
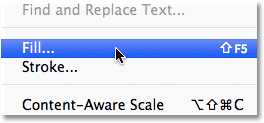
Step 7: Fill The Selection With Black
With the selection in place, go up to the Edit menu at the top of the screen and choose Fill:
This opens Photoshop's Fill dialog box. Change the Use option at the top of the dialog box to Black:
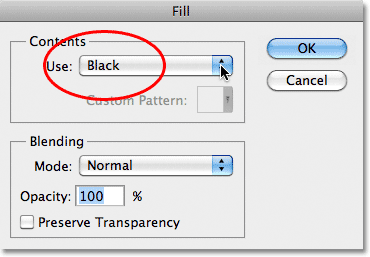
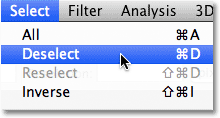
Click OK to close out of the dialog box. Photoshop fills the selection with black in the document. We don't need the selection outline anymore, so to remove it, go up to the Select menu at the top of the screen and choose Deselect. You could also press Ctrl+D (Win) / Command+D (Mac) to quickly deselect it using the faster keyboard shortcut:
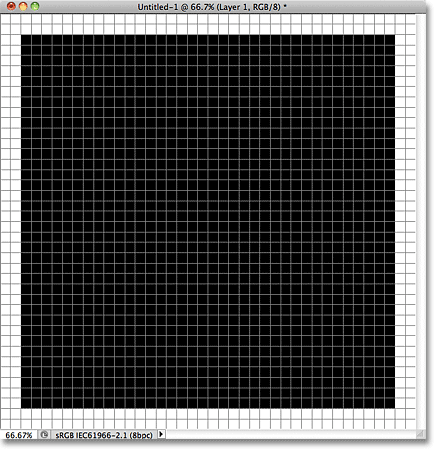
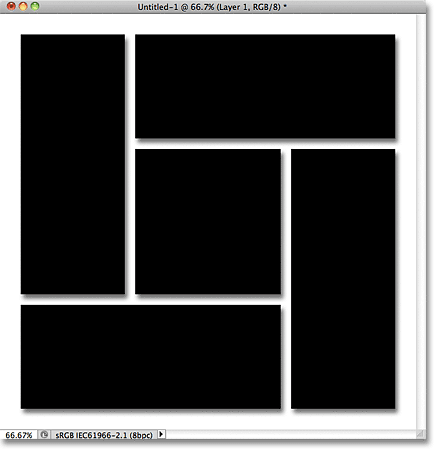
You should now have an initial black-filled square shape in the document. It really makes no difference which color we chose to fill the selection with since the photo will eventually appear overtop of it. I chose black simply because it's easy to see in front of the white background and it also makes it easy to see the grid lines:
Step 8: Draw A Series Of Narrow Rectangular Selections
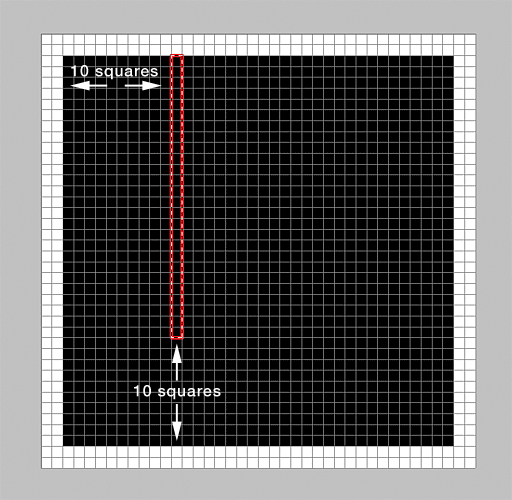
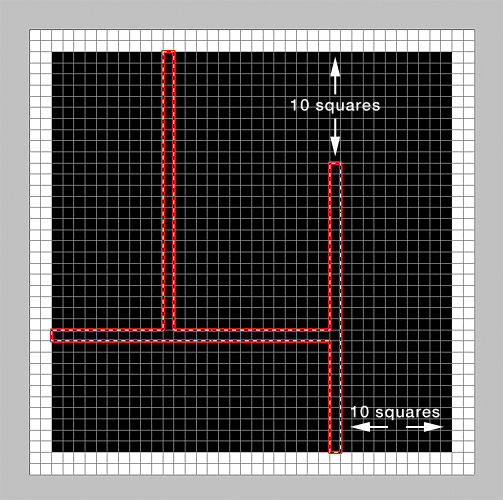
We're going to divide our initial shape into several smaller shapes, and we'll do that by deleting parts of it. First, we need to select the areas we're going to delete. With the Rectangular Marquee Tool still selected, start from the left side of the shape and count out 10 vertical columns of squares inward towards the right, then start at the top of the shape and draw a selection down around the 11th column, but leave 10 squares between the bottom of your selection and the bottom of the shape. I realize that can sound confusing so I've tried to make it clearer in the screenshot by once again highlighting my selection outline in red. Notice that my selection is just one column wide and that there's 10 squares between my selection and the left side of the shape, as well as 10 squares between the bottom of my selection and the bottom of the shape:
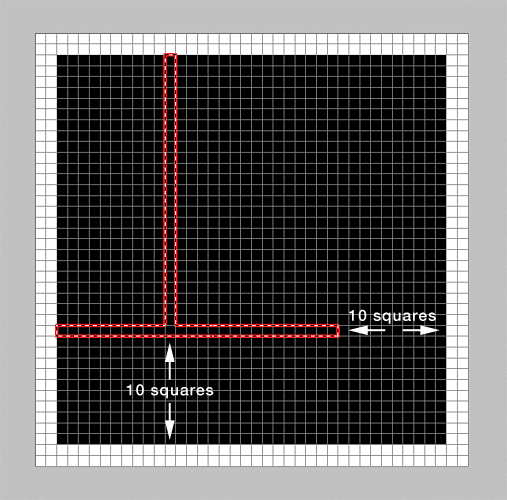
Once you've drawn the first selection, hold down your Shift key, which will temporarily switch you into Photoshop's Add to Selection mode, then count out 10 horizontal rows of squares upward from the bottom of the shape and draw a similar selection around the 11th row of squares starting from the left, leaving 10 squares between the right edge of your selection and the right side of the shape. Again, the screenshot hopefully makes it easier to see. By holding down the Shift key, this second selection is added to the first, and we now have parts of one column and one row of squares selected:
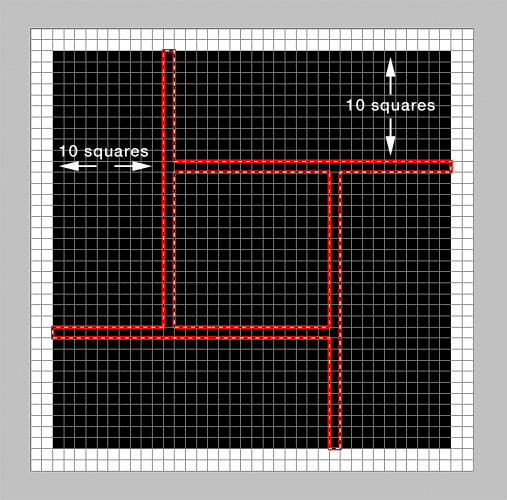
Two selections down, two more to go. Continue holding down your Shift key, then count out 10 columns of squares from the right side of the shape and draw a selection upward around the 11th column, leaving 10 squares between the top edge of your selection and the top of the shape. This third selection is added to the first two:
Finally, with the Shift key still held down, count out 10 rows of squares from the top of the shape and draw a selection around the 11th row, beginning from the right of the shape, leaving 10 squares between the left edge of your selection and the left edge of the shape. When you're done, you should have parts of two rows and two columns of squares selected:
Step 9: Delete The Selected Areas
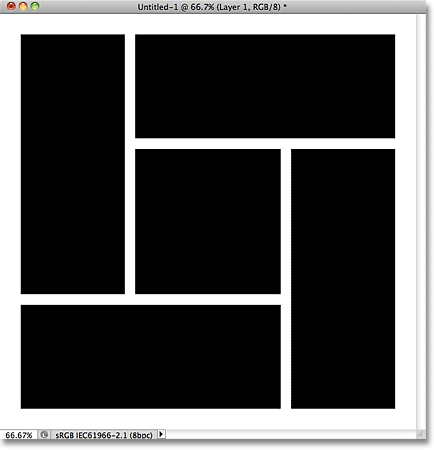
Press Backspace (Win) / Delete (Mac) on your keyboard to delete the selected areas of the shape, which instantly separates the larger shape into five smaller shapes. Press Ctrl+D (Win) / Command+D (Mac) to quickly remove the selection outlines from around the shapes. We no longer need our grid displayed in the document, so go back up to the View menu, choose Show, then choose Grid to turn the grid off. You could also press Ctrl+' (Win) / Command+' (Mac) to turn it off with the faster keyboard shortcut. Here's what the document now looks like after removing the selection outlines and turning off the grid:
Step 10: Add A Drop Shadow
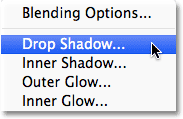
Click on the Layer Styles icon at the bottom of the Layers panel:
Choose Drop Shadow from the list of layer styles that appears:
This opens Photoshop's Layer Style dialog box set to the Drop Shadow options in the middle column. I'm going to set the Angle of the shadow to 120° and I'll set both the Distance and Size to 12 px. You may need to use different values for the Distance and Size options if you created a larger document than the size I'm using for this tutorial. Finally, to reduce the intensity of the shadow, I'll lower the Opacity value down to 60%:

Click OK to close out of the Layer Style dialog box. A drop shadow is now added to the shapes:
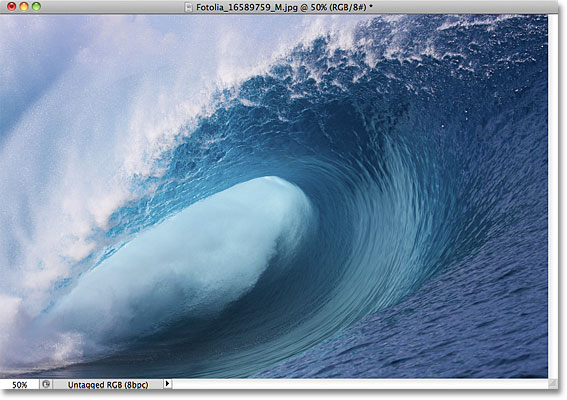
Step 11: Open Your Photo
Open the photo you want to place inside the shapes. It will open in its own separate document window. Here's the image I'll be using:
Step 12: Copy And Paste The Photo Into The Shapes Document
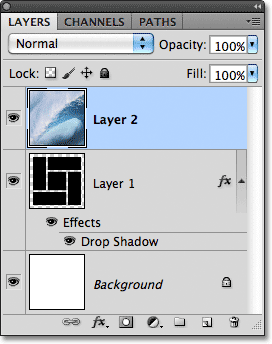
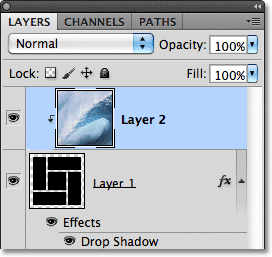
Press Ctrl+A (Win) / Command+A (Mac) to quickly select the entire photo, then press Ctrl+C (Win) / Command+C (Mac) to copy it to the clipboard. Switch over to your shapes document, then press Ctrl+V (Win) / Command+V (Mac) to paste the photo into the document. It will appear on its own layer (Layer 2) above the shapes layer (Layer 1) in the Layers panel:
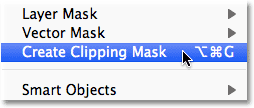
Step 13: Create A Clipping Mask
Go up to the Layer menu at the top of the screen and choose Create Clipping Mask:
This "clips" the photo to the shapes on the layer directly below it, creating the illusion that the photo is being divided up and displayed on the shapes:
If we look in the Layers panel, we see that Layer 2 is now indented to the right with a small arrow on the left of the preview thumbnail pointing down at Layer 1 below it. This is Photoshop's way of letting us know that Layer 2 is now clipped to the contents of Layer 1:
Step 14: Move And Resize The Photo With Free Transform
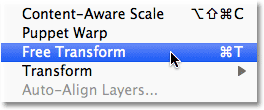
To resize and reposition the photo inside the shapes, go up to the Edit menu at the top of the screen and choose Free Transform, or press Ctrl+T (Win) / Command+T (Mac) to select the Free Transform command with the keyboard shortcut:
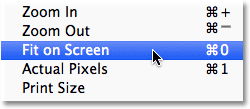
This places Photoshop's Free Transform box and handles around the photo. Even though we can only see the area of the photo that sits above the shapes, the Free Transform box and handles will appear around the photo's actual size. If you can't see the handles because the photo is too large and extends outside the current viewable area of the document, go up to the View menu at the top of the screen and choose Fit on Screen. You can also press Ctrl+0 (Win) / Command+0 (Mac) to select the Fit on Screen command with the keyboard shortcut:
Photoshop will instantly zoom out as far as needed to fit the entire photo into the document's viewable area so you can access the Free Transform handles. To resize the photo, hold down your Shift key, which will constrain the aspect ratio of the photo as you resize it, then drag any of the four corner handles (the little squares). To move the photo, simply click anywhere inside the Free Transform bounding box and drag the image around with your mouse. As you resize and reposition the image, you'll see it moving around inside the shapes:
When you're happy with how things look, press Enter (Win) / Return (Mac) to accept the changes and exit out of Free Transform. And with that, we're done! Here is my final "shape cluster photo display" result: