Add a Rainbow to an Image in Photoshop
Brighten those stormy skies by learning how to add a rainbow to your image with Photoshop! A step-by-step tutorial for Photoshop CC 2020.
In this tutorial, I show you how to add a colorful, realistic rainbow to an image with Photoshop. To create the rainbow, we'll use one of Photoshop's built-in rainbow gradients. I'll show you where to find the gradient and how to load it into Photoshop.
From there, you'll learn the fastest way to add the rainbow gradient to your image, and the easiest way to position the rainbow exactly where you need it. We'll blur the colors so they blend together more smoothly, and we'll hide the rainbow from different areas using a layer mask. Finally, we'll finish off the tutorial by learning an advanced yet easy way to blend the rainbow in with the clouds!
To follow along, you'll want to be using Photoshop CC 2020 or later. You can get the latest Photoshop version here.
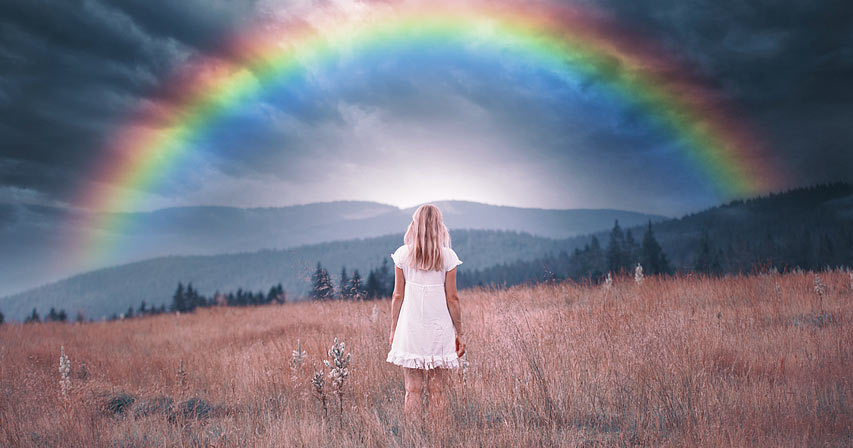
Here's an example of what the final rainbow effect will look like when we're done:
Let's get started!
Step 1: Open your image
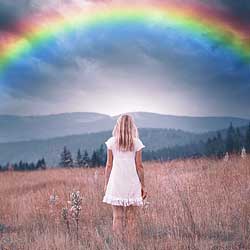
Start by opening your image into Photoshop. I'll use this image from Adobe Stock:

Related: Learn the many ways to get your images into Photoshop!
Step 2: Open the Gradients panel
Next, open the Gradients panel which is new as of Photoshop CC 2020.
The Gradients panel is found in the same panel group as the Color, Swatches and Patterns panels:

Step 3: Load the Legacy Gradients
To create the rainbow, we'll use one of Photoshop's built-in rainbow gradients.
But as of Photoshop CC 2020, many of Photoshop's older gradients, including the one we need, have been moved into a new Legacy Gradients group. And before we can use the group, we first need to load it into Photoshop. If you have already loaded the Legacy Gradients, you can skip to Step 4.
In the Gradients panel, click the menu icon in the upper right:
And then choose Legacy Gradients from the menu:

Step 4: Select the "Russell's Rainbow" gradient
Scroll down to the bottom of the Gradients panel and twirl open the Legacy Gradients group by clicking the arrow to the left of the folder icon:

And then inside the group, scroll down to the Special Effects group.
Twirl the group open and select the Russell's Rainbow gradient by clicking on its thumbnail:

Related: Learn how to create your own rainbow gradient in Photoshop!
Step 5: Drag the gradient onto the image
Drag the gradient's thumbnail from the Gradients panel and drop it onto your image:

The rainbow gradient appears horizontally across the top:

Related: The new ways to add gradients in Photoshop CC 2020
Step 6: Open the Gradient Fill dialog box
In the Layers panel, the gradient appears as a Gradient fill layer above the image.
To edit the shape of the gradient, double-click on the fill layer's color swatch:

And this opens the Gradient Fill dialog box:

Step 7: Change the gradient style to Radial
In the dialog box, change the Style of the gradient from Linear (the default setting) to Radial:

This gives the rainbow the circular shape we need:

Step 8: Scale the size of the gradient
To change the size of the rainbow, click inside the Scale box to highlight the current value.
The default value is 100%:

Then use the Up or Down arrow keys on your keyboard to increase or decrease the value. Hold your Shift key while pressing the arrow keys to adjust the value in larger steps.
The exact size you need will depend on your image and how large the rainbow should appear. In my case, I'll increase the Scale value to 143%:

At this value, the left and right sides of the rainbow are extending almost to the edges of my image.
The top of the rainbow now extends beyond the image, but we'll fix that next:

Step 9: Move the rainbow into place
With the Gradient Fill dialog box still open, click on the image and drag the rainbow into position. To make it easier to move the gradient straight up or down, hold your Shift key as you drag.
I'll drag my gradient straight down until the top of the rainbow is visible. Note that you may need to go back and forth between moving the gradient and adjusting the Scale value until you get things right.
When you're done, click OK to close the Gradient Fill dialog box:

Step 10: Convert the Gradient fill layer into a smart object
In a moment, we're going to help the rainbow look more realistic by applying a blur to the gradient. But Photoshop won't let us apply the blur directly to a Gradient fill layer. So first, we'll convert the fill layer into a smart object.
In the Layers panel, make sure the Gradient fill layer is selected. Then click the menu icon in the upper right of the panel:
And choose Convert to Smart Object from the menu:

A smart object icon appears in the lower right of the layer's preview thumbnail, telling us that the layer is now a smart object:
Related: How to edit a smart object in Photoshop
Step 11: Change the gradient's blend mode to Screen
Before we apply the blur, change the blend mode of the smart object from Normal to Screen:

The Screen blend mode brightens the gradient and blends the colors in with the image:

Learn how to download my Layer Blend Modes Complete Guide PDF!
Step 12: Apply the Gaussian Blur filter
Next, go up to the Filter menu in the Menu Bar at the top of the screen, choose Blur, and then choose Gaussian Blur:

Then in the Gaussian Blur dialog box, drag the Radius slider to the right to blur the gradient and soften the transitions between the colors. The exact Radius value you need will depend on the size of your image, so keep an eye on your image as you drag the slider to find the value that works best.
My image is fairly large, so I'll choose a Radius value of around 100px:

Click OK to close the dialog box, and here's my result with the blur applied:

How to change the Gaussian Blur amount
Since we used the Gaussian Blur filter with a smart object, Photoshop applied it as a smart filter, which means that the filter settings remain editable.
At any time, you can re-open the Gaussian Blur dialog box and adjust the Radius value by double-clicking on the words Gaussian Blur below the smart object in the Layers panel:

Step 13: Add a layer mask
An obvious problem with the rainbow is that it's still a complete circle. We need to hide the bottom half of the gradient, and we can do that using a layer mask.
In the Layers panel, click the Add Layer Mask icon:

A layer mask thumbnail appears on the gradient smart object:

Step 14: Select the Gradient Tool
Select the Gradient Tool from Photoshop's toolbar:

Step 15: Choose the Black, White gradient
Then in the Options Bar, click the arrow next to the gradient color swatch:

And in the Gradient picker, twirl open the Basics folder and choose the Black, White gradient by double-clicking on its thumbnail. This will select the gradient and close the Gradient picker:

Step 16: Draw a black to white gradient on the layer mask
In the Layers panel, make sure the layer mask is selected. You should see a highlight border around its thumbnail:

Then in your image, click anywhere along the horizon line to set the starting point for your rainbow. If there is no obvious horizon line, click where the left and right sides of the rainbow should begin to appear. Everything below this point is where the rainbow will be hidden.
With my image, I'll click in the trees just above the tall grass.
Keep your mouse button held down, hold the Shift key on your keyboard, and drag straight up to just below the top part of the rainbow. The Shift key makes it easier to drag vertically:

Release your mouse button and the bottom of the rainbow disappears, leaving only the top half that gradually fades into view as it rises into the sky.
If you did not draw the black to white gradient exactly right, just draw it again. The new gradient will replace the previous one:

Related: Learn advanced tips and tricks to use with layer masks!
Step 17: Select the Brush Tool
Once you have hidden the bottom of the rainbow, there may be other, smaller areas you need to hide.
For example, with my image, the bottom right of the rainbow is visible in front of the hill. But what I really want is for the rainbow to disappear behind the hill:

To hide areas like this, select the Brush Tool from the toolbar:

Step 18: Choose the Soft Round brush
With the Brush Tool selected, right-click (Win) / Control-click (Mac) anywhere inside the image.
Then in the Brush Preset picker, choose the Soft Round brush from inside the General Brushes folder. This will give us a brush with soft edges, allowing us to paint a smooth transition:

Step 19: Paint with black to hide more areas of the rainbow
Make sure your Foreground color is set to black. The current Foreground and Background colors are found in the color swatches near the bottom of the toolbar.
If the Foreground color (upper left) is white and the Background color (lower right) is black, press the letter X on your keyboard to swap them:

Before you start painting, change your brush size using the left and right bracket keys ( [ and ] ) on your keyboard. The right bracket key makes the brush larger while the left bracket key makes it smaller. The larger the brush, the wider the transition area you'll create.
Then simply paint over the part of the rainbow you want to hide. Or you may find that just clicking on the area a few times works better. If you make a mistake, press Ctrl+Z (Win) / Command+Z (Mac) on your keyboard to undo your brush stroke and try again.
Here I'm painting over the hill to hide the rainbow from that spot:

And here's the result:

Step 20: Open the Blending Options
At this point, the main rainbow effect is complete. But we can take it a step further by blending the rainbow into the clouds. And for that, we'll use Photoshop's Blending Options.
In the Layers panel, click the Add Layer Style icon (the "fx" icon):
And choose Blending Options from the menu:

Step 21: Drag the black Underlying Layer slider to the right
In the Layer Style dialog box, you'll find two sets of sliders at the bottom, each with its own black to white gradient bar. The top set is labeled "This Layer" and the bottom set is labeled "Underlying Layer".
Click on the black slider for the Underlying Layer set and begin dragging it to the right:

Keep an eye on your image as you drag and stop when the darkest clouds from the image begin to show through the rainbow:

The problem is that the transition between the clouds and the rainbow is very harsh. So to fix that, press and hold the Alt (Win) / Option (Mac) key on your keyboard and drag the black slider apart into two halves. The space between each half creates a transition area between the clouds and the rainbow.
Adjust each half of the slider until the result looks more realistic:

When you're done, click OK to close the Layer Style dialog box.
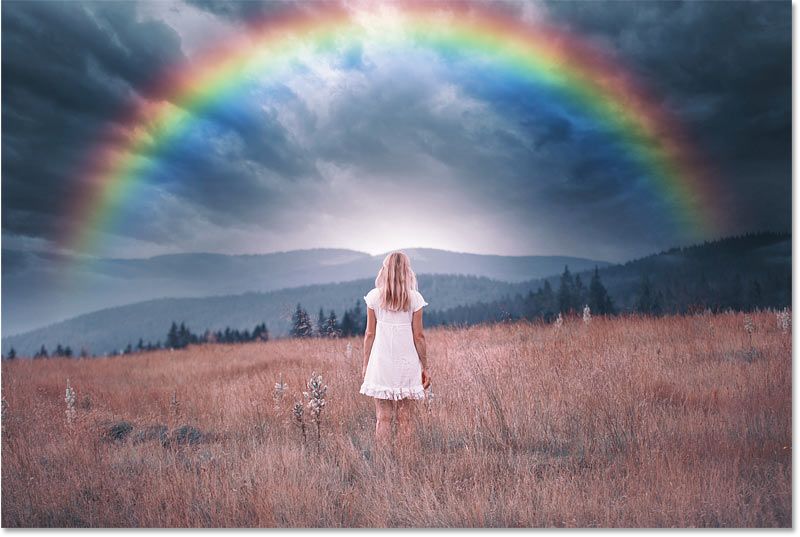
And here is my final rainbow effect with the clouds and the rainbow blended together:
And there we have it! That's how to add a rainbow to an image with Photoshop!
View our Photo Effects section for more Photoshop effects tutorials. And don't forget, all of our Photoshop tutorials are now available to download as PDFs!