How To Create Smart Objects In Photoshop
In this tutorial, I show you how to create smart objects in Photoshop! You'll learn how to open a new image into Photoshop as a smart object, how to convert an existing layer into a smart object, and how to place an image as a smart object into your Photoshop document. We'll also look at how to open raw files as smart objects, both from within Photoshop's Camera Raw plugin and from Adobe Lightroom. And we'll even learn how to place Adobe Illustrator files directly into Photoshop as smart objects!
What are smart objects?
A smart object is a container that holds the contents of a layer. The container protects the contents inside it from harm. We can scale and resize the container, apply transformations, warps and distortions, and even apply Photoshop's filters to a smart object, all without any loss in quality and without making a single permanent change to the layer inside it.
We can make multiple copies of a smart object, all displaying the same content, and then edit or even replace the content and have our changes instantly appear in each and every copy. This makes smart objects perfect for creating reusable templates! We'll look at different ways to use smart objects throughout this series of tutorials.
In this first tutorial, we'll learn how to create smart objects in Photoshop. I'll be using Photoshop CC but you can also follow along with Photoshop CS6. Let's get started!
How To Convert A Layer Into A Smart Object
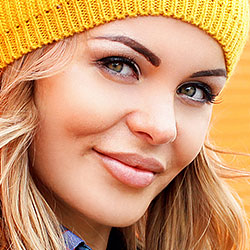
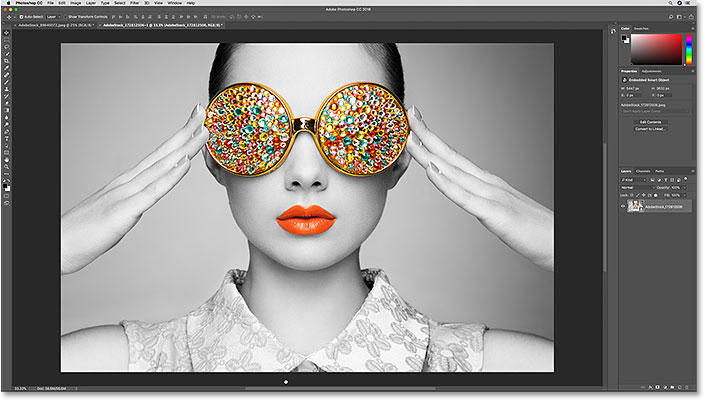
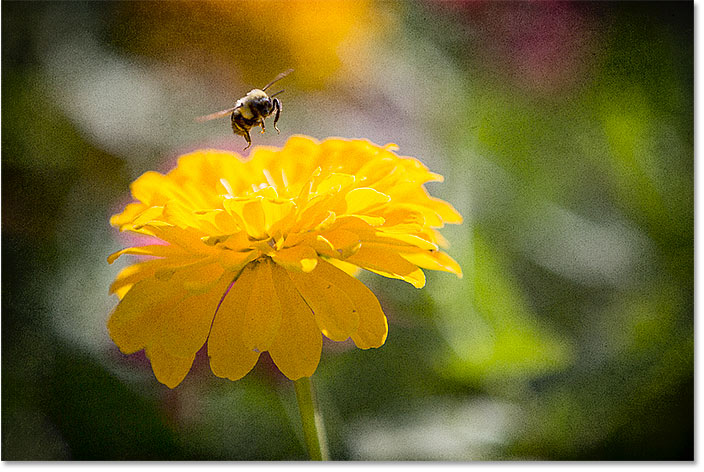
Let's start by learning how to convert an existing layer into a smart object. Here's an image I currently have open in Photoshop:
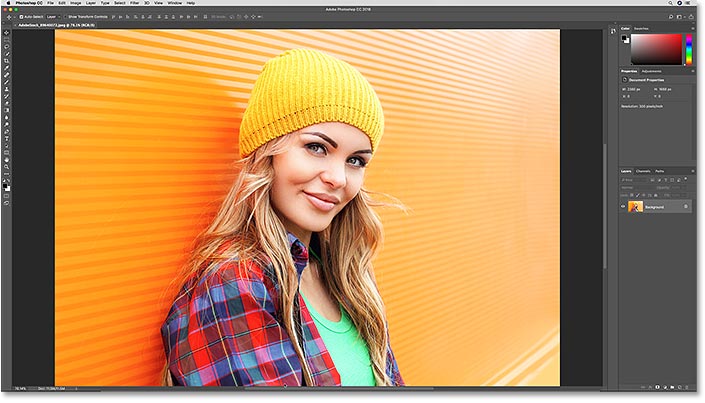
In the Layers panel, we see the image on the Background layer:
Method 1: The Layer menu
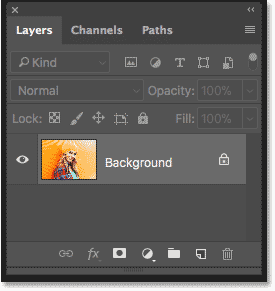
There's a few ways that we can convert a layer into a smart object. One way is by going up to the Layer menu in the Menu Bar, choosing Smart Objects, and choosing Convert to Smart Object:
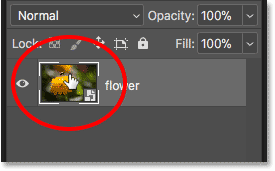
It won't look like anything has happened to the image. But if we look again in the Layers panel, we now see a smart object icon in the lower right of the layer's preview thumbnail. This is how Photoshop tells us that the layer is now a smart object. I've enlarged it here to make the icon easier to see:
![]()
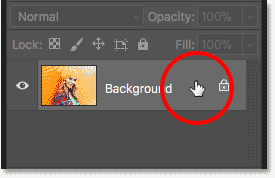
Method 2: The Layers panel menu
Another way to convert a layer into a smart object is from the Layers panel menu. Click the menu icon in the upper right corner of the Layers panel:
![]()
Then choose Convert to Smart Object from the list:
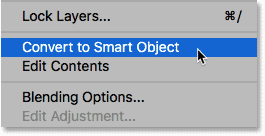
Method 3: From the layer itself
A third way is to right-click (Win) / Control-click (Mac) directly on the layer in the Layers panel:
And then choose Convert to Smart Object from the menu:

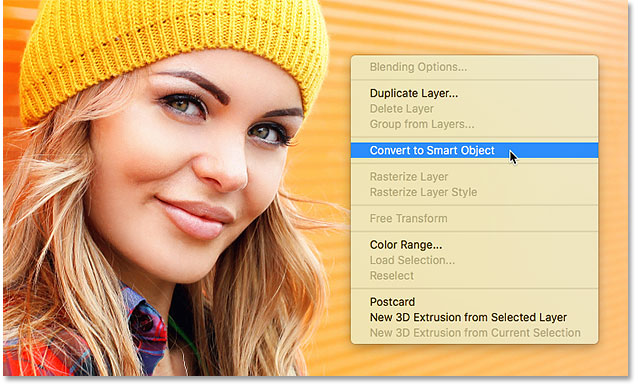
Method 4: With a selection tool active
And finally, if you have any of Photoshop's selection tools active in the Toolbar (the Marquee Tools, the Lasso Tools or the Quick Selection Tool):

You can right-click (Win) / Control-click (Mac) directly on the image in the document and choose Convert to Smart Object from the menu. The only selection tool where the Convert to Smart Object command is not available is the Magic Wand Tool:
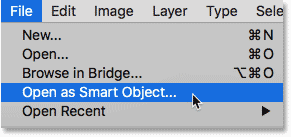
How To Open An Image As A Smart Object
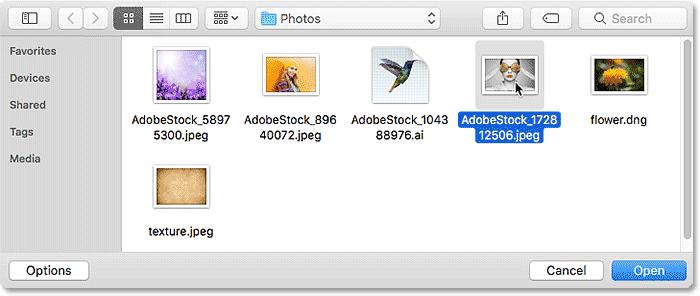
So far, we've learned how to convert an existing layer into a smart object. But we can also open a new image as a smart object in Photoshop. Go up to the File menu in the Menu Bar and choose Open as Smart Object:
Navigate to the image on your computer that you want to open. Click on it to select it, and then click Open:
The image opens in its own separate document:
And in the Layers panel, we see the same smart object icon in the lower right of the layer's preview thumbnail, telling us that Photoshop has automatically converted the image into a smart object for us:
![]()
How To Open Raw Files As Smart Objects
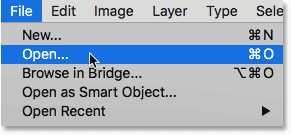
Along with opening standard image files like JPEGs, we can also open raw files into Photoshop as smart objects. The benefit of opening a raw file as a smart object is that a copy of the raw file itself will be embedded into the Photoshop file, allowing us to reopen it in Camera Raw, edit it as much as we need, and have our changes instantly reflected in the document. To open a raw file as a smart object, go up to the File menu in the Menu Bar and choose Open:
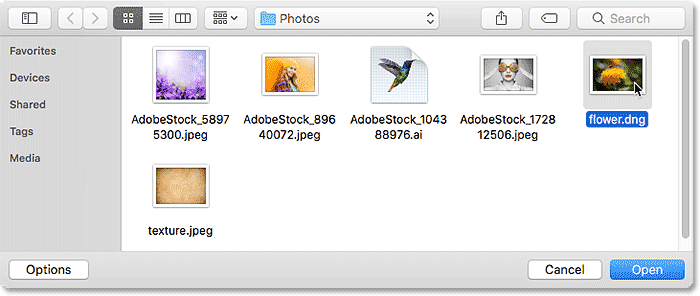
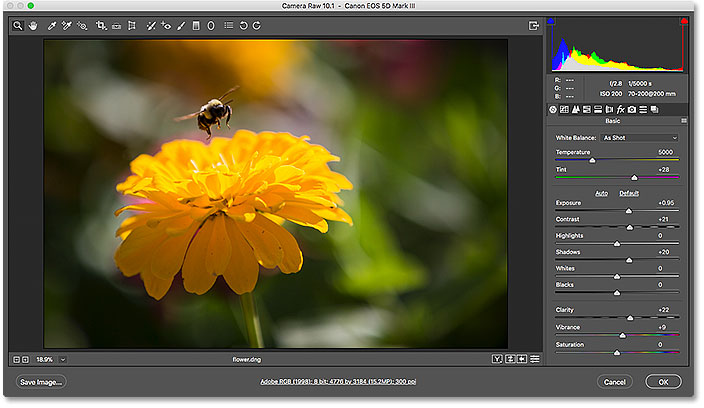
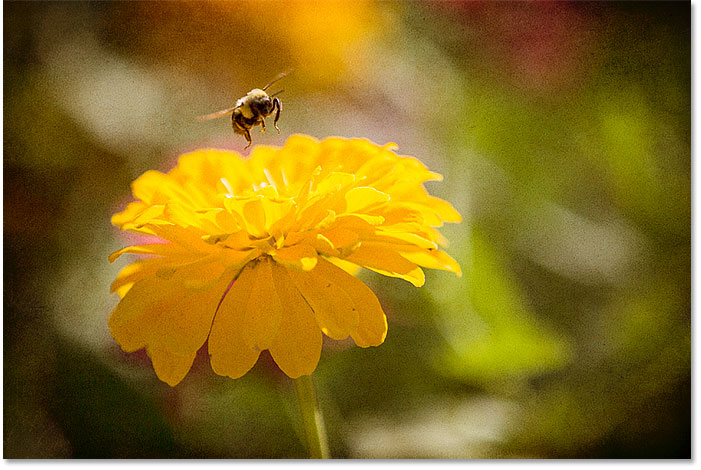
Navigate to a raw file on your computer. Click on the file to select it, and then click Open. I'll open my "flower.dng" file:
This opens the image into Photoshop's Camera Raw plugin:
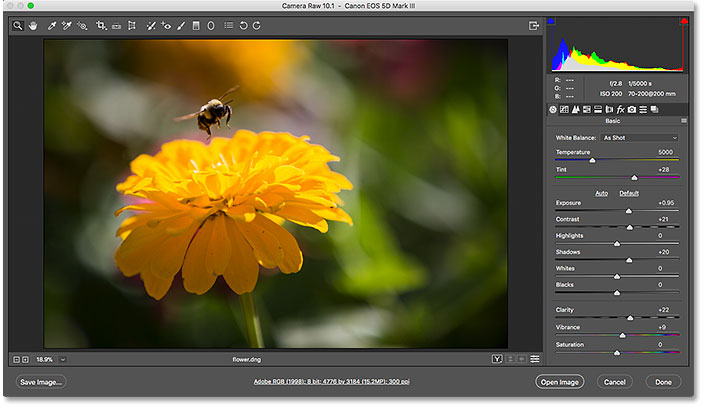
Turning "Open Image" into "Open Object"
If we look down in the bottom right corner, we see the Open Image button. But clicking Open Image will open the file into Photoshop as a normal layer, not as a smart object, and we'll lose all the benefits of having the raw file to work with:
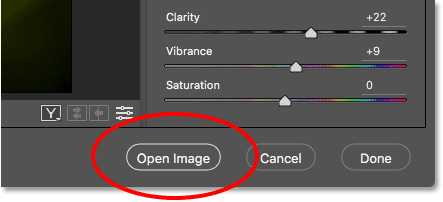
To open the raw file as an editable smart object, press and hold the Shift key on your keyboard. This turns the Open Image button into an Open Object button:
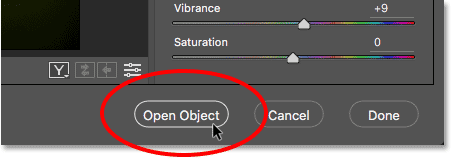
Click on Open Object to open the image into a new Photoshop document:
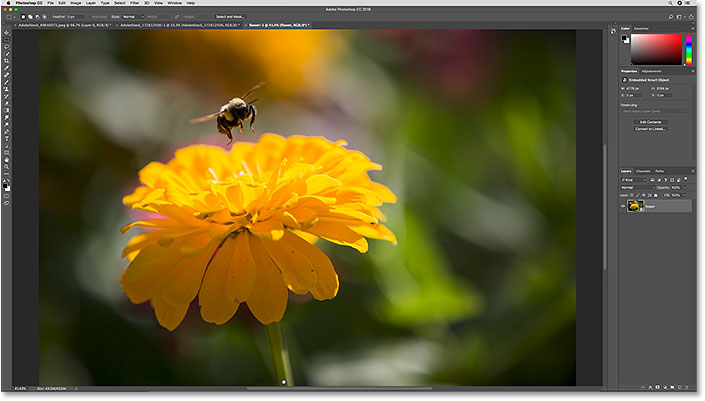
In the Layers panel, we see the now-familiar smart object icon in the lower right of the layer's preview thumbnail, telling us that the image was opened as a smart object:
![]()
Editing a raw file opened as a smart object
As I mentioned, the main benefit of opening a raw file as a smart object is that the raw file itself is now embedded in the document. To reopen the raw file for further editing, double-click on its thumbnail in the Layer's panel:
This reopens the image in Camera Raw. Make any edits you need, and then click OK to accept them. The changes will instantly appear in your Photoshop document. You can edit the Camera Raw settings as many times as you like with no loss in image quality:
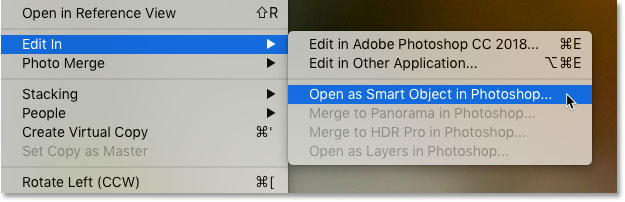
Opening raw files as smart objects from Lightroom
You can also open a raw file as a smart object in Photoshop directly from Adobe Lightroom. In Lightroom, go up to the Photo menu, choose Edit In, and then choose Open as Smart Object in Photoshop. Note, though, that once the image is open in Photoshop, double-clicking on its thumbnail in the Layers panel will open the raw file in Camera Raw, not in Lightroom. However, the editing options in both Camera Raw and Lightroom are exactly the same:
How To Place An Image As A Smart Object
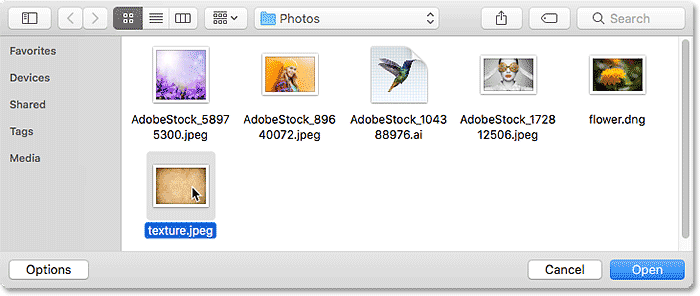
Instead of opening an image into a brand new Photoshop document, we can also place an image into an existing document as a smart object. In Photoshop CC, go up to the File menu and choose Place Embedded. In Photoshop CS6, go to the File menu and choose Place. Note that in Photoshop CC, there's also an option called Place Linked. We'll look at the difference between Place Embedded and Place Linked in a separate tutorial:
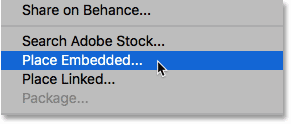
Navigate to the image that you want to place into your document. Click on it to select it, and then click Place. I'll choose my "texture.jpeg" image:
Resizing the placed image
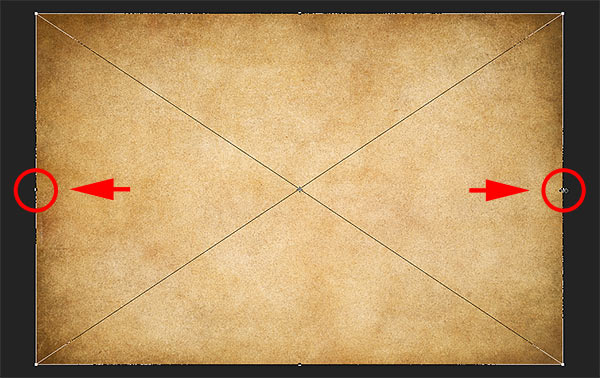
Photoshop places the texture image into the flower document that I opened a moment ago. Before committing the placed image to the document, Photoshop first gives us the chance to scale and transform it. I want to blend my texture image into the flower photo. But because the texture and the photo are using different aspect ratios, some of the flower image is sticking out on the sides:

To scale the texture so it covers the entire image below it, I'll press and hold the Alt (Win) / Option (Mac) on my keyboard as I click on one of the side handles and drag it outward. Holding Alt (Win) / Option (Mac) tells Photoshop to resize the image from its center:
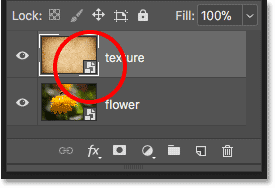
To accept it, I'll press Enter (Win) / Return (Mac) on my keyboard. And now, looking in the Layers panel, we see that my texture image has been placed into the document as a smart object. We also see the photo below it, also a smart object. The photo was opened as a smart object, which created the document, and the texture was then placed as a smart object into the same document:
Related tutorial: Photoshop's Free Transform essential skills
Using blend modes with smart objects
To blend the texture in with the photo, all I need to do is change the blend mode of the texture image. We can use blend modes with smart objects just like we can with normal layers. I'll change its blend mode from Normal to Soft Light:
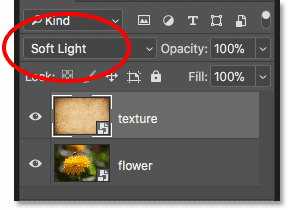
And now the texture is blending in nicely with the photo below it:
Applying Camera Raw as a smart filter (Photoshop CC)
Let's say that I like the texture itself but I don't like its color. I'd rather have a grayscale version of the texture so I can keep the original colors in the photo below it. The best way to convert a color image to grayscale (black and white) in Photoshop is by using Camera Raw. But because my texture smart object is holding a JPEG image, not a raw file, I can't just double-click on its thumbnail to open it in Camera Raw.
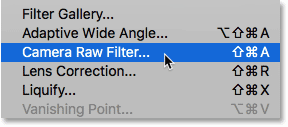
In Photoshop CC, what I can do is apply Camera Raw to the texture as a filter. And since we'll be applying the filter to a smart object, it will automatically become an editable smart filter! To use the Camera Raw Filter, I'll make sure my texture smart object is selected in the Layers panel. Then I'll go up to the Filter menu in the Menu Bar and choose Camera Raw Filter. Note that the Camera Raw Filter is only available in Photoshop CC:
This opens the Camera Raw Filter dialog box, which gives us the same image editing features as the main Camera Raw plugin:

Converting the texture to grayscale
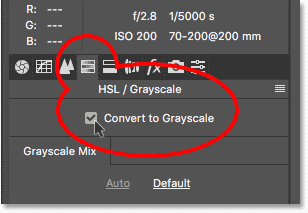
To convert the texture to grayscale, I'll open the HSL / Grayscale panel on the right of the dialog box by clicking its tab, and then I'll select the Convert to Grayscale option:
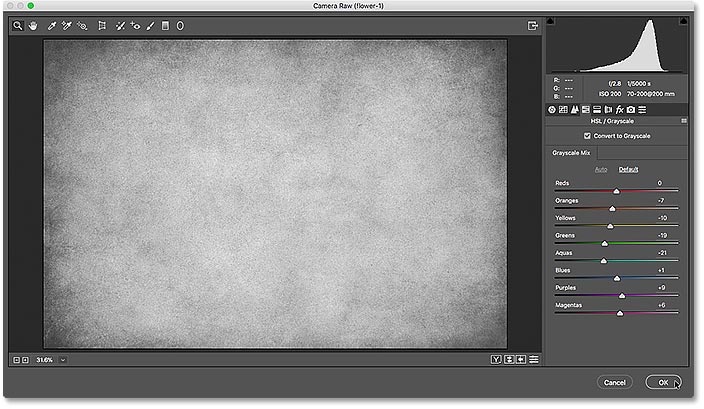
The preview area on the left shows the texture converted to grayscale. I'll click OK to accept it and close the dialog box:
And just like that, I now have a grayscale version of my texture blending in with the photo's original colors:
Working with smart filters
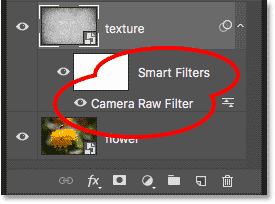
The advantage of applying a filter to a smart object is that Photoshop applies it as a smart filter. Smart filters are non-destructive, meaning that they won't make any permanent changes to the image. We can change a smart filter's settings at any time, and we can even turn smart filters on and off. In the Layers panel, we see the Camera Raw Filter listed as a smart filter below the texture:
If I want to revert back to the color version of my texture, all I need to do is turn off the Camera Raw smart filter. And I can do that just by clicking on the visibility icon beside the filter's name:
![]()
With the filter turned off, the color version of the texture is instantly restored, and I'm back to blending both the texture itself and its color in with the photo. We'll be learning all about smart filters in a separate tutorial:
How To Paste Adobe Illustrator Files As Smart Objects
Finally, let's learn how to paste an Adobe Illustrator file into a Photoshop document as a smart object. This will not only keep the original vector shapes intact, but it will also allow us to reopen the file back into Illustrator if we need to make changes, and then have those changes instantly update in Photoshop.
Step 1: Open the artwork in Illustrator
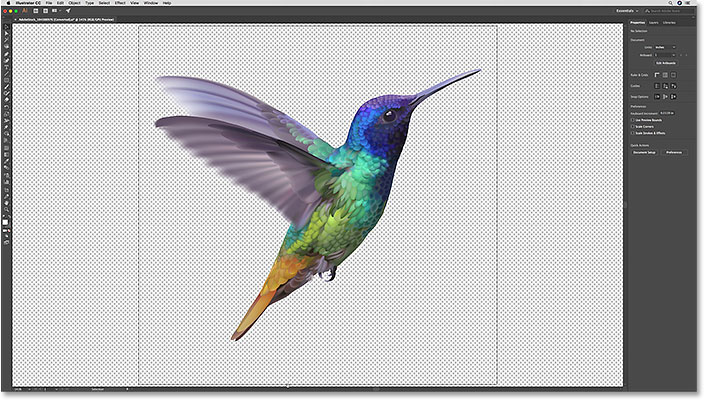
I'll switch over to Illustrator where I've opened a vector illustration of a hummingbird. I downloaded this file from Adobe Stock:
Step 2: Select and copy the artwork
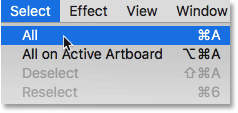
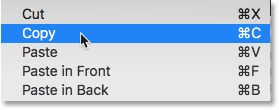
To move artwork from Illustrator into Photoshop, go up to the Select menu (in Illustrator) and choose All:
With the artwork selected, go up to the Edit menu and choose Copy. This copies the artwork to the clipboard:
Step 3: Switch over to Photoshop
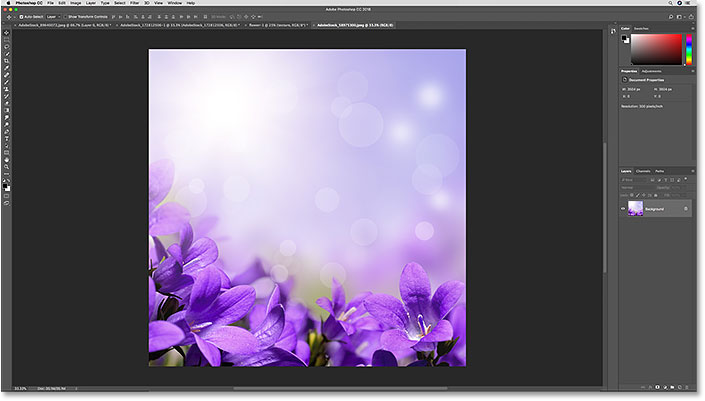
Switch over to your document in Photoshop. I've opened this image of flowers that I'm going to paste the hummingbird into:
Step 4: Paste the Illustrator artwork as a smart object
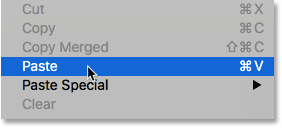
To paste the artwork from Illustrator into the Photoshop document, go up to the Edit menu (in Photoshop) and choose Paste:
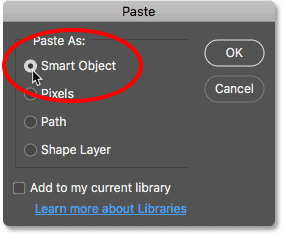
Photoshop will ask how you want to paste the artwork. Choose Smart Object from the list:
Scaling and positioning the artwork
Just as we saw earlier when placing a JPEG file into a document, Photoshop will first give you the chance to scale the artwork using the Free Transform handles. You can also drag inside the Free Transform box to move the artwork into position. In my case, I'll simply drag the hummingbird up a little bit higher into the sky above the flowers:
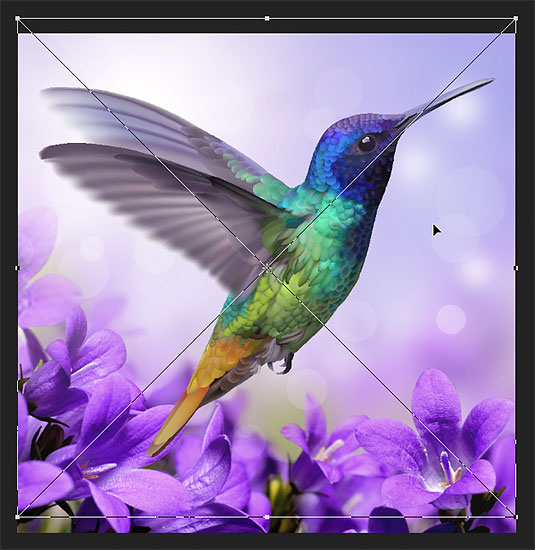
When you're ready, press Enter (Win) / Return (Mac) on your keyboard to place the vector art into your document:

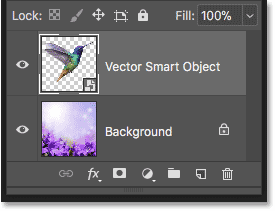
If we look in the Layers panel, we see the artwork on a new vector smart object above the image, with the smart object icon in the lower right of its preview thumbnail. Since the smart object is holding the original vector art, you can scale and resize it as much as you need without any loss in quality. And if you double-click on the smart object's thumbnail, you'll open the artwork back into Illustrator where you can make any changes you need. When you save the file in Illustrator, the changes will be instantly updated in Photoshop:
And there we have it! That's how to open, convert and place your images, raw files and even Illustrator files into Photoshop as editable, non-destructive smart objects! For more on smart objects, learn how to scale and resize images without losing quality, and how smart objects make it easy to transform and distort type! Or visit our Photoshop Basics section for more tutorials!