How to Remove Noise from Photos with Denoise in Adobe Camera Raw
Learn how to use Camera Raw's new Denoise feature to remove noise from your photos using the power of AI, and say goodbye to those manual Noise Reduction sliders forever!
Download PDF: The New AI Denoise in Camera Raw
The April 2023 update for Adobe Camera Raw adds a new AI-powered Denoise feature that removes noise from photos taken in low light conditions at high ISO settings while preserving image detail and color.
Denoise uses artificial intelligence and machine learning to remove the noise, and the results are very impressive.
Camera Raw still includes the old Noise Reduction sliders from previous versions that enable us to reduce luminance and color noise manually, but Denoise removes both automatically and with much better results. Here’s how to use it.
Current Denoise limitations
Denoise currently includes a few compatibility issues. Adobe hopes to expand the types of files that Denoise will work with in the future. But for now, here are the main limitations to be aware of:
- Denoise only supports raw files. JPEG and TIFF formats are not supported.
- The raw file must be from a camera that uses a Bayer or X-Trans sensor.
- Apple’s ProRaw format is not supported.
- Denoise and Super Resolution cannot be applied to the same image.
- Denoise is not available in Photoshop’s Camera Raw Filter.
Which version of Photoshop do I need?
Denoise was added to Camera Raw in the April 2023 update which brought Camera Raw to version 15.3.
Use the Creative Cloud Desktop app to make sure you’re running the latest version of Photoshop and its Camera Raw plugin.
Let's get started!
Opening the raw file in Adobe Camera Raw
The best way to open raw files into Camera Raw is from Adobe Bridge which is included with Photoshop and can be installed using the Creative Cloud Desktop app.
In Adobe Bridge, navigate to the raw file on your computer and click on the file’s thumbnail to select it.

Then click the Open in Camera Raw icon in the Options Bar along the top.
The image opens in Camera Raw.

Related: Add a spotlight behind your subject with Camera Raw
Showing the Camera Raw filmstrip
Even with only one image open in Camera Raw, you’ll want to show the filmstrip when applying Denoise. The reason is that Denoise will create a new DNG file. Having the filmstrip open will make it easy to switch between the two images (with and without the noise reduction) for comparison.
Click the Show Filmstrip icon below the lower left of the image (next to the Zoom options).
The filmstrip opens along the left of the interface (or along the bottom depending on your settings. Either is fine).

Viewing the ISO setting
Camera Raw shows the ISO value below the histogram in the upper right of the interface (along with the focal length, aperture and shutter speed). Here we see that my camera’s ISO was set to 6400.
Normally I use high ISO settings only when needed. But I purposely shot this image at a higher ISO value just to put Denoise and its AI to the test.

Inspecting the noise in the image
Even without zooming in, this image looks very noisy. But if I zoom in to 200% and scroll the image around, the noise becomes painfully obvious. Can Denoise remove it? Let’s find out.

How to use Denoise to remove noise from the image
Now that we've inspected the noise in the image, here's how to remove it using the new AI-powered Denoise feature in Camera Raw.
Where to find Denoise
Denoise can be accessed in a few different ways.
One is to right-click on the image and choose Enhance from the menu.

Another is to click on the More icon (the three dots) in the toolbar along the right of the interface:
Then choose Enhance from the menu.

But the main way is to twirl open the Detail panel where you’ll find the new Denoise button above the Manual Noise Reduction sliders.

How to use Denoise
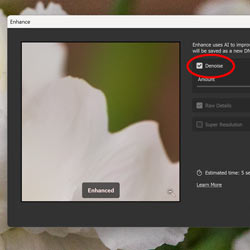
To use Denoise, click the Denoise button.

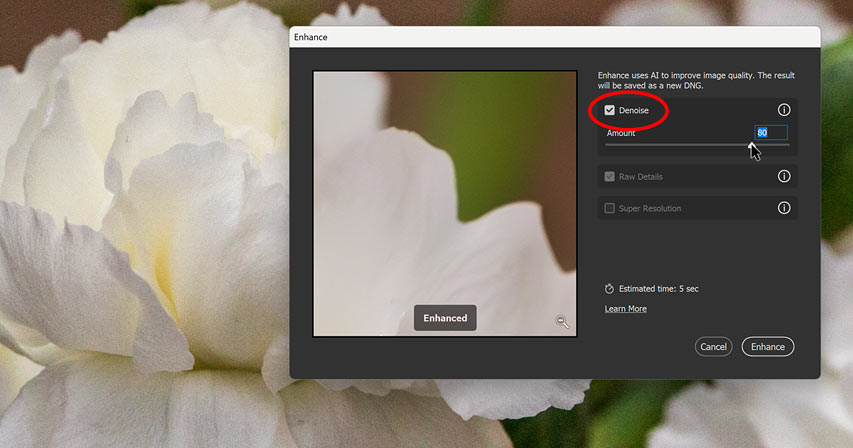
The Enhance dialog box opens with Denoise selected at the top. Since Denoise uses AI to do all the work, it’s very simple to use with only a single Amount slider. The initial default Amount value is 50 but once you start using it, the value will default to the setting you used last.
Tip: Hold the Alt key on a Windows PC or the Option key on a Mac and click the Denoise button to automatically apply your last Amount value without opening the Enhance dialog box.
The Enhance dialog box also includes the Raw Details and Super Resolution options (which are not new).
Denoise and Super Resolution cannot be applied to the same image, although I’ll show you a workaround in a separate tutorial. But Raw Details (which enhances detail and color) is selected automatically and cannot be disabled.

Previewing the noise reduction
The Preview window in the Enhance dialog box shows the image at the 100% zoom level with the current Amount value applied.
Note that edits made using Camera Raw’s healing tools before running Denoise will not be visible in the Preview window. That’s because Camera Raw will need to re-render those edits after Denoise is applied. I talk more about this at the end when we discuss when to run Denoise in your image editing workflow.
Click and hold inside the Preview window to view the image without the noise reduction. Release your mouse button to bring the noise reduction back.

Click and drag inside the Preview window to scroll the image around and inspect different areas.

Or click the magnifying glass icon in the lower right corner to fit the entire image within the Preview window.
Then click on an area of the image you want to inspect.

And the Preview window zooms in on that area.

You can also click anywhere on the main image to center that spot within the Preview window. So lots of ways to preview the results.

Setting the Denoise amount
To remove the noise from the image, simply drag the Amount slider to the right until the noise is gone.
Keep in mind that all noise reduction, even with AI, softens the image to some extent. So while it may be tempting to drag the Amount slider all the way to 100, you should only apply as much noise reduction as you need.
In my case, an Amount value of 80 looks good.

Applying Denoise
The Enhance dialog box displays the estimated time that Denoise will need to remove the noise.
In my case it will take around 5 seconds but this will depend on your computer. And if Camera Raw needs to re-render any previous edits or masks, it may add extra time.
Click the Enhance button to start the Denoise process.

A progress dial appears next to the Denoise button in the Details panel.

Once Denoise is finished, the image appears with the noise removed.
With my image, as with all photos I’ve tested, Denoise did an amazing job at removing the noise while preserving the detail and color, all thanks to its impressive AI.
The result is much better than what the Manual Noise Reductions sliders could have achieved.

If I zoom in to 200%, we see that most of the noise is gone.

And here’s a side-by-side comparison with the original image on the left and the Denoise result on the right, again zoomed to 200%.

Denoise creates a new DNG file
A new DNG file is created with Denoise applied. Edits you made to the original raw file are carried over to the new one, including edits made with the healing tools as well as with Camera Raw’s masking features.
Camera Raw displays the name of the file at the top, with Enhanced-NR
added to the end of its name.

And the filmstrip now shows thumbnails for both images, with the original raw file at the top and the Denoised
version below it.
Click on the thumbnails to swap between the two versions for comparison.

Sharpening the image after running Denoise
If Denoise made the image too soft, you can add sharpness by switching from the Detail panel to the Basic panel.

Then increase the Texture and Clarity values to bring out edge detail. Texture sharpens fine details while Clarity increases contrast in the midtones.

You can also open the Effects panel and drag the Grain slider to add a bit of grain if the image looks too clean
.

Closing Camera Raw after running Denoise
When you’re done with any additional edits after running Denoise, click the Done button to close Camera Raw and return to Adobe Bridge. Or click Open to close Camera Raw and send the image over to Photoshop for further editing.
I’ll click Done.

Back in Bridge, the Denoised
version appears as its own separate image next to the original raw file.

Where Denoise fits in your Camera Raw workflow
Now that we know how to use Denoise, when should you apply it to your image?
Noise reduction is traditionally done at the start since it’s always best to edit a clean image. That’s true even with Denoise and its AI-powered noise reduction. But Denoise comes with a few additional considerations.
- First, Camera Raw will need to re-render any edits made using the healing tools or the masking features before Denoise was applied, and this could result in a change to the image.
- Second, Denoise usually softens the image to some extent. So if you make adjustments using the Texture, Clarity or Sharpness sliders before running Denoise, you may need to go back and re-adjust them to compensate for the softness.
From my experience, you’re not likely to notice much difference no matter when you run Denoise. But it’s still best to run it at the start of your workflow just to avoid any issues.
And there we have it! That’s how to remove noise from your photos with the power of AI using the impressive new Denoise feature in Adobe Camera Raw.
Related tutorials:
- Add a spotlight behind your subject with Camera Raw
- Remove objects from photos with the new AI Remove Tool
- How to open JPEG files in Adobe Camera Raw
Don't forget, all of my Photoshop tutorials are now available to download as PDFs!