
Remove People or Objects from Photos Using Photoshop’s Remove Tool

Here's how to remove people and objects from your photos using Photoshop's new Remove Tool, powered by AI. This step-by-step tutorial shows you how to use the Remove Tool, with tips on how to get the best results!
Download the PDF: Remove Objects with the new AI Remove Tool
Adobe just added another new tool to Photoshop’s list of AI-powered features, and this one may be the biggest game-changer yet.
The Remove Tool uses artificial intelligence and machine learning to remove people, objects or distractions from your photos simply by painting over them. Like magic, the Remove Tool’s AI replaces unwanted objects with new and realistic content that blends seamlessly into the image as if the object was never there.
Best of all, the Remove Tool requires no selections or confusing dialog boxes. Just paint over the person or object you want to remove, release your mouse button and watch them disappear!
The Remove Tool is also the perfect companion to Photoshop's new Generative Fill because it makes it easy to clean up problems in the AI-generated content. So let's see how it works!
What you’ll learn in this tutorial
We’ll start by learning the basics of how to use the new Remove Tool in Photoshop to remove people or objects from your photos. Then we’ll look at a couple of options for the Remove Tool. The first option lets you remove objects nondestructively, and the second makes it easier to remove larger objects or multiple objects at once.
Along the way, we’ll compare the Remove Tool with Photoshop’s Spot Healing Brush to see how much better the Remove Tool really is. Plus I’ll share some useful tips, including the best way to use the Remove Tool to repair or rebuild edges.
Which version of Photoshop do I need?
The Remove Tool was added to Photoshop in the May 2023 update, which brought Photoshop to version 24.5.
You can get the latest Photoshop version here, or use the Creative Cloud Desktop app to make sure that your copy is up to date.
Let's get started!
How to remove objects with Photoshop’s Remove Tool
Here’s the basics of how to use the Remove Tool to remove a person or object from your photo.
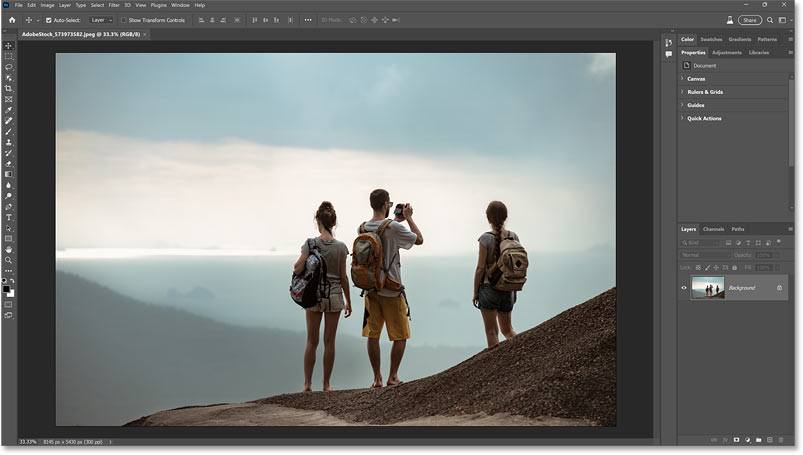
I’ll be using several images throughout this tutorial. Here’s my first image from Adobe Stock. I want to remove the person on the right in this photo, leaving only the two people in the center.
See Also: The Remove Tool's New Features in Photoshop 2024
Step 1: Select the Remove Tool from the toolbar
Photoshop's Remove Tool is found in the toolbar, grouped in with the Spot Healing Brush and Photoshop’s other healing tools.
Click and hold on the Spot Healing Brush (or whichever tool in the group you used last). Then select the Remove Tool from the fly-out menu.

Step 2: Adjust the Remove Tool’s brush size
The Remove Tool is a brush, not a selection tool. You simply paint over the object or person you want to remove.
Resize your brush using the left and right bracket keys ( [ and ] ) on your keyboard. The left bracket makes the brush smaller and the right bracket makes it larger.

Step 3: Paint over the person or object you want to remove
Then paint over the person or object you want to remove from the photo. Make sure to cover the area completely.
Tip! Always include a bit of the background as well for the best results.
By default, the Remove Tool will try to remove the person or object as soon as you release your mouse button. We’ll learn how to change this behavior in a moment. But for now, I’ll cover the entire woman and some of the background area surrounding her with a single continuous brush stroke.

Step 4: Release your mouse button
Release your mouse button once the area is completely covered by the brush. The Remove Tool’s AI instantly removes the object.
The result here is not perfect, but overall the Remove Tool did an amazing job. And as we’ll see in a moment, the Remove Tool can clean up problems just as easily.

Comparing the Remove Tool with Photoshop’s Spot Healing Brush
Since the Remove Tool is most similar to Photoshop’s Spot Healing Brush, here’s a side-by-side comparison of the results using both tools.
On the left, the Spot Healing Brush oddly chose to fill some of the area with part of the man’s arm.
Compare that with the Remove Tool result on the right and the winner is obvious. The Remove Tool’s AI did the better job.

Step 5: Paint over problems with the Remove Tool to fix them
Along with removing objects, the Remove Tool can also fix its own mistakes. All you need to do is paint over them again.
With my image, the Remove Tool added a detail that’s too similar to the original content next to it.

So I’ll paint with the Remove Tool over that area again.

When I release my mouse button, the Remove Tool replaces it with new content and the problem disappears.
Tip! You can paint with the Remove Tool over the same area multiple times until you get the result you want.
There's a bit more cleanup that we could do here, but we’ll see more examples as we go along. So let’s move on to the next part of the tutorial and learn how to remove objects non-destructively.

How to use Photoshop’s Remove Tool non-destructively
In the previous example, the Remove Tool made it easy to remove the person from the photo. But there’s a problem.
In my Layers panel, we see that the edit was made to the original image on the Background layer, which means that the person I removed is gone forever (from the photo, anyway).

The reason is that by default, the Remove Tool can only remove an object from the layer that’s currently selected.
Fortunately the Remove Tool can also work on a separate layer so we can remove objects non-destructively. To see how, and for another example of the Remove Tool in action, I’ll switch to my second image.
With this image, I want to remove the couple from the beach.

Related tutorial: Using Adjustment Layers for non-destructive editing
Step 1: Add a new blank layer above the photo
To use the Remove Tool non-destructively, first add a new layer by clicking the Add New Layer icon in the Layers panel.

Photoshop adds a new blank layer above the image.

Step 2: Select the Remove Tool from the toolbar
Then select the Remove Tool from the same group as the other healing tools in the toolbar.
Since the Remove Tool was the last tool I used from the group, I can simply click on its icon to select it. No need to open the fly-out menu this time.

Related tutorial: Using the Healing Brush to reduce wrinkles
Step 3: Turn on Sample all layers
Then turn on Sample all layers in the Options Bar.
This option enables the Remove Tool to work on the blank layer we just added.

Sample all layersoption.
Step 4: Paint over the object to remove it
Resize your brush as needed using the left and right bracket keys ( [ and ] ) on your keyboard.
Then paint over the area you want to remove. Again make sure to cover the entire person or object with one continuous brush stroke (we’ll learn how to change that in the next section) and also include a bit of the background.
With my image, I have two people to remove. But since they’re next to each other with no gap in between, I can easily cover them both with a single brush stroke. I’m also painting over their shadows in the sand, since a shadow with no one casting it is an easy giveaway that the image was Photoshopped
.

Step 5: Release your mouse button
When you have finished painting, release your mouse button. The Remove Tool’s AI analyzes the image, removes the unwanted area and replaces it with new detail.
Again the initial result here is not perfect but it’s still very impressive.

The Remove Tool vs the Spot Healing Brush
Here’s another comparison between the Remove Tool and the Spot Healing Brush after painting over the same area. The Spot Healing Brush result is on the left and the Remove Tool is on the right.
Another win for the Remove Tool’s artificial intelligence.

The content was removed non-destructively
With the previous photo, the Remove Tool made a permanent change by removing the person from the original image. But this time, the Remove Tool added the new content to our separate layer above the image, so the edit was non-destructive.
If I click the top layer's visibility icon to turn it off and hide the replacement content:

The original content returns.
Tip! Toggling the replacement content on and off is an easy way to see if something that looks odd was part of the original image or added by the Remove Tool.

Step 6: Paint over problem areas to fix them
Just like with the previous image, I can paint with the Remove Tool over any areas that need to be cleaned up.
For example, the Remove Tool added a weird triangle-shaped artifact on the beach. So I'll paint over that area again.

I’ll release my mouse button and the Remove Tool replaces the artifact with new detail that fits much better with the surrounding detail.

Tip! Earlier I mentioned that you can paint over the same area multiple times with the Remove Tool until you are happy with the result. But you can also press Ctrl+Z (Command+Z on a Mac) to undo your last brush stroke and then paint over the same area to try again.
Here’s my result after spending a few minutes painting with the Remove Tool to clean up more areas along the beach and in the water. It’s still not quite perfect, but the Remove Tool’s ability to rebuild and recreate image detail is extremely impressive.
We’ll see another example of how the Remove Tool can repair detail in a moment. But first, we need to learn about one more important option for the Remove Tool in the Options Bar.

The Remove after each stroke
option
By default, the Remove Tool removes the person or object you paint over as soon as you release your mouse button. This means you need to cover the entire area with a single continuous brush stroke.
The reason is that Remove after each stroke is turned on in the Options Bar.

Remove after each strokeoption.
If the area is small enough, it’s not a problem. But what if you need to remove a larger area, one that’s not so easy to cover with a single stroke? Or maybe you have multiple objects to remove that are scattered throughout the photo.
In that case, uncheck Remove after each stroke
. The Remove Tool will then wait to remove the area until you tell it to do so. Here’s how it works.
With this third image, I want to remove the person on the left.
I could try painting over her with a single continuous stroke. But instead I’m going to paint along the edges with a smaller brush and then use a larger brush to quickly fill in the rest. When I’m done, I’ll tell the Remove Tool to replace her with new content.

Step 1: Turn off Remove after each stroke
First, with the Remove Tool active, I’ll uncheck Remove after each stroke in the Options Bar.

Remove after each stroke.
Step 2: Paint with the Remove Tool using multiple brush strokes
I’ll resize my brush using the left bracket key ( [ ) on my keyboard to make it smaller.
Then I’ll paint along the edges of the person, making sure as always to include some of the background.
When I’m done, I’ll release my mouse button. And because I have Remove after each stroke
unchecked, nothing happens (which is good).

I’ll resize my brush again, this time using the right bracket key ( ] ) to make it larger.
Then I’ll quickly fill in the rest of the area. Again I’ll release my mouse button, and still nothing happens.

Step 3: Click the checkmark to remove the object
When you are finished painting, click the checkmark in the Options Bar to remove the person or object.

And once again the Remove Tool does an incredible job with only minor issues to clean up.

Removing multiple objects at the same
With Remove after each stroke
unchecked, the Remove Tool can even remove multiple objects from the photo at once.
With this fourth image, I’ll remove three of the four flamingos.

I’ll paint with the Remove Tool over the first two birds on the left and the last one on the right.
Again I have Remove after each stroke
unchecked in the Options Bar or else this would not work.

Then to let the Remove Tool’s AI do its magic, I’ll click the checkmark in the Options Bar.
And just like that, the birds I painted over disappear, replaced with new content that blends seamlessly with the background.
The only areas in need of cleanup are the reflections of the birds in the water.

How to repair edges with the Remove Tool
Finally, Photoshop’s new AI-powered Remove Tool is not just a remove
tool. It’s also a repair
and reconstruct
tool that works incredibly well with edge detail.
If an edge disappeared or was somehow messed up
(technical term) during the initial object removal, the Remove Tool can actually recreate the edge with jaw-dropping results.
To show you what I mean, I’ll switch over to my fifth and final image.
Keep an eye on the horizontal and vertical edges from the blocks in the wall as I use the Remove Tool to remove the person in front of it.

Removing the person from the image
With Remove after each stroke
unchecked in the Options Bar (which I covered in the previous section), I’ll paint over the person in front of the wall.

The new edges are not aligned
When I click the checkmark in the Options Bar, the Remove Tool removes her and replaces the background with new detail as expected.
But notice how the edges in the wall are not lining up properly. Instead they appear broken and disconnected.

And some parts of the wall now have random edges that should not be there at all.

Removing the unwanted edges
I’ll start by removing the edges that shouldn’t be there.
Tip! If you need to paint across something that’s essentially a straight line, like these edges, here’s an easy way to do it.
- First make sure that Remove after each stroke is unchecked in the Options Bar, otherwise this won’t work.
- Click on one side of the object and release your mouse button.
- Then hold Shift on your keyboard and click on the other side.
- The Remove Tool paints a straight line between the two points.

I’ll use the same Shift key trick to paint across the other two edges I need to remove.

Then after painting across all three, I’ll click the checkmark in the Options Bar and they disappear. So far so good.

Repairing the broken edges with the Remove Tool
Now here’s the part that, to me, really feels like next-level stuff.
Normally I would switch to the Clone Stamp Tool at this point and repair the edges manually. But instead, I’m going to let the Remove Tool’s AI repair and align the edges itself.
I’ll start with an edge that’s most in need of repair.

First I’ll turn on Remove after each stroke in the Options Bar so that the Remove Tool will do its magic after each brush stroke.
This is important because it usually takes multiple strokes to get an edge looking good.

Remove after each stroke.
Why longer brush strokes usually don’t work
From my experience, the trick to repairing edges with the Remove Tool is lots of short strokes and patience. Don’t try to repair the entire edge all at once, and here’s why.
I’ll paint across a large section of the edge with a single brush stroke.

But instead of repairing the edge, the Remove Tool removed it. Not what I wanted.
So I’ll restore the edge by pressing Ctrl+Z (Command+Z on a Mac) to undo the brush stroke.

Shorter brush strokes work better
This time, I’ll paint across a smaller section of the edge.

And when I release my mouse button, the Remove Tool’s AI instantly snaps that section into alignment. Very impressive.

I’ll paint across another small section of the edge.

And again the Remove Tool snaps it into place. This one's not quite aligned perfectly but it’s looking better and we can keep going to improve it.

I’ll continue painting over one small section at a time so the Remove Tool doesn't try to do too much at once.
Even a single click with your mouse button is sometimes all you need.
Some brush strokes made things worse, not better. So when that happened, I pressed Ctrl+Z (Command+Z on a Mac) to undo the stroke and tried again.
And here’s my result. The Remove Tool did an outstanding job and the edge looks good as new.

One Remove Tool to rule them all?
After spending a few more minutes with the Remove Tool, I was able to repair and align all of the broken edges in the wall.
But the Remove Tool was not able to fix the more complex edges on the ground where the woman was standing. So in that one area, the Clone Stamp Tool would do a better job.

Conclusion
And there we have it! Photoshop’s AI-powered Remove Tool removes people and objects from photos faster and easier than anything we’ve seen before. Simply paint over an object with the Remove Tool to replace it with new detail, and then paint over any problems to clean them up.
Photoshop’s traditional healing and retouching tools, like the Spot Healing Brush, still have their uses. But for removing objects, the Remove Tool does the better job every time.
More Photoshop AI tools and features:
- The Remove Tool's New Features in Photoshop 2024
- Color black and white photos with the Colorize filter
- How to use the Object Selection Tool
Don't forget, all of my Photoshop tutorials are now available to download as PDFs!