Add A Spotlight Behind Your Subject With Adobe Camera Raw
In this tutorial, you'll learn how to add a spotlight behind the subject in your photo with just a few simple steps using Adobe Camera Raw and its amazing masking features!
Download the PDF: Add A Spotlight Behind Your Subject With Camera Raw
Adding a spotlight behind the subject in your photo is a great way to help separate your subject from the background. A spotlight can add depth and dimension to the portrait, and you can adjust the intensity of the spotlight to create drama, or change the color of the light for different moods or emotions.
By using Camera Raw and its powerful masking features, we can add the spotlight non-destructively. And Camera Raw’s intuitive image editing controls will allow us to adjust the spotlight’s size, position, intensity and color quickly and easily.
You can also use these steps to add a spotlight in Adobe Lightroom and Lightroom Classic since they share the same editing and masking features as Camera Raw.
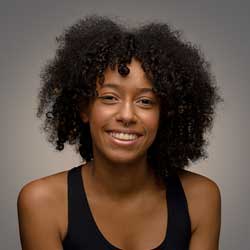
Here is an example of what the spotlight effect will look like when we’re done.
Let's get started!
Which version of Camera Raw do I need?
Adobe Camera Raw updates automatically with Photoshop because it is a plugin for Photoshop rather than a standalone app. So to access all of Camera Raw’s new features, make sure that your copy of Photoshop is up to date.
I’m using Photoshop 2023. You can get the latest Photoshop version here.
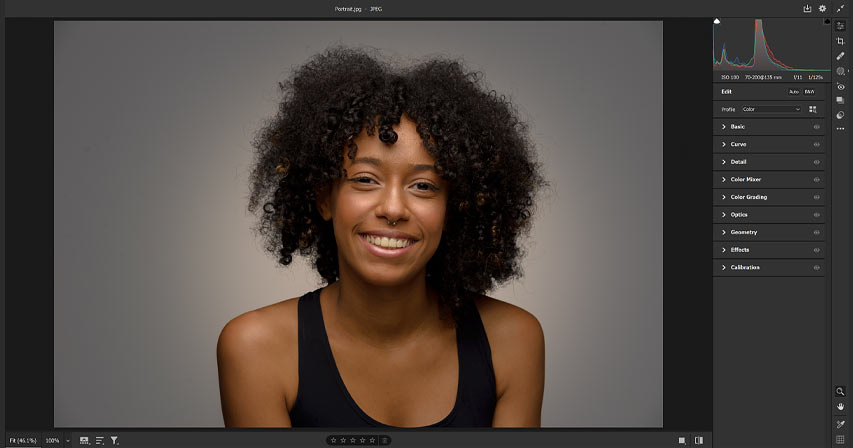
Step 1: Open your image in Camera Raw
First we need to open the image in Camera Raw. And the best way to do that is from Adobe Bridge.
Bridge is a file browser that’s tailor-made for organizing images and other assets we use in the various Creative Cloud apps. It’s included with your Creative Cloud subscription and can be installed using the Creative Cloud Desktop app.
The benefit to using Adobe Bridge is that it enables us to open not just raw files into Camera Raw but also JPEG and TIFF images. For this tutorial, I’ll use a JPEG image.
Open Adobe Bridge and navigate to where the photo is located on your computer. My image is in a folder on my Desktop.

Then right-click on the image thumbnail and choose Open in Camera Raw from the menu.

Camera Raw opens with your photo in the main preview window. The photo I’m using is from Adobe Stock.
If Camera Raw did not open in Full Screen mode, press the letter F (for Full Screen) on your keyboard.

Step 2: Open Camera Raw's Masking options
Adding the spotlight behind your subject can be done entirely using Camera Raw’s masking features. And there are two main steps.
First we’ll use a mask to add the spotlight to the image, which will place the spotlight in front of our subject. Then we’ll subtract our subject from the mask so that the spotlight appears only on the background behind them.
In the toolbar along the right of the Camera Raw interface, click the Masking icon.
Step 3: Choose Radial Gradient
Then in the Create New Mask options, choose Radial Gradient.

A separate Masking panel opens to the left of the main panel, while the main panel now shows all of the adjustments we can make to the area we select with the mask.

Related tutorial: Understanding layer masks in Photoshop
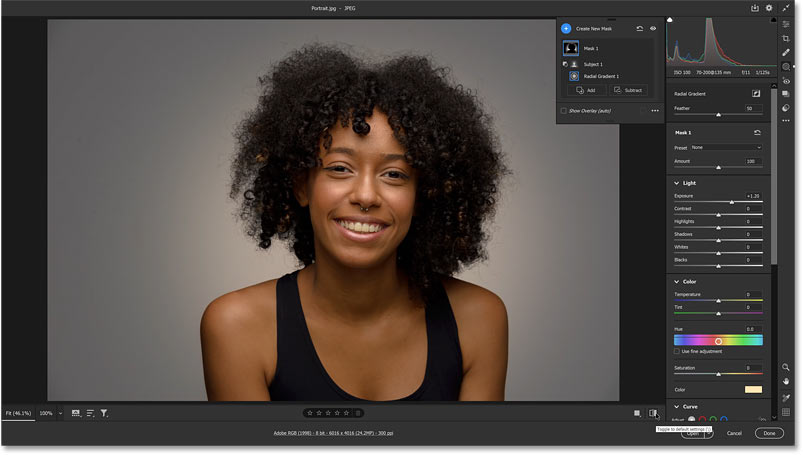
Step 4: Draw a radial gradient across your subject
Click in the center of your subject and begin dragging out a radial gradient selection. The area inside the selection, which is covered by a red overlay, is where we’ll add the spotlight.
You can force the radial gradient into a perfect circle by holding the Shift key on your keyboard as you drag.

Continue expanding the selection outward until it surrounds not only your subject but also some of the background behind them, since the background is ultimately where the spotlight will appear.
Release your mouse button when you’re done to complete the selection.

How to reposition the selection after you draw it
If you need to reposition the radial gradient, just click on the pin in the center and drag it into place.

Step 5: Drag the Exposure slider to brighten the spotlight
To create the spotlight effect, drag the Exposure slider (found in the Light section of Camera Raw's main panel) to the right to increase the brightness of the selected area.
The red overlay will disappear as soon as you start dragging.

Notice that along with the background, we are also increasing the brightness of our subject. But don’t worry about that for now. Just increase the Exposure value until the background behind your subject is bright enough.

How to toggle the pin on and off
To temporarily hide the pin in the center of the selection as well as the outline surrounding it, press the letter V on your keyboard to toggle the pin on and off. This lets you view the result without any distractions.

Step 6: Click the Subtract button in the Masking panel
So far so good. We have the spotlight in the background. Now we need a way to remove the spotlight from our subject. And we can do that by subtracting our subject from the mask. In fact, we’re going to let Adobe’s A.I. (artificial intelligence) do the work for us.
In the Masking panel, we see the mask (named Mask 1
) that we created. At the moment, the mask contains only the Radial Gradient.

To subtract an area from the mask, click the Subtract button.

Step 7: Choose Select Subject
Then choose which masking tool you want to use to remove the area. Since we need to remove our subject, choose Select Subject.

Select Subject works the same way in Camera Raw as it does in Photoshop. It uses A.I. to automatically detect and select the subject in the photo.
And because we’re using it to subtract an area from the mask, our subject is instantly removed from the effect, leaving them at their original brightness while the spotlight remains visible only on the background behind them.

We now have two pins in front of the image, one for the Radial Gradient and one for Select Subject. You can toggle the pins on and off by pressing V on your keyboard.
Back in the Masking panel, we see that our mask (Mask 1
) is now a combination of two masking tools. The Radial Gradient created the initial mask, and the Select Subject command removed our subject from the mask.

Related tutorial: Select Subject's new Cloud option for better selections
Step 8: Change the color of the spotlight
To change the color of the spotlight, go to the Color section in Camera Raw's main panel and click the color swatch.

Then in the Color Picker, click and drag left or right to choose a hue, and drag up and down to adjust the saturation.

I’ll choose a Hue value of 40 to warm up the light and a Saturation value of 30.
Click OK to accept the new color, or Cancel to return to the original color of the background.

Step 9: Make any adjustments to the spotlight
To make any needed adjustments to the spotlight, select the Radial Gradient in the Masking panel.

Then drag any of the handles to resize it. Hold Shift as you drag to lock in its original shape. Drag the pin in the center to reposition it (press V on your keyboard if you can’t see the pin).
You can also drag the Exposure slider to adjust the brightness of the spotlight. I’ll lower mine just a bit.

Step 10: Toggle the Preview on and off
To compare the spotlight effect with the original image, click the Preview button below the bottom right of the image to view it in its original state. Then click the Preview button again to view the spotlight.
You can also toggle the Preview on and off by pressing the backslash key ( \ ) on your keyboard.
Step 11: Click Done or Open
Now that we have added the spotlight behind our subject, we have two options. We can either close Camera Raw to accept our changes, or we can move the image over to Photoshop for further editing.
Option 1: Saving the spotlight and closing Camera Raw
To save your spotlight effect and close Camera Raw, click the Done button in the lower right.

Back in Adobe Bridge, the image appears with an icon in the upper right of its thumbnail. The icon means that we’ve applied edits to the image in Camera Raw.
If you right-click on the image and choose Open in Camera Raw again:

Camera Raw will reopen with the spotlight applied to the image.
You can click the Masking icon in the toolbar to open the Masking panel, and then click on the mask to expand it and view the Radial Gradient and Select Subject command inside it.

Option 2: Sending the image to Photoshop
Or if you want to save the spotlight and then send the image from Camera Raw over to Photoshop for further editing, click the Open button.

Camera Raw will close and your image, along with the spotlight effect, will open in Photoshop.

And there we have it! That's how to add a spotlight behind your subject using the masking features in Adobe Camera Raw.
Related tutorials:
- How to crop an image in a circle with Photoshop
- Photoshop layer masks for beginners
- How to change colors in Photoshop
Don't forget, all of my Photoshop tutorials are now available to download as PDFs!