How to Color Black and White Photos with Photoshop’s Colorize Filter
Learn how to let Photoshop auto-color your black and white images, or add your own colors with a single click, using the Colorize filter in Photoshop 2022!
Download PDF: 2022 - Color Black and White Photos with Colorize
In this tutorial, I show you how easy it is to add color to a black and white photo using the Colorize filter in Photoshop. Colorize was first introduced as a beta filter back in Photoshop 2021 but has been upgraded to an official feature in Photoshop 2022.
The Colorize filter is one of Photoshop’s Neural Filters. This means it uses machine learning, along with Adobe's artificial intelligence known as Adobe Sensei, to analyze your black and white image and automatically figure out which colors to use. The initial results are often amazing. And if the colors in some areas don’t look right, the Colorize filter lets you select those areas and choose your own colors with a single click! Let’s see how it works.
Which version of Photoshop do I need?
To use the Colorize filter, you'll need Photoshop 2022 or newer. Get the latest Photoshop version here.
Let's get started!
Step 1: Open a black and white image
You can follow along by opening any black and white image into Photoshop. It doesn’t need to be an old vintage photo, although colorizing old photos is really what the Colorize filter was designed for.
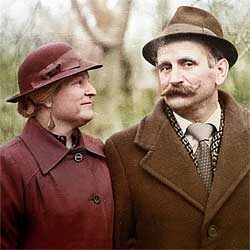
It also doesn’t need to be completely black and white. This image from Adobe Stock has a sepia tint which would still work fine. But if you do want to convert your image entirely to black and white before you start, I’ll show you a quick way to do it in a moment:

Step 2: Make sure the image is in RGB Color
The Colorize filter makes coloring black and white photos faster and easier than ever. But before we can use it, and to get the best results from the filter, there’s a couple of things we need to do to prepare the original image.
First, the Colorize filter only works with images that are in the RGB color mode. But many black and white photos were saved in Grayscale mode. So to make sure your image is in RGB, go up to the Image menu in the Menu Bar and choose Mode.
If you see a checkmark next to RGB Color, you’re good to go. But if Grayscale is checked, then click on RGB Color to select it:

You can also view the document’s color mode in the tab at the top:

Step 3: Boost the contrast if the image is faded
Also, the Colorize filter works best with images that have a good amount of contrast. So if you are working with an old photo that has faded over time, you’ll want to fix the contrast before adding color. And here’s a quick way to do it.
Duplicate the Background layer
In the Layers panel, click on the Background layer and drag it down onto the New Layer icon:

A copy of the layer appears above the original:

Double-click on the copy’s name to highlight it, rename the layer “Contrast”, and then press Enter on a Windows PC, or Return on a Mac, to accept it:

Contrast.
Desaturate the image
If your image has a color tint to it like mine does, and you want to remove it (which can help to improve contrast), then go up to the Image menu, choose Adjustments, and then Desaturate:

This removes any color and leaves the image in black and white:

Related: Create instant high contrast black and white photos!
Choose the Auto Contrast command
Then to increase the contrast, go up to the Image menu and choose Auto Contrast:

And here’s my result with Auto Contrast applied:

If Auto Contrast made some areas too bright or too dark, then before you do anything else, go up to the Edit menu and choose Fade Auto Contrast:

Then lower the Opacity of the Auto Contrast command to fade the effect. But I’ll leave mine at 100 percent:

Step 4: Select the Neural Filters
Now that we’re prepared our image, we’re ready to apply the Colorize filter. As I mentioned earlier, Colorize is one of Photoshop’s Neural Filters. So to select it, go up to the Filter menu and choose Neural Filters:

This opens the Neural Filters workspace, with the image on the left and the Neural Filters panel on the right:

If you can’t see your entire image, go to the toolbar along the left of the workspace and double-click on the Hand Tool icon to fit the image on screen:
Related: Learn how to navigate images in Photoshop like a pro!
Step 5: Download and turn on Colorize
The Neural Filters panel on the right lists all of the filters we can choose from. The official filters are in the Featured section, while the Beta section gives us early access to filters that are still a work in progress. As of Photoshop 2022, Colorize has been upgraded from Beta to Featured.
But before we can use a filter, we first need to download it. So if a cloud icon appears on the right of the Colorize filter’s tab, click the icon to download the filter:

Once the filter is downloaded, the cloud icon will turn into a toggle switch. Click it to turn the Colorize filter on:
The initial colorized image result
Photoshop analyzes the image, and after a few moments, we get a very impressive initial result. Since Colorize uses machine learning, it’s able to detect different elements in the image, like faces, clothing, trees and other objects, and figure out which colors to use.
As we see with my image, Colorize does an amazing job with faces and skin tones. And it also did well with the trees and grass in the background. But other areas, like the coats and hats, need some work:

Step 6: Add focal points to edit colors in specific areas
The options for the Colorize filter appear along the right of the Neural Filters panel. And at the top of the column is a smaller preview of the original photo, with no coloring applied. This is where we can select different areas and change the color:

The Auto Color Image option
But before we start editing colors, I just want to point out the option below the preview called Auto color image. This option is turned on by default, which is why Photoshop goes ahead and colors the image for us. If you turn Auto color image off by unchecking it, the image will revert back to its original black and white. And if you turn the option back on, Photoshop will auto color the image again.
In most cases, you’ll want to leave Auto color image turned on. But if you ever want to color the entire image yourself without using auto color, then start by turning Auto color image off. For this tutorial, I’ll leave it on:

Adding a focal point
To change the color of an object in the image, all we need to do is click on it in the image preview to add a focal point. I want to change the color of the man’s coat, so I’ll click on his coat to add a focal point to that spot:

Choosing a new color
Since this is the first focal point I’ve added, Photoshop automatically opens the Color Picker so I can choose a new color. I’ll choose a shade of brown by setting the Hue (H) value to 30 degrees, the Saturation (S) to 60 percent and the Brightness (B) to 50 percent.
You won’t really know how the color looks until you apply it, so just click OK to close the Color Picker:

And here we see that the brown looks pretty good, although the color is a bit too saturated:

Editing the color
Back in the image preview, the focal point appears as a dot filled with our chosen color. To edit the color and try again, click the color swatch below the image:

And then choose a different color, or a different shade of the color, from the Color Picker. I’ll lower the Saturation value from 60 percent down to 40 percent:

Then I’ll click OK to close the Color Picker, and now the coat looks better:

Moving the focal point
But notice that the color is not being applied to the entire coat evenly. It appears stronger and more saturated around the spot where the focal point was added, but then it fades out as we move farther away. And in some areas, like the top of the coat below the man’s ear, the blue from the auto color effect is still showing through:

If I click on my focal point and drag it to a different part of the coat, like the lower left:

Then the more saturated areas of color move along with it. And the top of the coat below his ear and along his shoulder is even less affected by the focal point than it was before:

The focal point Size slider
So how do we spread the color out so it affects a wider area? Well you could try changing the size of the focal point using the Size slider next to the color swatch. Drag the slider to the right to increase the size and spread the color outward, or drag to the left to make the focal point smaller and focus the color more on that one spot:

But even with the size increased, the color is still not spread out evenly:

So since increasing the size didn’t work, I’ll reset the Size slider back to its default setting, which is just left of center:

Adding more focal points
A better way to spread the color out is to simply add more focal points. Each new point will use the same color, so just click to add as many points as needed.
Here I’ve added a total of five focal points to the coat:

And now the coat looks better with the color spread out more evenly:

How to copy a focal point
Along with clicking to add new focal points, we can also copy an existing focal point.
I want to make the man’s hat the same color as his coat. So I could click on the hat to add a new point. Or I can hold the Alt key, or the Option key on a Mac, and drag a copy of one of my existing focal points onto the hat:

And now the hat and the coat are the same color:

How to delete a focal point
If you need to delete a focal point, click on the point to select it and then click the Delete icon (the minus icon) next to the color swatch.
And if you deleted the point by mistake and want to bring it back, you can undo your last step by pressing Ctrl+Z on a Windows PC or Command+Z on a Mac:

How to remove color from an area
Notice how the brown from the coat is bleeding into the man’s tie:

I’m guessing his tie was probably gray. So to remove the color, I’ll click to add a new focal point on his tie:

Then I’ll click the color swatch:

And in the Color Picker, I’ll choose gray by lowering the Saturation down to 0 percent. Then I’ll click OK:

I’ll add another focal point to the top of the tie, also set to gray, to spread the color out:

And that looks better. Making the tie gray also cleaned up most of the brown that was bleeding into his shirt:

Watch for shifting colors
Sometimes, adding a new color to one area causes the color in another area to shift. And looking at the previous image, we see that after adding gray to the tie, the left side of the coat has lost some of its saturation.
So to fix that, I’ll click on one of the existing focal points on the coat to switch my color from gray back to brown:

And then I’ll click to add a few more focal points to the coat:

And now the saturation in restored:

Saving other problem areas for later
There are still a few problems though, like in the bottom of the image where the brown from the coat sleeve is bleeding into the background. But rather than trying to fix it with focal points, I’ll show you how to paint away problems like this with the Brush Tool at the end of the tutorial:

Coloring the woman’s coat
I also want to change the color of the woman’s coat. So in the preview image, I’ll click on her coat to add a new focal point:

And since I don’t want to use the same color that I used for the man’s coat, I’ll click the color swatch:

For her coat, I’ll go with a shade of red by changing the Hue to 0 degrees. I’ll leave the Saturation at 40 percent and the Brightness at 50 percent, and I’ll click OK:

Of course, I don’t know what the original colors were so I’m just choosing colors that I think look good. And here’s the initial result using a single focal point:

Then to spread the color out more evenly, I’ll click to add more focal points to her coat, all set to the same red color. And I’ll add a couple of points to the woman’s hat to make it the same color as the coat:

And things are looking good. But again, there are some problems. In the bottom left corner of the image, the red from the coat sleeve is bleeding into the background. But I’ll ignore it for now and I’ll paint that problem away later, after I’m done with the Colorize filter:

Changing the color of the background
Finally, I think the trees and grass in the background look a bit too green for the time of year that this photo was probably taken. So in the preview image, I’ll click on an area of the background to add another new focal point:

Since I don't want to color the trees with red, I’ll click the color swatch:

In the Color Picker, I’ll set the Hue to 50 degrees. I’ll again leave the Saturation and Brightness at the same values, and I’ll click OK:

And since a single focal point won’t do much to cover such a wide area, I’ll click all around the background to add multiple points until the color is spread out evenly.
Here we see the brown focal points coloring the man’s coat and hat, the red focal points coloring the woman’s coat and hat, and the muted green focal points coloring the background:

And here is the result:

Step 7: Adjust the overall saturation and color balance
Once you are done editing specific areas with focal points, you can make global changes to the image using the Saturation and Color Balance sliders.
For example, if I wanted to warm up the image, I could drag the Cyan / Red slider a bit towards Red, and the Yellow / Blue slider slightly towards Yellow:

And here’s the result:

Step 8: Add Color Artifact or Noise Reduction if needed
Below the Color Balance sliders are two more sliders. Color artifact reduction can sometimes help to remove or reduce blotchy colors, especially around edges. But it can also lower the saturation, especially if set to high. I’ll leave it at 0.
And the same goes with the Noise Reduction slider which really just softens the overall image. It’s best left at 0 as well:

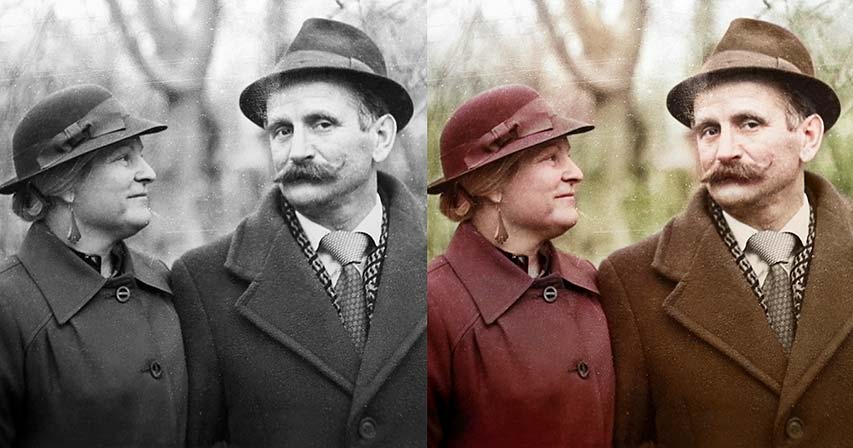
Step 9: Compare the original image with the colorized version
To compare the colorized version with the original black and white photo, click the Show Original icon in the lower left of the Neural Filters panel:
Here is my original black and white version for comparison:

And here is the colorized version:

Step 10: Output the colorized image
When you’re happy with the colorized version, choose how you want to output the result. There are two main output choices, and the best one to choose will depend on whether or not you have any areas that need to be cleaned up.
The Output option
If everything went great and there are no areas where the color still needs to be touched up, then choose one of the traditional output methods from the Output option at the bottom of the Neural Filters panel.
The best choice is usually New layer which will output the colorized version on its own layer above the original image:

Output as new color layer
But if you have areas where the color needs to be cleaned up (like I do), then a better choice is to select the Output as new color layer option directly below the Noise reduction slider. This will output only the color itself to a new layer. And as I’ll show you in a moment, this will make it easy to select the colors we need and paint them over any problem areas:

Output as new color layeroption.
As soon as you select Output as new color layer
, the image will change to show only the colors that you are applying. So don’t worry if things look weird. This is exactly what we want:

Then click OK to close the Colorize filter and output the result:

And back in Photoshop’s main interface, the image appears colorized:

Since I chose the Output as new color layer
option, the Layers panel shows the colors on their own layer above the image. And notice that the layer’s blend mode is set to Color so it affects only the colors in the image, not the brightness values:

How to clean up problem areas with the Brush Tool
Overall, I think my coloring result looks good. But there are some spots where the colors need to be touched up. So here’s how to quickly fix any problems.
Step 1: Select the Eyedropper Tool
First, in the toolbar, select the Eyedropper Tool:

Step 2: Increase the Sample Size
Then in the Options Bar, make sure the Sample Size is set to something other than Point Sample. With Point Sample selected, you’ll grab the color of the exact pixel you click on. But what we usually want is to sample the average color of the area. So set the Sample Size to something larger, like 5x5 Average or 11x11 Average:

Step 3: Select the Brush Tool
Then back in the toolbar, select the Brush Tool. We’re going to switch back and forth between the Eyedropper Tool and the Brush Tool, and I'll show you an easy way to do it in a moment. We’ll use the eyedropper to sample an area of good color from the image, and then we’ll use the brush to paint that color over a problem area:

Step 4: Choose the Soft Round brush
But first, with the Brush Tool active, right-click (Win) / Control-click (Mac) on the image to open the Brush Preset picker. Then twirl open the General Brushes group and make sure the Soft Round brush is selected.
You may also want to increase the size of the brush. I’ll set it to around 100 pixels. Press Enter (Win) / Return (Mac) to accept it:

Step 5: Look for a problem area
Then look for an area in the image that needs to be cleaned up. One area with my image that’s been bothering me from the beginning is the man’s mustache. The left side looks fine but the right side looks red from being oversaturated:

Step 6: Sample a good color with the Eyedropper Tool
To fix a problem like this, switch to the Eyedropper Tool temporarily by holding the Alt key, or the Option key on a Mac. Then click with the eyedropper on an area of good color to sample it. I’ll click on the left side of his mustache:

Step 7: Paint the good color over the problem area
Release the Alt (Win) / Option (Mac) key to switch back to the Brush Tool. Then paint the good color over the problem area. If you need to change your brush size, press the right bracket key ( ] ) on your keyboard to make the brush larger or the left bracket key ( [ ) to make it smaller.
Here I’m painting the color from the left side of the mustache over the bright red on the right side. And now the mustache looks much better:

Step 8: Continue cleaning up other areas
The man’s hat also has areas where the saturation is too strong:

So I’ll hold Alt (Win) / Option (Mac) to switch to the Eyedropper Tool and I’ll click on area of good color to sample it:

Then I’ll release Alt (Win) / Option (Mac) to switch back to the Brush Tool and I’ll paint the color over the entire hat:

And the top of his coat below his ear is still showing some blue from the initial auto color. So I’ll click with the eyedropper to sample a brown color from the coat:

Then I’ll paint that color over the blue area to fix it:

I’ll quickly make my way around the rest of the image, sampling good colors with the Eyedropper Tool and painting over problems with the Brush Tool. And here, thanks to the Colorize filter and a few manual touch-ups, is my final colorized result:

And there we have it! Along with Colorize, another great feature in Photoshop 2022 is the improved Object Selection Tool which makes selecting objects easier than ever. And for another coloring effect, learn how to color grade images with Gradient Maps in Photoshop! Or check out my Photoshop Basics, Photo Editing or Photo Effects sections for tutorials.