
Using the Improved Remove Tool in Photoshop 2024
Learn all about the Remove Tool's great new features in Photoshop 2024 that make removing people or objects from photos easier than ever!
Download the PDF: Using the Improved Remove Tool
Photoshop's Remove Tool, first introduced in Photoshop 2023, uses AI and machine learning to instantly remove people, objects or distractions from photos just by painting over them. And now in Photoshop 2024, the Remove Tool is even easier to use thanks to a couple of great new features.
What’s new with the Remove Tool in Photoshop 2024?
- The Remove Tool can now remove people or objects just by dragging an outline around them, so there’s no need to paint over the entire area.
- The Remove Tool now includes a Subtract mode so you can subtract areas you may have painted over by mistake before removing them. I cover both of these new features in this tutorial.
Which Photoshop version do I need?
You’ll need Photoshop 2024 to use the Remove Tool’s new features.
If you already have a Creative Cloud subscription, make sure that your copy of Photoshop is up to date.
Let's get started!
The document setup
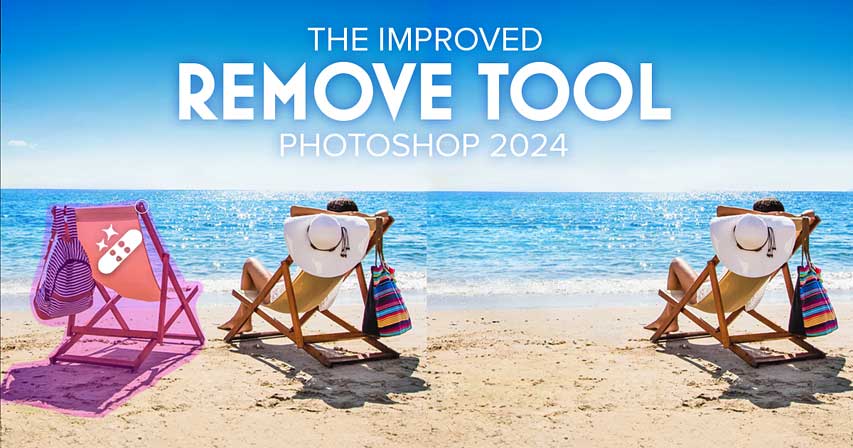
To show how the Remove Tool works, I’ll use this image from Adobe Stock and I’ll use the Remove Tool to remove the empty chair and bag on the left.

Related tutorials:
- Using Generative Fill to remove people from photos
- Remove skin blemishes with the Spot Healing Brush
- Removing noise from photos with AI Denoise
Where to find the Remove Tool
The Remove Tool is still found in the same spot in Photoshop’s toolbar, nested in with the Spot Healing Brush and the other healing tools.
If a tool other than the Remove Tool is visible in that spot, click and hold on the tool’s icon and choose the Remove Tool from the fly-out menu.

Video version of this tutorial
Visit Photoshop Essentials on YouTube for more videos!
The Sample all layers
and Remove after each stroke
options
With the Remove Tool active, go up to the Options Bar and you’ll find the same Sample all layers and Remove after each stroke options from Photoshop 2023.
- Sample all layers lets you work on a separate layer so you can remove objects without making permanent changes to the original photo.
- Remove after each stroke tells Photoshop to remove the person or object you highlighted with the Remove Tool as soon as you release your mouse button.

Sample all layersand
Remove after each strokeoptions in the Options Bar.
New! The Add to
and Subtract from brushed area
options
Also in the Options Bar (and new in Photoshop 2024) are the Add to brushed area and Subtract from brushed area options.
In Photoshop 2023, the Remove Tool was always in Add to brushed area
mode. But 2024 now includes the option to subtract areas we may have highlighted by mistake before Photoshop removes them. We’ll see how that works in a moment.

Add to brushed area(left) and
Subtract from brushed area(right) options.
Tip: Always use the Remove Tool on a separate layer
When using the Remove Tool, you should always work on a separate layer to avoid making permanent changes to your image.
So before I remove anything, I’ll first go to the Layers panel and click the Add New Layer icon.
Photoshop adds a new blank layer above the image on the Background layer.

We also need to turn on Sample all layers in the Options Bar. For some reason Adobe turns it off by default.

Sample all layers.
And for now, I’ll leave Remove after each stroke turned on as well. But we will need to turn it off to use the new Subtract mode, as we’ll see in a moment.

Remove after each strokeis turned on by default.
New! Outline an object with the Remove Tool to highlight it
Back in Photoshop 2023, we needed to paint with the Remove Tool over the entire object we wanted to remove. Depending on the size and shape of the object, this could take some time.
Here I’ve painted over the entire chair and bag, plus the shadows in the sand. The areas where I painted are highlighted in magenta.
Tip: You can adjust the size of the Remove Tool brush using the left and right bracket keys ( [ and ] ) on your keyboard.

But now in Photoshop 2024, there’s no need to paint over the entire area. We can simply paint an outline around the object we want to remove. Photoshop will then highlight everything inside the outline when you release your mouse button.
So I'll drag an outline around the chair, the bag and the shadows.

I’ll release my mouse button, and Photoshop highlights everything inside the outline.

Then after a few seconds, because I have Remove after each stroke
turned on in the Options Bar, Photoshop removes the chair, the bag and the shadows from the photo and replaces them with new AI-generated content that matches the surrounding area.

Cleaning up artifacts with the Remove Tool
Even though the Remove Tool uses AI and machine learning, it’s not as powerful as Generative Fill and can sometimes add weird artifacts or repeating textures. So you may need to paint over some areas again with the Remove Tool to clean them up.
Here we see an obvious example of repeating textures in the sand.

So I’ll just paint over that area again.

And when I release my mouse button, the problem is gone.
Tip: You may need to paint over an area multiple times with the Remove Tool to get a good result. Painting with a smaller brush or over smaller areas at a time can also help.

The Remove Tool removed the objects non-destructively
By working on a separate layer above the photo (and with Sample all layers
turned on in the Options Bar), the objects were removed non-destructively.
I can toggle the layer off by clicking its visibility icon.

And the objects return in the photo.

New! The Subtract from brushed area
option
Back in Photoshop 2023, a frustrating issue with the Remove Tool was that if you painted over something by mistake, there was no way to subtract it from the highlighted area before Photoshop removed it.
But now in Photoshop 2024, the Remove Tool includes a Subtract from brushed area option in the Options Bar, located next to the Add to brushed area option (also new) which is turned on by default.
Add to brushed area(left) and
Subtract from brushed area(right) options.
For the Subtract option to work, we first need to turn off Remove after each stroke. If you leave it on, Photoshop will remove everything you painted over as soon as you release your mouse button, which means you won’t have time to subtract anything.

Remove after each strokemust be off to use Subtract mode.
To see how Subtract mode works, here I’ve painted over part of the woman’s feet and her chair which I don’t want to remove.

One way (which I don’t recommend) to switch to Subtract mode is to select the Subtract from brushed area option in the Options Bar.

Subtract from brushed areaicon.
But the reason I don’t recommend it is that the option in the Options Bar is sticky, meaning that it will remain selected (and the Remove Tool will remain in Subtract mode) until you go back to the Options Bar and reselect the Add to brushed area option.
A better way is to switch to Subtract mode temporarily by holding down the Alt key on a Windows PC or the Option key on a Mac.
With the key held down, the icon in the center of the brush cursor will change from a + sign to a - sign, letting you know you’re in Subtract mode.
Then simply paint back over areas to subtract them from the selection.

While I’m here, I’m also going to subtract some of the highlighted areas within my chair selection where the sand and the water are showing through, just to keep as much of the original detail as possible. This can help the Remove Tool do a better job.

Since Remove after each stroke
is turned off, Photoshop won’t automatically remove the objects when you release your mouse button. Instead you need to click the check mark in the Options Bar.

And once again the chair, the bag and the shadows are removed, with new AI-generated content added in their place.

And there we have it! That’s how to use the Remove Tool and its new features in Photoshop 2024 to quickly remove people, objects or distractions from your photos.
Related tutorials:
- Using Generative Fill to remove people from photos
- Remove skin blemishes with the Spot Healing Brush
- Removing noise from photos with AI Denoise
Don't forget, all of my Photoshop tutorials are now available to download as PDFs!