
Non-Destructive Infrared Glow Effect In Photoshop
In this Photoshop tutorial, we'll learn how to quickly and easily add a dream-like infrared glow effect to an image, and we'll do it non-destructively using Smart Filters and adjustment layers so that when we're done, our effect will remain fully editable and we won't have damaged a single pixel in the original image.
For best results with this tutorial, I recommend using Photoshop CS6 (which is the version I'll be using).
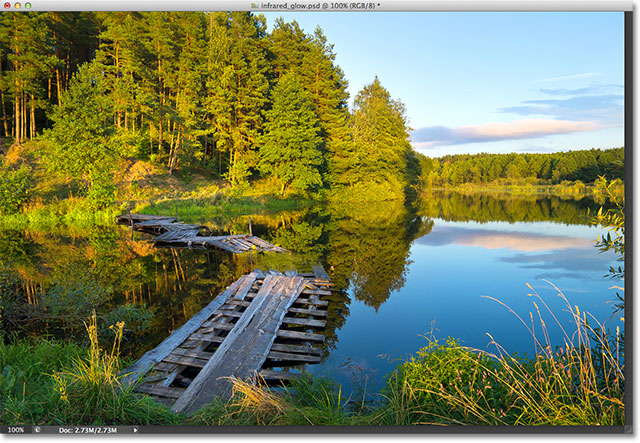
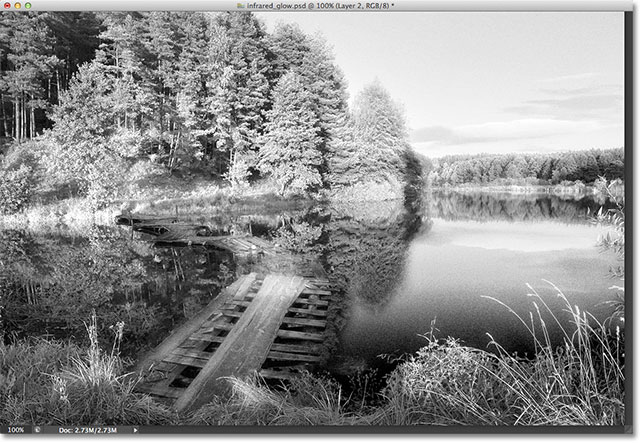
Here's the photo I'll be starting with:
And here's what the final infrared glow effect will look like, with a hint of the original color brought back in (which we'll do at the end of the tutorial):

How To Create An Infrared Glow Effect
Step 1: Add A Black & White Adjustment Layer
We're going to apply the infrared effect and the glow effect to the image separately, so let's start with the infrared effect which we can quickly add using a simple preset found in the Black & White image adjustment. In the Adjustments panel, click on the Black & White icon (third icon from the left, middle row):
This will add a Black & White adjustment layer (named "Black & White 1") above the image in the Layers panel:

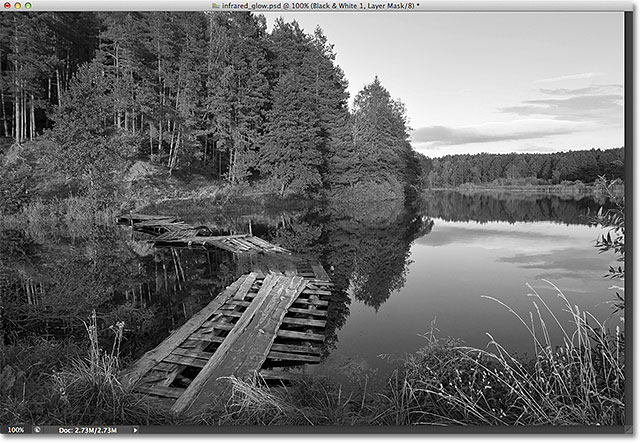
Your photo will instantly be converted from color to black & white in the document window:
Step 2: Select The Infrared Preset
The controls and options for the Black & White adjustment appear in the Properties panel (new in Photoshop CS6). Near the top of the panel is the Preset option which is initially set to Default. Click on the word Default and select Infrared from the list of presets that appears:
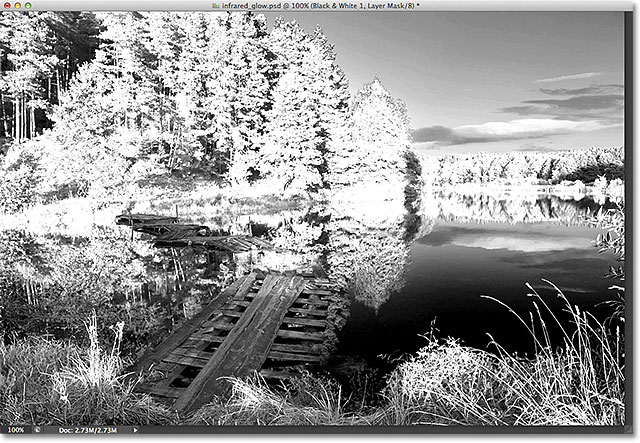
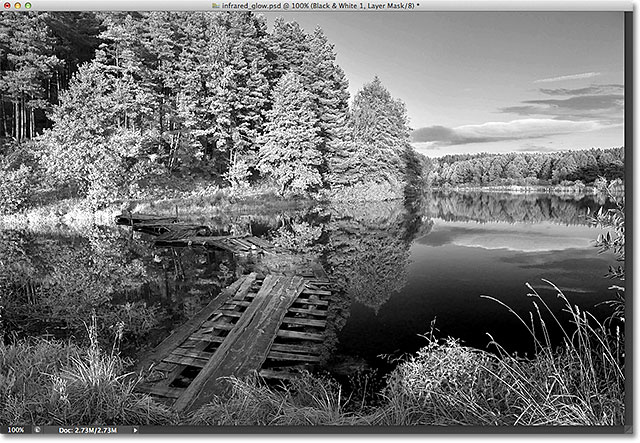
This will instantly give your image more of an infrared look to it. In my case, though, it's made most of the trees and grass too bright, causing them to lose much of their detail:
To fix that, since the trees and grass contain yellow and green, all I need to do is drag the Yellows and Greens sliders in the Properties panel towards the left to decrease the brightness in those areas. You can fine-tune the brightness of any area in your photo to your liking simply by dragging the appropriate color slider left or right (based on the original colors in the image):
Here's what my image looks like after fine-tuning it with the color sliders:
Step 3: Select The Background Layer
Now, let's work on adding our glow effect. Click on the Background layer in the Layers panel to select it:

Step 4: Convert It Into A Smart Object
Right-click (Win) / Control-click (Mac) directly on the Background layer in the Layers panel and choose Convert to Smart Object from the menu that appears:
This converts the Background layer into a Smart Object which means (among other things) that we can now apply filters to it non-destructively (filters applied to Smart Objects are known as Smart Filters). You'll see a small icon in the lower right corner of the layer's thumbnail telling us it's now a Smart Object:
Step 5: Reset Your Foreground And Background Colors To Black And White
In a moment, we're going to apply Photoshop's Diffuse Glow filter to the Smart Object to add our glow effect, but the Diffuse Glow filter uses our current Foreground and Background colors as the colors for the glow, which means that before we apply the filter, we first need to make sure our Foreground and Background colors are set to their defaults (black for the Foreground color, white for the Background color). The easiest way to do this is to reset them by pressing the letter D (for "Defaults") on the keyboard. You can see the current Foreground and Background colors in the color swatches near the bottom of the Tools panel. The upper left swatch (the Foreground color) should be black and the lower right (Background color) swatch should be white:
Step 6: Apply The Diffuse Glow Filter
With our Foreground and Background colors reset, we can apply the Diffuse Glow filter. In previous versions of Photoshop, we could select Diffuse Glow directly from the Filter menu, but Adobe cleaned up the Filter menu in CS6 and now many of the filters (Diffuse Glow being one of them) can only be accessed through the Filter Gallery. Go up to the Filter menu in the Menu Bar along the top of the screen and choose Filter Gallery:
When the large Filter Gallery appears on your screen, use the middle column to navigate to the Distort category, then select the Diffuse Glow filter:
Before we start adjusting the glow, let's first make sure we can see the entire image in the preview area on the left. Right-click (Win) / Control-click (Mac) anywhere inside the preview area and choose Fit in View from the menu that appears:
Photoshop will zoom the image so it fits nicely within the preview area boundaries:
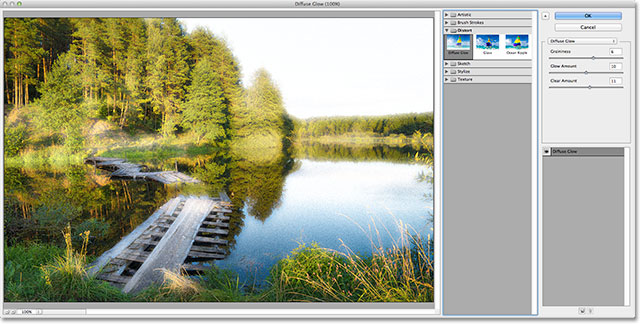
One thing you'll notice is that even though we just finished converting the photo to black and white, it appears in full color again in the preview area of the Filter Gallery. That's because the black and white effect is contained entirely within our Black & White adjustment layer, and we're applying the filter only to the Smart Object below it, so all we see in the preview area is the contents of the Smart Object (which holds the full color version of the photo). The Filter Gallery has no idea that there's a Black & White adjustment layer sitting above the Smart Object, but when we're done with the Diffuse Glow filter and close out of the Filter Gallery, we'll go back to seeing the infrared black and white version of the image in the document window.
At the top of the right column in the Filter Gallery are the three slider controls for the Diffuse Glow filter. Drag the top Graininess slider right or left to increase or decrease the amount of film grain the image, or drag the slider down to 0 to turn the grain effect off if you don't like it. The actual glow effect is controlled by the other two sliders. The Glow Amount slider controls the strength and intensity of the glow, while the Clear Amount slider controls the tonal range that's affected by the glow. Dragging the slider further to the right will limit the glow effect to just the lighter areas of the image, while dragging it to the left will add in the darker areas as well. There's no preset recipe here for the values to use for each option. It will depend entirely on your image and on your own personal taste, so just keep an eye on the preview area as you drag each slider until you're happy with the results:
If you want to compare the glow effect with the original image, click on the Diffuse Glow filter's visibility icon (the eyeball) below the three sliders. Click it once to hide the filter effects and view the original image in the preview area, then click it again to turn the filter back on
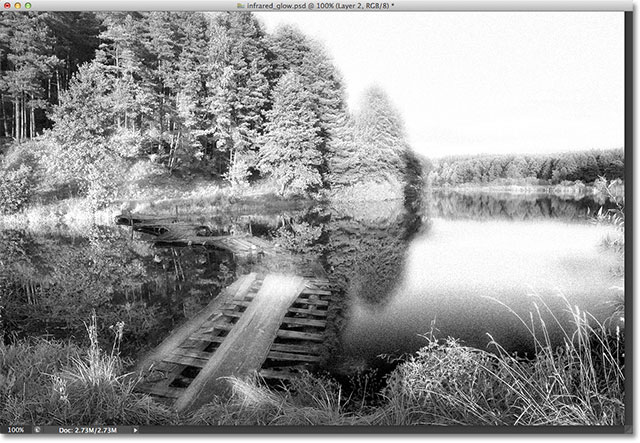
When you're done, click OK in the top right corner of the Filter Gallery to close out of it and apply the Diffuse Glow filter as a Smart Filter to the Smart Object. Now that we're no longer in the Filter Gallery, we again see the effects of the Black & White adjustment layer, now combined with the glow effect from the Diffuse Glow filter:
Step 7: Lower The Opacity Of the Smart Filter If Needed
You may not need this step with your image, but in my case, the Diffuse Glow filter has blown out the detail in the sky, as well as some detail in the water. A simple solution to the problem is to lower the opacity of the Diffuse Glow filter to bring back some of the missing detail, and since we applied it as a Smart Filter, lowering the opacity is easy!
If we look in the Layers panel, we can see the Filter Gallery listed as a Smart Filter below the Smart Object. We can access blending options for the Smart Filter by double-clicking on the small Blending Options icon to the right of the filter's name:
This opens the Blending Options dialog box where we can change the blend mode or the opacity (or both) of the filter. I'm going to leave the blend mode set to Normal, but I'll use the Opacity option to lower the opacity down to 75%:

This allows some of the Smart Object's original contents to show through the filter effects, restoring some detail in the sky and water:
If you need to go back and make changes to the Diffuse Glow settings at this point, once again it's easy thanks to Smart Filters. Simply double-click on the Filter Gallery in the Layers panel. This will re-open the Filter Gallery to the Diffuse Glow settings where you can make any changes you need. Click OK when you're done to once again close out of the gallery and you'll see your changes instantly updated in the document window. You can do this as many times as you want because Smart Filters are non-destructive so no permanent changes are ever made to the image:
Step 8: Select The Black & White Adjustment Layer
Let's finish things off by bringing back just a hint of the photo's original colors. First, click on the Black & White adjustment layer in the Layers panel to select it:
Step 9: Lower The Opacity To 90%
In the upper right of the Layers panel is the Opacity option. Simply lower the adjustment layer's opacity down to around 90%:
This allows some of the colors from the Smart Object below the adjustment layer to show through, giving us our final result: