
Non-Destructive Photo Editing With Adjustment Layers In Photoshop
Version Note: A newer version of this tutorial is now available for Photoshop CC users (including CC 2020/2021).
In this Photoshop tutorial, we're going to look at the benefits of working non-destructively in Photoshop with Adjustment Layers.
Photoshop wouldn't be the world's most popular image editor if it didn't give us simple ways to edit, retouch and restore our photos. It's a good thing, then, that the program comes with so many great tools and commands to help bring our images, and our creative ideas, to life! In fact, Photoshop comes with a collection of commands built specifically to handle many of our most common photo editing tasks, like improving overall contrast in an image, removing color casts, bringing out hidden detail in the highlights and shadows, and more!
Photoshop calls these commands Image Adjustments, and we can find them all grouped together in one convenient location by going up to the Image menu at the top of the screen and choosing Adjustments. In Photoshop, they appear in one long vertical list, but I've spread them out here so they'll fit better on the page:
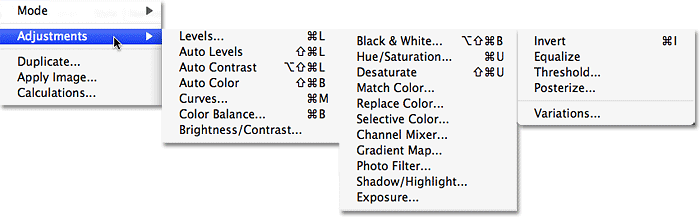
As we can see from the list, there's plenty of image adjustments to choose from, and while some of them, like Gradient Map or Posterize, may not be quite as useful as others, commands like Levels, Curves and Hue/Saturation are indispensable to our daily photo editing work.
The Problem With Photoshop's Image Adjustments
Unfortunately, as powerful as these image adjustments are, they all suffer from one serious problem - they all cause permanent damage to our images. By that, I don't mean you'll get error messages telling you that your files are suddenly corrupt and won't open. I mean that image adjustments make permanent changes to the pixels and level of detail in our photos. Let's look at an example of what I mean.
Here we have a photo of the sun setting across snow-covered mountains:

It's a beautiful image, but it's a bit dark and could use a boost in contrast, a perfect job for Photoshop's Levels command. I'm going to select Levels by going up to the Image menu, choosing Adjustments, and then choosing Levels:

This brings up the Levels dialog box. Keep in mind that this tutorial assumes you already have a basic understanding of how to use Photoshop's standard image adjustments, so we'll be skipping most of the step-by-step details of how they work. What we're focusing on here is why you should be replacing Photoshop's image adjustments with their adjustment layer equivalents in your image editing workflow. Having said that, I can tell by looking at the histogram in the center of the Levels dialog box that this photo is lacking any real highlights or shadows, which is why it looks rather dull at the moment. I'm going to fix that by dragging the white point slider in towards the right edge of the histogram, and I'll drag the black point slider in towards the left edge of the histogram:

This boosts the lightest areas of the image up to pure white and deepens the darkest areas to pure black, improving overall contrast. I'll click OK to exit out of the Levels command, and we can see that the photo is already looking better:

Everything seems fine at this point, but let's say I decide to make another change. Maybe, after staring at the photo for a while, I think the image could still be a bit lighter, so I'll make another edit with the Levels command. Since I've already closed out of the Levels command, I'll need to open it again by going back up to the Image menu, choosing Adjustments, and then choosing Levels. This brings the Levels dialog box back up, but this time when I look at the histogram in the center of the dialog box, something looks wrong:

If you remember, the original histogram was solid black from left to right, which meant that we had a continuous amount of image information from darks to lights in the photo. Now, it has a series of white vertical lines cutting through it, giving us more of a "comb" pattern. Those white vertical lines in the histogram represent missing image information, or detail, in the photo, and that's because we damaged our image when we made that initial edit with the Levels adjustment. Even though the "damaged" version may look better to us than the original "undamaged" version did, all of that missing image information is gone for good, and every time we make more edits to the photo, we'll be throwing away even more image information. Eventually, if you throw enough of it away, you'll start seeing harsh, ugly transitions between colors or areas of brightness in the image, known as banding. Keep in mind as well that just because you can't see any problem areas in an image on your computer screen doesn't mean they won't appear when you print the image. Unfortunately, there isn't a lot you can do once you've reached the point where you're seeing problems since there's no way to tell Photoshop to magically bring back all the image detail you've lost. Once it's gone, it's gone.
Wouldn't it be great if we could edit our photos without having to worry about permanently losing image detail? Well guess what? We can, and it's easy! All we need to do is stop using Photoshop's standard image adjustments and start using adjustment layers!
Working Non-Destructively With Adjustment Layers
Let's perform the exact same edit on the photo to boost its contrast, but this time, rather than using the standard Levels command, we'll use a Levels adjustment layer. First, I'll revert the image back to its original state by going up to the File menu at the top of the screen and choosing Revert. To access Photoshop's adjustment layers, all we need to do is click on the New Adjustment Layer icon at the bottom of the Layers palette. It's the icon that looks like a circle split diagonally between black and white. A list of all the adjustment layers will appear. If you compare the list of adjustment layers with the list of Photoshop's standard image adjustments that we saw earlier, you'll notice that most of the image adjustments are available as adjustment layers. To choose an adjustment layer, simply click on its name in the list. I'll select a Levels adjustment layer:

This brings up the exact same Levels dialog box that we saw a moment ago when we selected the standard Levels adjustment from the Image menu. Again, we can see from the histogram that the image is lacking any real highlights or shadows, so I'm going to make the exact same edit as last time, dragging the white point slider in towards the right edge of the histogram and the black point slider in towards the left edge:

I'll click OK to exit out of the Levels dialog box, and we can see that the overall contrast of the photo has once again been improved, just as it was last time:
So what's different? We used the Levels command both times and saw the same results regardless of whether we used a standard Levels adjustment or a Levels adjustment layer. If the results are the same, what's the big deal about adjustment layers? For the answer to that, all we need to do is look at our Layers palette. Adjustment layers appear as actual layers in the Layers palette (hence the name "adjustment layer"), and we can see that we now have a Levels adjustment layer, which Photoshop has named "Levels 1", sitting directly above the Background layer, which is the layer that contains our original image:

When we used the standard Levels adjustment, the edit was made directly to the photo itself on the Background layer, which is what caused us to permanently lose some of the image information. With adjustment layers, the image remains unharmed. No pixels in the image are ever touched! Even though we're seeing the same result in our document window, what we're seeing is actually a live preview of the edit. Everything is being done by Photoshop directly within the adjustment layer itself. In fact, to prove it, all we need to do is toggle the visibility of the adjustment layer on and off. To temporarily hide the adjustment layer, which will also temporarily hide the effects of the edit we just made, click on the "eyeball" icon (the layer visibility icon) on the far left of the layer in the Layers palette:
The little eyeball will disappear, which tells us that the adjustment layer has been turned off. And with the adjustment layer off, the photo reverts back to its original, unedited state:
To turn the adjustment layer back on, simply click once again on the layer visibility icon, which looks like an empty square at the moment since the layer is turned off:

This not only turns the adjustment layer back on, it also brings back the effects of our edit, improving the image contrast once again:
Photo Editing Flexibility
Now let's say that we need to make another change to the image using our Levels adjustment. When we used a standard Levels adjustment the first time, we had to go back up to the Image menu, back to Adjustments, and then choose the Levels command all over again so we could apply a second Levels adjustment to the photo, which is when we noticed all the missing image information in the histogram. With adjustment layers, there's no need for that. We can simply re-open the dialog box for our Levels adjustment layer and make whatever changes we need! And since we're making changes to the settings for the adjustment layer, not to the image itself, we're still not harming a single pixel in the original photo. In fact, we can go back and make as many changes as we want to an adjustment layer and never have to worry about damaging our image!
To re-open the dialog box for an adjustment layer, simply double-click on the adjustment layer's thumbnail in the Layers palette. Different types of adjustment layers have different looking thumbnails, but the dialog box for any adjustment layer is always just a double-click away. I'm going to double-click directly on the thumbnail for the Levels adjustment layer:

The dialog box for the Levels adjustment layer pops back up, allowing me to make any additional changes that I need. Notice how everything is exactly the way I left it, with the white and black point sliders already moved in to the edges of the histogram. More importantly, notice how the histogram itself is still solid black. The ugly "comb" pattern of white vertical lines that we saw earlier, which indicated missing image detail, is nowhere to be found, and that's because we haven't made a single change to our actual photo. Every change we make is being done within the Levels adjustment layer itself:

Putting It To The Test
To really get a sense of how much freedom and flexibility we get with adjustment layers, all without harming a single pixel in the photo, let's look at an extreme example. I'm going to do something crazy here. I'm going to drag the white point slider in to the center of the histogram:

If you're familiar at all with how the Levels command works, you know that I've just ruined my photo. I've taken everything in the image that's 50% gray (the shade of gray directly between black and white) or lighter and bumped it up to pure white. If that sounds like something you probably wouldn't want to do, it is. As we can see in the document window, the peaceful quiet of our sunset has been shattered by a sudden nuclear blast:

I'm going to click OK to accept the change I've made and exit out of the Levels adjustment layer for a moment. Now obviously, blowing out half the detail in your image probably isn't something you'll ever want to do in a real world situation, but to show you how extremely flexible adjustment layers are, I'm going to re-open the Levels dialog box by double-clicking on its thumbnail in the Layers palette. To fix the problem I've created and restore all the detail I've lost, all I need to do is click on the white point slider in the middle of the histogram and drag it back to where it was before I ruined my image, over on the right edge of the histogram:

Again, keep in mind that everything we're doing is being done directly within the adjustment layer itself, not to the image, and that all we're seeing in the document window is a dynamic preview of the changes we're making. If we look at the image, we can see that simply by moving the white point slider back to the right edge of the histogram, I've restored all of the highlight detail and saved the world from nuclear destruction:
Let's do the same thing with a standard Levels adjustment and see if we can fix the problem just as easily. I'm going to again go up to the File menu at the top of the screen and choose Revert to revert my image back to it's original state, which removes the adjustment layer from the Layers palette. At this point, I'm working directly on the image itself on the Background layer:

I'll go up to the Image menu, choose Adjustments, and then choose Levels. When the Levels dialog box appears, I'll click on the white point slider and drag it to the middle of the histogram, just as I did a moment ago with the Levels adjustment layer:

I'll click OK to exit out of the Levels dialog box, and as expected, my image is now completely ruined:

Let's see what happens when we try to fix the image. I'll use the faster keyboard shortcut Ctrl+L (Win) / Command+L (Mac) to bring up the Levels command rather than selecting it from the Image menu, just to save some time. As soon as the dialog box appears, it becomes obvious that we have some serious problems. The histogram is almost non-existent at this point because we've lost so much of our image information. If you look closely, you'll see a very thin black line running straight up and down the far right edge of the histogram, directly above the white point slider, which is telling us that most of the pixels in our image are now pure white:

Notice also that the white point slider is already at the far right edge of the histogram, which means we can't drag it back to where it was before we ruined our image like we did with the Levels adjustment layer because there's nowhere to drag it to. There's no way for us to bring back any of the image detail we've lost because we made the change directly to the image itself this time when we used a standard image adjustment. Our photo is ruined, the world has been destroyed, and all we can do is start over again, assuming we haven't saved our changes and lost the original, which would be really bad indeed.
This little example may have been extreme, but hopefully the point of it is clear. Photoshop's standard image adjustments, all found under the Image menu, make permanent changes to our images and cause us to lose image detail with every edit we make, detail that once lost is lost forever. Adjustment layers, on the other hand, offer us the exact same editing abilities as the standard image adjustments, but they have the major advantage of allowing us to work freely, flexibly and non-destructively on our images. Even after losing half the detail in our image, we were able to restore it quickly and easily simply by re-opening the dialog box for the adjustment layer and making changes. Again, it's because Photoshop does all the work directly inside the adjustment layer. Turn off the adjustment layer or drag it down on to the Trash Bin at the bottom of the Layers palette to remove it completely and the image returns instantly to its original state.
There really is no reason at all to use Photoshop's standard image adjustments when editing your photos. Adobe continues to make them available with each new version of Photoshop, but the sooner you replace them with adjustment layers in your editing workflow, the better off both you and your photos will be!
Eternally Editable
One final point. Adjustment layers are saved along with the document when you save it as a .PSD file, which means you can re-open the document tomorrow, next week, next year, or however long you keep Photoshop on your computer, re-open the dialog box for any of the adjustment layers, and make whatever changes you need, as many times as you like! As long as you're using adjustment layers, your original image will never be harmed. Compare that with using standard image adjustments which cause permanent damage with your very first edit and the choice, I think, becomes pretty clear. Using adjustment layers in Photoshop is the smart way to work.
And there we have it! Check out our Photo Retouching section for more Photoshop image editing tutorials!