
A Better Way to Convert Type to a Smart Object in Photoshop
Converting type to a Smart Object in Photoshop lets you apply filters while keeping the text editable. But if you edit the text, the letters can get cut off! This tutorial shows you why that happens, and a simple trick to fix it. For Photoshop 2026 or earlier.
Download the PDF: A Better Way To Convert Type To A Smart Object
Converting type to a Smart Object in Photoshop has lots of great benefits. One of them is that we can apply filters to our text and still keep the text editable even with the filters applied.
But the standard way of converting a Type layer to a Smart Object has a hidden flaw: it permanently restricts your canvas size. If you edit the text later, your letters might get cut off.
Let’s look at why this happens, and the simple trick that fixes the problem.
Which version of Photoshop do I need?
I’m using Photoshop 2026. You can get Photoshop here or use the Creative Cloud Desktop app to make sure Photoshop is up to date.
The document setup
I'm starting with a document containing a simple background image and some placeholder text (background image from Adobe Stock).
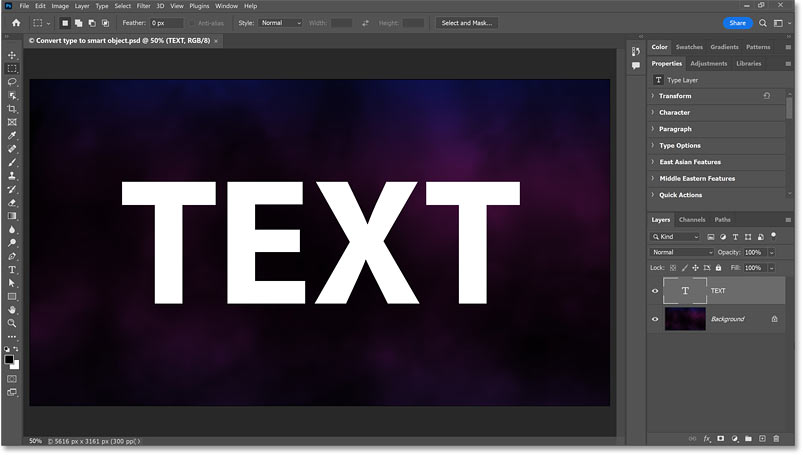
In the Layers panel, the Type layer sits above the Background layer.

Let's get started!
Converting type to a smart object the usual way
To convert type to a smart object the usual way, right-click (Win) / Control-click (Mac) on the Type layer.

Choose Convert to Smart Object from the menu.

Photoshop adds a Smart Object icon to the lower right of the layer’s thumbnail.

Learn more: How to Create Smart Objects in Photoshop
Applying a filter to the text
With the type now converted to a smart object, we can apply a filter to the text. I'll apply the Gaussian Blur filter.
Go to Filter > Blur > Gaussian Blur.

In the dialog box, I'll set the Radius to 60 Pixels and click OK.

Photoshop blurs the text. So far, so good

Opening the smart object
Notice how Gaussian Blur now appears as a smart filter in the Layers panel.
Smart filters can be re-opened and edited just by double-click on their name.

But what we’re more interested in here is that the text itself remains editable, even with the filter applied.
Double-click on the smart filter's thumbnail.

Photoshop opens the contents of the Smart Object in a separate document tab with a .psb extension.

The smart object’s canvas size
Notice the canvas size in this new document. Instead of giving us the full space of the original document, Photoshop cropped the canvas to the exact width and height of the original text.
This creates a trap when we edit our text.

Editing the text inside the smart object
Select the Type Tool from the toolbar.

Double-click on the text to highlight it.

I’ll change the word from TEXT
to BLUR
.

Click the checkmark in the Options Bar to accept the change.

The problem: The new text does not fit on the canvas
Because our new word is longer and wider than the original, it doesn't fit. The tops and bottoms of the letters extend past the cropped canvas and are cut off.
To make the problem easier to see, I've temporarily changed my text color from white to black.
Notice that the top and bottom of the letter B are cut off because the round parts of the letter extend outside the canvas. Same with the bottom of the letter U, and the right side of the letter R.

I’ll change the text color back to white.
Close the Smart Object document by clicking the X on its tab.

Click Yes (Win) or Save (Mac) when asked to save your changes.

Back in the main document, Photoshop updates the Smart Object.
The blur is still applied, but the edges of our text are missing.

I'll turn off the Gaussian Blur filter for a moment (by clicking its eye icon in the Layers panel).

The problem is now easier to see. Parts of the text are cut off.

A better way to convert type to a smart object
That’s why the usual way of converting a Type layer to a Smart Object does not always work. At least, not if you need to edit the text later.
We need a way to convert the text to a Smart Object while forcing Photoshop to keep the full canvas size. Here's how to do it.
Press Ctrl+Z (Win) or Command+Z (Mac) a few times to undo your steps and return to the original, unblurred Type layer.
Step 1: Make a copy of the Background layer
Click the Background layer to select it.

Press Ctrl+J (Win) / Command+J (Mac) to duplicate it. Photoshop creates a Background copy layer.

Step 2: Select the type and Background copy layers
With the Background copy layer selected, hold Shift and click the Type layer.
Now both the Type layer and the Background copy layer are selected together.

Step 3: Convert the layers to a smart object
Right-click (Win) / Control-click (Mac) on the Type layer and choose Convert to Smart Object.
Step 4: Open the smart object
Double-click the new Smart Object thumbnail to open it.

Because we included the Background layer in the Smart Object, Photoshop was forced to keep the canvas at its full, original size.
It is no longer cropped around the text.

Step 5: Delete the Background copy layer
We only used the Background copy layer to force the full canvas size, so we no longer need it.
Select the Background copy layer and press Delete.

Your text is now surrounded by transparency, with lots of room to edit.

Step 6: Close the smart object
Close the Smart Object by clicking the X in the document tab.

Click Yes (Windows) or Save (Mac).

Back in the main document, we again have our text converted to a Smart Object.

Applying a filter to the text
I’ll apply the same Gaussian Blur filter to the text by going to Filter > Blur > Gaussian Blur.
I’ll again set the Radius to 60 pixels and click OK.
We’re back to the same blurry text.
Editing the text inside the smart object
Let's try editing the text. Double-click the Smart Object thumbnail.

I've again changed my text color to black to make it easier to see.

With the Type Tool selected, highlight the text and change it to BLUR.
This time, because we have the full size canvas to work with, the entire word fits easily with no letters cut off.

Click the checkmark in the Options Bar to accept it.
I’ll change the type color back to white.
Close the Smart Object by clicking X in the document tab.
Click Yes (Win) / Save (Mac) to save your changes.
Back in the main document, Photoshop updates the text.
The Gaussian Blur remains, and no letters are cut off.

Centering the new text in the document
The only minor issue is that our new word is off-center.
Select the Move Tool from the toolbar.

Hold Shift to lock your movement to a straight horizontal line, and drag the text back to the center of the canvas.

And there we have it! That’s a better and more flexible way to convert type to a Smart Object in Photoshop.
Don't forget, all of my Photoshop tutorials are available to download as PDFs!
Related tutorials:
- How to warp a gradient inside text with smart objects
- Create 3D perspective text with smart objects
- How to edit smart objects