
How to Change the Color of an Object in Photoshop
Learn how easy it is to change the color of an object in Photoshop, including the fastest way to select an object and two simple ways to change colors! A step-by-step tutorial for Photoshop 2022.
Download the PDF: How To Change Colors In Photoshop
In this tutorial, I show you how easy it is to change the color of an object in Photoshop. In fact, I’ll show you two easy ways to do it, and why you might choose one over the other. But regardless of which way to choose, changing an object’s color always starts with making a selection. So that’s how we’ll start this tutorial.
For best results, you’ll want to be using Photoshop 2022 or later. You can get the latest version of Photoshop here.
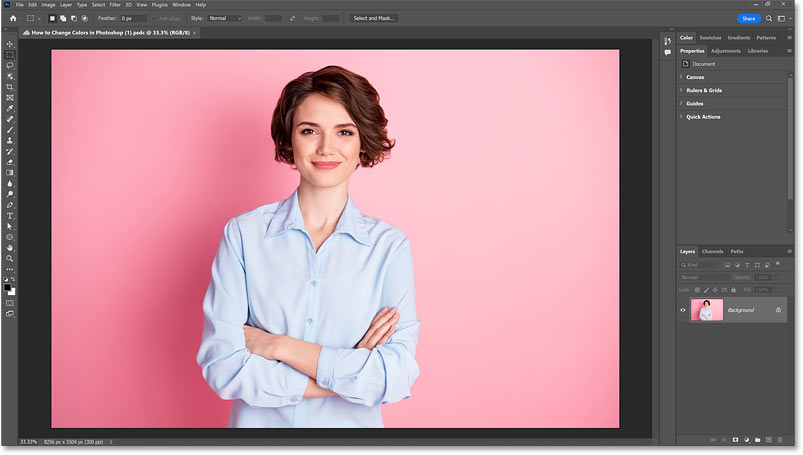
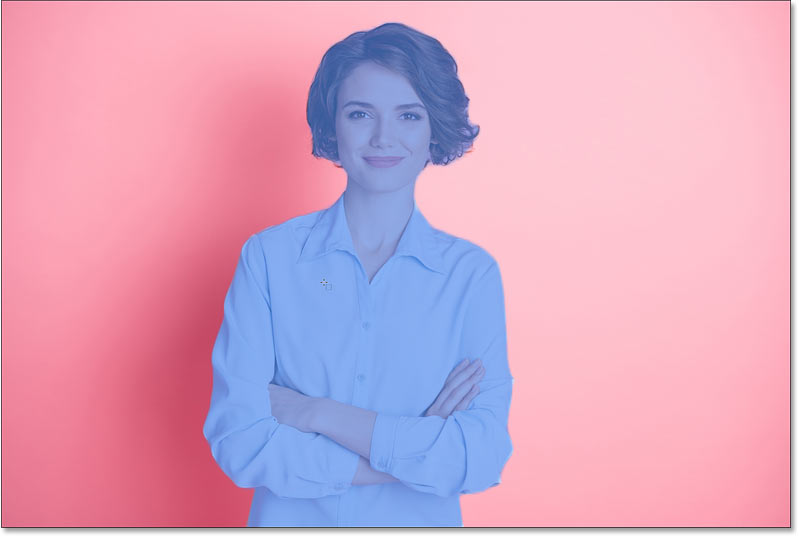
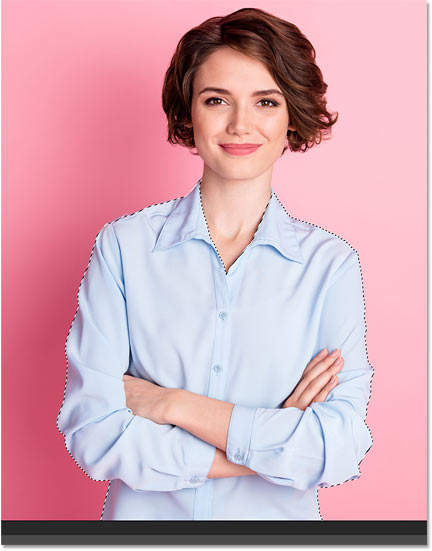
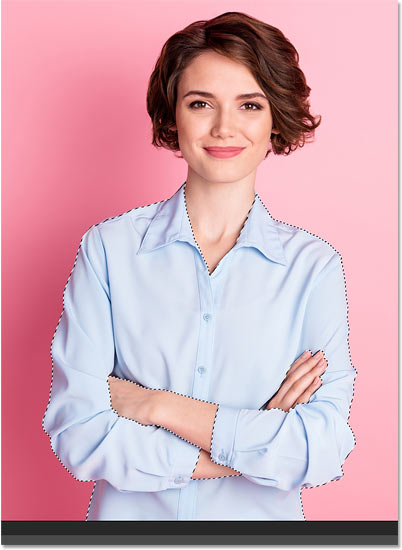
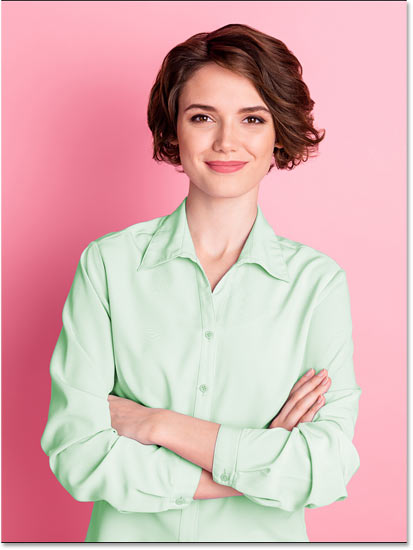
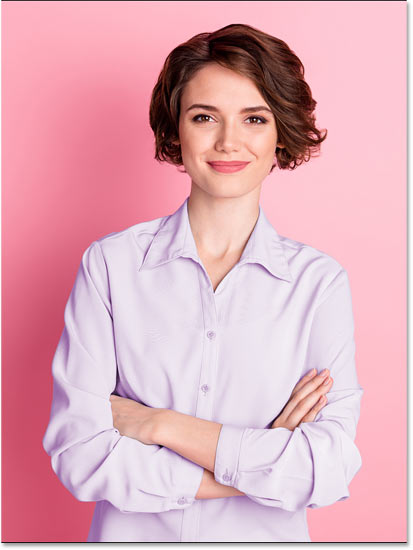
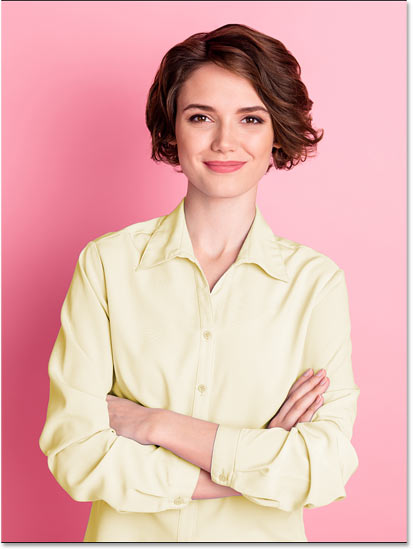
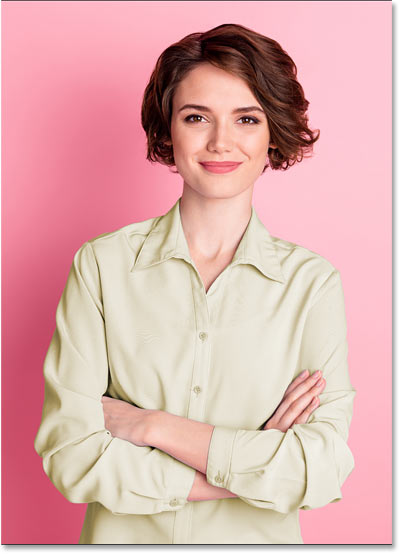
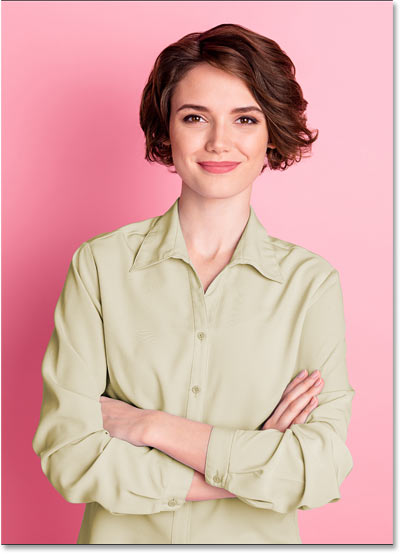
And I’ll use this image (portrait photo from Adobe Stock). For this tutorial, I’m going to change the color of the woman’s shirt.
Let's get started!
Step 1: Select the object
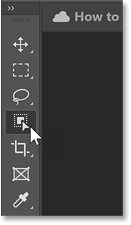
First, we need to select the object. And these days, the fastest way to select an object in Photoshop is with the Object Selection Tool. So I’ll select it from the toolbar.
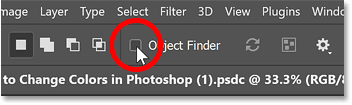
The Object Finder
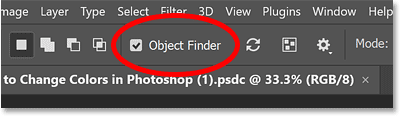
As of Photoshop 2022, the Object Selection Tool includes an Object Finder option in the Options Bar.
How the Object Finder works
With Object Finder turned on, which it is by default, Photoshop will first analyze the image looking for objects that you can select. While it’s looking, the rotating arrows icon in the Options Bar will spin. Any objects it finds will then be highlighted in blue when you hover your mouse cursor over them. You can click on the highlighted object to instantly select it.
With my image, I want to select the woman’s shirt so I can change its color. But notice that when I hover my cursor over her shirt, Photoshop highlights the entire person, not just the shirt. That’s because Photoshop assumes we want to select the main subject, and usually we do. But in this case, I just want the shirt.
Turning Object Finder off
Since Object Finder is not going to help me in this case, I’ll turn it off by unchecking it in the Options Bar. And for this tutorial, I suggest you do the same so I can show you another way to work.
How to select an object manually
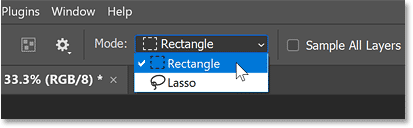
With Object Finder turned off, you can select an object by dragging a selection outline around its general area. Photoshop will then look for the object within the area you selected.
In the Options Bar, set the tool’s Mode to either Rectangle or Lasso. I’ll leave it set to Rectangle which is the default mode.
Then drag a selection outline around the object. I’ll drag around her shirt.
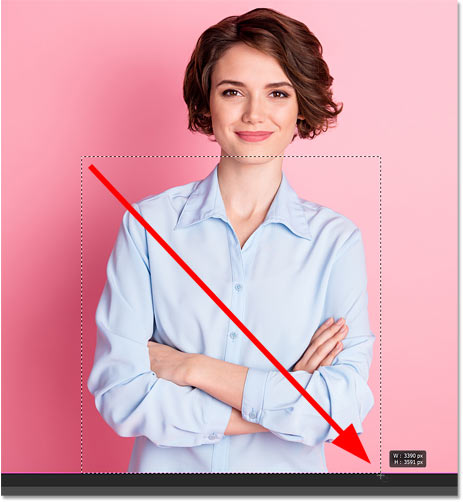
Release your mouse button, and after a few seconds, Photoshop selects the object it found. In my case, her shirt is now selected.
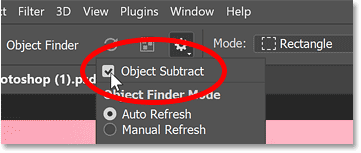
How to subtract an area from the selection
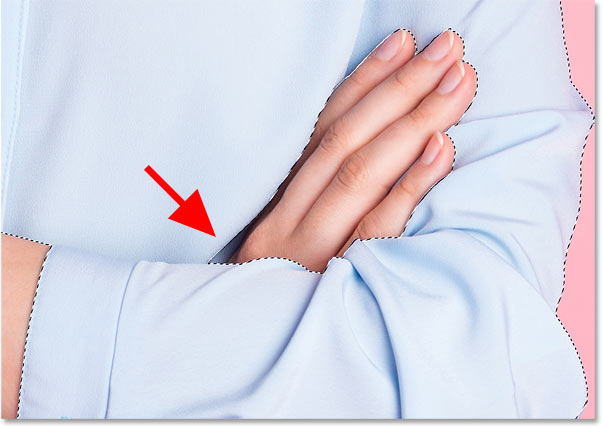
Sometimes the Object Selection Tool includes unwanted areas in the selection. With my image, the woman’s arms and hands were included with the shirt. But we can remove an area from the selection just as easily.
In the Options Bar, click the gear icon and make sure Object Subtract is turned on, which it is by default. Object Subtract allows Photoshop to use the same artificial intelligence to figure out which objects to subtract as it does when looking for objects to select.
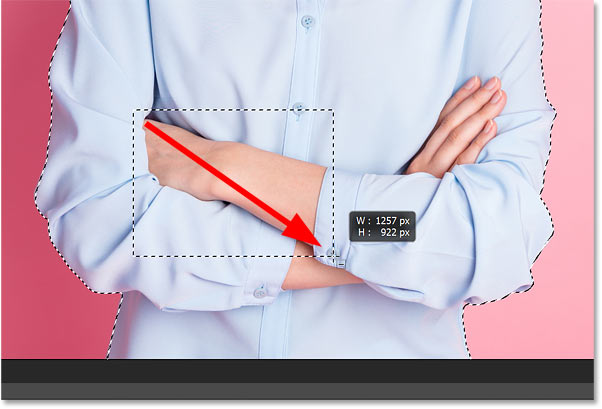
Then press and hold the Alt key on a Windows PC, or the Option key on a Mac, and drag a selection outline around the area you want to remove. I’ll drag around her arm and hand on the left.
When I release my mouse button, her arm and hand are subtracted from the selection.
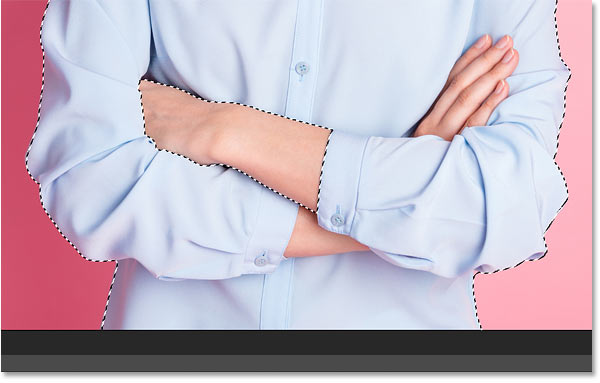
I’ll do the same thing to subtract her other arm and hand, holding Alt (Win) / Option (Mac) and dragging a selection outline around them. And now only the shirt remains selected.
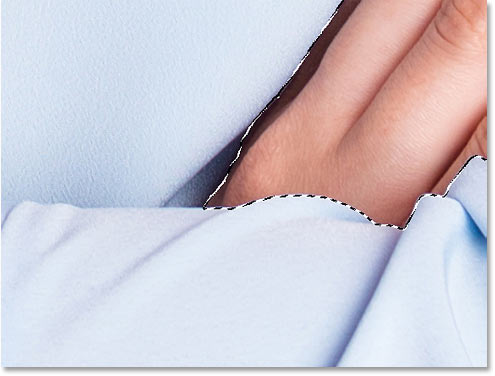
Cleaning up any problems with the selection
Before we change the object’s color, inspect the selection outline looking for any parts of the object that Photoshop missed. For example, if I zoom in on her hand, we can see part of the shirt that’s not selected.
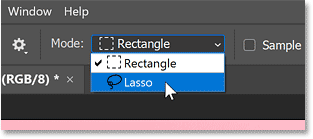
To add an area to the selection, hold the Shift key on your keyboard and drag around it. But before I do, I’m going to change the tool’s Mode in the Options Bar from Rectangle to Lasso.
Then I’ll hold Shift on my keyboard to add to the selection. And because this area has low contrast, which makes it harder for Photoshop to figure things out, this time I’ll stay much closer to the area as I drag around it.
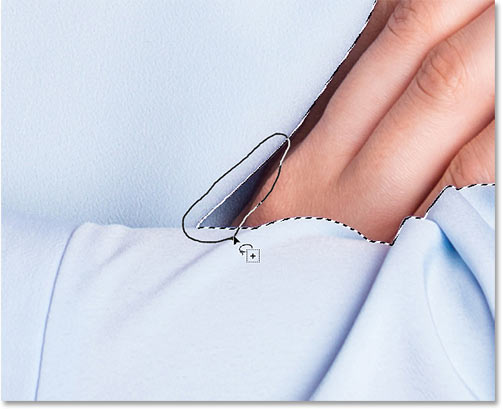
For tricky areas like this, you may need to try a few times before Photoshop gets it right. You can undo your last attempt by pressing Ctrl+Z on a PC or Command+Z on a Mac.
But in my case, Photoshop is able to add that missing part of the shirt to the selection. Continue cleaning things up, adding or subtracting areas as needed, until the selection looks good.
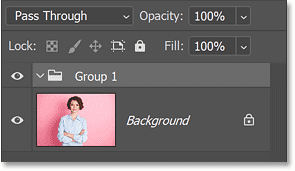
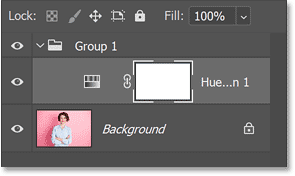
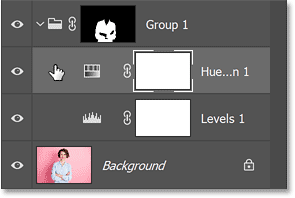
Step 2: Add a new layer group
Selecting the object was the hard part. But now that it’s selected, changing its color is easy. All it takes is a couple of adjustment layers. But first, we need to create a new layer group to hold the adjustment layers.
In the Layers panel, click the Create New Group icon (the folder icon).
The group appears above the image.
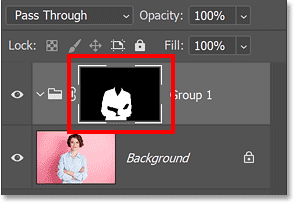
Step 3: Convert the selection into a layer mask
The reason for adding the adjustment layers to a group is that we need them both to share the same layer mask. And we can do that by adding the layer mask to the group itself.
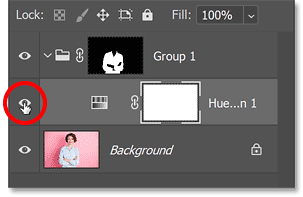
Make sure the group, not the image layer, is selected. Then with your selection outline still active, click the Add Layer Mask icon at the bottom of the Layers panel.
Photoshop converts the selection outline into a layer mask for the group. The white area in the layer mask thumbnail is the object we selected. The black area is everything that was outside the selection. So now, any adjustment layers we add to the group will affect only the object itself.
Step 4: Add a Hue/Saturation adjustment layer
Click the New Fill or Adjustment Layer icon at the bottom of the Layers panel.
There are two types of adjustments that work great for changing colors. One is better for experimenting with colors. The other is better when you know the exact color you need. So I’ll start by showing you the one that’s better for experimenting. For that, choose a Hue/Saturation adjustment layer from the list.
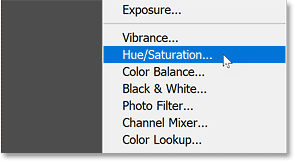
The adjustment layer is added above the image but inside the group.
Step 5: Turn on Colorize
To make the new color for the object look realistic, we need to adjust the color's three components (hue, saturation, and brightness) separately. We’ll use the Hue/Saturation adjustment layer to change the hue (the main color) and the saturation. But we’ll adjust the brightness using a different kind of adjustment layer, which we’ll add in a moment.
In the Properties panel, turn on the Colorize option.

Step 6: Drag the Hue slider
Then drag the Hue slider to try different colors. I’ll drag the slider into the greens.
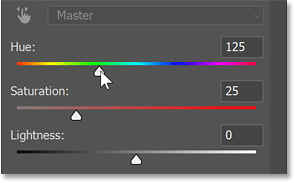
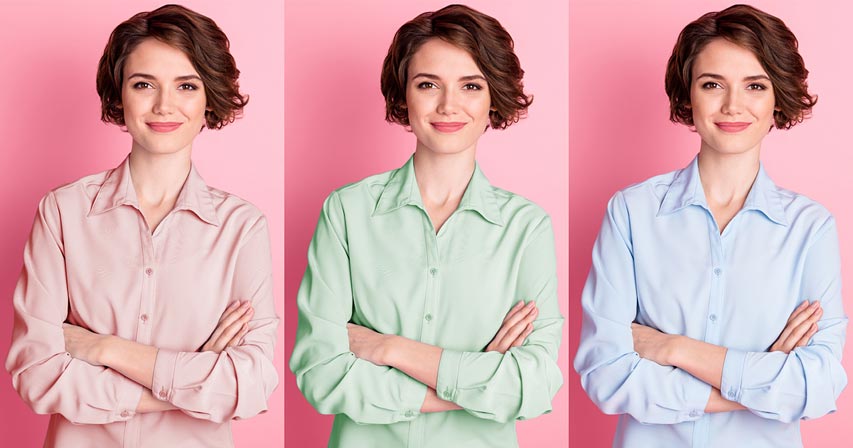
And the woman’s shirt changes from its original blue color to green.
If I drag the Hue slider over to purple:
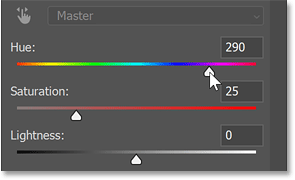
Her shirt is now purple.
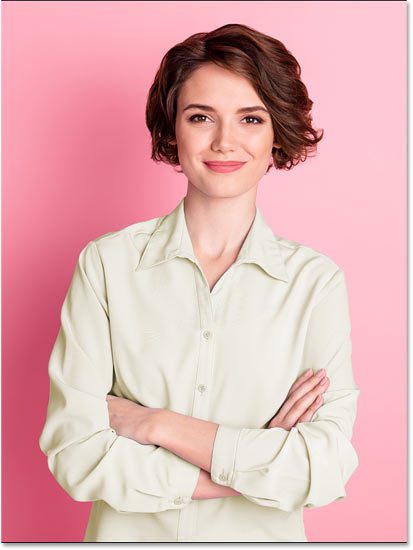
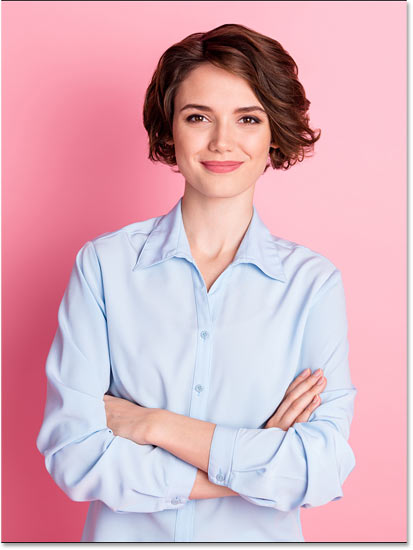
And if I drag the Hue slider into the yellows:
Her shirt color changes to yellow.
Step 7: Drag the Saturation slider
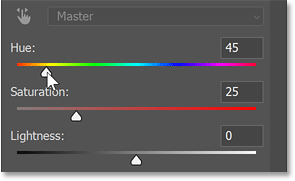
Once you’ve chosen a main color with the Hue slider, adjust its saturation with the Saturation slider. The default saturation value is 25. Higher values make the color more intense. Lower values move the color closer to gray.
If I increase the saturation value to 50:
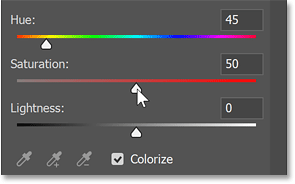
The yellow color of her shirt is now more intense.
Using a Solid Color fill layer instead of Hue/Saturation
Before we look at how to adjust the brightness of the color, let’s look at the other type of adjustment we can use for changing the hue and saturation. A Hue/Saturation adjustment layer is great for experimenting with different colors. But when you know the exact color you need, or you want to sample a color from your image, a Solid Color fill layer works better.
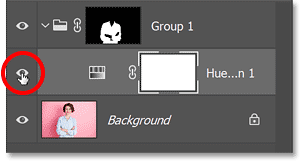
Turning off the Hue/Saturation adjustment layer
In the Layers panel, I’ll turn off my Hue/Saturation adjustment layer for a moment by clicking its visibility icon.
With the adjustment layer off, the original shirt color is restored.
Adding a Solid Color fill layer
Instead of adding a Solid Color fill layer from the Layers panel (by clicking the New Fill or Adjustment Layer icon and choosing Solid Color), go up to the Layer menu in the Menu Bar, choose New Fill Layer, and then Solid Color.
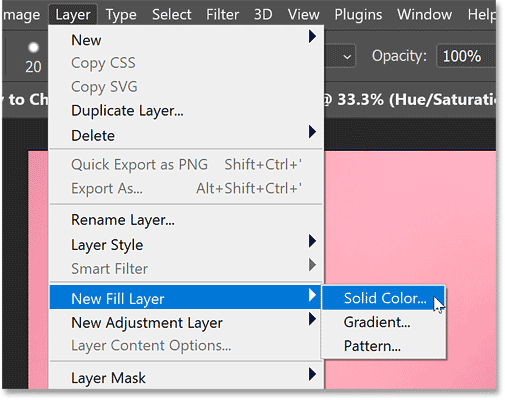
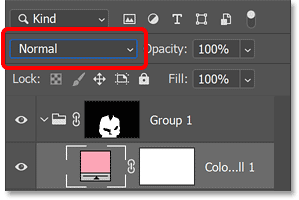
The reason we’re adding it from the Layer menu is so we have access to the New Layer dialog box. Change the Mode (the blend mode) of the adjustment layer from Normal to Color. Then click OK.
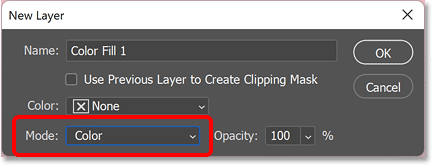
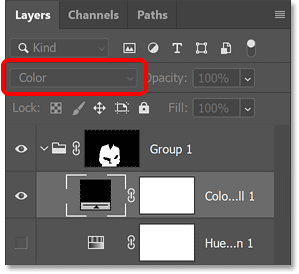
The adjustment layer is added to the group. And even though the blend mode option is grayed out at the moment, we can still see that it’s set to Color.
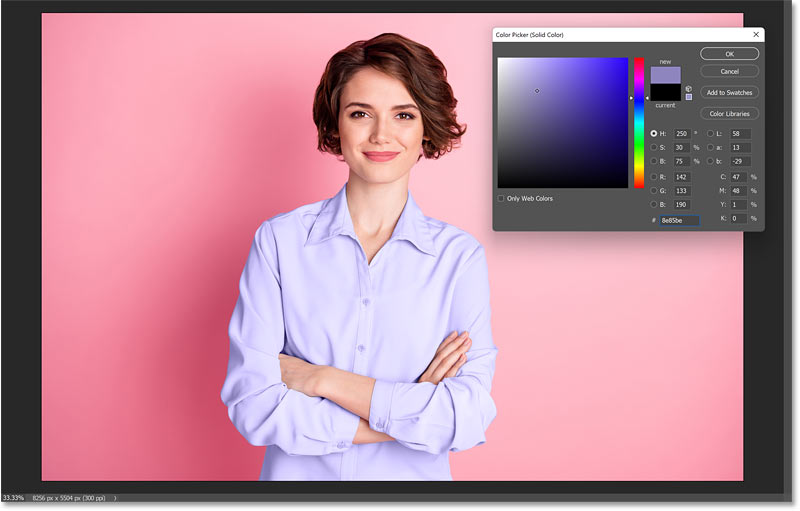
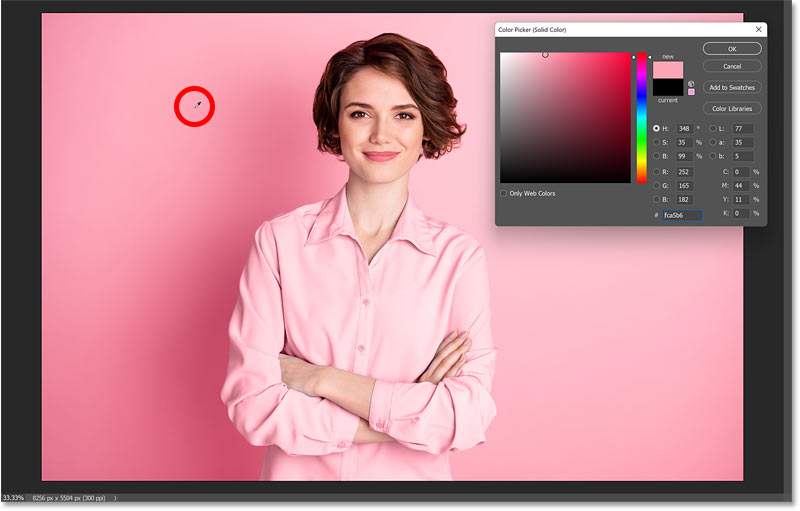
Choosing a color from the Color Picker
Photoshop opens the Color Picker where we can choose a new color for the object. But while you can choose a hue from the vertical strip in the center, and then a saturation value from the square on the left, it’s not as intuitive as the sliders we were using with the Hue/Saturation adjustment layer. Which is why the Hue/Saturation adjustment is better for experimenting.
Sampling a color from the image
But the advantage with a Solid Color fill layer is that we don’t need to use the Color Picker or any sliders. Instead, we can sample a new color directly from the image itself. This is especially helpful if the image includes a color swatch that you or a client added. You could simply click on the color swatch to instantly choose that exact color.
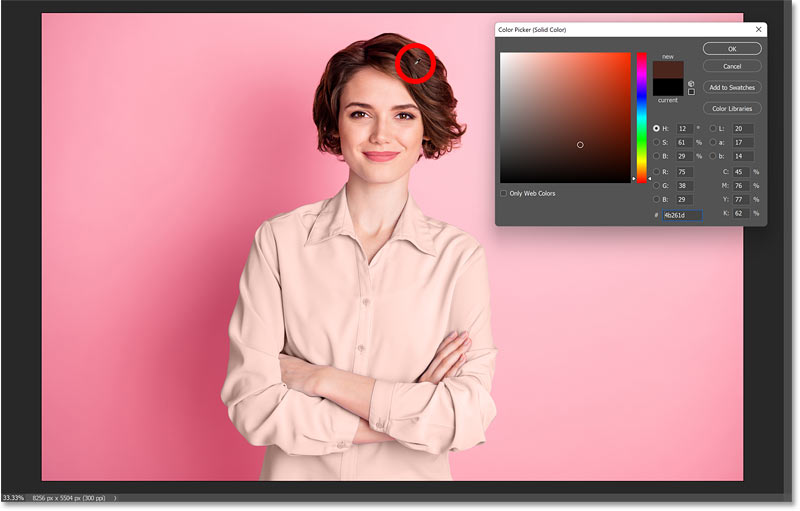
Even if you don’t have a color swatch to click on, you can still click on any color in the image to select it. So if I want the woman’s shirt to match the color of her hair, I can simply click on her hair to sample it.
Or if I want her shirt color to match the background, I can just click on the background. Once you have sampled the color you need, click OK to close the Color Picker.
Why did we change the blend mode to Color?
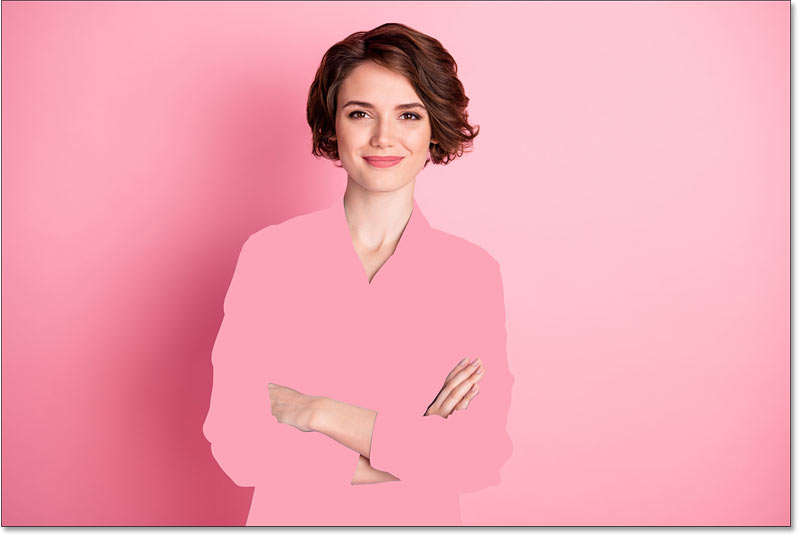
You may be wondering why we changed the Solid Color fill layer’s blend mode to Color before the layer was added. The reason is that if we had left the blend mode set to Normal:
The new color would have appeared flat, blocking the object from view. But the Color blend mode leaves the brightness of the object alone and affects only the color. And by changing the blend mode before the fill layer was added, it was much easier to see what we were doing.
Deleting the Solid Color Fill layer
Now that we know how to change the object’s color with a Solid Color fill layer, I’ll delete the fill layer by pressing the Delete key on my keyboard. Then I’ll turn the Hue/Saturation adjustment layer back on by clicking its visibility icon.
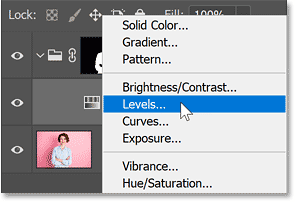
Step 8: Add a Levels adjustment layer
To adjust the brightness of the color, click on the New Fill or Adjustment Layer icon at the bottom of the Layers panel:
And choose a Levels adjustment layer.
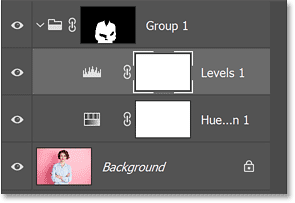
The Levels adjustment layer is added above the Hue/Saturation adjustment layer (or the Solid Color fill layer, whichever one you’re using).
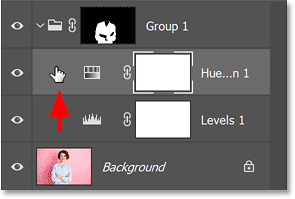
Step 9: Drag Hue/Saturation above Levels
Click on the Hue/Saturation (or Solid Color) layer and drag it above the Levels adjustment layer.
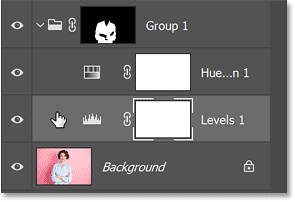
Step 10: Select the Levels adjustment layer
Then click on the Levels adjustment layer to make it active.
Step 11: Drag the sliders to adjust the brightness
In the Properties panel, click on the midtones slider below the middle of the histogram and drag it left or right to adjust the overall brightness of the new color. Drag to the left to lighten the color or to the right to darken it. I’ll darken the color by dragging the slider to the right.

And now the yellow in her shirt appears darker.
Adjusting the brightness of the highlights
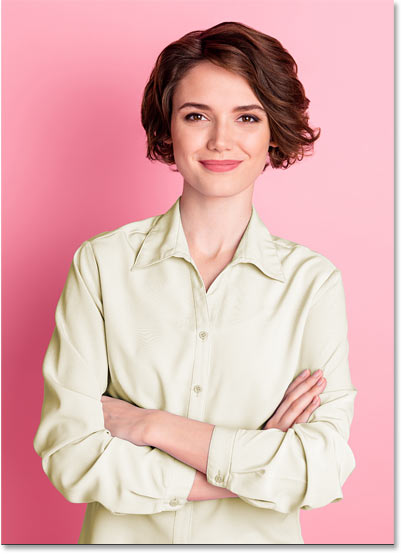
To brighten the highlights in the color, drag the white point slider (below the far right of the histogram) to the left. But don’t drag too far or you’ll lose highlight detail.
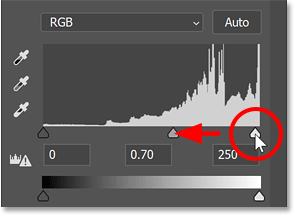
After dragging the white point slider just slightly to the left, the highlights in the shirt are now brighter.
Or to reduce the brightness in the highlights, drag the white output slider below the far right of the gradient. The further you drag the slider to the left, the more you will limit how bright the highlights can be.
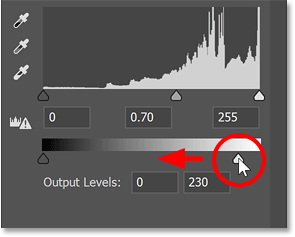
And here’s the result with her shirt color looking more flat.
Step 12: Edit the hue or saturation if needed
Once the brightness is adjusted, you can always go back and change the hue or saturation. Click on the Hue/Saturation adjustment layer to make it active.
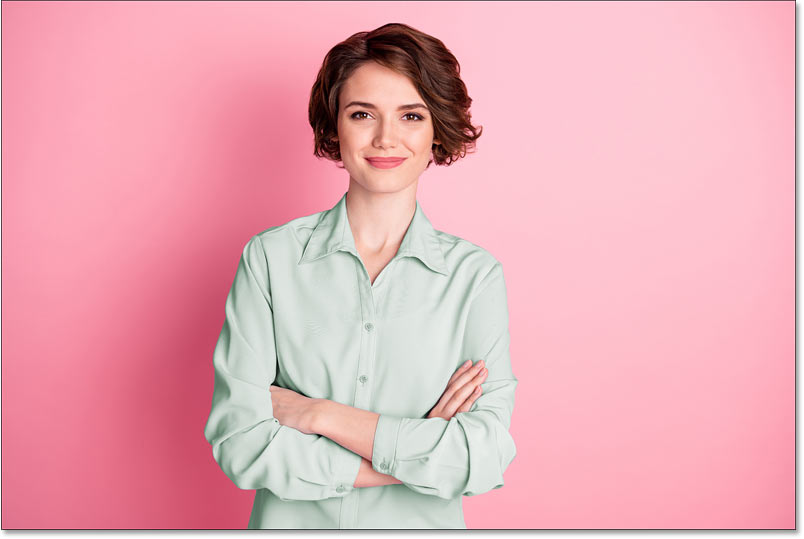
Then in the Properties panel, drag the Hue or Saturation sliders as needed. I’ll drag the Hue slider over to green and I’ll lower the Saturation down to 12.
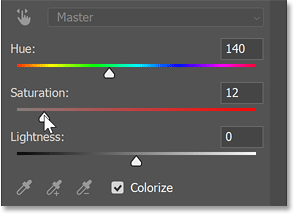
And her shirt color is changed once again, but this time with the brightness adjusted in the Levels adjustment layer.
Step 13: Compare the new color with the original
To compare the new color of the object with the original, simply toggle the layer group on and off by clicking its visibility icon.
And there we have it! That’s how easy it is to change the color of an object in Photoshop!
Check out my Photoshop Basics, Photo Editing or Photo Effects sections for more tutorials. And don't forget, all of my tutorials are now available to download as PDFs!