How to Brighten Eyes in Photoshop and Make Them Sparkle
In this tutorial, I show you how to brighten someone’s eyes in Photoshop and make them sparkle to help your portraits look more engaging. We’ll use a classic Photoshop technique for brightening eyes that’s not only quick but also simple enough for even beginners to use.
Download the PDF: 2025 - How to Brighten Eyes and Make Them Sparkle
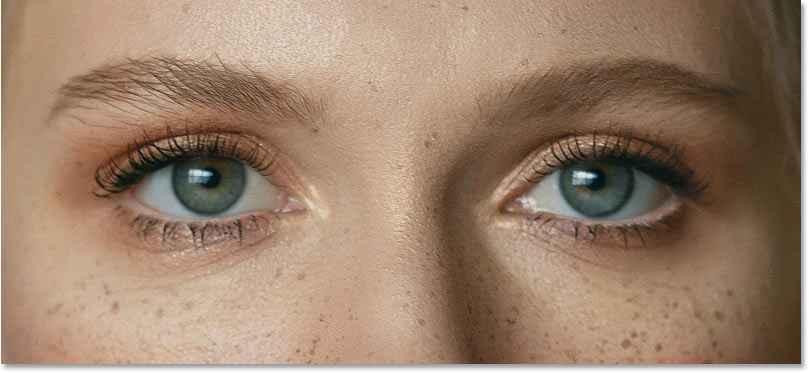
Here’s a closeup of my subject’s eyes before brightening them. I'm using this image from Adobe Stock.
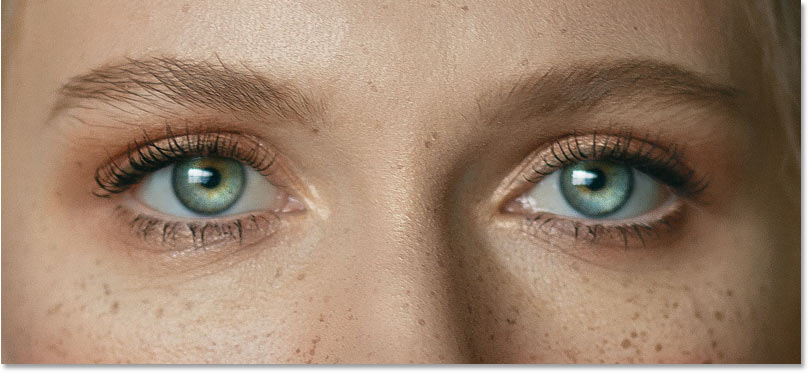
And here’s how the eyes will look after the brightening is added.
Which Photoshop version do I need?
I'm using Photoshop 2025 but any recent version will work.
Let's get started!
Step 1: Add a new layer
Start by going to Photoshop's Layers panel and clicking the Add New Layer icon.
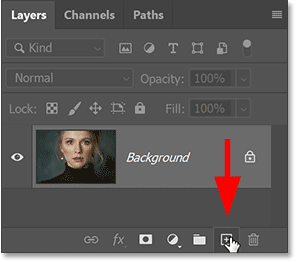
Photoshop adds a new blank layer above your image.
By default the new layer is named Layer 1
but I’ve renamed it Eyes
.

Step 2: Select the Brush Tool
In Photoshop’s toolbar, select the Brush Tool.

Step 3: Choose the Soft Round brush
With the Brush Tool active, right-click anywhere on your image to open the Brush Preset Picker.
Then select the Soft Round brush. In newer versions of Photoshop, the Soft Round brush is found in the General Brushes category.
Press Enter (Win) / Return (Mac) to close the Brush Preset Picker.

Photoshop's Brush Tool is now fixed!
Step 4: Set your brush color to white
Make sure your Foreground color (which is also the brush color) is set to white.
If it’s set to a different color, press the letter D on your keyboard to reset the Foreground and Background colors to their defaults (black for the Foreground and white for the Background). Then press X on your keyboard to swap them.
The current Foreground and Background colors are shown in the color swatches in the toolbar. The Foreground color is the upper left swatch and should now be white.

Step 5: Resize the brush
We can brighten both eyes at once on the same layer.
Start with the left eye. Use the left and right bracket keys ( [ and ] ) on your keyboard to resize your brush cursor so that it’s slightly smaller than the iris (the color part of the eye that we want to brighten).

Step 6: Click once on each iris
Then click once in the lower right of the iris to add a big white blob.

Do the same thing with the right eye using the same brush size, clicking once in the lower right of the iris to add the same white blob in the same spot.

Step 7: Add a smaller area of white on the opposite sides
Press the right bracket key ( ] ) on your keyboard two or three times to make the brush cursor a bit smaller.
Then click once in the upper left of the iris in each eye to add a second smaller white blob on the opposite side. Don’t worry, it will look better in a moment.

Step 8: Add a layer mask
Back in the Layers panel, with the eyes layer selected, click the Add Layer Mask icon.

A layer mask thumbnail appears on the eyes layer.

Step 9: Set the Foreground color to black
The layer mask will be used to hide the white blobs in the pupils and the areas surrounding each iris, which means we need to paint on the layer mask with black.
Make sure your Foreground color is set to black. If it’s set to white, press X on your keyboard to swap the Foreground and Background colors.

Step 10: Hide the white from the pupils and surrounding areas
Again we’ll start with the left eye. Press the right bracket key ( ] ) on your keyboard to make the brush smaller until it is the same size as the pupil.

Then click once in the center of the pupil to hide the white (by painting with black on the layer mask).

Do the same thing for the right eye, clicking once in the center of the pupil to hide the white.

Then paint carefully around the outer edges of each iris to hide the white from the surrounding areas. Make sure to paint over the eyelashes as well.
Here I’m painting with black around the left iris to hide the white.

And here I’m doing the same thing for the right iris. The white in each eye should now be visible only in the iris itself.

Step 11: Change the layer blend mode to Overlay
Finally back in the Layers panel, change the blend mode of the eyes layer from Normal to Overlay.

The areas in each eye where we painted with white now appear brighter, adding a nice sparkle.
If the brightening is too much, simply lower the opacity for the eyes layer to fine-tune the result.

And there we have it! That’s how easy it is to brighten and add sparkle to eyes in Photoshop.
Related tutorials:
- How to change eye color in Photoshop
- Create rainbow color eyes in Photoshop
- How to give eyes a radial zoom effect
Don't forget, all of my Photoshop tutorials are available to download as PDFs.