
Zoom And Pan All Images At Once In Photoshop
This tutorial shows you how to navigate two or more open images in Photoshop at the same time. You'll learn how to zoom all images with the Zoom Tool, how to pan all images with the Hand Tool, and how to instantly jump all images to the same zoom level or location!
Download PDF: Image Navigation - 02 - Zoom And Pan All Images
In the previous lesson, we learned the basics of how to zoom and pan images in Photoshop. I showed you how to use the Zoom Tool to zoom in and out of an image, and how to use the Hand Tool to pan or scroll an image from one area to another.
In that lesson, we navigated around a single image, which is what you’ll be doing most of the time. But Photoshop also lets us view two or more open images side-by-side. And in this lesson, I show you the tricks to zooming and panning all open images together.
If you're new to Photoshop, be sure to read through the previous lesson to learn the basics of zooming images before you continue.
Let's get started!
Which Photoshop version do I need?
I'm using Photoshop 2022 but any recent version will work. You can get the latest Photoshop version here.
How to switch between open images in Photoshop
You can follow along with your own images. For this lesson, I’ve opened two images in Photoshop, both from Adobe Stock.
By default, Photoshop lets us view only one open image at a time. So here’s my first image.
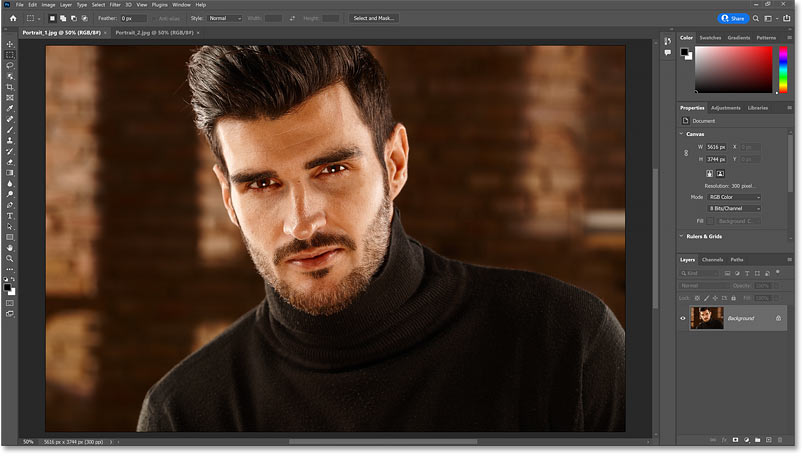
To switch from one open image to another, click the document tabs at the top.
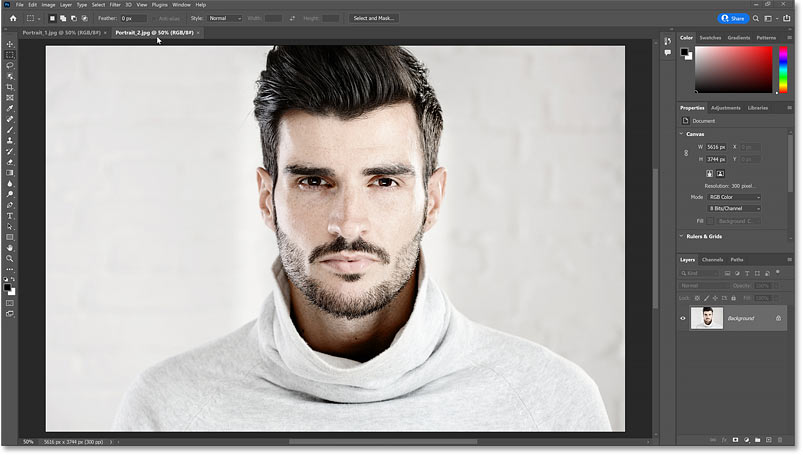
I’ll click on the tab for the second image:
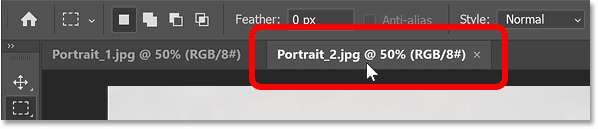
And now my second image appears.
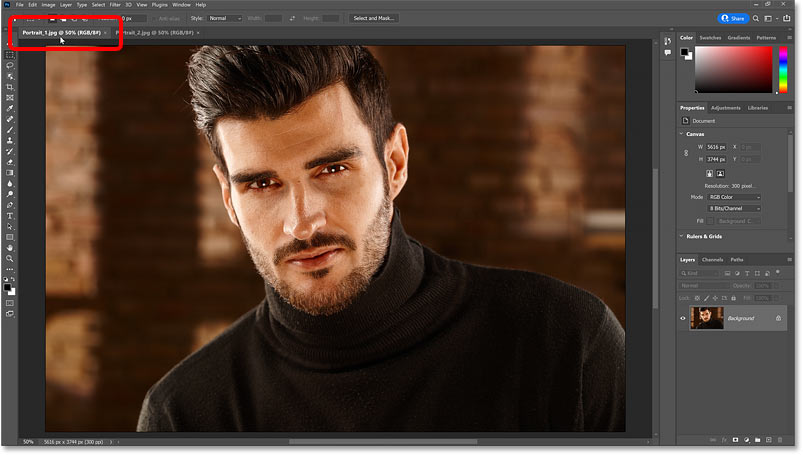
To switch back to my first image, I’ll click on its tab.
The initial zoom level
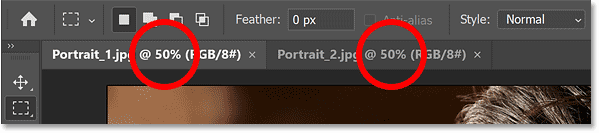
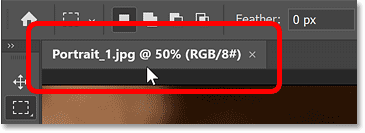
Photoshop initially displays images at a zoom level that allows them to fit entirely on the screen. And the current zoom level is displayed in the document's tab.
Since both of my images share the same dimensions (width and height), they both opened at a zoom level of 50%. Your zoom levels may be different depending on the sizes of your images and your screen resolution.
How to view multiple images at once in Photoshop
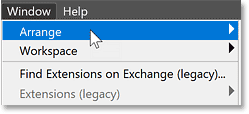
To view two or more open images at the same time, go up to the Window menu in the Menu Bar and choose Arrange.
From here, choose one of Photoshop’s multi-document layouts. Depending on the number of images open, some layouts will be grayed out.
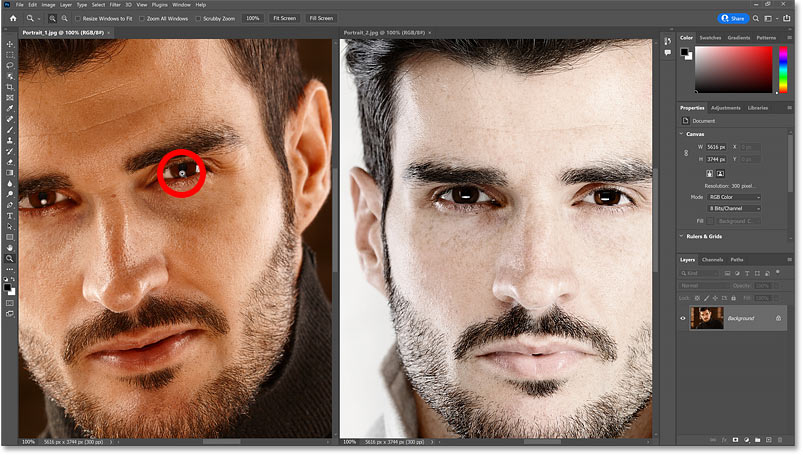
In my case, I have only two open images, so I’m limited to either 2-up Horizontal or 2-up Vertical. I’ll choose 2-up Vertical.
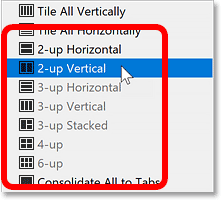
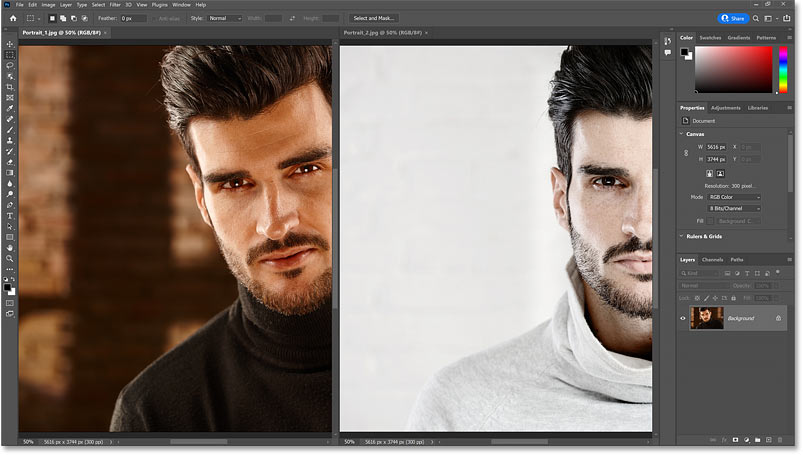
The 2-up Vertical layout splits the screen vertically so that both images appear side-by-side.
The active image
Even though we’re seeing both images, we can still only work on one image at a time. And the currently active image is the one with its name, zoom level and other information in its tab appearing brighter, while the other one appears dimmed.
Again we can switch between active images by clicking the tabs. Or you can just click on an image itself in the document window to make it active.
How to pan all open images in Photoshop
Since both of my images are currently off-center, I’ll start by showing you how to pan all open images at the same time.
First select the Hand Tool, either from the toolbar or by holding the spacebar on your keyboard.
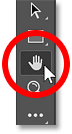
Then hold your Shift key (or add the Shift key if you’re holding the spacebar). Click on your active image, keep your mouse button held down, and drag the image around inside the document window. Holding Shift as you drag moves all open images at the same time.
Here I’ve panned the active image on the left to center my subject in the document window. And because I was holding Shift, the image on the right moved along with it.

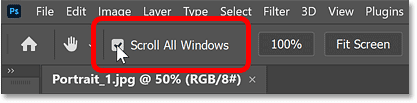
The Scroll All Windows option
You can make panning all images the default behavior for the Hand Tool (so there’s no need to hold Shift) by turning on Scroll All Windows in the Options Bar. Note that the Hand Tool needs to be active in the toolbar for the option to appear.
How to zoom all images in Photoshop
To zoom all open images at the same time, select the Zoom Tool, either from the toolbar or by holding the spacebar and the Ctrl key on a Windows PC, or the spacebar and the Command key on a Mac.

Then just like we did with the Hand Tool, hold your Shift key (or add the Shift key if you’re holding the spacebar and the Ctrl or Command key) and click on the active image to zoom in. Both images will zoom in at the same time.
To zoom all images out at the same time, add the Alt or Option key and click.
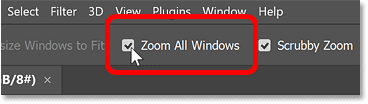
The Zoom All Windows option
You can make zooming all open images the default behavior for the Zoom Tool by making sure the Zoom Tool is active in the toolbar, and then selecting Zoom All Windows in the Options Bar.
Photoshop will then zoom all open images automatically with no need to hold the Shift key. But you’ll still need to hold the Alt or Option key to zoom them out.
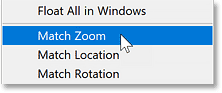
The Match Zoom, Location and All commands
If you change the zoom level for your active image on its own, and then want your inactive images to match that same zoom level, go up to the Window menu, choose Arrange, and then choose the Match Zoom command.
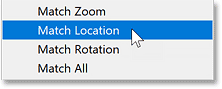
Or if you panned or scrolled your active image on its own and want your inactive images to match that same location, go up to the Window menu, choose Arrange, and then choose Match Location.
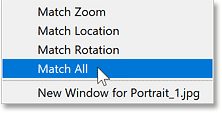
To match both the zoom level and the location of the active image (as well as the rotation value which I cover in a separate tutorial), go up to the Window menu, choose Arrange, and then choose Match All.
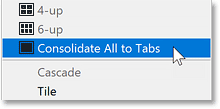
How to exit the multi-document layout
Finally, to exit out of your multi-document layout and go back to Photoshop’s default behavior of viewing a single open image at a time, go up to the Window menu, choose Arrange, and then choose Consolidate All to Tabs.
And there we have it! In the next lesson in my Navigating Images in Photoshop series, we'll learn how to use Photoshop's Navigator panel which is like the Zoom Tool and the Hand Tool rolled into one! Or visit my Photoshop Basics section for more topics for beginners!