
Best Way to Watermark Images in Photoshop CC
In this tutorial, you'll learn not only how to add your logo or copyright information as a watermark to your images, but also how to make sure that any changes to it instantly update across all your images, by adding your watermark as a linked smart object in Photoshop! Linked smart objects are very powerful, but they're only available in Photoshop CC. So to follow along, you'll need Photoshop CC and you'll want to make sure that your copy is up to date. Let's get started!
What are linked smart objects?
Smart objects have been around since Photoshop CS2. But in Photoshop CC, Adobe introduced a new type of smart object known as a linked smart object. Before that, the contents of a smart object were always embedded in the document. This meant that there was no way to share a smart object between documents. Any changes you made to your smart object in one document would not appear in any others.
But linked smart objects are different. Rather than embedding their contents, a linked smart object simply links to an external file, like a separate Photoshop document. Multiple documents can all be linked to the same file, and any changes you make to that file will instantly appear in every document that links to it!
This makes linked smart objects perfect for things like watermarks. You can save your logo as a separate file, and then link all of your images to that file. If you edit the logo, the changes in that one file will be updated throughout all of your images. Let's see how it works!
Creating the logo document
To add a watermark as a linked smart object, you'll first want to create your logo in a separate document. Here's the logo I created. I added some basic copyright information, like the copyright symbol and year, as well as my name and my website address below it:
If we look in the Layers panel, we see my Type and Shape layers. I filled the Background layer with black just so I could see the white text and shapes as I was adding them:
Turning off the Background layer
To use the file as a linked smart object, we need to save it. But I don't want the black background to appear in my images. I want a transparent background instead. So before I save it, I'll turn off the Background layer by clicking its visibility icon:

This leaves the logo in front of a transparent background:
Saving and closing the logo file
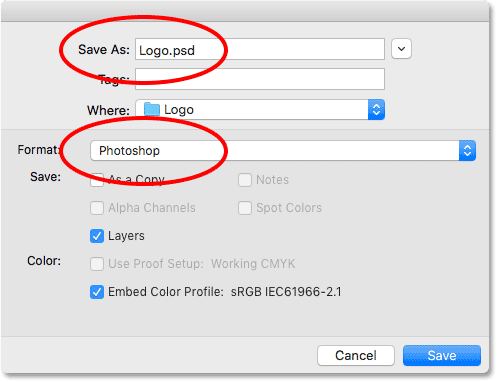
To save the file, go up to the File menu in the Menu Bar and choose Save As:

In the dialog box, name the file "logo" or whatever else makes sense. And to keep all of your layers, make sure you save it as a Photoshop .PSD file. Choose where you want to save it on your computer (I'll save mine to a folder on my Desktop), and then click Save. If Photoshop asks if you want to maximize compatibility, click OK:
Then to close the file, go back up to the File menu and choose Close:

How to add your logo as a watermark
Now that we've created and saved our logo, let's see how to add it as a watermark to an image. And to make sure that any changes we make to the logo will update in the image, we'll add it as a linked smart object.
Adding the watermark to the first image
Here's the first of three images I'll be using. All three are photos I shot recently, and I want to add a watermark to each of them:

How to add the watermark as a linked smart object
To add your watermark as a linked smart object, go up to the File menu and choose Place Linked. Again, this option is only found in Photoshop CC:

Navigate to your logo file, then click on it to select it and click Place:
Photoshop adds the logo to the document and centers it in the image:
Resizing and repositioning the logo
Notice that Photoshop places the Free Transform box and handles around the logo. To resize it, press and hold your Shift key, as well as your Alt (Win) / Option (Mac) key, and then click and drag any of the corner handles. The Shift key locks the aspect ratio as you're resizing it, and the Alt / Option key lets you resize the logo from its center:
Then click inside the Free Transform box and drag the logo into place. I'll move mine into the upper left corner. To accept it, press Enter (Win) / Return (Mac) on your keyboard to close out of Free Transform:
How do we know it's a linked smart object?
If we look again in the Layers panel, we see our logo as a smart object above the image. We know it's a linked smart object, not an embedded smart object, by the link icon in the lower right of the thumbnail. I've enlarged it here to make it easier to see:

Blending the watermark into the image
To fade the watermark into the image, I'll simply lower the opacity of the smart object from 100% down to 60%. You'll find the Opacity option in the upper right of the Layers panel:

And here's the result with the watermark added to the first image:

Adding the watermark to the second image
Let's quickly add the same watermark to the other two images. I'll switch to my second image by clicking its tab below the Options Bar:

Then I'll do the same thing I did before by going up to the File menu and choosing Place Linked:
I'll select my logo file, and I'll click Place:
Photoshop again places the logo and centers it in the document:
I'll press Shift+Alt (Win) / Shift+Option (Mac) as I drag the corner handles to resize it. And then I'll click inside the Free Transform box and I'll drag the logo into position. I'll move this one into the bottom right corner. To accept it, I'll press Enter (Win) / Return (Mac) on my keyboard:
Two smart objects sharing the same content
Again in the Layers panel, we see the logo as a linked smart object above the image. Even though this smart object is in a separate document, because its a linked smart object, it's sharing its contents with the smart object in the previous document. They're both sharing that same "logo.psd" file:

I'll fade the logo into the image by lowering the opacity of the smart object to 60%:

And here's the result with the watermark added to the second image:
How to blend images together in Photoshop
Adding the watermark to the third image
I'll add it to one more photo. I'll switch over to my third image by clicking its tab:

Then I'll go back to the File menu and I'll choose Place Linked:
I'll select the same logo file, and I'll click Place:
Photoshop again centers the logo in the document:
I'll press Shift+Alt (Win) / Shift+Option (Mac) and I'll drag the corner handles to resize it. Then I'll drag the logo into the bottom left corner of the image. Finally, I'll press Enter (Win) / Return (Mac) to accept it:
Three smart objects, one shared file
In the Layers panel, we again see the logo as a linked smart object. And we now have three smart objects, each in a separate document, all sharing that same "logo.psd" file. I'll fade the logo into the image by lowering its opacity to 60%:

And here's the result with the watermark now added to the third image:

Saving and closing one of the images
Before we look at how to make changes to the logo, I'm going to save and close my third image. We'll see why I'm doing this at the end of the tutorial. To save it, I'll go up to the File menu and I'll choose Save As:
Just like with the logo file, make sure you save your image as a Photoshop .PSD file. This will keep any layers intact, including your smart object. Click Save, and again if Photoshop asks if you want to maximize compatibility, click OK:

How to edit the logo file
So now that we've added the logo to three separate images, what if we need to change the logo? Maybe we want something completely different, or we just need to update something about it, like our contact information. And, how to we get the change to appear in all of our images? With linked smart objects, it's easy to do.
I'll switch back to my original image by clicking its tab:

Opening a linked smart object
To open a linked smart object and view its contents, simply double-click on the smart object's thumbnail in the Layers panel. You can do this in any document that shares the same linked smart object. So in my case, any of my three images would work:

This reopens the logo file that all of my images are linking to:
Editing the smart object contents
To save time, I've created a new logo that I want to use in place of my original one. To see it, I'll turn the Background layer back on by clicking its visibility icon:
To keep things organized, I've placed each logo in its own separate layer group. I'll turn off the first logo by clicking the visibility icon for the "Logo 1" group, and then I'll view my new logo by turning on "Logo 2":

And here's the new logo in front of the black background:
Saving the changes
Again, I don't want the black background to appear in the images, so before I save it, I'll turn off the Background layer:

And then, to save my change, I'll go up to the File menu and I'll choose Save:

Since I don't need to keep the document open, I'll close it by going back to the File menu and choosing Close:
How to edit smart objects in Photoshop
Updating the watermark in the images
This returns us to the image. And just like that, Photoshop updated the smart object with my new logo. Depending on the changes you've made, you may need to reposition the logo with the Move Tool:
I'll switch over to my second image, and here again we see that the original logo has been replaced with the new one. Just by changing that one file, both images were instantly updated:
How to update an image that was closed
The reason that Photoshop instantly updated both images was not only because they're both linking to a shared file, but also because both documents were open in Photoshop when I made the change. But Photoshop won't automatically update a document that was not open, even if it also links to the same shared file.
To show you what I mean, and how to fix it, I'll reopen my third image, the one I closed earlier, by going up to the File menu and choosing Open:

I'll navigate to the file, and then I'll double-click to open it:

And notice that this image is still showing the original logo, even though it's linking to the same file as the others. That's because the document was closed when I made the change:
Updating modified content
If we look in the Layers panel, notice the small warning icon in the lower right of the smart object's thumbnail. This icon tells us that the contents of the smart object have changed since the last time the file was opened, and it needs to be updated:
To update it, make sure the smart object is selected. Then go up to the Layer menu, choose Smart Objects, and then choose Update Modified Content. Or if you have several smart objects that all need to be updated, choose Update All Modified Content instead:

As soon as you select it, Photoshop updates the smart object with the new content, and just like that, our new logo appears:

And there we have it! That's how add a watermark to your images, and how to update your changes, using linked smart objects in Photoshop! Be sure to check out our Photoshop Basics section for more smart object tutorials! And don't forget, all of our Photoshop tutorials are now available to download as PDFs!