How to Add Falling Snow to Photos with Photoshop
Learn how to add realistic falling snow to your winter photos with Photoshop. A step-by-step tutorial for Photoshop 2026.
Download the PDF: Add Falling Snow To Your Photos with Photoshop
Nothing adds life to a winter photo like falling snow, but capturing it with your camera can be tricky. So in this tutorial, I'll show you step-by-step how to create your own realistic falling snow effect using Photoshop.
Along the way, I'll share tips for how to customize the snow effect for your image. And I'll show you how to avoid Photoshop performance issues when adding the snow to larger images.
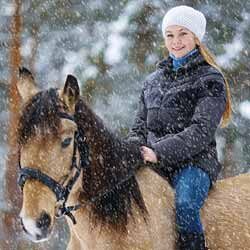
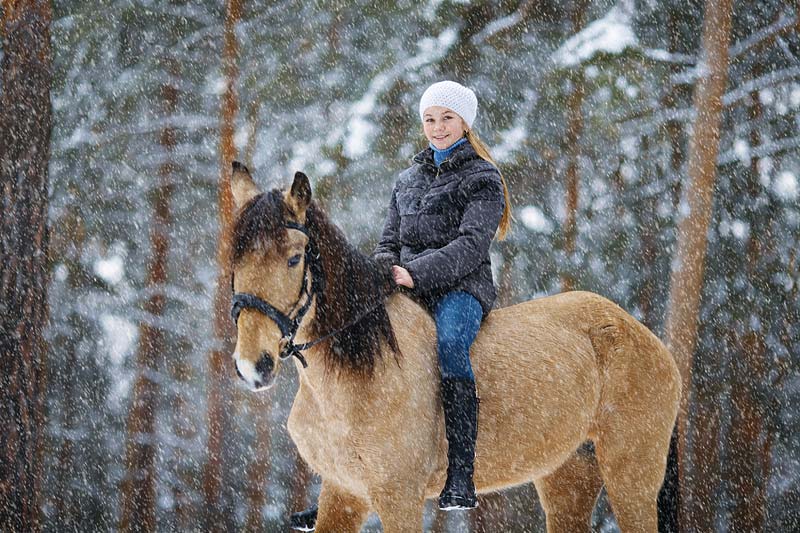
Here is an example of the falling snow we'll create.
Which Photoshop version do I need?
This tutorial is fully updated for Photoshop 2026 (version 27.0 or higher).
You can get Photoshop here or use the Creative Cloud Desktop app to make sure that your copy is up to date.
The document setup
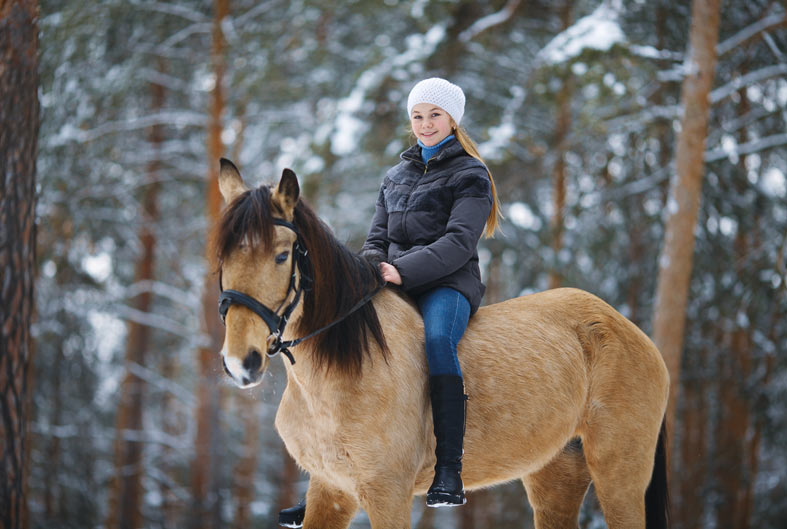
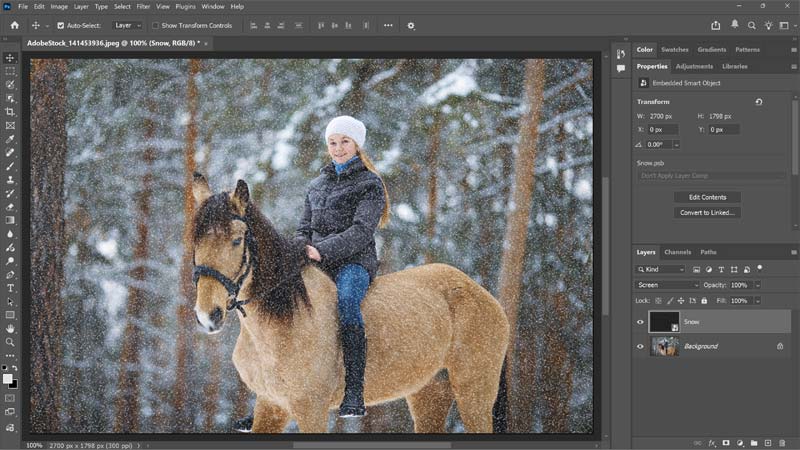
I’ll use this photo from Adobe Stock but you can easily follow along with your own image.
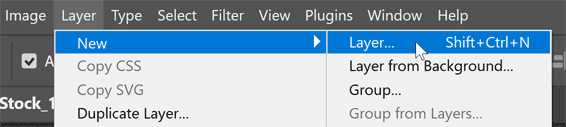
Step 1: Add a new Snow layer
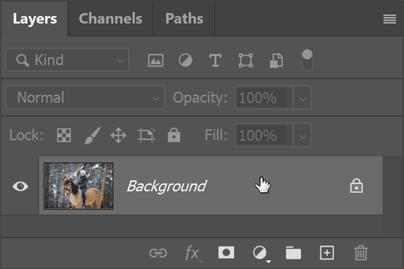
When you open your image in Photoshop, it appears on the Background layer in the Layers panel.
Add a new blank layer above the image by going to Layer > New > Layer in the Menu Bar.
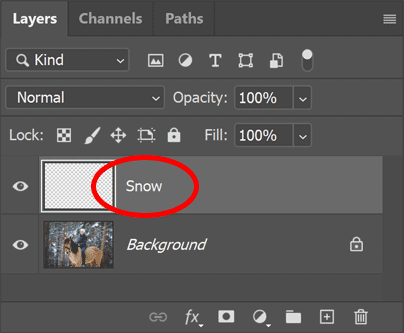
Name the layer Snow
and click OK.

The new Snow
layer appears above the Background layer.
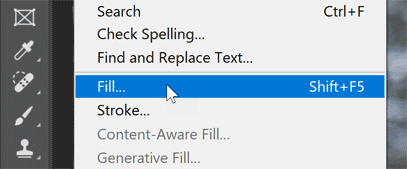
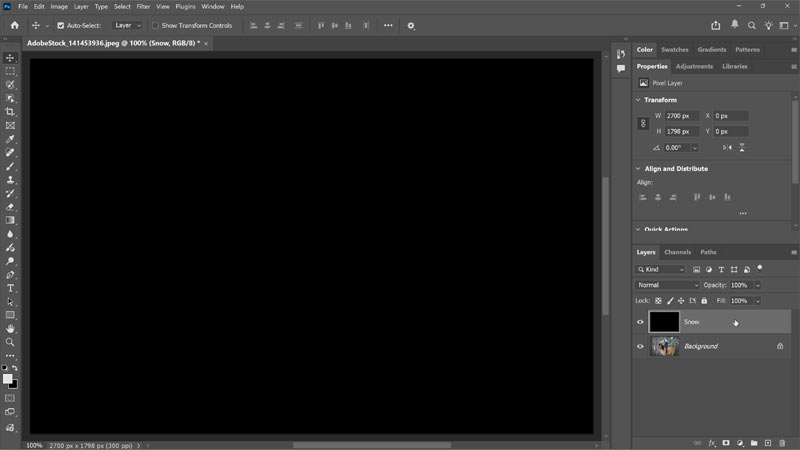
Step 2: Fill the layer with black
In the Menu Bar, go to Edit > Fill.
Then in the Fill dialog box, set the Contents to Black and click OK.
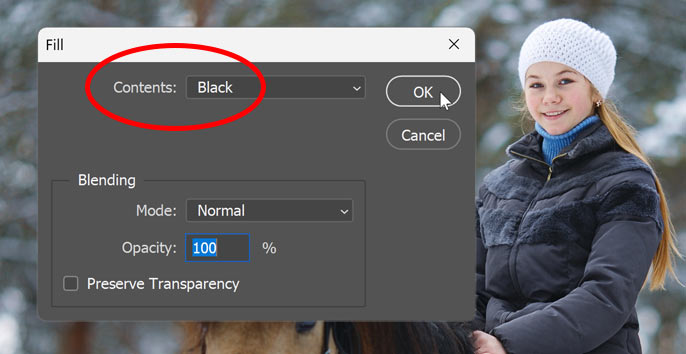
The image is temporarily hidden from view.
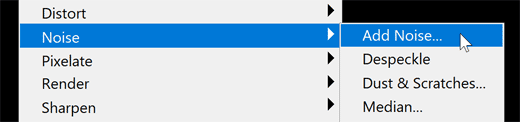
Step 3: Add noise to the layer
Go to Filter > Noise > Add Noise in the Menu Bar.
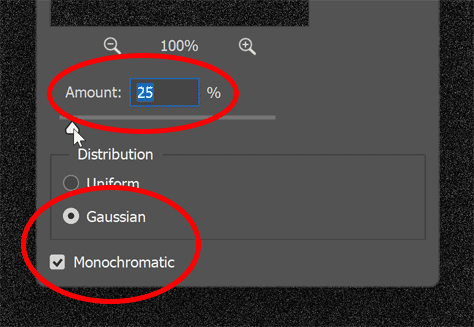
In the dialog box, select Gaussian and Monochromatic at the bottom.
Then set the noise Amount to around 25% and click OK.
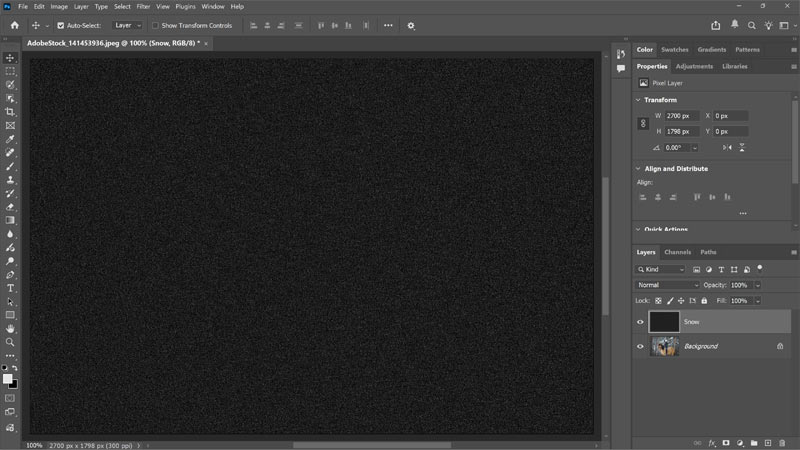
Photoshop fills the layer with noise.
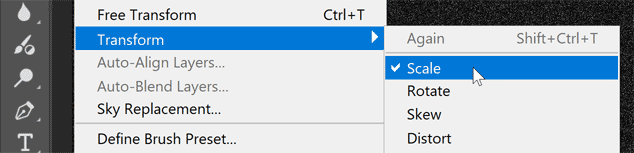
Step 4: Scale the noise
The noise will become our falling snow, but right now it’s too small.
To scale the noise, go to Edit > Transform > Scale.
In the Options Bar, make sure the link icon between the Width and Height fields is selected.
Then change the Width to 400%. The Height will automatically change to 400% to match.
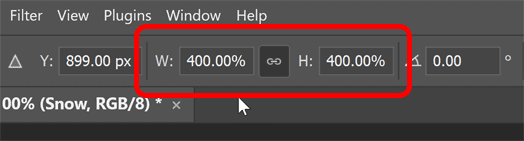
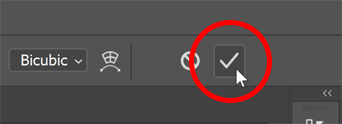
Click the check mark in the Options Bar to accept it.
The larger noise is starting to look more like snow, but we're not there yet.

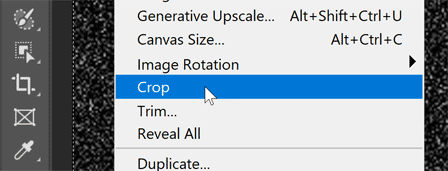
Step 5: Crop away the extra space
Here’s what could cause performance issues with Photoshop if you’re working with a larger image.
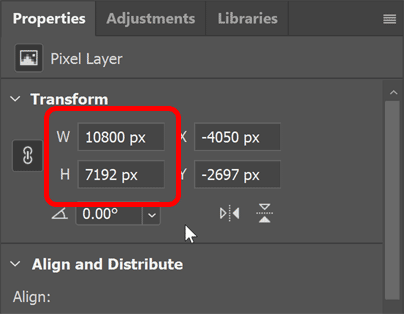
After scaling the width and height of the noise layer by 400%, our document size is now that much bigger.
In the Properties panel, notice that my document is now 10800 pixels wide and nearly 7200 pixels high. At large sizes like this, Photoshop could run out of memory when we start applying filters, causing slowdowns and other issues.
The good news is that most of the extra space is outside the visible canvas. Since we don’t need it, we can crop it away.
In the Menu Bar, go to Select > All.
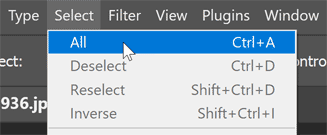
Then go to Image > Crop.
With the image cropped, go to Select > Deselect.
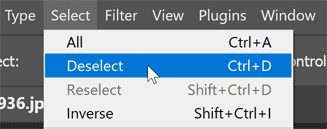
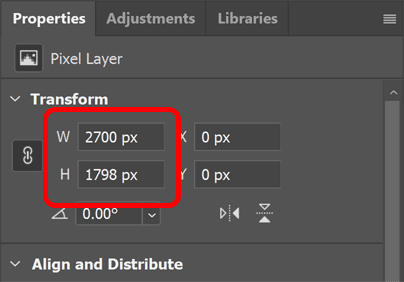
The Properties panel now shows the document at its original size, so we can start adding filters.
Step 6: Convert the snow layer to a smart object
Before adding any filters, convert the snow layer to a smart object. The filters will then be applied as smart filters so you can adjust their settings at any time.
In the Menu Bar, go to Layer > Smart Objects > Convert to Smart Object.
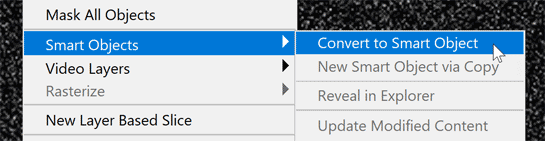
In the Layers panel, a smart object icon appears in the lower right of the layer’s thumbnail, just to show that it's now a smart object.
Step 7: Blend the noise with the photo
To blend the noise with the image, change the Snow smart object’s blend mode from Normal to Screen.
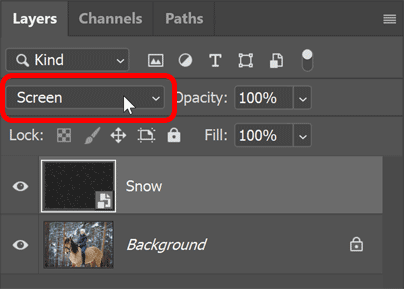
The Screen blend mode hides the black areas on the layer, leaving only the white noise visible.
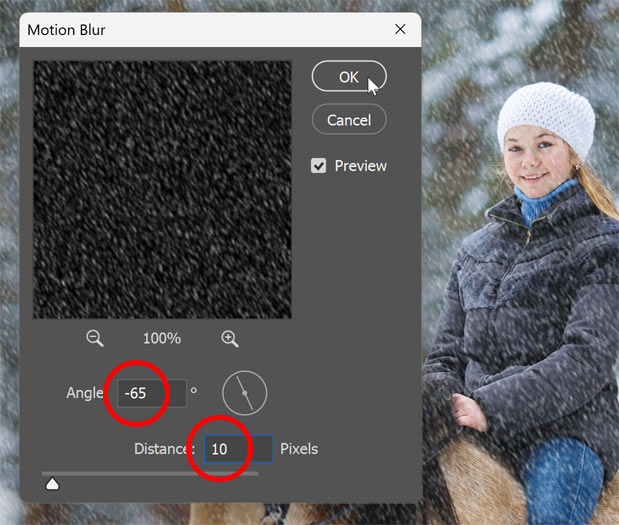
Step 8: Add motion to the snow
Right now the snow is frozen in place. To make it look like it’s falling, go to Filter > Blur > Motion Blur.
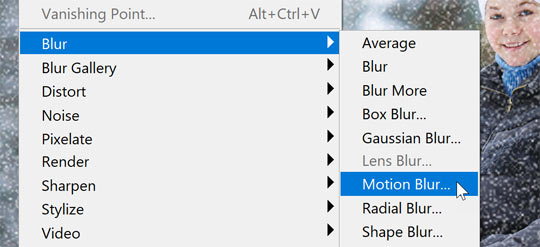
In the dialog box, set the Angle to the direction you want the snow to fall. I’m using –65° so the snow appears to fall from the upper left.
Then use the Distance slider to control the amount of motion. Avoid setting it too high or the snow will look like rain. Lower values work best, so I’ll set mine to 10 px.
Click OK to close the dialog box.
The Layers panel shows the Motion Blur filter applied as a smart filter.
You can double-click its name to reopen the dialog box and try different settings if needed. But I’m happy with the result.
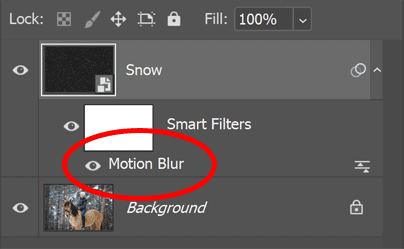
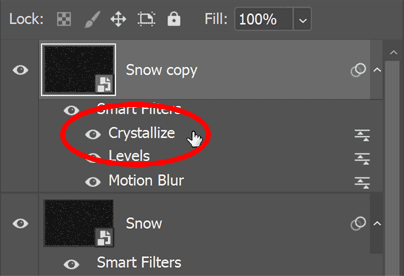
Still in the Layers panel, notice the filter mask (the white thumbnail) that’s taking up a lot of space.
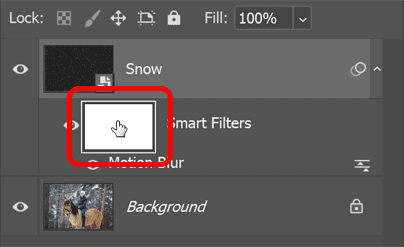
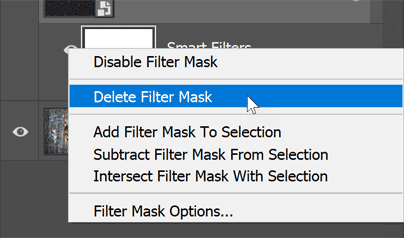
The filter mask is not needed for this snow effect. So you can delete it to free up space by right-clicking on the thumbnail and choosing Delete Filter Mask.
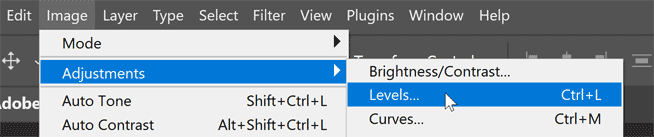
Step 9: Reduce and brighten the snow
Next we’ll reduce the amount of snow and brighten the flakes at the same time.
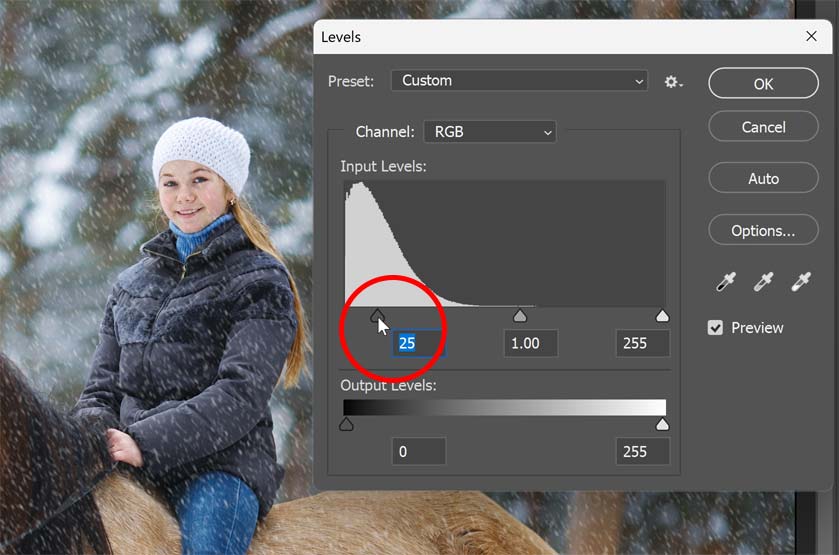
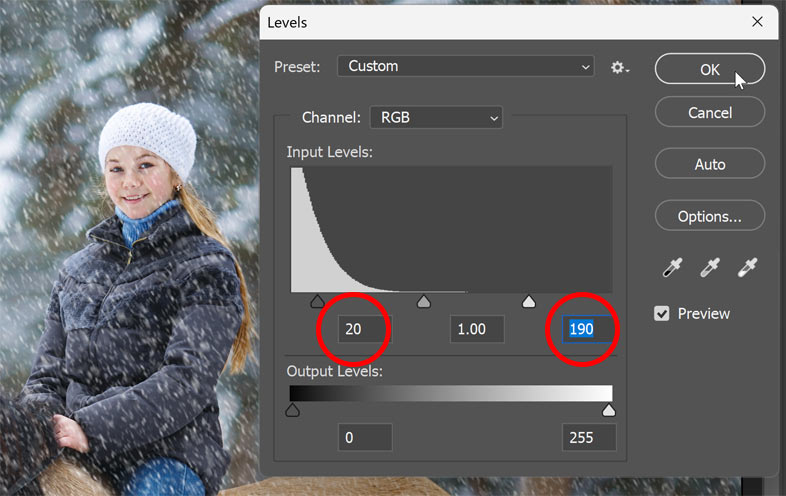
Go to Image > Adjustments > Levels.
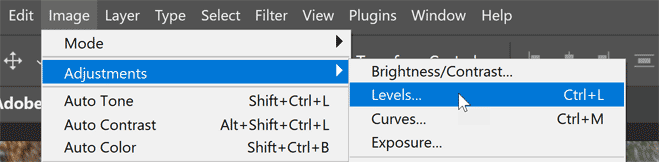
Reduce the number of snowflakes by dragging the black point slider below the left side of the histogram to the right.
As you drag, the darker snowflakes disappear, leaving only the brighter flakes visible.
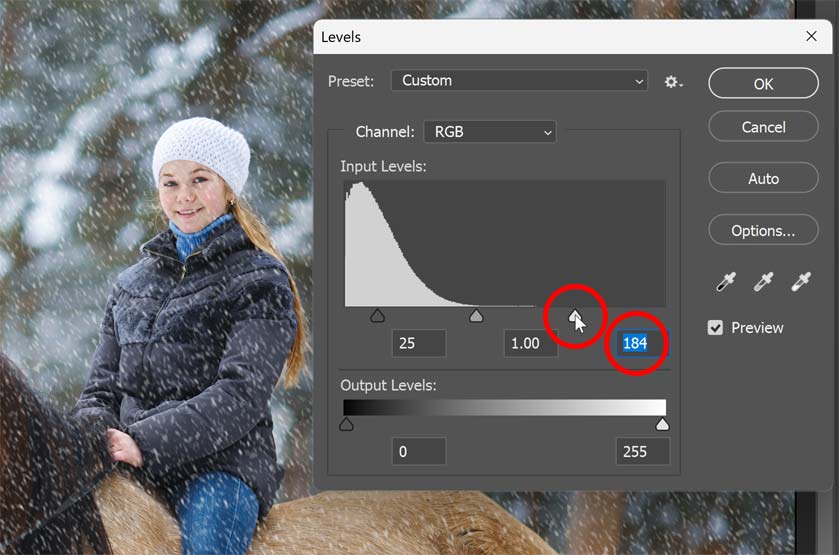
Then brighten the remaining snowflakes by dragging the white point slider below the right side of the histogram to the left.
When you’re done, click OK to close the dialog box.
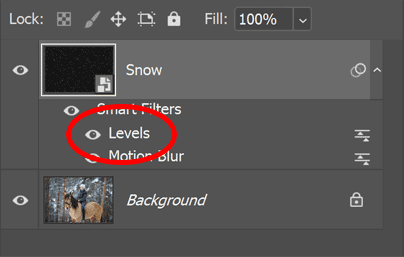
Back in the Layers panel, notice that Photoshop applies image adjustments as smart filters, even though they not technically filters.
This means you can double-click on the Levels adjustment to reopen the dialog box and adjust the sliders at any time.
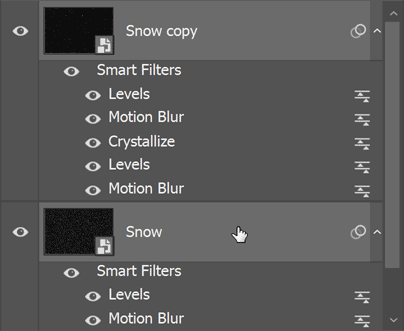
Step 10: Duplicate the snow
At this point, the initial falling snow effect is done. But let’s add some depth by creating a second layer of snow, this time with larger flakes so they appear closer to the camera.
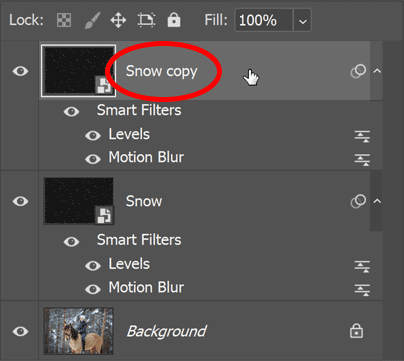
In the Layers panel, drag the Snow smart object down onto the Add New Layer icon to make a copy.
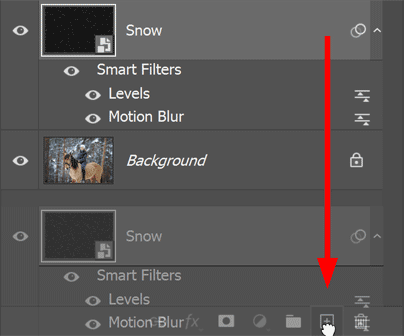
The copy appears above the original, along with copies of our Levels and Motion Blur smart filters already applied.
Step 11: Rotate the copy
Right now the new snowflakes are directly above the originals. To fix that, go to Edit > Transform > Rotate 180°.
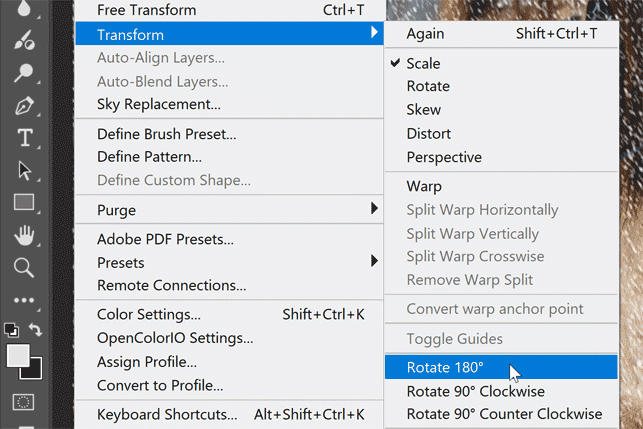
Rotating the new flakes doubles the amount of falling snow.

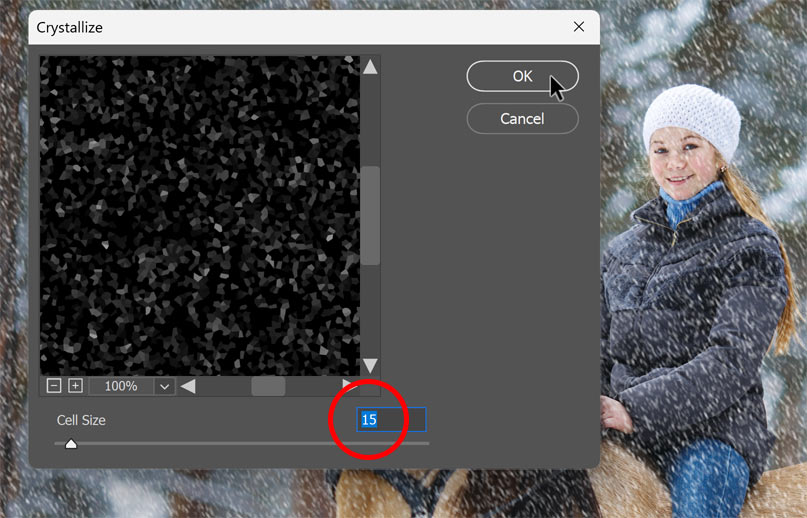
Step 12: Make the snowflakes larger with Crystallize
To make these snowflakes larger than the originals, go to Filter > Pixelate > Crystallize.

Increase the Cell Size to somewhere between 10 and 20. I’ll go with 15.
Then click OK to close the dialog box.
If the flakes look too big or too small, double-click on the Crystallize smart filter in the Layers panel and try a different Cell Size value.
Step 13: Add motion to the snowflakes
To add the falling motion to the larger flakes, go to Filter > Blur > Motion Blur.
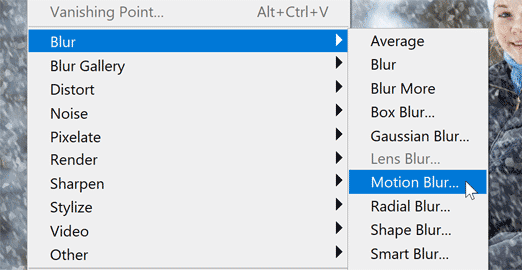
Leave the Angle the same so the snow continues falling in the same direction. But since these flakes are bigger, increase the Distance to around 20 pixels. Then click OK.
Step 14: Reduce and brighten the larger snowflakes
Finally, to reduce and brighten the larger flakes, go to Image > Adjustments > Levels.
Just like before, drag the black point slider to the right to reduce the number of flakes, and drag the white point slider to the left to brighten the ones that remain.
Then click OK to close the dialog box.
Here is the result. If you’re happy with the falling snow effect, you’re done!
But if you think the snow looks too bright, I’ll show you how to fix that next.

Step 15: Group the two Snow smart objects
To reduce the brightness of the snow, first place both Snow smart objects into a layer group.
In the Layers panel, with one of the Snow smart objects selected, hold Shift on your keyboard and click on the other one to select them both.
Then in the Menu Bar, go to Layer > Group Layers.
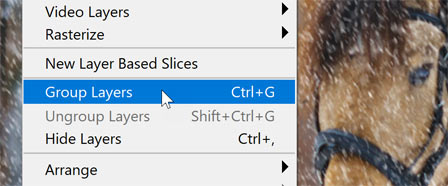
In the Layers panel, the new group appears with both Snow smart objects inside it.
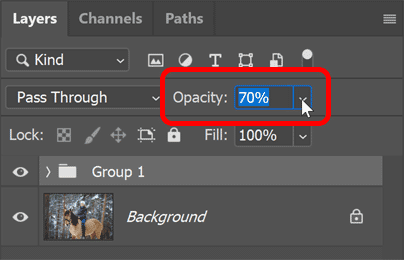
Reduce the snow’s brightness by lowering the Opacity of the group.
Summary
And there we have it. That’s how to add falling snow to your winter photos with Photoshop.
If you find my Photoshop tutorials helpful, they are all available to download as PDFs.
Related tutorials:
- Make it rain in your photos with Photoshop
- Add stars to your night skies with Photoshop
- Add a rainbow to your image with Photoshop