
Create A Custom Motion Trail From Your Subject With Photoshop
In this Photoshop effects tutorial, we'll learn how to add a sense of action and movement to an image by giving the main subject an easy to create motion trail!
No, we won't be using the standard Motion Blur filter for this since we've already covered it in a previous tutorial. Instead, we'll be creating a custom motion trail using multiple copies of our subject, along with one of Photoshop's blend modes and some simple layer opacity adjustments.
I'll be using Photoshop CS5 for this tutorial but any recent version will work.
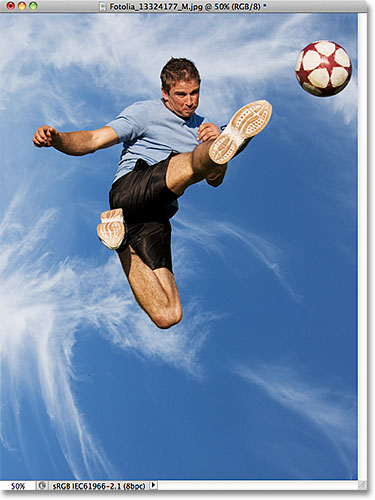
Here's the image I'll be starting with, which is available from the Fotolia image library:
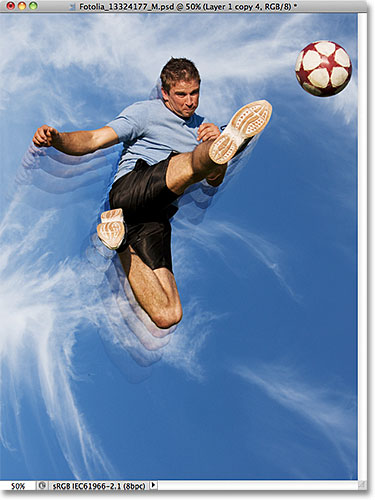
And here's how it will look after adding the motion trail effect to the athlete as he jumps to kick the ball:
How To Create A Custom Motion Trail Effect
Step 1: Select The Main Subject In The Photo
With the image newly opened in Photoshop, begin by selecting the main subject in your photo using the selection tool of your choice (Lasso Tool, Quick Selection Tool, Pen Tool, etc). For my image, I'll use the Quick Selection Tool which was first introduced in Photoshop CS3, but of course you can use a different selection tool if you prefer. I'll select the Quick Selection Tool from the Tools panel:

Then, with the Quick Selection Tool in hand, I'll click anywhere inside the athlete and, with my mouse button held down, I'll simply drag the tool around over top of him until he's completely selected. Regardless of which selection tool you used, you should see a selection outline around your subject when you're done:

Step 2: Make Two Copies Of Your Subject
With your subject selected, go up to the Layer menu in the Menu Bar along the top of the screen, choose New, then choose Layer via Copy, or press Ctrl+J (Win) / Command+J (Mac) on your keyboard to quickly select the same command with the shortcut:

Nothing will appear to happen in the document window, but Photoshop makes a copy of your subject and places it on a new layer named Layer 1 above the original image in the Layers panel (the original image is on the Background layer):

Once you have your first copy of the subject, make a second copy either by going back up to the Layer menu, choosing New, then choosing Layer via Copy or by pressing Ctrl+J (Win) / Command+J (Mac) on your keyboard. You'll now have two copies of your subject, each on its own layer, above the original photo:

Step 3: Select Layer 1
Click on Layer 1 in the Layers panel to select it:

Step 4: Select The Move Tool
Select Photoshop's Move Tool from the top of the Tools panel. You can also press the letter V on your keyboard to select it with the shortcut:

Step 5: Drag The Copy Away From The Subject
With the Move Tool selected, click on your main subject and, with your mouse button held down, drag a short distance away from the subject's original location in the direction the subject would have been coming from. In other words, if your photo is of someone running from left to right, drag a little towards the left to where the runner would have appeared if the photo had been taken a split second earlier. You'll see a copy of your main subject moving behind the original as you drag. In my case, I'm going to drag a short ways down and to the left, as if that's the direction the man is jumping from. We can see the copy of him appearing just behind the original:

Step 6: Change The Layer Blend Mode To Soft Light
Go up to the Blend Mode option in the top left corner of the Layers panel and change the layer's blend mode from Normal to Soft Light:

This blends the copy behind the subject in with the background, creating a faded "ghost" image of the person:

Step 7: Drag Out Another Copy In The Same Direction
With the Move Tool still active, hold down your Alt (Win) / Option (Mac) key, then click inside the image and drag in the same direction as you did a moment ago. Holding the Alt (Win) / Option (Mac) key down tells Photoshop to make a copy of the layer as you drag with the Move Tool, which gives us another copy of our subject. Drag this new copy in the same direction as before but make the distance between them a bit wider than you did previously:

Step 8: Lower The Opacity Of The Layer
If we look in the Layers panel, we see that we now have three copies of our main subject, each on its own layer. The one we just created is selected and highlighted. We need the new copy of our subject to appear more faded in the image than the previous one, so lower its Opacity value down to around 65%:

The motion trail effect now begins to take shape, with the copies appearing more faded as they move further from the subject:

Step 9: Repeat Steps 7 And 8 A Few More Times
To complete the motion trail effect, we simply need to repeat the same couple of steps (steps 7 and 8) two or three more times. Hold down your Alt (Win) / Option (Mac) key, click inside the document with the Move Tool and drag out another copy of the subject in the same direction, making the distance between copies a little bit wider each time. Then lower the opacity of the new copy so it fades out more than the previous one. I'm going to drag out two more copies of my subject. I'll lower the opacity of the first copy down to 35% and the second one to 15% so it's just barely visible. We can see in the Layers panel that I now have five copies of my subject in total:

If you need to reposition any of the copies after they've all been added, simply click on the copy's layer in the Layers panel to select it. Then either click inside the document with the Move Tool and drag the copy around with your mouse or press the arrow keys on your keyboard to make subtle adjustments. You may need to experiment with the opacity values for the layers to get the fade effect looking right with your particular image. Again just click on the layer you need in the Layers panel, then enter a different value in the Opacity option.
Here, after making some minor adjustments to the spacing between the copies, is my final "motion trail" effect: