
High Speed Motion Trail Effect With Photoshop
In this Photo Effects tutorial, we'll learn how to add a sense of speed to an object using an easy to create motion blur effect! This "speed trail" effect is very popular in sports photography since it's a great way to add motion, direction and excitement to an image, creating the illusion that an athlete, for example, is blazing past the competition at super human speed.
Of course, this effect works just as well with a photo of your kids running in the backyard, or people dancing at a party, or any image where the subject should appear to be moving. I'll be working with Photoshop CS4 for this tutorial, but you can create this effect with any version of Photoshop.
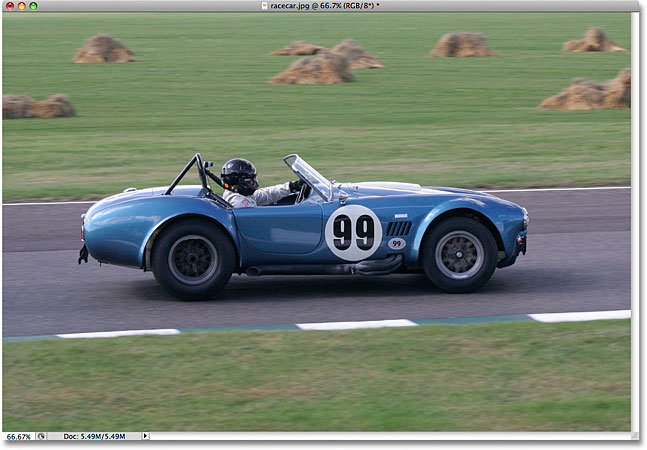
Here's the image I'll be using:
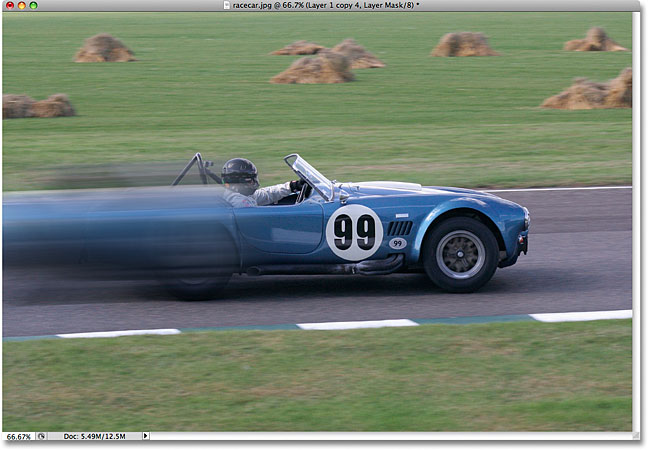
Here's how the image will look after giving the racecar a high speed motion trail:
How To Create A High Speed Motion Trail
Step 1: Select The Object You Want To Apply The Motion Blur To
In many of our photo effects tutorials, the first step is to protect our original image from harm by creating and then working on a duplicate of the Background layer. For our motion blur effect though, there's no need to do that because we're not going to be working on the entire image. Instead, we're going to apply the motion blur only to the main subject in the photo. To do that, we'll need to separate the main subject from the rest of the image and place it on its own layer. In my case, I want to apply the motion blur to the racecar, so the first thing I need to do is draw a selection around the racecar.
Use the selection tool of your choice (Lasso Tool, Pen Tool, etc.) to draw a selection around your main subject. When you're done, you should see a selection outline (sometimes called "marching ants") around the entire object (or person, whatever the case may be). Try to make as accurate a selection as possible. For best results, I highly recommend using the Pen Tool. Check out our Making Selections with the Pen Tool tutorial for full instructions on how to use it. You can also read our Full Power Of Basic Selections In Photoshop tutorial for help with getting the most out of Photoshop's basic selection tools:

Step 2: Copy The Selected Area To A New Layer
With the subject now selected, we need to copy it to its own layer. Copying a selection to a new layer is done exactly the same way as copying an entire layer. The only difference is that only the area inside the selection gets copied. Go up to the Layer menu at the top of the screen, choose New, and then choose Layer via Copy:

For a faster way to copy a layer or selection, simply press the keyboard shortcut Ctrl+J (Win) / Command+J (Mac). Nothing will appear to have happened to the image in the document window, but if we look in the Layers palette, we can see that we now have a new layer, which Photoshop has automatically named "Layer 1", and if we look in the new layer's preview thumbnail to the left of the layer's name, we can see that the layer contains only the part of the image we selected (in my case, it contains the racecar). The rest of the layer is transparent, which is represented in Photoshop by a gray and white grid pattern:

Step 3: Apply The Motion Blur Filter
With our subject now on its own layer and separated from the rest of the image, we can apply our motion blur effect to it. Go up to the Filter menu, choose Blur, and then choose Motion Blur:

This brings up Photoshop's Motion Blur filter dialog box. First, set the Angle of the motion blur streaks so that they match the direction your subject is moving in. In many cases, the direction movement will be horizontal, either left to right or right to left, so an angle of 0° would work perfectly. In my case, the racecar appears to be moving uphill slightly, so I need to set my angle to around 2°. You can use the angle control wheel to the right of the input box to help set the angle by clicking inside of it and dragging your mouse to rotate it, keeping an eye on your image in the document window for a preview of the angle as you're rotating the wheel. You can also simply type a value for the angle directly into the input box and then use the Up and Down arrow keys on your keyboard to increase or decrease the angle. Hold down your Shift key as you press the Up or Down arrows to increase or decrease the angle in 10° increments.
Next, drag the Distance slider at the bottom of the dialog box to set the length of the motion blur streaks. Dragging the slider all the way to the right will give you the longest streaks and is usually what you want for this effect, but again, keep an eye on your image as you drag the slider for a preview of the results:

Click OK when you're done to exit out of the Motion Blur dialog box and apply the blurring to the image. Your photo should now look something like this:

Step 4: Duplicate The Motion Blur Layer Several Times
We now have the beginnings of our motion blur effect, but at the moment, the blur streaks are too faint. We need to intensify them, and an easy way to do that is to simply duplicate the layer that they're on ("Layer 1"). Each time we duplicate the layer, the blur streaks will become stronger and more visible in the image since we're piling copies of the blur streaks on top of each other. We'll probably need to make a few copies of the layer to really bring them out, so press Ctrl+J (Win) / Command+J (Mac) three or four times in a row to quickly create multiple copies of "Layer 1". Each time you duplicate the layer, you'll see the blur streaks intensify in the image. I'm going to create four copies of "Layer 1" by pressing the keyboard shortcut four times. I can see in my Layers palette that I now have four copies of "Layer 1" sitting above the original:

The motion blur streaks are now much more intense, to the point where the racecar is practically hidden behind them:

Step 5: Select All Motion Blur Layers At Once
Let's merge all of our motion blur layers into a single layer so we can work on the blur effect more easily. To do that, click on the top layer in the Layers palette to select it if it isn't selected already (selected layers are highlighted in blue). Then hold down your Shift key and click on "Layer 1" directly above the Background layer to select it. This will select the top layer, the original "Layer 1" and all layers in between. You'll see them all highlighted in blue in the Layers palette, indicating that they're all selected:
Step 6: Merge The Layers
With the layers selected, go up to the Layer menu at the top of the screen and choose Merge Layers:

Everything will still look the same in the image, but we're back to having only two layers in the Layers palette, with all of our motion blur layers now merged into a single layer above the Background layer:

Step 7: Add A Layer Mask
The only remaining problem with our effect is that the motion blur streaks are still covering up the entire subject. We want it to appear as if the streaks are trailing behind the subject, with the subject itself emerging out from them as it blazes forward. We need to hide the part of the streaks that we don't need, and for that, we'll use a layer mask. With the motion blur layer selected, click on the Layer Mask icon at the bottom of the Layers palette. A layer mask thumbnail will appear to the right of the layer's preview thumbnail:

Step 8: Select The Gradient Tool
Grab the Gradient Tool from the Tools palette, or simply press the letter G on your keyboard to select it with the shortcut:

Step 9: Select The Black To White Gradient
With the Gradient Tool selected, you'll see the Options Bar at the top of the screen change to show various options for working with gradients. Click on the small down-pointing arrow to the right of the gradient preview area, which pops open a small gradient selection box, and choose the Black to White gradient, third one from the left, top row. If you have Tool Tips enabled in Photoshop's Preferences (they're enabled by default), you'll see the name of the gradient appear when you hover your mouse cursor over it:

Step 10: Drag Out A Black To White Gradient On The Layer Mask
You should see a white highlight border around the layer mask thumbnail in the Layers palette, which indicates that the layer mask, not the layer itself, is currently selected. If you don't see the highlight border around the thumbnail, click on it to select it. Then, to hide the unwanted areas of the motion blur streaks and create the illusion that the subject is emerging from them, simply click at the point on the subject where you want the blur streaks to begin fading into view, then drag out a short transition area which will become the "fade in" area for the streaks. The point where you release your mouse button will be the area where the blur streaks become 100% visible.
In my case, I'm going to click on the racecar just in front of the driver, then I'll drag towards the back of the car to create a short transition area for the blur streaks to fade in, releasing my mouse button just behind the driver. Make sure you follow the same angle as the blur streaks as you drag out the gradient:

When you release your mouse button, Photoshop draws the gradient. Since we drew the gradient on the layer mask, not on the image itself, you won't see the gradient in the document window but you can see it if you look at the layer mask thumbnail in the Layers palette. The black area on the right represents the area in the image where the blur streaks are hidden, the white area on the left is where they're fully visible, and the actual gradient area between them is where the blur streaks fade into view:

Here's my image after dragging out the gradient on the layer mask. The racecar is now blazing towards the finish line, leaving a motion blur trail behind it: