
Old-Fashioned, Hand-Tinted Photo Effect With Photoshop
In this Photoshop Effects tutorial, we're going to learn how to easily create an old-fashioned, hand-tinted photo effect. All it takes is an adjustment layer, a layer blend mode, some blurring, a slider bar, and a couple of minutes of your time.
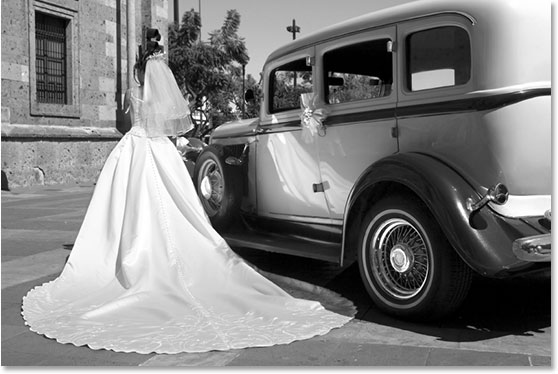
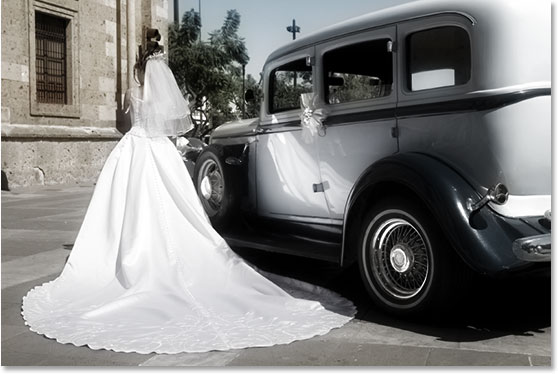
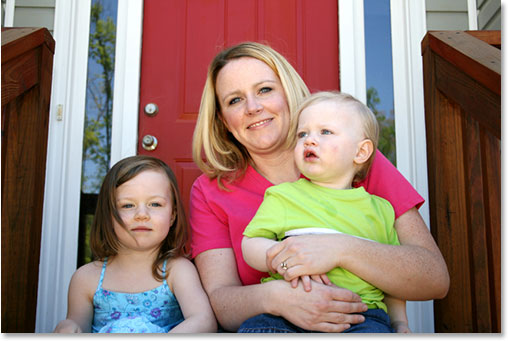
Here's the photo I'll be using:

And here's the "hand-tinted" effect we're after:

This tutorial is from our Photo Effects series. Let's get started!
Step 1: Duplicate The Background Layer
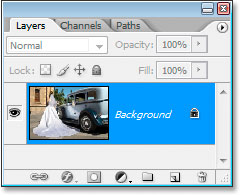
With my image open in Photoshop, I can see in my Layers palette that I currently have just one layer, the Background layer, which contains my original image:
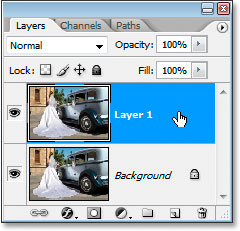
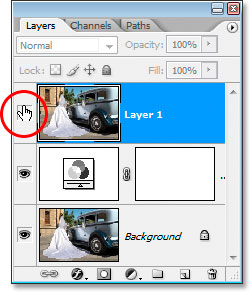
I need to make a duplicate of my Background layer, so I'll use the keyboard shortcut Ctrl+J (Win) / Command+J (Mac). I now have two layers in the Layers palette, the original Background layer and the copy above it, which Photoshop names "Layer 1":
Step 2: Hide The Background Copy Layer For Now
We don't need to actually see our Background copy layer just yet, so click on the Layer Visibility icon (the eyeball) on the left of "Layer 1" in the Layers palette to temporarily hide it in the Document Window:
Step 3: Add A Channel Mixer Adjustment Layer Above The Background Layer
Click back on the original Background layer to select it, and then click the New Adjustment Layer icon at the bottom of the Layers palette:
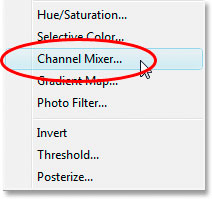
Choose Channel Mixer from the list that appears:
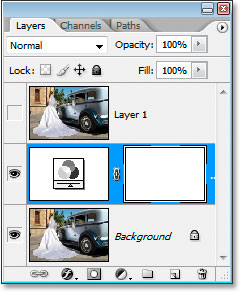
The Channel Mixer adjustment layer should now appear between the Background layer and "Layer 1":
Step 4: Use The Channel Mixer To Create A Black And White Version Of The Image
We're going to use the Channel Mixer to create a nice black and white version of the image. We could simply desaturate the image, but that usually gives us poor quality results. The Channel Mixer allows us to create our own custom black and white version and adjust it until we're happy with how it looks. Also, by using the adjustment layer version of the Channel Mixer, we're not touching the original image in any way.
When the Channel Mixer dialog appears, the first thing you want to do is select the Monochrome option in the bottom left corner:
You'll see the image turn black and white in the Document Window when you select it. Then drag the Red, Green and Blue slider bars left and right to create a custom black and white version of the image. The idea is to keep all three values totaling 100%, which will give you the brightest possible image without "blowing out" any of the details in the highlights. The values you end up choosing for your image will depend entirely on the image itself. Here I've chosen 10% for Red, 45% for Green and 45% for Blue, which gives me a black and white version I'm happy with. Again, your numbers will depend on the image you're working with.
If you want to learn more about what exactly these Red, Green and Blue channels are, check out the RGB And Color Channels Explained section of the site.
Click OK when you're done to exit out of the Channel Mixer. Here's my image after converting it to black and white using the Channel Mixer:
Step 5: Make "Layer 1" Visible Again
Click on "Layer 1" in the Layers palette to select it, then click on its Layer Visibility icon once again to make it appear in the Document Window:
When you do that, it will temporarily hide the black and white version from view:

Step 6: Change The Layer Blend Mode To "Soft Light"
With "Layer 1" selected, go up to the blend mode options in the top left of the Layers palette. Click on the down-pointing arrow to the right of the word "Normal" and change the blend mode to Soft Light:
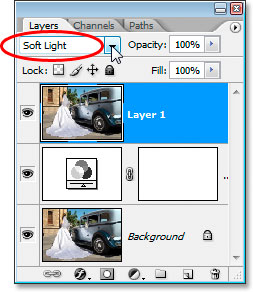
This gives us the start of our hand-tinting effect:

Step 7: Apply The Gaussian Blur Filter
Still with "Layer 1" selected, go up to the Filter menu at the top of the screen, choose Blur, and then choose Gaussian Blur. We're going to apply some blurring to the tinting so it looks more like it was done by hand and not by a computer. When the Gaussian Blur dialog box appears, enter in a Radius value of about 10 pixels:

Here's the image after applying the Gaussian Blur filter:
Step 8: Bring Back Some Of The Shadow Detail With The "Blend If" Sliders
Things are looking good, except that I've lost some of the detail in the shadow areas of the image. I need to bring it back, and I'm going to do that by hiding the darkest parts of the image on "Layer 1" and letting the black and white version show through. How am I going to do that? By using Photoshop's Blend If sliders.
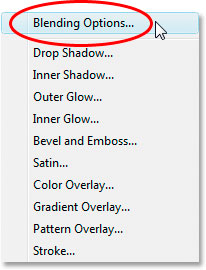
Click on the Add Layer Style icon at the bottom of the Layers palette:
Choose Blending Options... from the top of the list that appears:
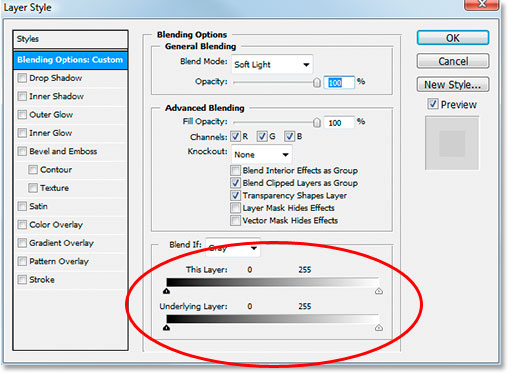
This will bring up the Layer Style dialog box. The "Blend If" sliders are at the very bottom:
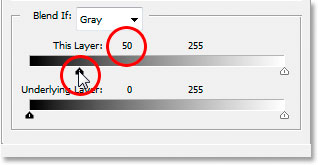
Step 8: Drag The Upper Left Slider Towards The Right To Bring Back The Shadow Detail
Drag the top left black slider to the right to bring back the shadow detail. As you drag more and more towards the right, you'll see more and more of the detail in the shadows re-appearing. That's because "Layer 1" is blocking the details in the shadows, so what we're doing by dragging this black slider towards the right is telling Photoshop to hide the darkest areas in "Layer 1" and allow the black and white image beneath it to show through in those areas instead. Continue dragging towards the right until you've brought back all the detail in the dark parts of the image. Here I've dragged mine to 50:
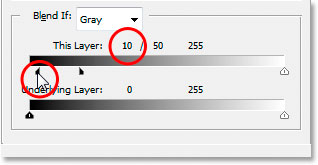
The only problem now is that there's harsh lines along the areas where "Layer 1" and the black and white image beneath it meet. We need to soften those areas and create a nice transition between them, and we can do that by holding down Alt (Win) / Option (Mac), clicking on that same black slider and dragging it back towards the left. Holding Alt/Option will split the slider in two, and you'll be dragging the left half of it towards the left. As you drag the left half further towards the left, you'll be increasing the distance between the left and right halves, and that space in between creates the soft transition area we're looking for in the image. I've dragged my left half of the slider back to a value of 10:
When you're done, click OK to exit out of the Layer Style dialog box, and you've completed the effect!
Here's my original image once again:
And here's my finished "old-fashioned, hand-tinted" effect:
As I mentioned, you can use this tinting effect on all sorts of images. Here's a different photo:
And here it is after applying the same effect:

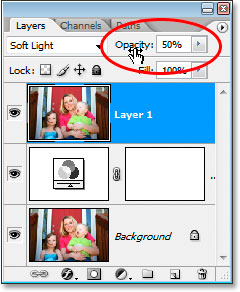
In the case of the second image, I fine-tuned the effect by lowering the opacity of "Layer 1" to 50% to reduce the amount of color in the image:
If you need to add more color to the image, simply lower the opacity of the Channel Mixer adjustment layer. Not only is this effect easy to create, it's also easy to adjust and fine-tune as needed.
And there we have it! For more old fashioned photo effects, check out our Turn A New Photo Into An Old Photo and Old Paper Background Texture tutorials. Or visit our Photo Effects section for more Photoshop effects tutorials!