
Photoshop Old Paper Background Texture
In this Photoshop Effects tutorial, we'll learn how to create a simple old paper texture, great for use as a scrapbooking background for displaying old, antique photos! I'll be using Photoshop CS5 here but any recent version of Photoshop will work.
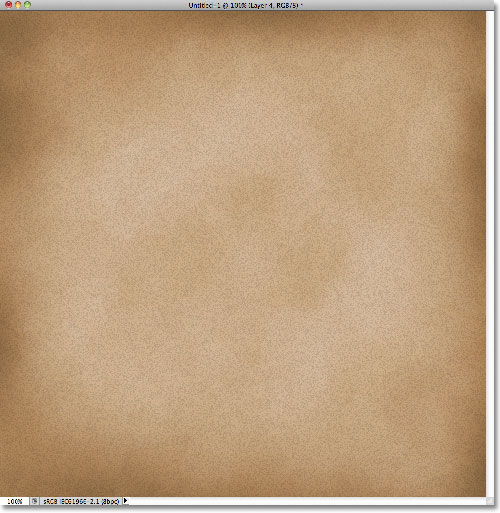
Here's what our old paper texture will look like when we're done:
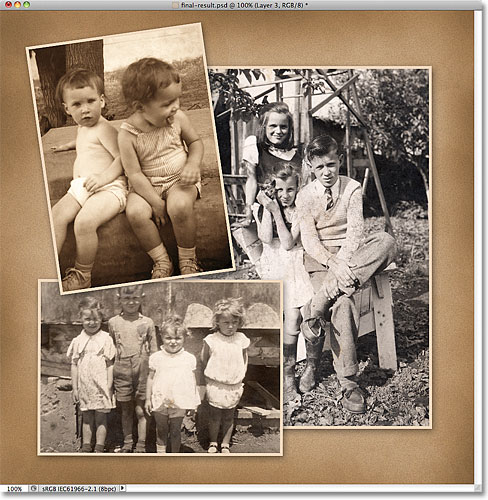
And here's just one example of how it can be used as a background for a photo layout:
How To Create An Old Paper Background Texure
Step 1: Create A New Photoshop Document
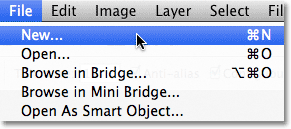
Let's begin by creating a new document for our paper texture. Go up to the File menu in the Menu Bar along the top of the screen and choose New:
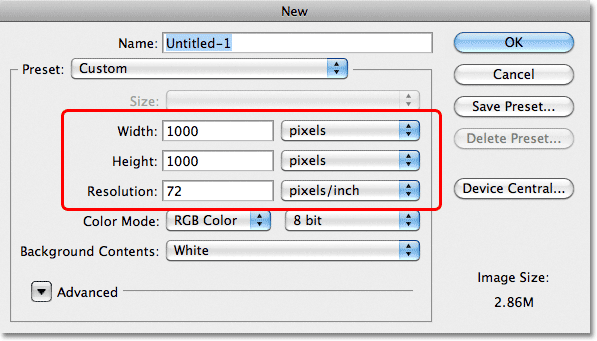
This opens the New Document dialog box. Enter the width, height and resolution you need. For this tutorial, I'll enter 1000 pixels for both the Width and Height, and I'll leave my Resolution set to 72 pixels/inch. If you're planning to print the final result, you'll probably want to enter width and height values in inches, and you'll want to set your resolution to 240 pixels/inch or higher. Click OK when you're done to close out of the dialog box. Your new Photoshop document will appear on the screen:
Step 2: Fill The Document With A Light Brown
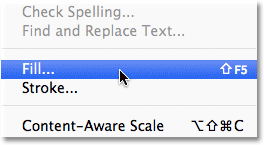
At the moment, our new document is filled with solid white. Let's change the color. Go up to the Edit menu at the top of the screen and choose Fill:
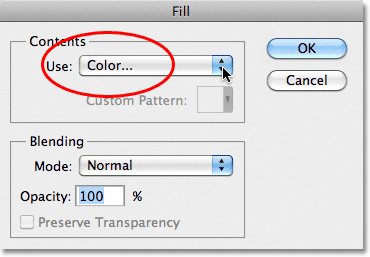
This opens the Fill dialog box. Set the Use option at the top of the dialog box to Color:
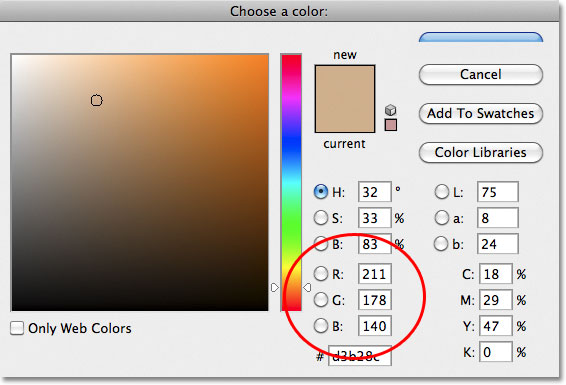
As soon as you select Color, Photoshop will pop open the Color Picker which is where we choose the color we want to fill the layer with. Select a light brown. If you want to use the same color I'm using, look for the R, G and B options (which stand for Red, Green and Blue) near the bottom center of the dialog box, then set the R value to 211, G to 178 and B to 140:
Click OK to close out of the Color Picker, then click OK to close out of the Fill dialog box. Photoshop fills the document with light brown:

Step 3: Add A New Layer
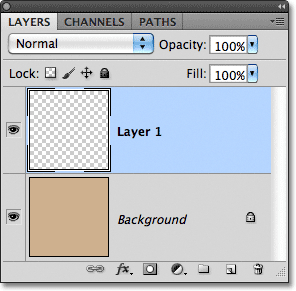
Click on the New Layer icon at the bottom of the Layers panel:
Nothing will happen in the document window, but a new blank layer named Layer 1 appears above the Background layer in the Layers panel:
Step 4: Apply The Clouds Filter
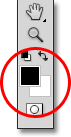
We're going to use this layer to add some texture to the paper. First, make sure your Foreground and Background colors are set to their defaults by pressing the letter D on your keyboard. This resets your Foreground color to black and your Background color to white, just in case they were set to something different. The reason we're doing this is because the filter we're about to run uses the Foreground and Background colors. You can see what the colors are currently set to by looking at the Foreground and Background color swatches near the bottom of the Tools panel:
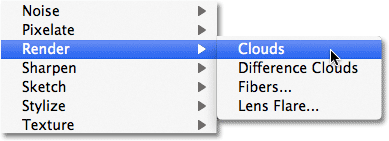
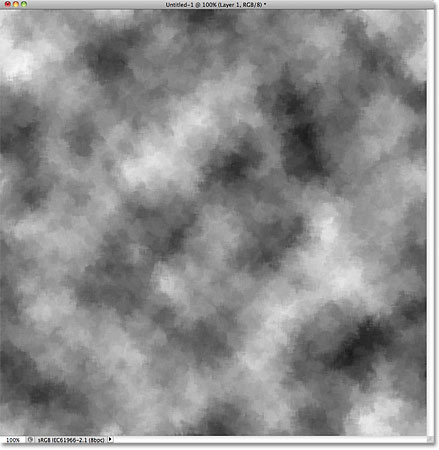
With the Foreground and Background colors reset, go up to the Filter menu at the top of the screen, choose Render, and then choose Clouds:
There are no additional options for the Clouds filter, so Photoshop will simply go ahead and run it, adding random "clouds" to the layer. Your document will look something like this:

Step 5: Apply The Spatter Filter
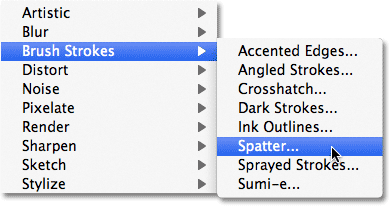
Go back up to the Filter menu and this time choose Brush Strokes, then choose Spatter:
This opens Photoshop's Filter Gallery showing a large preview of the effect on the left, with the Spatter options appearing in the top right corner of the dialog box. Drag the sliders for both the Spray Radius and Smoothness options all the way to the right so they're both maxed out:
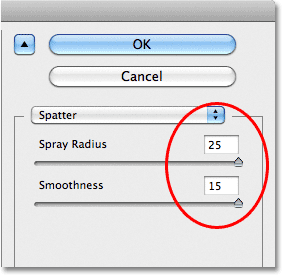
Click OK to close out of the Filter Gallery, at which point Photoshop applies the Spatter filter to the clouds, giving them more of a rough, textured look:
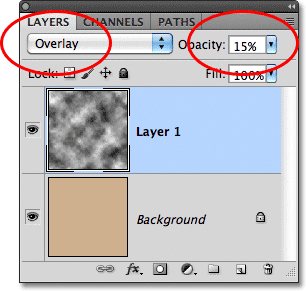
Step 6: Change The Blend Mode To Overlay And Lower The Opacity
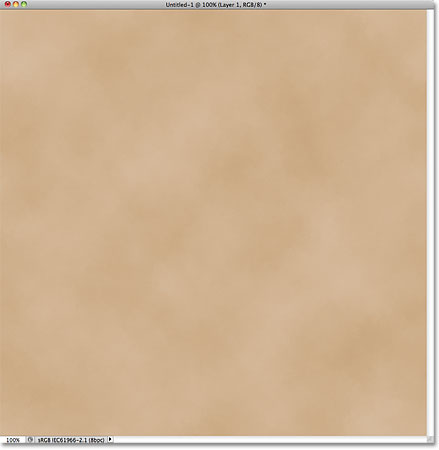
In the top left corner of the Layers panel, you'll find the Blend Mode option which by default is set to Normal. Change the blend mode to Overlay. This blends the clouds texture in with the light brown color on the layer below it. Directly across from the Blend Mode option is the Opacity option, set to 100%. This controls the transparency of the layer. Lower the opacity value down to around 15% to give the texture a much more subtle appearance in the document:
Your image should now look something like this:
Step 7: Add Another New Layer
Click once again on the New Layer icon at the bottom of the Layers panel to add another new blank layer to the document. It will appear in the Layers panel as Layer 2:
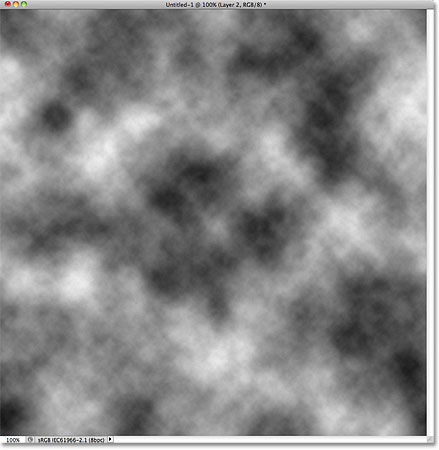
Step 8: Apply The Clouds Filter Again
Just as we did back in Step 5, apply the Clouds filter to the new layer by going up to the Filter menu at the top of the screen, choosing Render, and then choosing Clouds. A different cloud pattern will appear in the document:
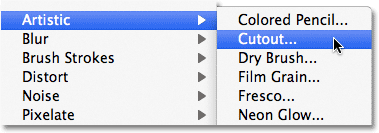
Step 9: Apply The Cutout Filter
We'll use this second clouds pattern to add some stains to the paper. Go up to the Filter menu, choose Artistic, and then choose Cutout:
This again opens Photoshop's Filter Gallery, but this time with the options for the Cutout filter in the top right corner. Set the Number of Levels to 4, Edge Simplicity to 3 and Edge Fidelity also to 3:
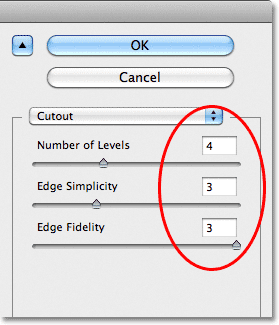
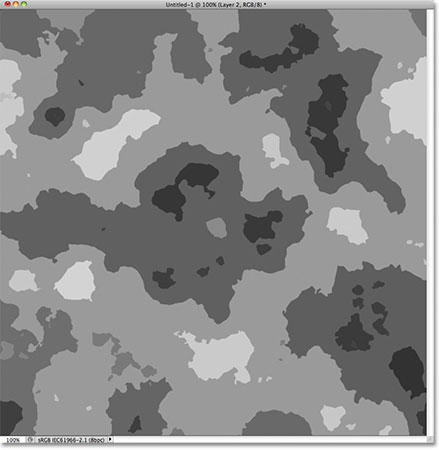
Click OK to close out of the Filter Gallery. Photoshop applies the Cutout filter to the clouds pattern, which should now look something like this in your document:
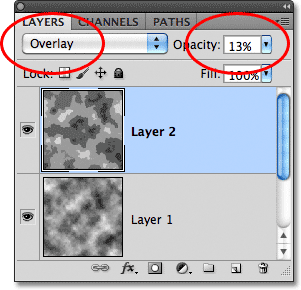
Step 10: Change The Blend Mode To Overlay And Lower The Opacity
As we did in Step 8, change the blend mode for the layer from Normal to Overlay, then lower the opacity of the layer, this time to somewhere between 10-15% to reduce the intensity of the stains. I'm going to lower my opacity value to 13%:
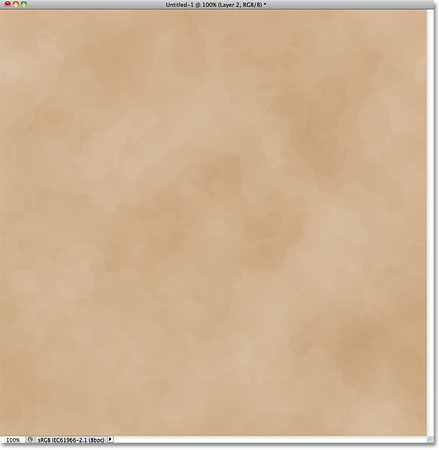
Here's the document after adding the stains:
Step 11: Merge The Existing Layers Onto A New Layer
Hold down your Alt (Win) / Option (Mac) key, then with the key still held down, go up to the Layer menu at the top of the screen and choose Merge Visible:
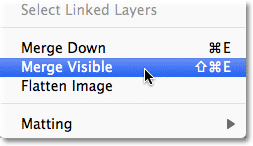
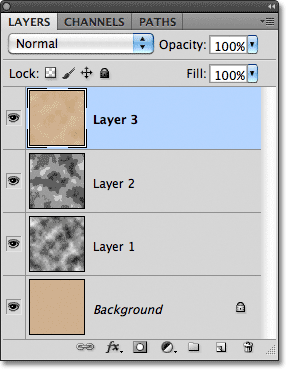
Normally, the Merge Visible command would have flattened all of our layers onto the Background layer, but by holding down the Alt (Win) / Option (Mac) key while selecting the command, we told Photoshop to merge the layers onto a brand new layer above them in the Layers panel (Layer 3):
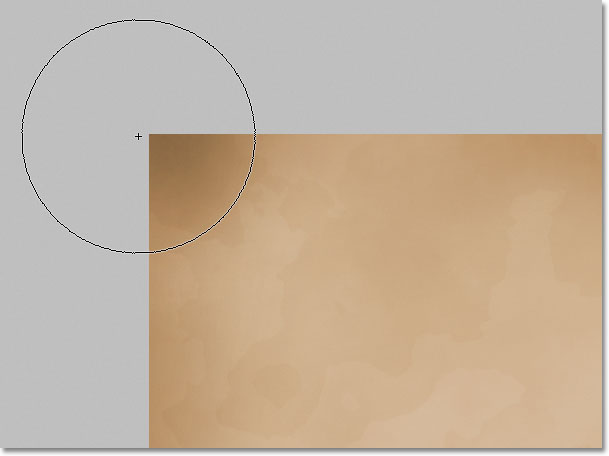
Step 12: Select The Burn Tool
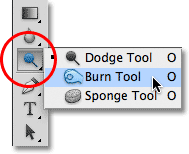
Select Photoshop's Burn Tool from the Tools panel, which we're going to use to darken the paper's edges. By default, it's nested behind the Dodge Tool, so click on the Dodge Tool's icon and hold your mouse button down for a second or two until a fly-out menu appears showing the other tools available in that spot, then select the Burn Tool from the list:
Step 13: Paint With The Burn Tool To Darken The Edges
Press the letter F on your keyboard to switch to the first of Photoshop's fullscreen modes, which will make this next step easier (pressing the letter F a couple more times will cycle through the various screen modes and bring you back to the document window later). With the Burn Tool selected, look up in the Options Bar at the top of the screen and make sure the Range option is set to Midtones and Exposure is set to 50% (these are the default settings):
Then, with a large, soft-edge brush (the Burn Tool is considered a brush), paint around the edges of the paper to darken (or "burn") them. To change the size of the brush, press the left bracket key ( [ ) on your keyboard to make the brush smaller, or the right bracket key ( ] ) to make it larger. To change the hardness of the brush edges, hold down your Shift key and press the left bracket key to soften them. Press the key a few times to set the brush edge hardness to 0%, which will give you the softest edges possible.
For best results, keep the center of the Burn Tool's brush cursor in the gray pasteboard area surrounding the paper and only allow the outer edges of the cursor to pass over the paper. Passing over the same area again will darken that area even more. Here, I'm painting over a corner to darken it. Notice how the center of the cursor (the small target symbol) remains in the pasteboard area:
Use the left and right bracket keys on your keyboard to vary the size of the brush as you paint around the edges to create a more random looking result. If you make a mistake and you're not happy with how your last brush stroke looks, press Ctrl+Z (Win) / Command+Z (Mac) to undo it, or press Ctrl+Alt+Z (Win) / Command+Option+Z (Mac) repeatedly to undo multiple strokes.
I'll press the letter F on my keyboard a couple of times to switch back to the document window screen mode, and here's my image after darkening the edges:

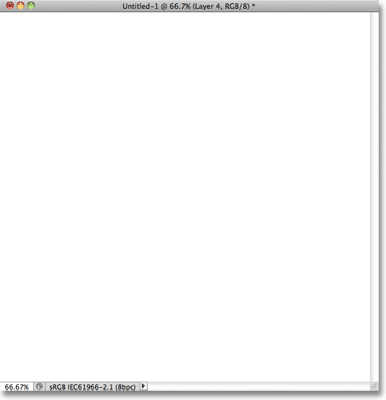
Step 14: Add Another New Layer
Click again on the New Layer icon at the bottom of the Layers panel to add another new layer, which will appear above Layer 3 in the Layers panel. Photoshop will name it... you guessed it... Layer 4:
Step 15: Fill The New Layer With White
Press Ctrl+Backspace (Win) / Command+Delete (Mac) on your keyboard. This is a quick way to instantly fill a layer with the current Background color, which in our case happens to be white. The document will temporarily appear filled with solid white:
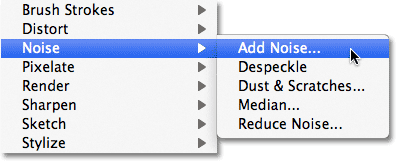
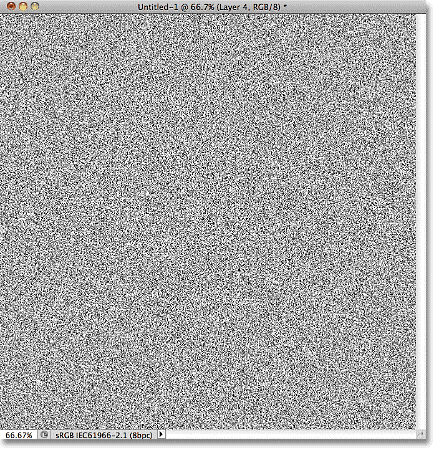
Step 16: Add Noise
Go up to the Filter menu, choose Noise, then choose Add Noise:
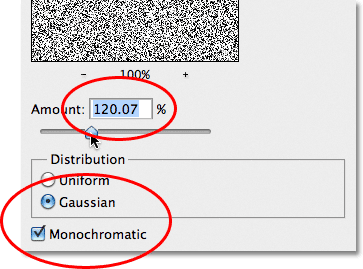
This opens the Add Noise filter's dialog box. Increase the Amount value to around 120%, although the specific value doesn't really matter as long as you're adding lots of noise. Make sure the Gaussian and Monochromatic options are both selected at the bottom of the dialog box:
Click OK to close out of the dialog box. Photoshop will fill the layer with noise:
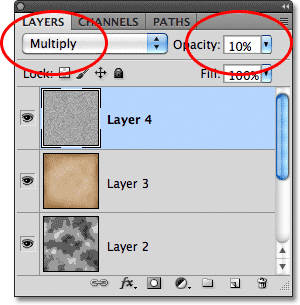
Step 17: Change The Blend Mode To Multiply And Lower The Opacity
Finally, to blend the noise in with the paper texture to give it a grainy look, change the blend mode of Layer 4 to Multiply and lower it's opacity down to around 10%:
And with that, our old paper texture is complete! Here's the result with the noise now blended in:
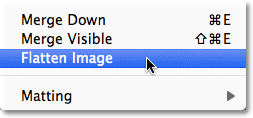
Step 18: Flatten And Save The Texture
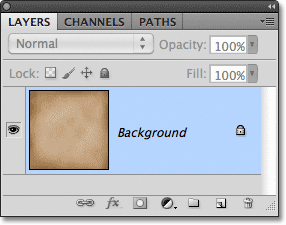
Since we're done creating the texture and there's really nothing we can go back and change at this point, let's simplify things by flattening the file. Go up to the Layer menu and choose Flatten Image:
This flattens all the layers onto the Background layer, which will make it easier to use the texture as a background whenever we need it:
With the image flattened, save the file to your computer by going up to the File menu and choosing Save As. Give the file a descriptive name like "Old Paper Texture.PSD" and make sure you set the Format to Photoshop so you're saving a Photoshop document. This will keep the texture's image quality intact for later use.