
Blend Photos With Apply Image In Photoshop
In this Photoshop tutorial, we're going to learn how easy it is to blend photos together using Photoshop's Apply Image command to give us all kinds of different results and effects. The Apply Image command is one of those features in Photoshop that, for one reason or another, doesn't get used very often, even by people who have been using Photoshop for years. Many people don't know it's there, or if they happened to stumble across it one day while browsing through Photoshop's Menu Bar, took one look at it, said "I don't get it" and moved on. And that's unfortunate, since as we'll see in this tutorial, not only is the Apply Image command one of the most powerful and flexible photo blending tools in all of Photoshop, it also happens to be very easy to use and a whole lot of fun!
Basically, Apply Image allows us to blend, or "apply", a layer and channel from one image with a layer and channel of another image. It's similar to using layer blend modes to blend layers together in the Layers palette, with the added ability to blend individual channels together as well. This not only gives us much more control over how the images are blended, but also opens up far more creative possibilities and gives us better overall results.
We're going to look at the basics here of how Apply Image works, but it's important to keep in mind that this is only scratching the surface of what you can do with this amazing tool. We're going to be blending two images together in this tutorial, but you can use it to blend as many images together as you like, using different channels and blend modes for each one! You can even blend channels from different color modes together. Try leaving one image in RGB mode and converting the other image to a different color mode, like CMYK or Lab, then blending the channels together to see what you get! Or try a different blend mode for a completely different effect!
Okay, we're getting a little ahead of ourselves. First, we need to learn how Apply Image works. Before we begin though, there's one very important thing you need to know. Apply Image will only work with images that have the exact same pixel dimensions. By that, I mean that if one image is 800 pixels wide by 600 pixels high, the second image also has to be 800 pixels wide by 600 pixels high. If you're working with high resolution images, your pixel dimensions will be much higher but both images will still need to have the exact same dimensions. If you're working with photos directly from your digital camera and you haven't cropped or resized them, you should be good to go, but it's very important that all the images you want to use are the same size before you begin. You'll know rather quickly if they're the same size or not because if they're not, the Apply Image command won't even recognize them. Make sure you check the size of each image in the Image Size dialog box by selecting each one separately, then going up to the Image menu at the top of the screen and choosing Image Size. Resize any images as needed.
Step 1: Open The Images You Want To Use
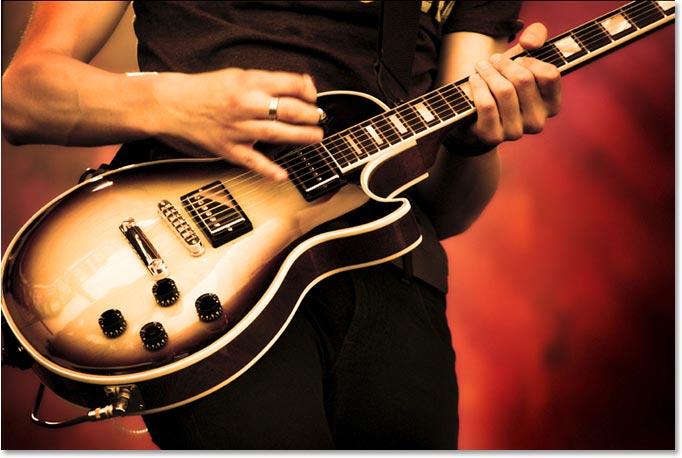
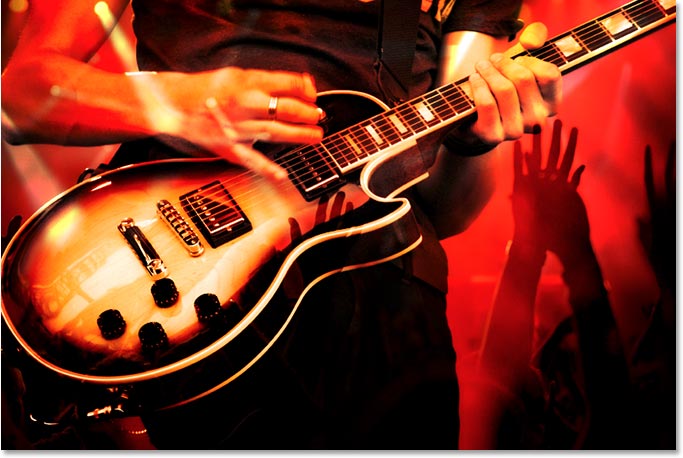
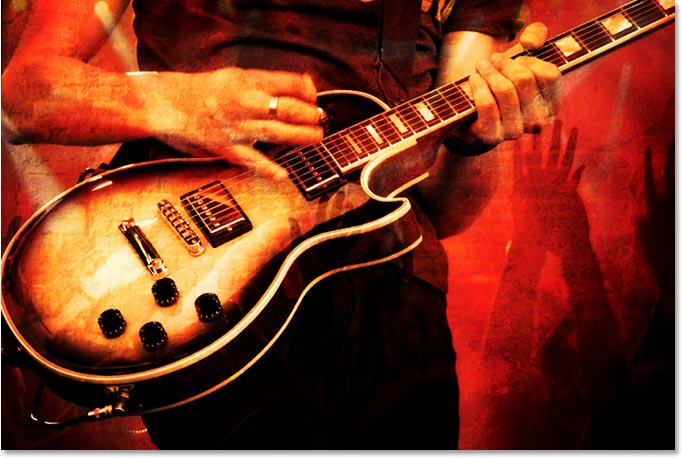
Before we can blend our images together, we first need to have them open in Photoshop, so go ahead and open the images you want to use. I'll be blending two images together. Here's my first image:
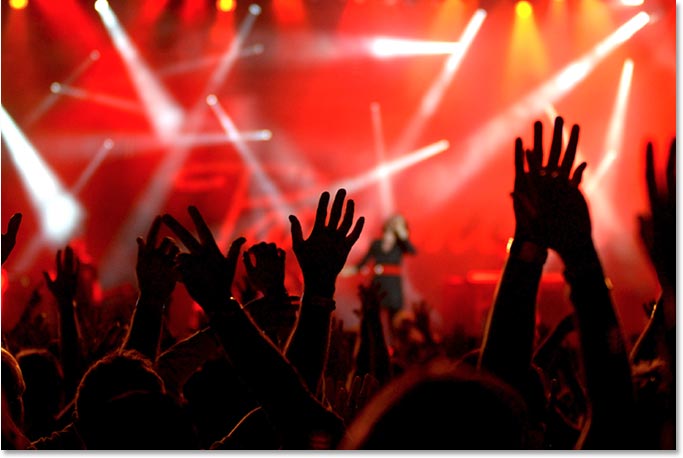
And here's the image I'll be blending it with:
Step 2: Select The Photo You Want To Use As Your "Target" Image
With both of my images open, I need to select the one that I want to use as my primary image, or in other words, the image that will have the other image applied to it. The Apply Image command refers to this primary or base image as the Target image, while the image you're applying to it is known as the Source image. I'm going to use my guitar player photo as my target image, so I'll click anywhere in its document window to select it, which will move it in front of my other image in Photoshop:

Step 3: Duplicate The Background Layer Of The Target Image
Currently, my target image (as well as my source image) is made up of only one layer, the Background layer, which we can see if we look in the Layers palette:
The Background layer contains our original image information which is something we never want to touch in case we need to fall back on it later, so the first thing we always do when working on an image is duplicate the Background layer. To do that, use the keyboard shortcut Ctrl+J (Win) / Command+J (Mac). If we look again in our Layers palette, we can see that we now have the original Background layer on the bottom, plus we have a copy of it, which Photoshop has named "Layer 1", above it:

Step 4: Open The Apply Image Command
Now that we've safely duplicated our Background layer, go up to the Image menu at the top of the screen and choose Apply Image. Photoshop will pop up the Apply Image dialog box. If you've never seen the Apply Image dialog box before, it can seem a little confusing at first, but it's really quite simple. Let's look at what the dialog box is telling us and what options it's giving us.
The Target Image, Layer and Color Mode
In the center of the dialog box, it shows the name of your target image, along with the name of the layer you had selected when you opened the Apply Image command. This is the layer you'll be blending the other image with. My target image is named "guitar.jpg", and I had "Layer 1" selected in my Layers palette, which is exactly what it's showing in my Apply Image dialog box below. It's also telling me that my target image is currently using the RGB color mode:
We can't change any of this information for the target image. This is simply telling us what we had selected when we opened the Apply Image command.
The Source Image
At the top of the dialog box is the Source option, which shows the currently selected source image. Since I only have two images open in Photoshop, my second image, "concert-crowd.jpg", is automatically chosen as my source image:
If you're seeing your target image listed as the source image as well, simply click on the down-pointing arrow and select your second image from the list to set it as the source. If your second image is not appearing at all in the Source option, it's because it's not the same size as your target image. You'll need to cancel out of the Apply Image dialog box, resize your second image to match the target image, and then try again.
The Source Image Layer
Below the Source option is the Layer option. If you recall from the beginning of the tutorial, I mentioned that we can use the Apply Image command to blend a layer from one image with a layer from another image. We already have the layer chosen in our target image, and this is where we can choose the layer we want to use in our source image. If your source image contains more than one layer, you'll see each layer's name listed here in the Layer options' drop-down box. Simply choose the layer you want to blend with your target image. In my case, since my source image contains only one layer - the Background layer - it's automatically selected as the layer that will be used:
The Source Image Channel
Below the Layer option is the Channel option. This is where we can choose which channel from the source image we want to blend with the target image. My source image (and most likely yours as well) is in RGB mode, just like my target image, which means it's made up of a red channel, a green channel and a blue channel (if you want more information on color channels, be sure to check out our RGB and Color Channels in Photoshop Explained tutorial in the Digital Photo Essentials section of the website). By default, the composite RGB channel is selected, and we'll leave it set that way for now:

The Blend Mode and Opacity
Finally, we have the Blending and Opacity options, which are directly below the target image information. The Blending option is where we tell Photoshop how we want to blend the source image with the target image by choosing any of the blend modes from the drop-down list, while the Opacity option allows us to fine-tune our blending effect if needed by adjusting the opacity of the source image. Both of these options are the same as what you'd find at the top of the Layers palette. In fact, most of the blend modes you'd find in the Layers palette are here in the Apply Image dialog box, along with a couple of new ones ("Add" and "Subtract"). My blend mode is currently set to "Overlay":
We'll skip the bottom two options in the dialog box, "Preserve Transparency" and "Mask", since we've already covered everything we need to know to blend our images together using Apply Image. In fact, even without changing anything in the dialog box and leaving all the options at their defaults, I can see if I look at my target image that my two images are already blending together nicely:
Right now I'm only seeing a preview of how the two images will blend together. I'm not going to click OK to exit out of the dialog box just yet though because on the next page, we'll see how we can create different blending effects simply by playing around with the options in the dialog box!
So far, we've looked at everything we need to know to blend two images together using Photoshop's Apply Image command, and we saw that we could get decent results just by leaving the options in the dialog box set to their defaults. But the real power of the Apply Image command comes from playing around with the options and seeing what sort of new effects you can create! In this next part of the tutorial, we'll look at a few examples of what we can come up with simply by trying different options in the dialog box. There's no "right" or "wrong" settings to use. It's simply a matter of experimenting and having fun until you're happy with the results.
Here once again is the result we get by blending the two images using the default option settings:
Changing The Blend Mode
The easiest way to get a much different effect with Apply Image is by simply changing the Blending option and trying different blend modes. If you recall, my blend mode was originally set to "Overlay". Watch what happens when I try a different blend mode. I'll change my Blending option to "Screen":
If I look again at my target image to see a preview of the effect, I can see that I'm now getting a much different result:

For a completely different effect, try changing the Blending option to "Difference":
Here's my new result, again a completely different effect simply by changing the Blending option:
Selecting Individual Color Channels
This time, I'll leave the Blending option set to "Difference" and let's see what happens when we try blending an individual color channel from the source image. As we saw on the previous page, my source image is using the RGB color mode, which means that it's being made up of a red channel, a green channel and a blue channel. By default, Apply Image blends all three channels at once (which is referred to as the "composite channel"). But we can isolate individual color channels from the source image using the Channel option to give us even more creative possibilities.
When all three channels are being used together, you'll see the Channel option in the dialog box set to "RGB" (assuming of course that your image is using the RGB color mode which is most likely is). I'm going to change the option so that I'm blending only the red channel from the source image. To do that, I'll simply click on the down-pointing arrow to the right of the letters "RGB" and choose "Red" from the list:
And here we can see that just by isolating one of the color channels from the source image, this gives me a different take on the previous result:

As a final example, and to get away from the more "artsy" looking effects, I'll set my Channel option back to "RGB" so that I'm once again blending all three color channels from the source image at once, and I'll try changing my Blending option to "Hard Light":
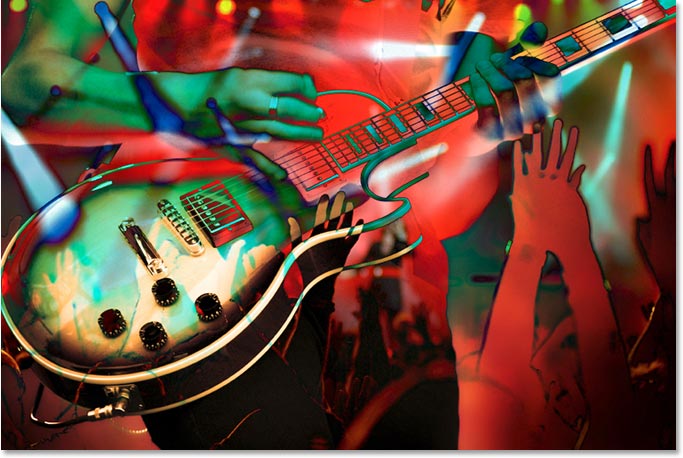
As you can see, there's no "recipe" for creating effects using Apply Image. It's simply a matter of changing different options and seeing what you get, and a lot of it depends on the images you're using. Here's my result after changing my Blending option to "Hard Light". This sends my guitar player into the background and brings the concert crowd up front:

As I mentioned at the beginning of the tutorial, blending a couple of images together like this is only scratching the surface of what you can do with the Apply Image command, but we've now covered everything you need to know to start using it and we've looked at a few examples of the different effects you can achieve by experimenting with the various options in the dialog box. At this point, it's simply a matter of having fun with your own images and seeing what you can come up with! Once you've successfully blended two images together, try adding a third image! Here, after blending my first two images, I've used Apply Image again to blend in a photo of a grungy-looking brick wall to give my final effect some texture:
And there we have it! That's how to blend photos together using the Apply Image command in Photoshop! Visit our Photo Effects section for more Photoshop effects tutorials!