
Action Zoom Blurring Effect In Photoshop
In this Photoshop Effects tutorial, we'll learn how to add some action and a sense of motion to a photo with a zoom blur effect. We'll use Photoshop's Radial Blur filter to add the initial blurring, then we'll bring back some of the original image using a layer mask and the Gradient Tool. Not only is this a great (and popular) way to help bring an image to life, but the entire effect can be completed in less than five minutes once you're comfortable with the steps.
Note: This version of the tutorial is for Photoshop CS5 and earlier. Photoshop CS6 and CC (Creative Cloud) users will want to check out the fully updated Radial Blur Action Effect tutorial.
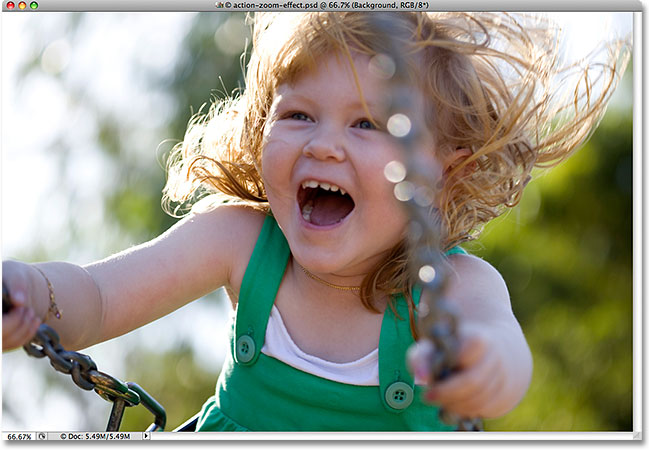
Here's the photo I'll be using for this tutorial:
Here's how it will look after adding the blur effect:

How To Create An Action Zoom Blurring Effect
Step 1: Duplicate The Background Layer
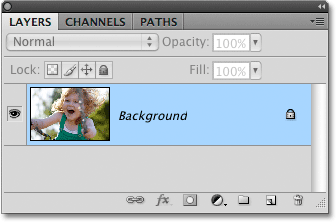
The first step in creating our action zoom effect is to duplicate the Background layer so we can work on a separate copy of the image, which will allow us to bring back some of the original image later. With our photo newly opened in Photoshop, if we look in the Layers panel, we can see that we currently have one layer, the Background layer, which is the layer than contains our photo:
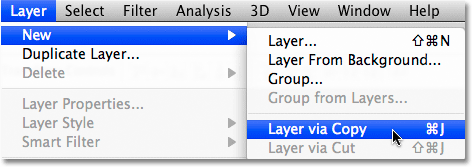
To duplicate the Background layer, go up to the Layer menu in the Menu Bar at the top of the screen, choose New, and then choose Layer via Copy. Or, for a faster way to duplicate a layer in Photoshop, use the keyboard shortcut Ctrl+J (Win) / Command+J (Mac):
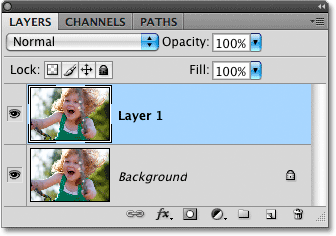
Either way you choose tells Photoshop to make a copy of the layer, and if we look again in the Layers panel, we can see that we now have two layers. The original Background layer is on the bottom, while a brand new layer named "Layer 1" sits above it. If we look at the preview thumbnails to the left of the layer names, we can see that both layers contain the same image, which means we can now do whatever we want to the image on "Layer 1" and the original photo will remain safe and unharmed on the Background layer below it:
Step 2: Apply The Radial Blur Filter
With "Layer 1" selected in the Layers panel (it should be highlighted in blue), go up to the Filter menu at the top of the screen, choose Blur, and then choose Radial Blur:
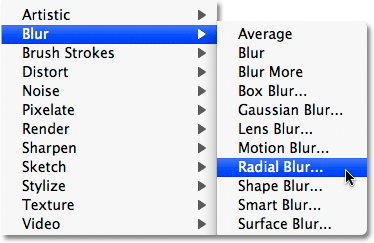
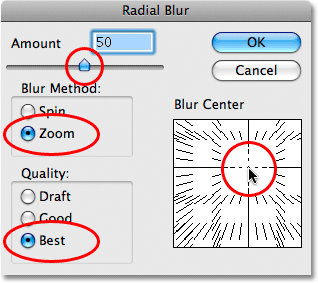
This brings up Photoshop's Radial Blur dialog box. The Radial Blur filter gives us a choice of two different types of blurring - Spin and Zoom. Since we're creating a zoom effect, set the Blur Method option on the left side of the dialog box to Zoom. Directly below the Blur Method option is the Quality option. Choose Best for the quality.
We control how much blurring is applied to the image with the Amount option at the top of the dialog box. The higher the Amount value we select, the more blurring is applied. Drag the slider towards the right to increase the Amount value, or drag it towards the left to decrease it. Unfortunately, the Radial Blur filter doesn't give us a preview of the effect, so you'll probably need to try a few different values before you find the one that works best for your image. I'll explain how to do that in a moment. I'm going to set my Amount value to 50, but the value you end up choosing may be different.
Finally, use the Blur Center box on the right side of the Radial Blur dialog box to set the point where the blur will appear to be "zooming" out from. Simply click inside the box to set the point. Again, there's no way to preview the effect before running the filter so be prepared to try a few times before you get it right. I want my blur effect to appear to be coming from behind the girl's head, so I'm going to click above and to the right of center in the box to set my point.
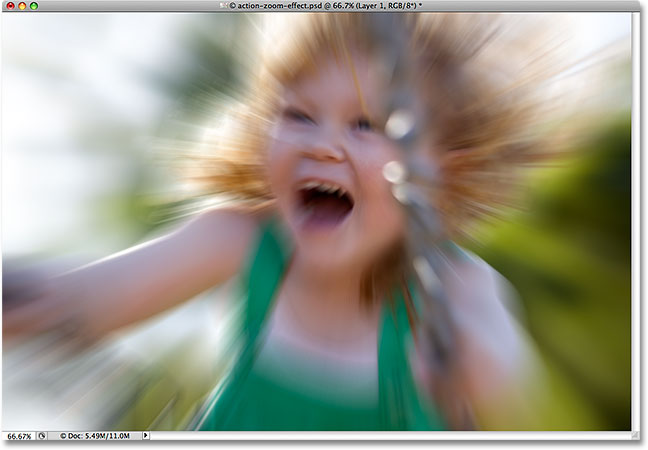
Click OK when you're done to exit out of the dialog box. Depending on the speed of your computer, as well as the size and complexity of your image, you may need to wait a bit for Photoshop to finish applying the blur, so don't panic if it seems like nothing is happening. After waiting a few seconds for Photoshop to do its thing, here is my image with the zoom blur applied:
If you're not happy with your initial blur results and want to try again, first undo the filter by going up to the Edit menu at the top of the screen and choosing Undo Radial Blur. Or, for a faster way to undo the filter, use the keyboard shortcut Ctrl+Z (Win) / Command+Z (Mac):
Then, to quickly bring the Radial Filter dialog box back up, press Ctrl+Alt+F (Win) / Command+Option+F (Mac). Choose a different Amount value and/or set a different point for the zoom effect in the Blur Center box, then click OK to run the filter again. You can undo and redo the filter as many times as you need until you get the results you want.
Step 3: Add A Layer Mask
The problem with our blur effect is that it's covering up the entire image, which isn't really what we want. In my case, the blur effect is distorting the girl's face, so I want to hide the effect in that part of the image and allow the original photo to show through. We can do that easily using a layer mask. With "Layer 1" still selected, click on the Layer Mask icon at the bottom of the Layers panel. It's the icon that looks like a rectangle with a round hole in the center of it:

Nothing will appear to happen in the document window, but a layer mask thumbnail appears to the right of the preview thumbnail for "Layer 1" in the Layers panel, letting us know that we've added our layer mask. If you look closely at the thumbnail, you'll see a white highlight border around it, which tells us that the layer mask, not the layer itself, is selected:

Step 4: Select The Gradient Tool
We're going to draw a black-to-white gradient on the layer mask to hide part of the blur effect and create a nice, smooth transition between the effect on "Layer 1" and the original image on the Background layer below it. To draw the gradient, we'll need Photoshop's Gradient Tool, so select it from the Tools panel. You can also select the Gradient Tool by pressing the letter G on your keyboard:
Step 5: Select The Black to White Gradient
With the Gradient Tool selected, right-click (Win) / Control-click (Mac) anywhere inside the document window to quickly bring up the Gradient Picker. Click on the Black to White gradient to select it. It's the third gradient from the left, top row:

Click anywhere outside of the Gradient Picker to close out of it when you're done.
Step 6: Select The Radial Gradient
By default, the Gradient Tool is set to draw a standard linear gradient, but we also have different styles to choose from, all of which can be selected from the Options Bar at the top of the screen. You'll see a row of five icons, each one representing a different shape for the gradient (Linear, Radial, Angle, Reflected, and Diamond). Select Radial Gradient by clicking on its icon (second one from the left):

Step 7: Drag Out A Radial Gradient To Hide Part Of The Blur Effect
I want to allow the girl's face to show through the blurring effect, so with the Gradient Tool, the Black to White gradient and the Radial Gradient style selected, I'll click in the center of her face to set my starting point for the gradient. Then I'll simply drag my mouse towards the left until I'm just beyond her hair. The area in between the starting and end points of the gradient will become a smooth transition area between the blurring effect on "Layer 1" and the original image on the Background layer below it. Since I'm drawing a radial gradient, the gradient will extend 360° around my starting point (which means it doesn't really matter which direction you drag from the starting point), creating a circular shape with black in the center and gradually changing to white as it extends out in all directions:
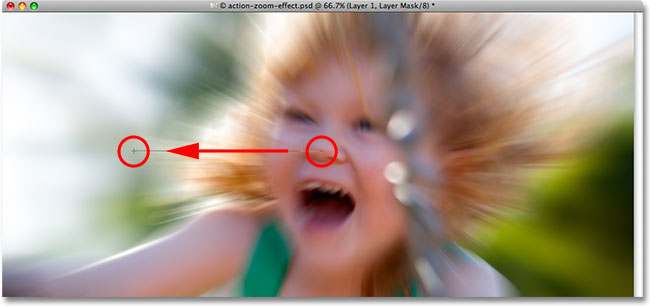
Since we drew the gradient on the layer mask, not on the layer itself, we don't see the gradient in the document window. Instead, we see the results of the gradient on the layer mask. The girl's face is now visible through the blurring effect:

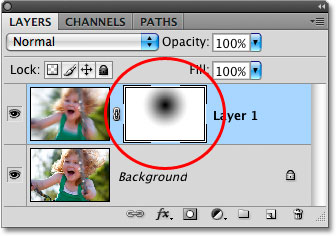
Even though we can't see the gradient in the document window, we can see it if we look at the layer mask thumbnail in the Layers panel. The black area represents the part of the layer that's now hidden from view. As the gradient becomes lighter towards the edges, more of the layer becomes visible. The white areas are where the layer is completely visible:
If you're not happy with your initial gradient, simply press Ctrl+Z (Win) / Command+Z (Mac) to undo the gradient, then try again.
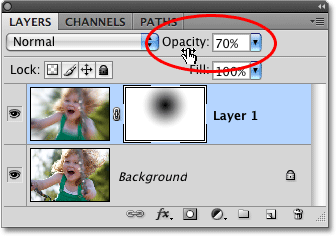
Step 8: Lower The Opacity To Fine-Tune The Results
If you find that your blur effect is too strong, you can reduce its intensity by lowering the opacity of "Layer 1". Lowering the layer's opacity value will allow more of the original image on the Background layer below it to show through. You'll find the Opacity option in the top right of the Layers panel. Keep an eye on your document window as you adjust the opacity to judge the results. I'm going to lower mine down to around 70%:
And with that, we're done! Here, after fine-tuning my results with the Opacity option, is my final "action zoom effect" result: