
Radial Blur Action Effect In Photoshop
In this photo effects tutorial, we'll learn how bring more action and excitement to an image with a simple zoom effect created using Photoshop's Radial Blur filter. The one drawback to the Radial Blur filter, however, is that it doesn't give us a preview of what we're doing, but not to worry. We'll get around that problem using Smart Objects and Smart Filters to keep our effect fully editable and non-destructive. We'll also be using a layer mask and Photoshop's Gradient Tool to hide the effect where we don't need it. A radial blur is a great way to add motion to an image, and the entire effect can be completed in a matter of minutes.
I'll be using Photoshop CS6 here, but the steps are fully compatible with any version of Photoshop from CS3 on up, including Photoshop CC (Creative Cloud). If you're using an older version of Photoshop, you'll want to check out our original Action Zoom Blurring Effect tutorial which covers the same effect, just without Smart Objects and Filters. It's available both in our Photo Effects section and as part of our complete PDF collection.
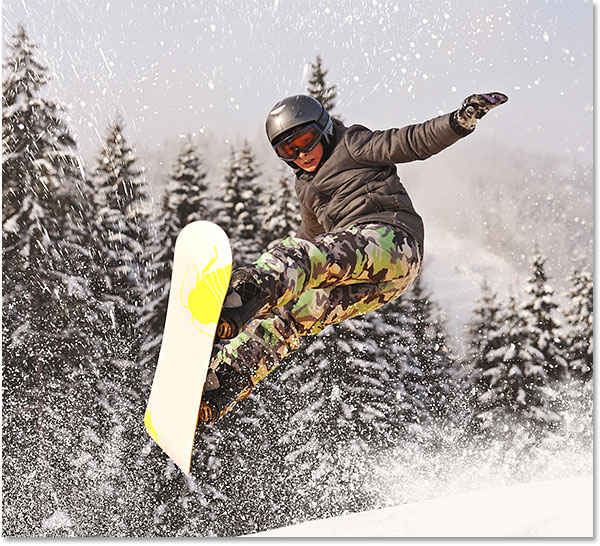
Here's the image I'll be using (snowboarder photo from Shutterstock):
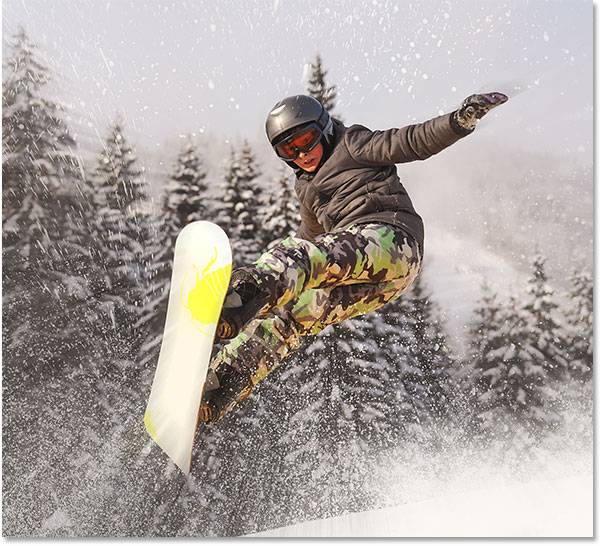
And here's what the final result will look like:
How To Create A Radial Blur Action Effect
Step 1: Convert The Background Layer Into A Smart Object
We'll start by converting the layer our image is sitting on into a Smart Object. This way, we'll be protecting the original image from harm, and we'll be able to apply the Radial Blur filter as a Smart Filter, keeping it fully editable and non-destructive.
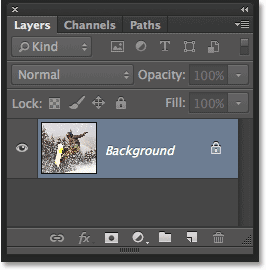
If we look in my Layers panel, we see the image currently sitting on the Background layer:
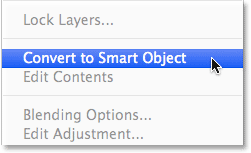
To convert the Background layer into a Smart Object, click on the small menu icon in the top right corner of the Layers panel:
Then choose Convert to Smart Object from the menu that appears:
Photoshop places a Smart Object icon in the lower right corner of the layer's preview thumbnail, letting us know the layer is now a Smart Object:
Step 2: Apply The Radial Blur Filter
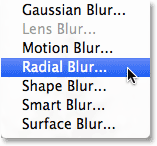
With our layer now converted to a Smart Object, we're ready to apply the Radial Blur filter. Go up to the Filter menu in the Menu Bar along the top of the screen, choose Blur, then choose Radial Blur:
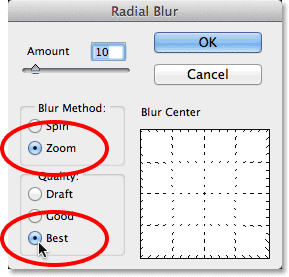
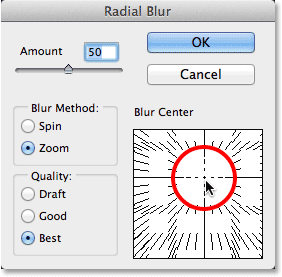
This opens the Radial Blur filter's dialog box. First, set the Blur Method along the left side of the dialog box to Zoom. Then, directly below it, set the Quality to Best:
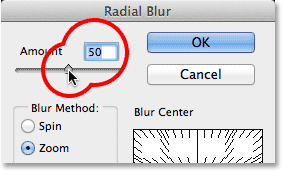
We control the blur amount using the Amount slider in the upper left of the dialog box. Higher Amount values will increase the intensity of the zoom effect. Unfortunately, as I mentioned at the beginning of the tutorial, Photoshop doesn't provide us with a preview for the Radial Blur filter so we have no way of knowing how our chosen Amount value will look until we actually apply the filter and view the results. For now, I'll set my Amount value to 50:
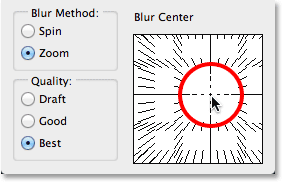
In the lower right is the Blur Center box where we set the origin point for the zoom effect. In other words, we use it to tell Photoshop which area of the image we want the zoom to be coming from. The square represents the image itself (even if your image isn't actually square-shaped), and by default, the origin point is in the very center of the box. To change the origin point, simply click inside the box and drag it to a different spot. Again, since Photoshop doesn't provide us with a preview, we won't know for sure if we've set the origin point correctly until we apply the filter and see what happens. In my case, I want the zoom to be coming from behind the snowboarder, so I'll take my best guess for now and drag the origin point just a bit higher and over towards the right:
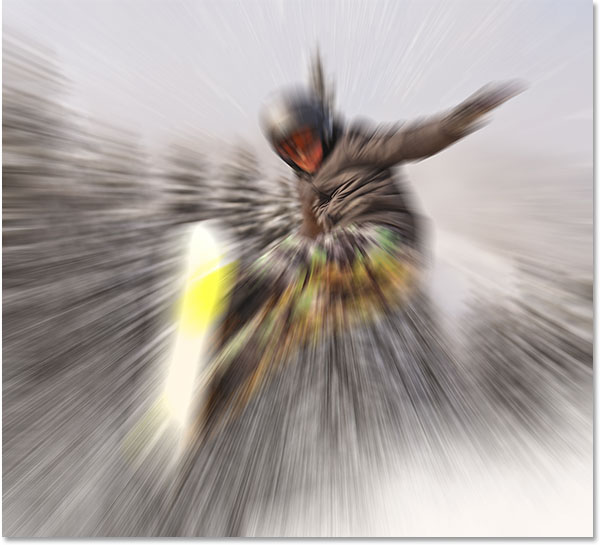
When you're ready, click OK to close out of the dialog box and apply the filter. Depending on the size of your image and how high you've set the Amount value, it can take several seconds for Photoshop to render the effect (a progress bar will let you know how it's going). Here's what my initial radial blur effect looks like:
Step 3: Re-Open The Radial Blur Smart Filter And Make Changes As Needed
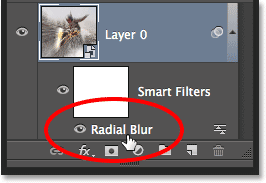
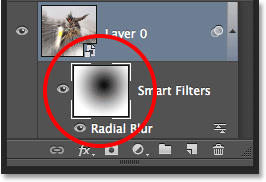
My first attempt with the Radial Blur filter isn't bad, but I'm not quite happy with the origin point I chose so I'd like to try again. Fortunately, I can! In fact, I can go back as many times as I want and re-apply the Radial Blur filter with different settings until I get the effect looking just right. The reason is because we applied the filter to a Smart Object, which means Photoshop converted it to a fully editable Smart Filter. If we look below the Smart Object in the Layers panel, we can see Radial Blur now listed as a Smart Filter. To edit the filter's settings, all we need to do is double-click on its name:
Photoshop re-opens the dialog box, allowing us to increase or decrease the Amount value if needed or change the zoom's origin point. I think I'm happy with an Amount value of 50, but I'll click and drag inside the Blur Center box to move my origin point up a bit higher:
I'll click OK once again to close out of the dialog box, at which point Photoshop re-applies the Radial Blur filter with my new settings. You can go back and change the filter's settings as often as needed until you get the effect looking the way you want:
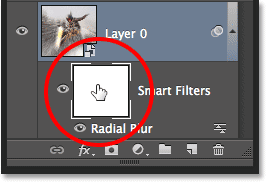
Step 4: Select The Smart Filter's Mask
Now that we've created the main zoom effect, we'll use the built-in Smart Filter layer mask to bring back some of our original image through the zoom effect. First, we need to select the mask, so click on the Smart Filter's mask thumbnail in the Layer's panel. A white highlight border will appear around it, letting you know the mask is selected:
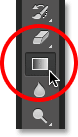
Step 5: Select The Gradient Tool
Next, select Photoshop's Gradient Tool from the Tools panel along the left of the screen:
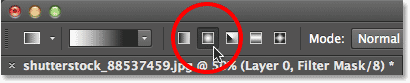
Step 6: Choose A Radial Gradient
With the Gradient Tool selected, click on the Radial Gradient icon in the Options Bar:
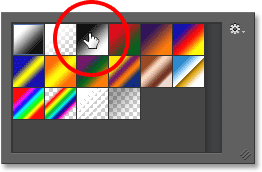
Step 7: Select The Black, White Gradient
Still in the Options Bar, click on the small triangle icon directly to the right of the gradient preview bar:
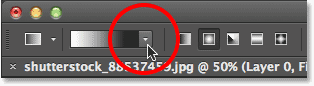
This opens the Gradient Picker. Select the Black, White gradient by double-clicking on its thumbnail (third one from the left, top row):
Step 8: Drag Out a Gradient Across Your Main Subject
Click with the Gradient Tool in the spot where the zoom effect is originating from, then keep your mouse button held down and drag outward from that spot towards one of the edges of the image (it doesn't matter which one since our radial gradient will extend outward 360° in all directions from the spot we initially clicked on):
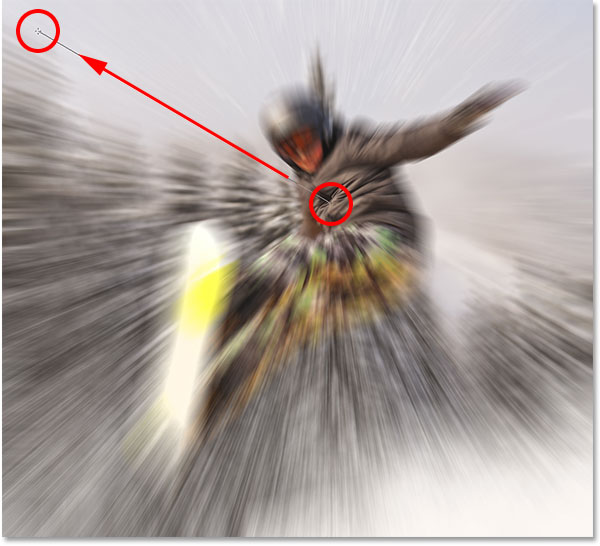
Release your mouse button when you're far enough away from your main subject, at which point Photoshop draws the black-to-white radial gradient on the Smart Filter's mask. Since we chose the Black, White gradient, it transitions from black in the center to white around the edges. The only problem of course is that we can't actually see the gradient in the image because it was drawn on the mask itself. However, we can see it in the layer mask thumbnail in the Layers panel. The black area on the mask is where our original image will show through the zoom effect:
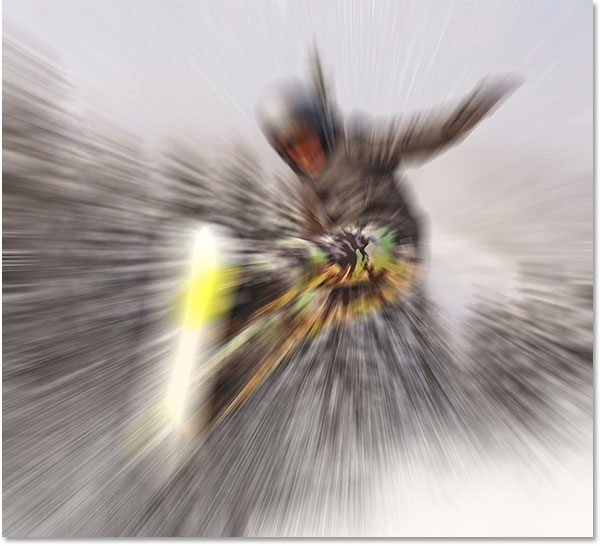
And here's what my image looks like after drawing the radial gradient on the mask. The snowboarder is now fully visible at and around the spot where I initially clicked with the Gradient Tool, and as we move further away from him, the zoom effect transitions into view. You can always go back and redraw your gradient if you didn't get it quite right the first time:

Learn all about layer masks in Photoshop
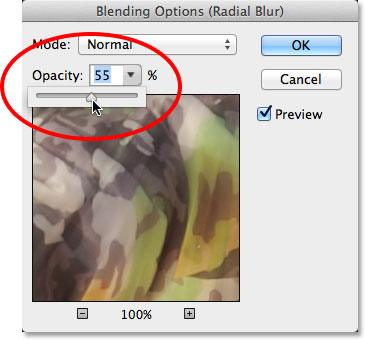
Step 9: Lower The Filter's Opacity
If you find that your zoom effect is too intense, simply lower its opacity. Double-click on the Radial Blur filter's Blending Options icon in the Layers panel:
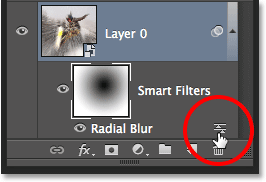
This opens the Blending Options dialog box specifically for the Radial Blur filter (if we had applied additional Smart Filters, they'd each get their own separate blending options). You'll find the Opacity option in the upper left corner. Simply click on the triangle icon to the right of the current value, then use the slider to drag the opacity lower, keeping an eye on your image in the document window to judge the results. A value of between 50-60% often works best:
Click OK to close out of the dialog box, and we're done! Here, after lowering the opacity of the filter, is my final effect:
And there we have it! That's how to quickly add motion and excitement to an image using an easy-to-create radial blur action effect in Photoshop! Visit our Photo Effects section for more Photoshop effects tutorials!