
Photoshop Black and White Conversions – Luminosity Blend Mode
As we continue our journey through the many ways of converting color photos to black and white in Photoshop, we've so far looked at how to convert a color photo from the RGB color mode to the Grayscale color mode, how to desaturate the color in the image using a Hue/Saturation adjustment layer, and how to replace the original colors in the image with a black-to-white gradient using a Gradient Map.
In this tutorial, we'll look at our fourth way of converting color photos to black and white, this time using the Luminosity layer blend mode, which deals only with the brightness values in the image, ignoring the color information. At the end of the tutorial, we'll see how to improve on the results using a couple of additional blend modes, and how to target specific areas of the photo with a layer mask!
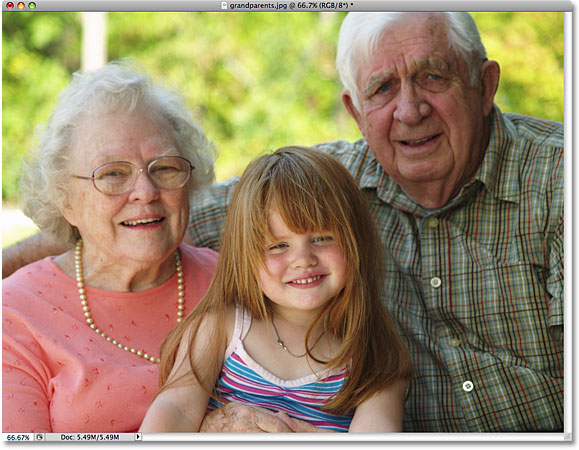
Here once again is the photo I'll be using throughout these tutorials so we have an easy way of comparing the results of our black and white conversions:
Let's get started!
Step 1: Add A New Blank Layer Below The Background Layer
The first thing we need to do with our Luminosity technique is to create a new layer. If we look in our Layers palette, we can see that with our photo newly opened in Photoshop, our document contains just one layer named Background. This is the layer our photo is sitting on:

The problem is, we need the new layer to appear below the Background layer. It's a problem for two reasons. First, by default, Photoshop adds new layers above the currently selected layer, not below them, and second, Photoshop doesn't allow us to place anything below the Background layer (since, after all, it's supposed to serve as the background for the document).
Fortunately, there's a simple solution. To get around the problem of not being able to add anything below the Background layer, we just need to rename the layer to something other than "Background". The quickest way to do that is to hold down your Alt (Win) / Option (Mac) key and double-click directly on the word "Background" in the Layers palette. Photoshop will change the name of the layer to "Layer 0":

Then, to add a new layer below "Layer 0", hold down your Ctrl (Win) / Command (Mac) key and click on the New Layer icon at the bottom of the Layers palette:
Holding down the Ctrl / Command key while clicking on the New Layer icon tells Photoshop that we want the new layer to appear below the currently selected layer, and if we look once again in the Layers palette, we see that a new layer named "Layer 1" has appeared below our original layer:

Step 2: Fill The New Layer With White
We're going to be changing the layer blend mode of the image to Luminosity, and the way the Luminosity blend mode works is that it blends the brightness values of the layer with the color of the layer (or layers) below it. At the moment though, the layer we just added below the image is blank, which means the Luminosity blend mode won't work since it will have nothing to blend the brightness values of the image with. Let's fill the new layer with white.
With "Layer 1" selected in the Layers palette (selected layers are highlighted in blue), go up to the Edit menu at the top of the screen and choose the Fill command:

This brings up Photoshop's Fill dialog box, which gives us an easy way to fill the layer with a color. Set the Use option to White in the Contents section at the top of the dialog box:

Click OK when you're done to exit out of the dialog box. Photoshop fills the new layer with white. Nothing will seem to have happened in the document window since the photo on "Layer 0" is blocking the bottom layer from view, but if we look at the preview thumbnail for "Layer 1" in the Layers palette, we can see that it's filled with white, which tells us that the layer itself is filled with white:

Step 3: Change The Blend Mode Of The Photo Layer To Luminosity
With the bottom layer now filled with white, click on the top layer ("Layer 0") in the Layers palette to select it so we can change the blend mode of the layer that contains our image. At the top of the Layers palette, you'll find the list of blend modes we can choose from. By default, layers are set to the Normal blend mode. Change the blend mode to Luminosity:

By changing the blend mode to Luminosity, Photoshop blends only the brightness values (whites, blacks and all the shades of gray in between) with the white-filled layer below the image, effectively hiding the color and giving us a black and white version of the photo:

To bring the original color back at any time, all we need to do is change the blend mode for "Layer 0" back to Normal:

Instantly, the full color version of the photo returns:
Switch back to the Luminosity blend mode so we're once again seeing the black and white version of the image. Up next, we'll see how to improve our black and white conversion using two other blend modes, and how to limit the areas of the image that are affected with a layer mask!
If you find that the black and white version of your photo is either too light or too dark, we can easily lighten or darken it by combining the Luminosity blend mode with a couple of other blend modes. As we learned in the Five Essential Blend Modes For Photo Editing tutorial, Photoshop's Screen blend mode can quickly brighten a dark image, while the Multiply blend mode is great for darkening an image that's too bright. Let's see how to use these two blend modes to improve our results.
Step 4: Combine Both Layers On To A New Layer
Photoshop won't allow us to use more than one blend mode with a layer, so let's combine our two existing layers on to a new layer above "Layer 0". With "Layer 0" selected in the Layers palette, press Shift+Ctrl+Alt (Win) / Shift+Command+Option (Mac) to quickly combine both layers on to a new layer. You should now see a new layer named "Layer 2" sitting above the original two layers. The new layer contains a copy of our black and white image:

Step 5: Change The Blend Mode To Either Screen Or Multiply
If your black and white version is too light, change the blend mode of the new layer to Multiply:

This will instantly darken the entire photo, bringing out image detail that may have been hidden when the photo was overly bright. Unfortunately in my case, the Multiply blend mode makes the image too dark:

Let's try lightening it. To lighten a dark image, change the blend mode of the top layer to Screen:

The entire photo now appears lighter than it was originally, although again in my case, the overall image is too bright:

One specific problem with my black and white version that I'd like to be able to fix is that the girl's grandfather appears darker than the other two people in the photo. The Screen blend mode was able to brighten him, but since it affected the entire image, it made the rest of the photo too bright. Let's see how we can easily target just the girl's grandfather without brightening any other areas using a layer mask!
Step 6: Add A Layer Mask Filled With Black
With the top layer ("Layer 2") selected, hold down your Alt (Win) / Option (Mac) key and click on the Layer Mask icon at the bottom of the Layers palette:
This will add a layer mask to the top layer which we can use to isolate specific areas of the photo. Normally, Photoshop fills new layer masks with white, which keeps everything on the layer visible (see our Understanding Layer Masks in Photoshop tutorial for more information on layer masks), but by holding down the Alt / Option key as we click the Layer Mask icon, we tell Photoshop to fill the new mask with black instead, which hides the entire layer in the document window. If we look at "Layer 2" in the Layers palette, we can see the layer mask preview thumbnail that's been added, letting us know that we do have a mask on the layer, and we can see from the thumbnail that the mask is filled with black:

Since the top layer is currently hidden from view by the layer mask, even though it's set to the Screen blend mode and should be lightening the image, my photo appears unaffected and in its original black and white form in the document window:
Step 7: Select The Brush Tool
To brighten only the girl's grandfather, all I need to do is paint over him with white on the layer mask. For that, I'll need Photoshop's Brush Tool, so I'll select it from the Tools palette. I could also press the letter B on my keyboard to quickly select it with the shortcut:

Step 8: Paint With White On The Layer Mask
Photoshop uses the current Foreground color as the color for the brush, so press the letter D on your keyboard to quickly reset your Foreground and Background colors if needed, which will make white the Foreground color. If you look at the Foreground and Background color swatches near the bottom of the Tools palette, you should see the Foreground color swatch (top left) set to white. The Background color swatch (bottom right) will be set to black:

With the Brush Tool selected and white as the Foreground color, simply paint over any areas that you need to brighten (or darken, if your top layer is set to the Multiply blend mode). Since we're painting on the layer mask, not the layer itself, we won't see the white. Instead, we'll reveal "Layer 2" in those areas, which will lighten (or darken) the areas we paint over.
You can change the size of your brush as you paint by pressing the left bracket key ( [ ) to make the brush smaller or the right bracket key ( ] ) to make it larger. We can also control the softness or hardness of the brush edges from the keyboard as we paint. Press Shift + left bracket ( [ ) to make the brush edges softer, or Shift + right bracket ( ] ) to make them harder.
Here, we can see the girl's grandfather becoming lighter in the photo as I paint over his face and shirt:

If we look again at the layer mask thumbnail in the Layers palette, we can see the areas we've painted over with white. The rest of the layer where the mask is still filled with black remains hidden from view in the document:

Step 9: Lower The Layer Opacity To Fine-Tune The Results
If you find that the areas you've painted over are too light or dark compared with the rest of the image, simply lower the opacity of the layer to fine-tune the results. The Opacity option is directly across from the blend mode option at the top of the Layers palette. The lower you set the opacity, the more transparent the layer will become, allowing it to blend in more with the image below it.
In my case, the girl's grandfather is too light after painting over him on the mask, so I'm going to lower my opacity down to 70% to reduce the brightness a little:

Thanks to that little bit of extra work with the Screen blend mode and a layer mask, all three people in the photo now share similar brightness levels:

Up next, we're going to switch modes (as in "color modes") and take our Photoshop black and white conversions into the Lab (rocket science degree and propeller hat not required)!