
Photoshop Black and White Conversions – Gradient Map Tutorial
So far in this series of tutorials on the many ways of converting color photos to black and white in Photoshop, we've looked at how to convert an image to the Grayscale color mode and how to remove the color by desaturating the image.
In this third tutorial in the series, we'll learn how Photoshop's Gradient Map adjustment allows us to easily "map" the original colors in an image to the colors in a gradient. You could play around for hours with a Gradient Map coming up with all kinds of wild and crazy color effects, but for our purposes here, we're going to look specifically at how a Gradient Map makes black and white conversions a snap! (Get it? "Map", "snap"? It rhymes! Yes, I know, just get on with it. Geez.)
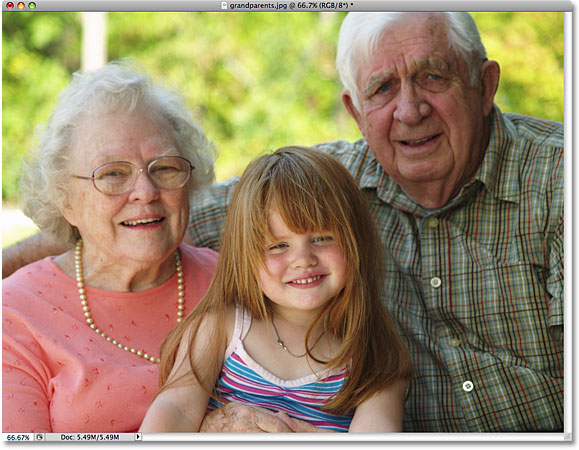
Here's the image once again that I'm using throughout this series of tutorials:
Step 1: Reset Your Foreground And Background Colors
By default, Photoshop's Gradient Map adjustment uses a gradient that's based on our current Foreground and Background colors. If, for example, our current Foreground color was red and our Background color was purple and we applied a Gradient Map adjustment, we'd end up with a photo made up of reds and purples. While that may (or may not) be interesting from a creative perspective, it's definitely not the effect we're aiming for here. We want to convert our image to black and white, which means we'll want to map the colors in the image to a black-to-white gradient. So before we do anything else, let's make sure our Foreground and Background colors are set to their defaults, which, as luck would have it, just happen to be black (Foreground color) and white (Background color)!
Since black and white are Photoshop's default Foreground and Background colors, there's a good chance that yours are already set to black and white. You can check to see what your current colors are by looking at the Foreground and Background color swatches near the bottom of the Tools palette. The swatch in the top left represents the Foreground color, while the swatch in the bottom right is the Background color:

If they're already set to black and white as mine are, you're good to go. If they're set to other colors, simply press the letter D on your keyboard (think "D" for "Default") to reset the Foreground and Background colors to black and white.
Step 2: Add A Gradient Map Adjustment Layer
We're ready to add our Gradient Map. As with most of Photoshop's image adjustments, including the Hue/Saturation adjustment we looked at previously, the Gradient Map is available to us as an adjustment layer which is what we'll be using. Click on the New Adjustment Layer icon at the bottom of the Layers palette and select Gradient Map from the list of adjustment layers that appears:

If you're using Photoshop CS4 as I am here, the options for the Gradient Map will appear in the Adjustments Panel which is new to CS4. If you're using Photoshop CS3 or earlier, the Gradient Map dialog box will open on your screen. The main feature in the Gradient Map options is the gradient preview bar showing us the current colors in the gradient that's being applied to our image. As we mentioned, this default gradient is based on our Foreground and Background colors, and since we made sure to set them to black and white before adding the Gradient Map, we get a black-to-white gradient which is exactly what we needed:

Based on their brightness values, all of the original colors in the photo are now being replaced by the colors (or in this case, the shades of gray) in the gradient, and if we look at our photo in the document window, we see that the black-to-white gradient has converted the image to black and white:

It's not a bad start, but we can make some adjustments to our gradient to improve our black and white results. We'll look at how to do that next!
Step 3: Open The Gradient Editor
By simply mapping the original colors in the photo to our black-to-white gradient using the Gradient Map adjustment, we've managed to achieve decent results for our black and white conversion. But that was just a starting point. We can try to enhance the results even further by making a few simple changes to the gradient we're using.
Click directly on the gradient preview bar in the Gradient Map dialog box (or Adjustments Panel in CS4) to bring up Photoshop's Gradient Editor. The Gradient Editor contains another gradient preview bar showing us the current gradient colors, but unlike the Gradient Map dialog box, the Gradient Editor allows us to change and/or adjust the colors in the gradient. By making changes to the appearance of the gradient, we can fine-tune the appearance of our black and white image.
Step 4: Adjust The Midtones With The Midpoint Marker
If you look directly below either end of the gradient preview bar, you'll see a color stop. These two color stops control the two main colors that make up our gradient. The one on the far left will appear black, while the one on the far right will be white (since our gradient goes from black on the left to white on the right):

If you click on either of the two color stops (doesn't matter which one), a small Midpoint marker will appear directly below the middle of the gradient:

As you may have guessed from it's name, the Midpoint marker controls where the middle of the gradient falls between the two color stops on either side of it. By default, it's, well, in the middle, but it doesn't have to be. We can move the midpoint of the gradient simply by clicking on the marker and dragging it left or right. If you're familiar with how Photoshop's Levels adjustment works, you know that with a Levels adjustment, we can brighten or darken the midtones in an image (the brightness levels that fall between pure black and pure white) by dragging the midtone slider. We can do the same thing here with the gradient's Midpoint marker. By dragging the marker left or right, we can adjust the brightness of the midtones in our black and white image.
If you click on the Midpoint marker and look down at the Location option at the bottom of the Gradient Editor dialog box, you'll see that it's set to 50%. This means the gradient's midpoint is initially halfway between the color stops on either end of the gradient. I'm going to drag the Midpoint marker a short distance towards the left, which will move the gradient's midpoint closer to black. The Location value decreases as we move the slider closer to black. I'm going to stop when the Location value is set to around 43% since we usually don't have to drag the marker very far to see noticeable changes in the image (you'll need to release your mouse button after dragging the marker for the image in the document window to update with your changes):

Moving the midpoint of the gradient closer to black lightens the midtones, and my image now appears brighter:

Likewise, we can drag the Midpoint marker towards the right, which will move the midpoint of the gradient closer to white. The Location value increases as we move the marker closer to white:

Moving the midpoint of the gradient closer to white darkens the midtones. In my case, the photo now appears too dark, but of course your image will be different, which is why you'll want to keep an eye on your photo in the document window as you drag the Midpoint marker to judge the results:

Next, we'll see how to improve the overall contrast of our black and white image using the black and white color stops!
Step 5: Adjust Contrast With The Black And White Color Stops
We can also try to improve the overall contrast in the black and white image if necessary using the black and white color stops at either end of the gradient preview bar, although depending on your image, your black and white points may already be set to their optimal levels and no further adjustments should be made. You'll definitely want to keep Photoshop's Histogram palette open on your screen if you choose to adjust the contrast this way, since you'll want to make sure you don't clip any important shadow or highlight details in the image (see our How To Read An Image Histogram In Photoshop tutorial for more details). By default, the Histogram palette is nested in with the Navigator and Info palettes. If you can't see the Histogram palette on your screen, go up to the Window menu in the Menu Bar at the top of the screen and choose Histogram:

To pull the darkest areas of your image closer to pure black, simply click on the black color stop below the left edge of the gradient preview bar and drag it towards the right. As you continue to drag the color stop towards the right, more and more of the image will be darkened:

After dragging the black color stop towards the right, the darkest areas in my photo are now even darker:

However, if we look again at my Histogram palette, we now see a spike along the left edge of the histogram which means I've gone too far with the black color stop and pulled a lot of pixels in the image down to pure black, resulting in a loss of detail in the shadow areas:

Whether or not you have any room to move the black color stop without losing shadow detail will depend entirely on the image you're working on, which is why it's so important to keep an eye on the Histogram palette.
We can also push the lightest areas in the image closer to pure white by clicking on the white color stop below the right edge of the gradient preview bar and dragging it towards the left. As you continue to drag the color stop towards the left, more and more of the image will be lightened:

The lightest parts of my image are now even lighter after moving the white color stop:

However, if we look once again at my histogram, we see a spike along the right edge, which means we've lost detail in the highlights by going too far with the white color stop and forcing too many pixels to pure white:

Again, whether or not you have any room to move the white color stop without blowing out the highlights will depend entirely on your image, since every photo is different. For a better way to improve the overall contrast of an image, which should usually be done before converting the photo to black and white, be sure to check out our Improving Image Tone With Levels tutorial.
When you're satisfied with the results, click OK to exit out of the Gradient Editor dialog box, then click OK to exit out of the Gradient Map dialog box (Photoshop CS4 users can leave the Adjustments Panel open since there's no need to close out of it).
As we saw in the previous tutorial in this series when we looked at converting the image to black and white using a Hue/Saturation adjustment layer, nothing we've done to the image here is permanent. The entire black and white effect we've created is contained within the Gradient Map adjustment layer itself, while the original image remains safe and unharmed on the Background layer below it. If at any time you want to view the full color version of the image once again, simply turn the Gradient Map adjustment layer off by clicking on its layer visibility icon (the "eyeball" icon) on the left of the adjustment layer in the Layers palette:
Turning the adjustment layer off instantly restores all the color in the image:
Click again on the layer visibility icon to turn the Gradient Map adjustment layer back on and return to the black and white version.
Up next, we'll look at how we can use Photoshop's Luminosity blend mode to create a black and white version of our photo by simply ignoring the color, and we'll see how we can improve upon the initial results with a couple of additional blend modes and a layer mask!