
Applying Shadows/Highlights As A Smart Filter In Photoshop
In the previous tutorial, we learned all about Photoshop's Shadows/Highlights image adjustment and how it's great for brightening up the shadows and dimming down the highlights to restore hidden detail in photos that suffer from too much contrast. Unfortunately, Shadows/Highlights is one of the few image adjustments in Photoshop that is not available to us as an adjustment layer, which may lead you to think we have no choice but to apply it directly to the image as a permanent, static adjustment.
Thankfully, that's not the case. As we'll learn in this tutorial, while Shadows/Highlights may not be available as an actual adjustment layer, there's a simple yet powerful trick we can use to gain the same advantages that an adjustment layer would give us, and that's by applying Shadows/Highlights as an editable and non-destructive Smart Filter!
I covered all the details about how Photoshop's Shadows/Highlights adjustment works in the previous tutorial when we looked at how to apply it as a static adjustment. In this tutorial, I'll run through things more quickly so we can focus on how to apply it as a Smart Filter and the advantages we gain by doing so. If you're not yet familiar with Shadows/Highlights, be sure to read through the previous Restoring Hidden Detail With Shadows/Highlights tutorial first before you continue.
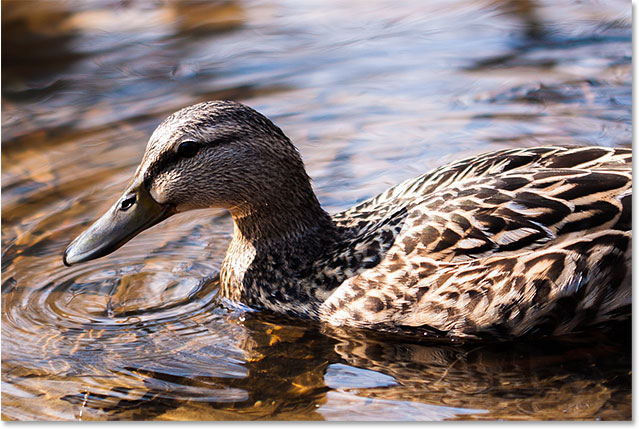
To keep things simple, I'll use the same image as last time; a photo I captured on a bright, sunny day that suffers from too much contrast, with shadows that are too dark and highlights that are too bright. Let's see how applying Shadows/Highlights as a Smart Filter can give us the same results as before without making a single permanent change to the image:
Step 1: Convert The Image Into A Smart Object
When we applied Shadows/Highlights previously as a static adjustment (meaning an adjustment that's applied directly to the pixels in the image), the first thing we needed to do was duplicate the image and place a copy of it on a separate layer. This allowed us to do all of our work on the copy and leave the original photo unharmed. This time, we don't need to worry about that because we're applying Shadows/Highlights as a Smart Filter, and Smart Filters are completely non-destructive.
What exactly is a Smart Filter? It's really nothing more than a normal filter in Photoshop except that it's applied not to a normal layer but to a Smart Object. So, great, but what's a Smart Object? Think of a Smart Object as a transparent container that the image is placed into. Once we've placed the image inside the container, anything we do to it that point is actually done not to the image but to its container. It still looks like we're making changes to the image itself, but we're not. It's the container that's being changed, while the image inside of it remains unharmed.
We'll be covering Smart Objects in great detail in other tutorials. For our purposes here, what's important to know is that when we apply one of Photoshop's filters to a Smart Object, it automatically becomes a Smart Filter, and the big advantage Smart Filters have over regular filters is that their settings remain fully editable, allowing us to go back and re-edit them any time we like without any permanent changes being made to the image!
Since Smart Filters need to be applied to Smart Objects, the first thing we need to do is convert our image into a Smart Object. If we look in the Layers panel, we can see the image sitting on the Background layer:

To convert it into a Smart Object, click on the small menu icon in the upper right corner of the Layers panel:
Then choose Convert to Smart Object from the menu:

Nothing will seem to have happened to the image in the main document area, but if we look again in the Layers panel, we see that a small Smart Object icon has appeared in the lower right of the layer's preview thumbnail, letting us know that the layer has been converted into a Smart Object. Notice also that Photoshop has renamed the layer (the Smart Object) from "Background" to "Layer 0":
Step 2: Select The Shadows/Highlights Adjustment
With our layer now converted into a Smart Object, we're ready to apply Shadows/Highlights as a Smart Filter. Now, at this point you may be wondering, "Wait a minute, how can we apply Shadows/Highlights as a Smart Filter when it's an image adjustment, not a filter?" That's a good question, and you're right, we won't find Shadows/Highlights listed anywhere under Photoshop's Filter menu. So how, then, can we apply something that's not a filter as a Smart Filter?
As it turns out, Shadows/Highlights is special. It's one of only a couple of image adjustments (the other being HDR Toning) that Photoshop allows us to apply as a Smart Filter. To select it, go up to the Image menu in the Menu Bar along the top of the screen, choose Adjustments, then choose Shadows/Highlights. Notice that all of the image adjustments in the list are grayed out and unavailable except for two (Shadows/Highlights and HDR Toning):

Step 3: Select "Show More Options"
This opens the Shadows/Highlights dialog box to its default settings. Again, I'll be going through these options fairly quickly here, so if you're not yet familiar with how Shadows/Highlights works, be sure to read through the previous tutorial where I cover all the details.
If your dialog box is showing just the two default sliders (Shadows Amount and Highlights Amount), select Show More Options by clicking inside its checkbox:

This expands the dialog box to its full size and gives us access to the advanced options. At the top are the Shadows and Highlights sections, each with three sliders (Amount, Tone and Radius), followed by the Adjustments section with its Color and Midtone sliders, along with the Black Clip and White Clip options, all of which we looked at previously. As before, I'm using Photoshop CC 2014 here which includes some minor name changes to a few of these options. If you're using an earlier version of Photoshop, the Tone option is named Tonal Width, Color is Color Correction and Midtone is Midtone Contrast. Other than the name changes, these options still function the same in all versions:

Quick Recap: Amount, Tone And Radius
Here's a quick recap of how the three sliders in the Shadows and Highlights sections work:
Amount: The Shadows/Highlights adjustment works by brightening shadows and darkening highlights to bring out more detail in these areas. The Amount sliders control how much brightening is being applied to the shadows (in the Shadows section) and how much darkening is being applied to the highlights (in the Highlights section). The further we drag the slider to the right, the more brightening or darkening is applied.
Tone: Known as Tonal Width in earlier versions of Photoshop, the Tone slider controls the range of tones that should be considered either shadows or highlights. Only the tones that fall within these ranges are affected by the Amount sliders. In the Shadows section, low Tone values limit the brightening to just the darkest areas. Increasing the Tone value expands the range more into the midtones, while values beyond 50% (the default setting) will allow even the lighter tones in the image to be brightened. Photoshop brightens the shadows using a gradual transition, with darker tones receiving more brightening than lighter tones.
In the Highlights section, Tone works the same way but in the opposite direction. Low Tone values limit the effects of the Amount slider to just the lightest areas. Increasing the Tone value expands the range into the midtones, while Tone values beyond 50% will allow even the darker tones in the image to be affected. As with the shadows, Photoshop darkens the highlights using a gradual transition, with lighter tones being darkened more than darker tones.
Radius: The Radius slider controls how well the affected areas will blend with their surroundings. Higher Radius values create larger, smoother and more natural looking transitions between the areas being lightened or darkened and the areas surrounding them, while lower Radius values create more of a sharpening effect and can produce unwanted halos around edges. Typically, higher Radius values work best.
I'll set my Shadows options to the same values I used last time, increasing the Amount to 40%, leaving Tone set to its default 50% and increasing the Radius to around 102 pixels. As we'll see in a moment, applying Shadows/Highlights as a Smart Filter means we don't have to worry about getting things perfect because we can always come back and re-edit our settings later:

Here's my image after brightening the shadows:

Next, I'll set my Highlights options to the same values as before, increasing the Amount to 20%, leaving Tone set to its default 50% and increasing the Radius to around 91 pixels:

And here's my image after dimming down the highlights to bring out more detail in the lighter areas:

Quick Recap: Color And Midtone
The two sliders in the Adjustments section help us compensate for problems that may have been introduced by our shadows and highlights adjustments. The Color (Color Correction) slider can be used to increase or decrease the overall color saturation in the image if it now differs from the original, while the Midtone (Midtone Contrast) slider can boost contrast in the midtones if the image is now looking a little too flat.
I'll increase my Color value to +30 and my Midtone value to around +19. The Black Clip and White Clip options determine the percentage of your shadows that will be clipped to pure black (Black Clip) and the percentage of your highlights that will be clipped to pure white (White Clip). Unless you have a specific reason to change them, you can leave these options set to their default values:

Here's my result so far:

The Smart Filter Advantages
When you're happy with your settings, click OK to close out of the dialog box and apply them to the image:

And here's where things get interesting. So far, I've done everything the same as before when I was applying Shadows/Highlights as a static adjustment. I brightened my shadows, then dimmed down the highlights, and finished up with some color and midtone corrections. But this time, when I clicked OK to apply my settings to the image, something very different happened. Rather than being applied directly to the image as a static adjustment, they were applied as a Smart Filter.
It may not seem like anything is different if we're looking just at the image itself since my final result is the same here as it when I applied Shadows/Highlights as a static adjustment. But, if we look in the Layers panel, we now see Shadows/Highlights listed as a Smart Filter under our Smart Object:

What are the advantages of applying it as a Smart Filter? Well, first off, we can toggle the Shadows/Highlights adjustment on and off by clicking the small visibility icon (the eyeball icon) to the left of its name. Click the icon once to turn off the Shadows/Highlights adjustment and view your original image in the document. Click it again to turn Shadows/Highlights back on and view the adjusted version. This works the same as the Preview option in the Shadows/Highlights dialog box except that here, we can toggle the adjustment on and off even after we've applied it:
We can also change the blend mode and opacity values of the Shadows/Highlights Smart Filter by double-clicking the Blending Options icon to the right of its name:
This opens the Blending Options dialog box, with the Mode (short for Blend Mode) and Opacity options at the top. If you find that the colors in your image have shifted after applying Shadows/Highlights, try changing the blend mode from Normal (the default) to Luminosity. The Luminosity blend mode will allow the Shadows/Highlights adjustment to affect only the brightness levels in the image, not the colors. Lowering the Opacity value will reduce the impact that the Shadows/Highlights adjustment is having on your image by allowing some of the original, uncorrected version to show through. Generally, you'll want to leave it set to its default 100%:

Click OK when you're done to close out of the Blending Options dialog box. Here's my image with the blend mode for the Shadows/Highlights adjustment changed to Luminosity. In my case, the difference in the colors is subtle, but they do look less saturated now and closer to the original. Note that since we're no longer affecting the colors in the image, any adjustments you made to the saturation with the Color (Color Correction) slider in the Shadows/Highlights dialog box will no longer have any effect:

Related: Photoshop's Five Essential Blend Modes For Photo Editing
The main advantage we gain from applying Shadows/Highlights not as a static adjustment but as a Smart Filter (and the one I saved for the big finish) is that all of our settings remain fully editable! Even though we've already applied the settings and closed out of the Shadows/Highlights dialog box, we can easily reopen it at any time by double-clicking on the Smart Filter's name in the Layers panel:

Photoshop reopens the Shadows/Highlights dialog box, allowing us to make any changes we need. And, since Smart Filters are non-destructive, no permanent changes are being made to the image, which means we can reopen the dialog box and re-edit our settings as often as we like until we're happy with the results. When you're done making your changes, click OK to save them and close back out of the dialog box. Or, if you want to close out of the dialog box without saving your changes, click Cancel:

And there we have it! Photoshop may not allow us to apply Shadows/Highlights as an adjustment layer, but as we learned in this tutorial, we can easily gain the same advantages that an adjustment layer would give us by applying Shadows/Highlights as an editable, non-destructive Smart Filter! Check out our Photo Retouching section for more Photoshop image editing tutorials!