
How To Make Holiday Candy Cane Text With Photoshop
In this tutorial, I'll show you how to easily create a holiday candy cane text effect with Photoshop. We'll start by making a seamless, repeating candy cane pattern with red and green stripes. Then, we'll learn how to apply the pattern to our text, and how to combine it with layer styles to create rounded, shiny, candy cane letters. At the end of the tutorial, we'll learn how to copy the candy cane effect and instantly apply it to as many Type layers as we need. I'll be using Photoshop CC but any recent version of Photoshop will work. You can get the latest Photoshop version here.
Here's what the final candy cane text will look like:

Let's get started!
How To Create A Repeating Candy Cane Pattern
Step 1: Create A New Photoshop Document
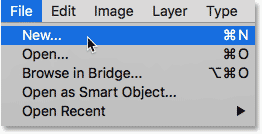
We'll start by making the candy cane pattern that we'll be using to fill the text. For that, we'll create a new Photoshop document. Go up to the File menu in the Menu Bar and choose New:
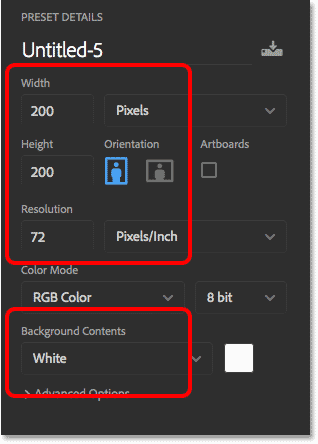
In the New Document dialog box, set both the Width and Height to 200 pixels. Set the Resolution to 72 Pixels/Inch and the Background Contents to White. Click Create or OK (depending on which version of Photoshop you're using) to create the new document:
Step 2: Select The Rectangle Tool
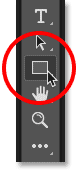
With the new document open on your screen, select the Rectangle Tool from the Toolbar:
Step 3: Set The Tool Mode To Shape
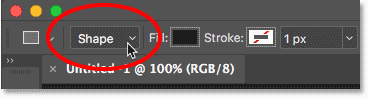
In the Options Bar, make sure the Tool Mode is set to Shape:
Step 4: Set The Shape Color To Red
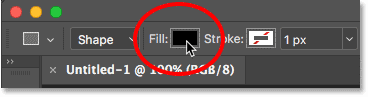
Click the Fill color swatch:
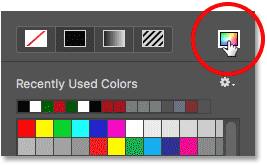
In the Fill Type options, click the Color Picker icon in the upper right:
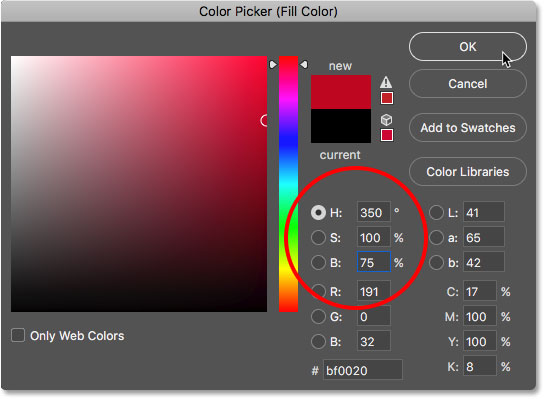
In the Color Picker, choose a shade of red by setting the H (Hue) value to 350, the S (Saturation) value to 100 and the B (Brightness) value to 75. Click OK to close the Color Picker.
With the Fill color now set to red, make sure the Stroke for the shape is set to None:

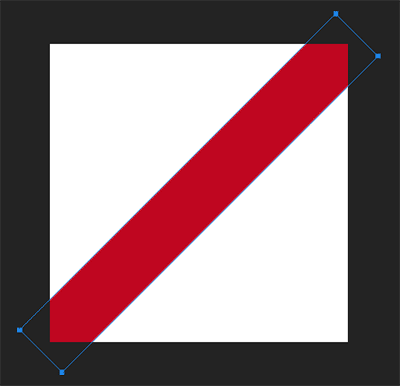
Step 5: Draw The First Shape
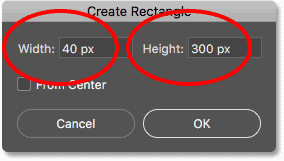
Click inside the document. Don't click and drag, just click. Photoshop opens the Create Rectangle dialog box. Set the Width to 40 px and the Height to 300 px, and then click OK:
Photoshop draws the shape, but not in the right spot:
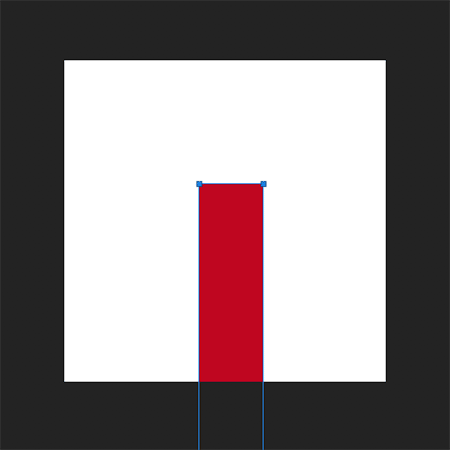
Step 6: Reposition The Shape
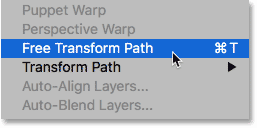
To center the shape, go up to the Edit menu and choose Free Transform Path:
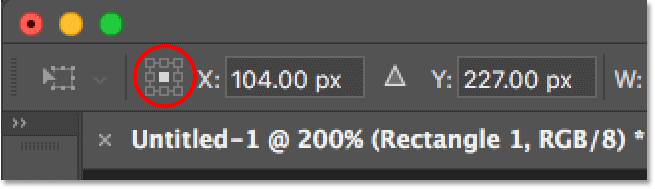
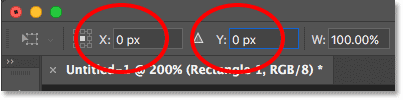
On the far left of the Options Bar, make sure the center box is selected in the Anchor grid, which it should be by default. I've enlarged it here to make the grid easier to see:
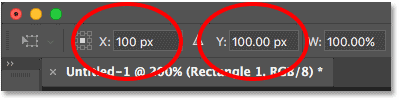
Then change both the X and Y values to 100 px (half the width and height of our 200 x 200 px document). This centers the shape within the document:
Step 7: Change The Angle To 45 Degrees
To rotate the shape, set the Angle in the Options Bar to 45°:

Press Enter (Win) / Return (Mac) twice on your keyboard, once to accept the new settings and then again to exit the Free Transform Path command. Photoshop will ask if you want to turn your live shape into a regular path. Click Yes:

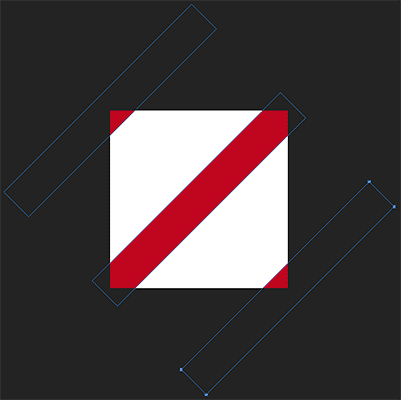
The first shape is now centered and rotated in the document, and we have our first candy cane stripe:
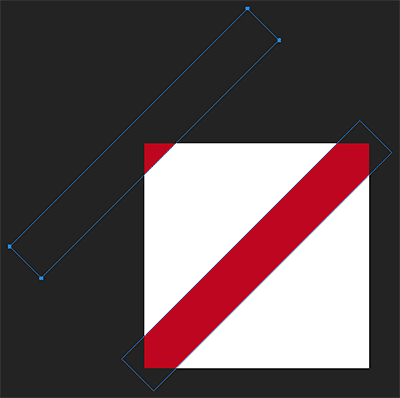
Step 8: Copy And Move The Shape
Press Ctrl+Alt+T (Win) / Command+Option+T (Mac) on your keyboard. This makes a copy of the shape and re-opens the Free Transform Path command. You'll see the Free Transform box and handles around the shape. To move the copy of the shape into the upper left corner of the document, go up to the Options Bar and change the X and Y values both to 0 px:
Press Enter (Win) / Return (Mac) twice, once to accept the new settings and again to exit out of the Free Transform Path command. The second shape now sits in the upper corner, and we have our second candy cane stripe:
Step 9: Make Another Copy And Move It
Once again press Ctrl+Alt+T (Win) / Command+Option+T (Mac) on your keyboard to make another copy of the shape and re-open Free Transform Path. In the Options Bar, set the X and Y values both to 200 px:
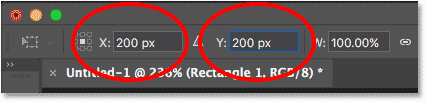
Press Enter (Win) / Return (Mac) once to accept the settings and then again to exit the Free Transform Path command, and we now have our third shape, and our third candy cane stripe, in the lower right corner of the document:
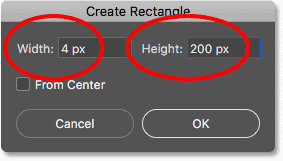
Step 10: Draw A New, Smaller Shape
We've added some larger stripes, so now let's add some smaller ones. Click inside the document with the Rectangle Tool to once again open the Create Rectangle dialog box. This time, set the Width to just 4 px, and then set the Height to 200 px. Click OK to close the dialog box:
Photoshop draws a fourth shape, this time smaller, but again places it in the wrong spot:

Step 11: Reposition The Shape
Go up to the Edit menu and choose Free Transform Path, or press Ctrl+T (Win) / Command+T (Mac) on your keyboard:
In the Options Bar, set both the X and Y values to 50 px, and then set the Angle to 45°:

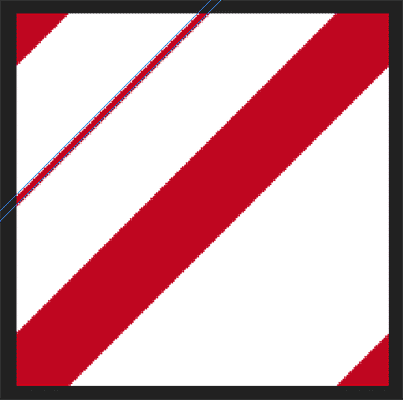
Press Enter (Win) / Return (Mac) twice on your keyboard. Photoshop will again ask if you want to convert the live shape into a regular path. Click Yes, and now the new shape is positioned between the two larger shapes in the upper left:
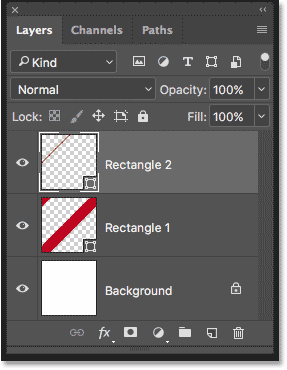
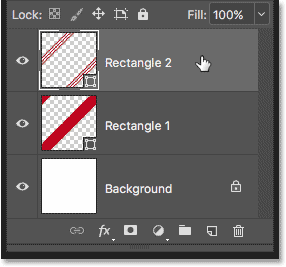
If we look in the Layers panel, we see that our three larger shapes are on one Shape layer named "Rectangle 1" directly above the Background layer. The new smaller shape is on a separate Shape layer named "Rectangle 2" at the top:
Step 12: Copy And Move The Shape
Press Ctrl+Alt+T (Win) / Command+Option+T (Mac) to make a copy of the smaller shape and open the Free Transform Path command. Then in the Options Bar, set the X and Y values both to 44 px:
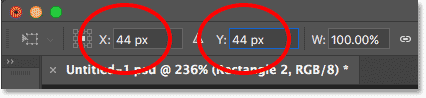
Press Enter (Win) / Return (Mac) twice, and now a copy of the smaller stripe appears just above and to the left of the original:

Step 13: Make Another Copy And Move It
Again press Ctrl+Alt+T (Win) / Command+Option+T (Mac) to copy the shape and open Free Transform Path. In the Options Bar, set the X and Y values to 56 px. Press Enter (Win) / Return (Mac) twice to accept it and close Free Transform Path:
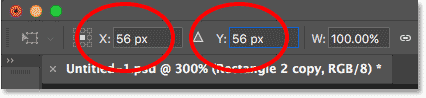
We now have three smaller stripes spaced equally apart in the upper left:
Step 14: Select All Three Smaller Shapes
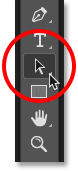
We're going to copy the three smaller stripes and move them into the bottom right of the pattern. Select the Path Selection Tool (the black arrow tool) from the Toolbar:
Drag a box across all three smaller stripes to select them:
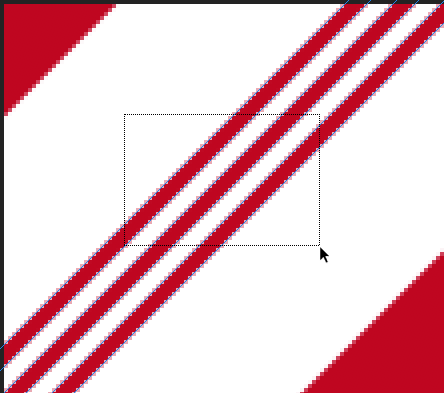
Step 15: Copy And Move The Stripes
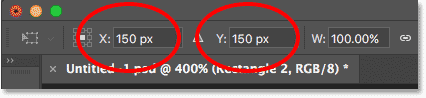
With the stripes selected, press Ctrl+Alt+T (Win) / Command+Option+T (Mac) to make a copy of them and open the Free Transform Path command. Then in the Options Bar, set the X and Y values both to 150 px:
Press Enter (Win) / Return (Mac) twice to accept the new values and exit Free Transform Path. And now we have a copy of the smaller stripes in the lower right. Press Enter (Win) / Return (Mac) a third time to remove the path outlines from around the shapes:

Step 16: Change The Color Of The Smaller Stripes To Green
If you're happy with the candy cane stripes all being red, you can skip this step, but I think the pattern looks better with the smaller stripes in green. To change the color of the smaller stripes, make sure the "Rectangle 2" Shape layer is selected in the Layers panel:
Click the Fill color swatch in the Options Bar, and then click the Color Picker icon in the Fill Type options:

In the Color Picker, choose a shade of green by setting the H value to 120, the S value to 100 and the B value to 50. Then click OK to close the Color Picker:

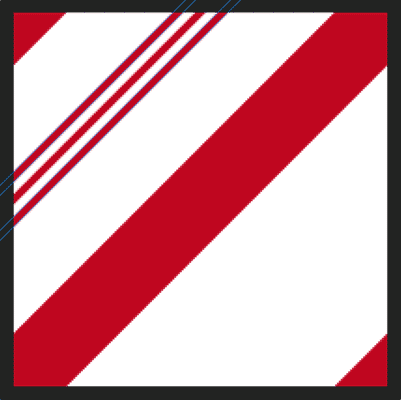
And now the smaller stripes are green while the larger stripes remain in red, completing our candy cane pattern:

Step 17: Define The Shapes As A Pattern
To turn the shapes into an actual Photoshop pattern, go up to the Edit menu and choose Define Pattern:

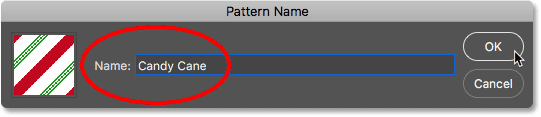
Name the pattern "Candy Cane" and then click OK:
Creating The Candy Cane Text
At this point, our candy cane pattern is done! Let's see how to apply it to some text and make the letters look more like candy. To save time, I'll switch over to a separate document where I've already added some white text in front of a holiday-themed background (snowflake background from Adobe Stock). For best results, choose a font with rounded letters. I'm using Arial Rounded MT Bold:

If we look in my Layers panel, we see that each word is on a separate Type layer. I'll start by adding the candy cane effect to one of the words, and then show you how to quickly copy the entire effect from one Type layer to another:

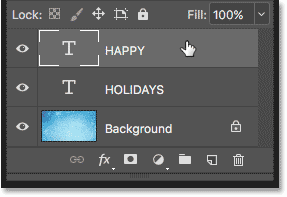
Step 1: Select Your Type Layer
Start by selecting a Type layer in the Layers panel. I'll select the word "HAPPY":
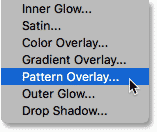
Step 2: Add A Pattern Overlay Layer Style
To create the candy cane text effect, we'll use Photoshop's layer styles. Click the Layer Styles icon (the fx icon) at the bottom of the Layers panel:
Then, to fill the text with your candy cane pattern, choose Pattern Overlay from the list:
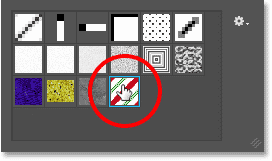
Photoshop opens the Layer Style dialog box with the Pattern Overlay options in the middle column. Click the pattern swatch to choose a different pattern:

Double-click on your candy cane pattern's thumbnail to select it:
This instantly fills your selected type with the candy cane stripes:

Step 3: Adjust The Size Of The Pattern
Use the Scale slider below the swatch to adjust the size and appearance of the pattern within the letters. Lower Scale values will shrink the pattern so it repeats more often. The value that works best will depend on the size of your text. I'll lower mine down to 68%:
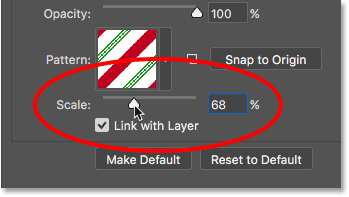
And here's what the letters look like with the pattern scaled down in size:

Step 4: Apply A Drop Shadow
To help separate the letters from the background, we'll add a drop shadow. Still in the Layer Style dialog box, select Drop Shadow in the column on the left:
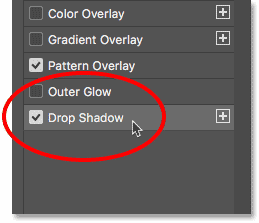
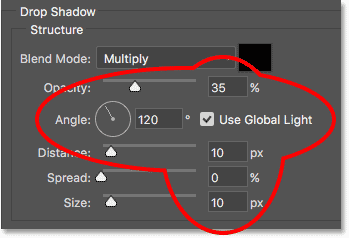
In the Drop Shadow options, set the Opacity to 35%. Turn on Use Global Light and then set the Angle to 120°. I'll set my Distance and Size values both to 10 px but you may want to try different values depending on the size of your image:
Here's the text with the drop shadow applied:

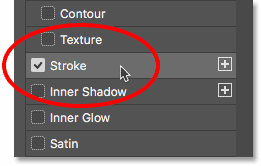
Step 5: Add A Stroke
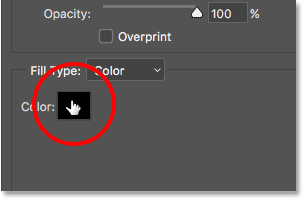
Let's also add a thin stroke around the letters. Select Stroke on the left of the Layer Style dialog box:
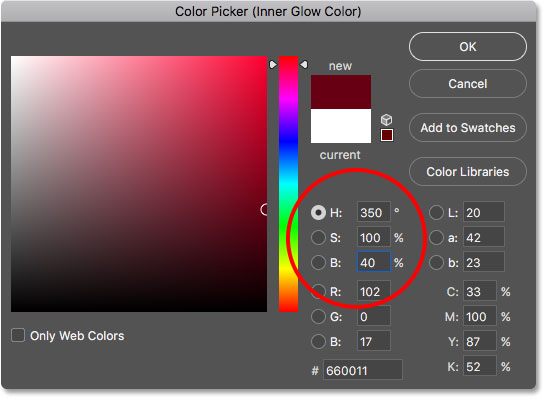
In the Stroke options, click the color swatch to change the color of the stroke:
In the Color Picker, set the H value to 350, the S value to 100 and the B value to 40, and then click OK:
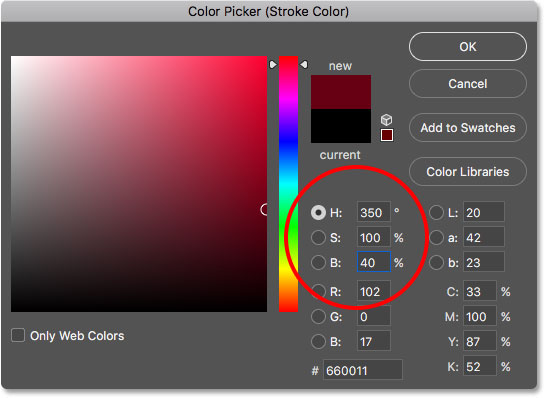
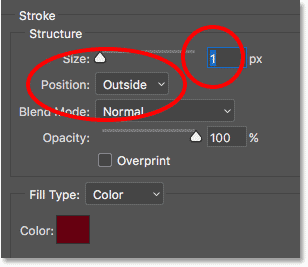
Back in the Stroke options, set the Size to 1 px (2 px may work better for larger images), and then change the Position to Outside:
And here's the text with the stroke applied. So far the effect looks rather plain. We'll make the letters look rounded and shiny next:

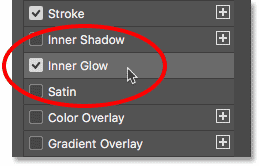
Step 6: Add An Inner Glow
Select Inner Glow on the left of the Layer Style dialog box:
Click the color swatch to change the color of the glow:
In the Color Picker, choose the same color we used for the stroke by setting H to 350, S to 100 and B to 40, and then click OK:
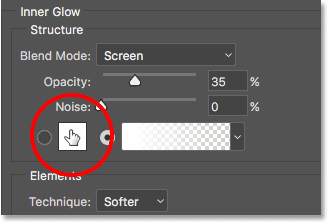
Back in the Inner Glow options, change the Blend Mode from Screen to Multiply and increase the Opacity to 100%. Then, increase the Size value to around 24 px:

You may need to experiment with the Size value depending on the size of your text. The result you want is for the Inner Glow to extend from the outer edges of the letters inward to nearly their centers, which creates the illusion of roundness:

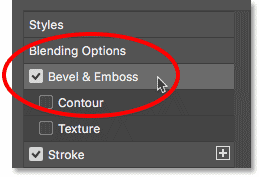
Step 7: Apply Bevel & Emboss
Finally, to make the letters look shiny, select Bevel & Emboss on the left of the Layer Style dialog box:
In the Shading section of the Bevel & Emboss options, click on the small arrow beside the Gloss Contour thumbnail, and then choose the Ring contour by double-clicking on its thumbnail (second from the left, bottom row):

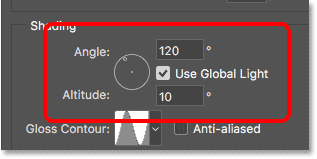
Still in the Shading section, make sure Use Global Light is selected. Leave the Angle set to 120° but lower the Altitude to 10°:
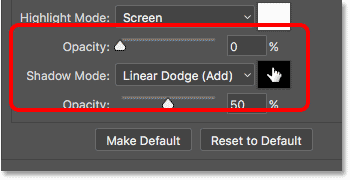
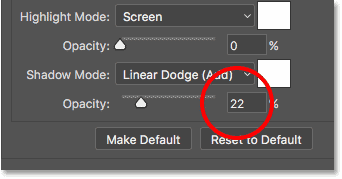
For the Highlight Mode, lower the Opacity to 0%. Then for the Shadow Mode, change the blend mode from Multiply to Linear Dodge (Add), and then click the color swatch:
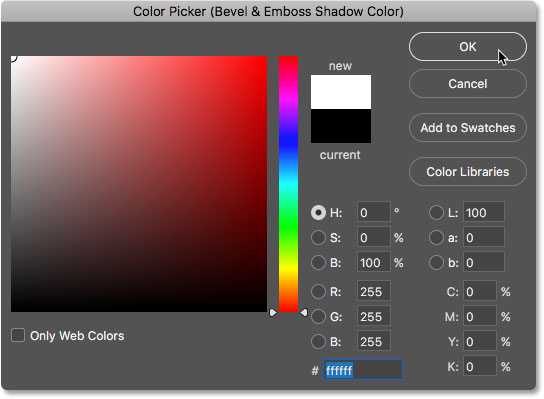
In the Color Picker, choose white for the shadow color, and then click OK:
Then lower the Shadow Mode opacity to 22%:
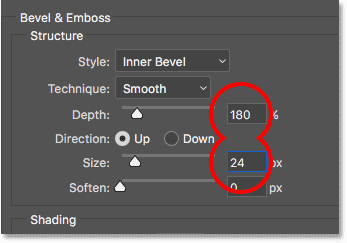
In the Structure section at the top of the Bevel & Emboss options, leave Style set to Inner Bevel and Technique set to Smooth. Then increase the Depth to 180% and the Size to 24px. As with some of the other options we've looked at, you may need to experiment with the Depth and Size depending on your text:
Click OK to close the Layer Style dialog box, and the candy cane text effect is complete:

Step 8: Copy The Layer Styles To Other Type Layers
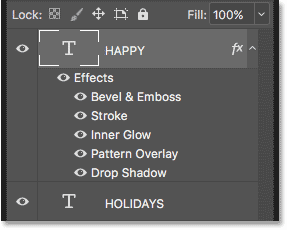
If we look in the Layers panel, we see all the layer styles that have been added to the Type layer at the top:
To copy the layer styles to another Type layer, press and hold the Alt (Win) / Option (Mac) key on your keyboard, and then click on the word "Effects" and drag it directly onto the other Type layer:
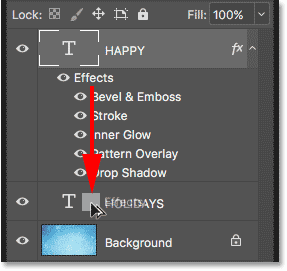
Release your mouse button, then release the Alt / Option key. Photoshop copies all the layer styles onto the other Type layer:
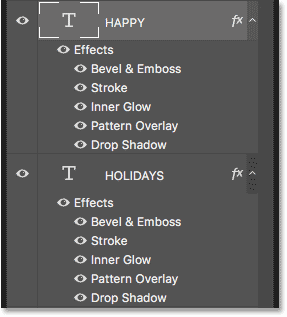
And in the document, we see that both words have now been transformed into sugary, delicious candy cane holiday treats:

And there we have it! That's how to create holiday candy cane text with Photoshop! For another fun text effect, learn how to turn type in gold with Photoshop. Or for something more winter-related, add falling snow to your photos! Visit our Text Effects or Photo Effects sections for more Photoshop tutorials!