
Screen Jumping Effect In Photoshop
In a previous tutorial, we learned how Photoshop's Paste Into command lets us easily place one photo into a selected area of another photo. In that tutorial, we recreated the same effect seen every week in electronics store flyers where the latest movie or video game is displayed on all the latest big screen HDTV's. In this tutorial, we'll add more action and excitement to the effect by making a person or object appear to be leaping right out of the screen!
To create this effect, you'll need a photo of a tv, computer monitor, cell phone or something similar (a quick Google search will give you lots of choices), and you'll need the photo that contains the person or object that will be jumping out of the screen. I'll be using Photoshop CS5 throughout this tutorial, but any recent version of Photoshop will work.
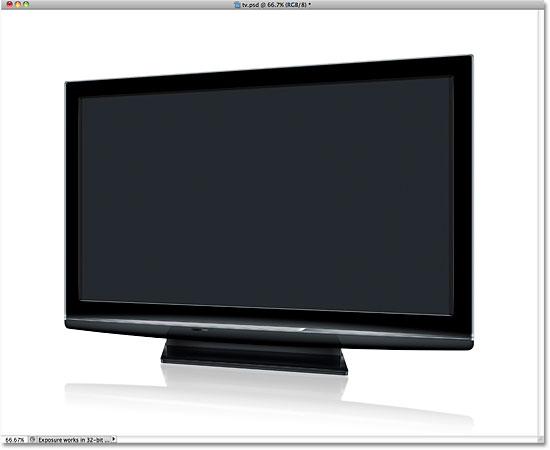
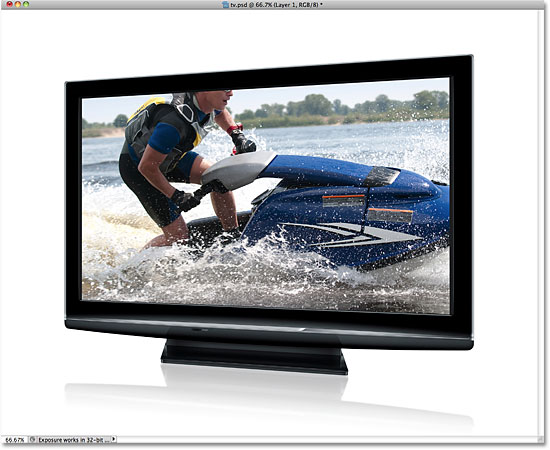
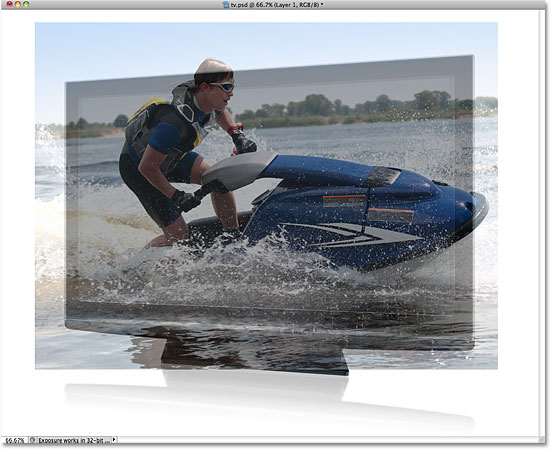
Here's the effect we're going for:

How To Create A Screen Jumping Effect
Step 1: Select The Screen
Open your image of a tv or other similar display device. Here's the image I'll be using:
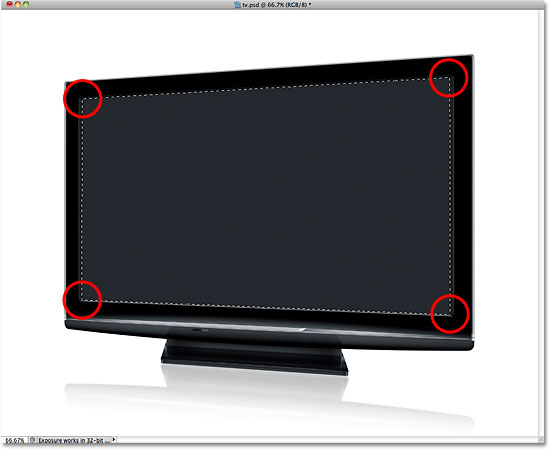
We need to select the screen itself, since that's the area we'll be placing the second photo into. The tv screen is made up of nothing more than four straight sides, so Photoshop's Polygonal Lasso Tool will make things easy. I'll select it from the Tools panel. By default, it's hiding behind the standard Lasso Tool, so I'll click on the Lasso Tool and hold my mouse button down until a fly-out menu appears, then I'll select the Polygonal Lasso Tool from the list:
Then, with the tool selected, all I need to do to select the tv screen is click once in each corner. I'll click first in the top left corner of the screen, then the top right, down to the bottom right, and then over to the bottom left. Finally, to close the selection, I'll click again in the top left corner where I started. When I'm done, a selection outline appears around the edges of the screen:
Step 2: Open The Photo That Will Appear Inside The Screen
Now that we have our screen selected, open the image that will appear inside of it. The image will open in a separate document window. Here's the photo I'll be using:

Step 3: Copy The Image To The Clipboard
Press Ctrl+A (Win) / Command+A (Mac) on your keyboard to quickly select the entire image. A selection outline will appear around it. Then press Ctrl+C (Win) / Command+C (Mac) to copy the image to the clipboard.
Step 4: Paste The Photo Into The Screen
Switch back over to the document window that contains the tv screen (or whatever screen you're using). We're going to paste the second photo into the selection we created. If you're using Photoshop CS5 as I am, go up to the Edit menu in the Menu Bar along the top of the screen, choose Paste Special, and then choose Paste Into:
If you're using Photoshop CS4 or earlier, simply go up to the Edit menu and choose Paste Into. Photoshop pastes the second photo directly into the screen:
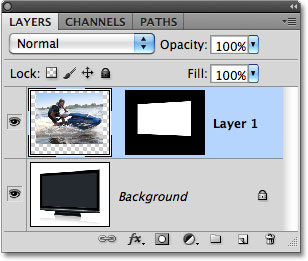
If we look in the Layers panel, we see that Photoshop has added the second photo on a new layer above the image of the tv on the Background layer. We also see that Photoshop used our selection outline to define a layer mask for the image, which is why it's visible only inside the tv screen even though the actual size of the image is larger than the screen area. The white area in the layer mask preview thumbnail represents the area inside the document window where the image is visible, while the black area surrounding it is where the image is hidden from view:
Step 5: Turn The Layer Mask Off
Hold down your Shift key and click directly on the layer mask preview thumbnail in the Layers panel:
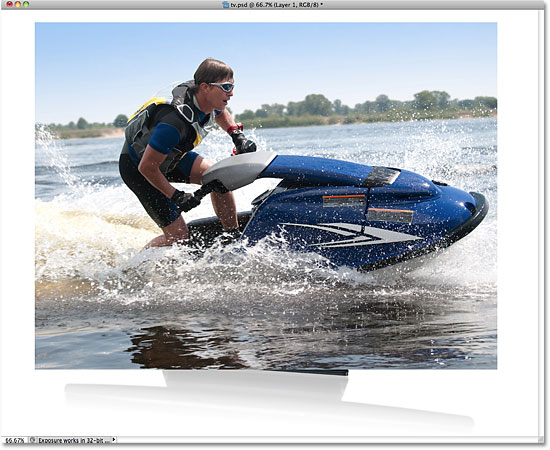
This will temporarily turn the layer mask off, allowing us to see the entire image in the document window. The tv becomes hidden behind the photo:
Step 6: Lower The Opacity Of The Layer
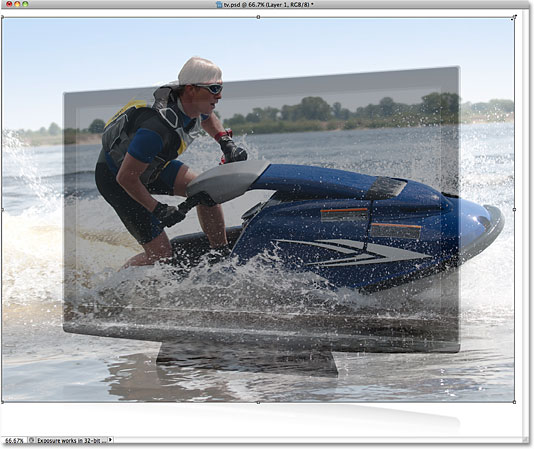
In a moment, we're going to reposition the image exactly where we need it in front of the tv. Of course, it would help if we could actually see the tv as we're doing that, so let's lower the opacity of the layer. You'll find the Opacity option at the top of the Layers panel. By default, it's set to 100%. Lower it to around 60%:
With the opacity lowered, the tv becomes visible through the photo in front of it:
Step 7: Resize And Reposition The Image With Free Transform
Press Ctrl+T (Win) / Command+T (Mac) on your keyboard to quickly bring up Photoshop's Free Transform box and handles around the image, then move and/or resize it as needed so it appears where you want it in front of the screen. To move the image, click anywhere inside the boundaries of the Free Transform box and, with your mouse button still held down, drag the image around inside the document. Don't click on the small target symbol in the center, though, or you'll move the target symbol, not the image. To resize the image, hold down your Shift key and drag any of the corner handles (the little squares). Holding the Shift key as you drag will constrain the shape of the image so you don't stretch and distort it as you're resizing it.
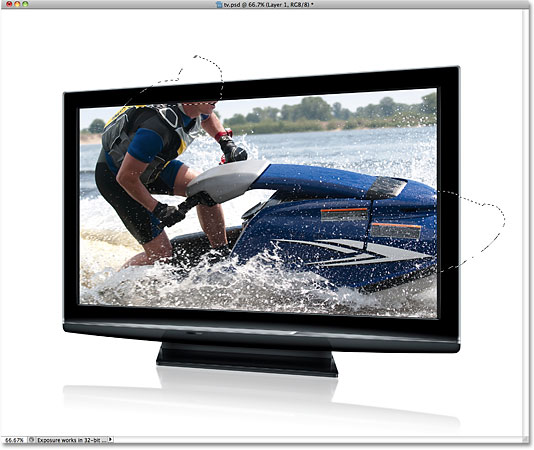
In my case, I'm going make my image just a little bit larger so more of the jet skier's head is positioned above the tv screen and the front of the jet ski itself extends out the right side of the screen. These are the two areas I'll be using in a moment to create the illusion that the jet ski is jumping out of the tv. When you're done, press Enter (Win) / Return (Mac) to accept the changes and exit out of the Free Transform command:
Step 8: Select The Areas That Will Extend Outside Of The Screen
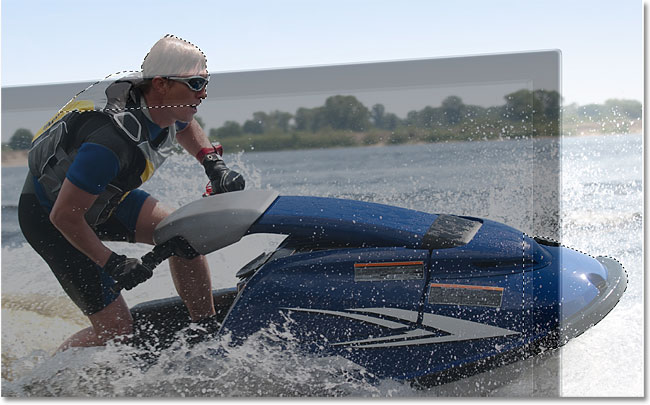
Use your favorite selection tool (Lasso Tool, Pen Tool, etc) to select the area(s) of the image that will extend out beyond the boundaries of the screen. As I mentioned, I'll want the top of the jet skier and the front of the jet ski to appear as if they're popping out of the tv, so I need to select those two areas. There's no need to select anything that already fits inside the screen since the layer mask already includes those areas. All we need to select are the areas that will extend beyond it. When you're done, you should see selection outlines around the areas:
Step 9: Turn The Layer Mask Back On And Set The Opacity Back To 100%
Hold down your Shift key once again and click on the layer mask preview thumbnail in the Layers panel to turn the layer mask back on. Then change the opacity of the layer back to 100%:
The image will reappear within the boundaries of the screen and only the outline of the area(s) we just selected will remain:
Step 10: Select The Layer Mask
We're going to add our selections to the layer mask. To do that, we'll first need the layer mask selected, so click on its preview thumbnail in the Layers panel to select it (no need to hold down the Shift key this time). A white highlight border will appear around the thumbnail letting you know that the mask is selected:
Step 11: Fill The Selections With White
Go up to the Edit menu at the top of the screen and choose the Fill command:
When the Fill dialog box appears, set the Use option in the top half of the dialog box to White:
Click OK to exit out of the Fill dialog box, and Photoshop fills the selected areas of the layer mask with white. Press Ctrl+D (Win) / Command+D (Mac) to remove the selection outlines since we know longer need them. If we look at the layer mask preview thumbnail again, we can see the new areas that we've filled with white extending out of the original screen shape:
With the areas now white on the layer mask, those areas of the image appear visible in the document, giving us our "screen jump" effect: