
How to Create a Monochromatic Color Effect in Photoshop
Learn an easy way to convert a full color photo to a single color with this simple monochromatic color effect in Photoshop! A step-by-step tutorial for Photoshop 2021 and earlier!
In this tutorial, I show you a fast and easy way to add a monochromatic color effect to an image with Photoshop. The term monochromatic means that the colors in the image are limited to different shades of the same hue, or the same main
color. And this is a great way to simplify an image or convey a certain mood or emotion. Black and white photography is monochromatic since it uses only shades of gray, but any color can work.
We'll start by going step-by-step through the basics of how to convert your image to monochromatic color using a Solid Color fill layer, which is the easiest way to do it. Then we'll learn how to combine some of the steps to create the effect even faster. From there, we'll look at a variation of the effect that mixes a single color with the photo's original colors to create a unified color theme. And finally, I'll show you the trick to choosing your color directly from the image itself.
I'm using Photoshop 2021 but any recent version will work. You can get the latest Photoshop version here.
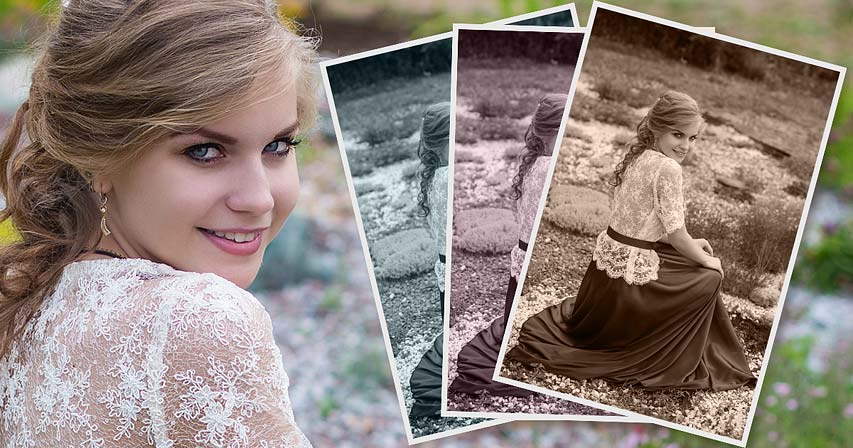
You can follow along by opening any image into Photoshop. I'll use this image from Adobe Stock:

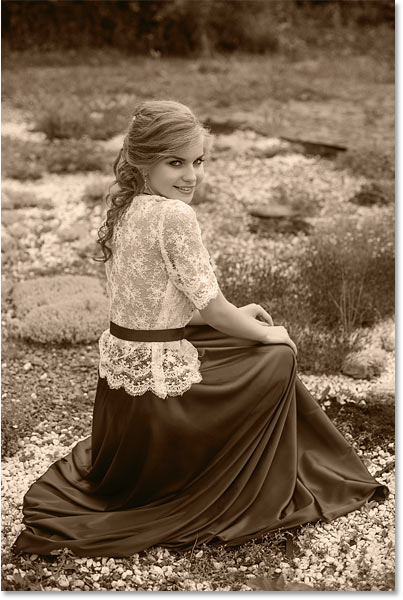
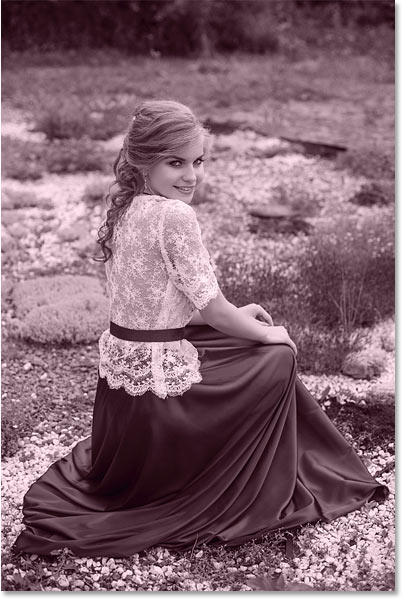
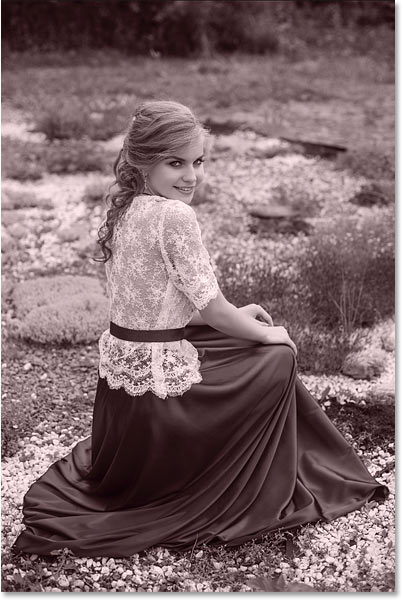
Here is just one example of the monochromatic effect, using a sepia tone to give the photo a vintage look. Other colors can be used depending on the subject and the mood you want to achieve:
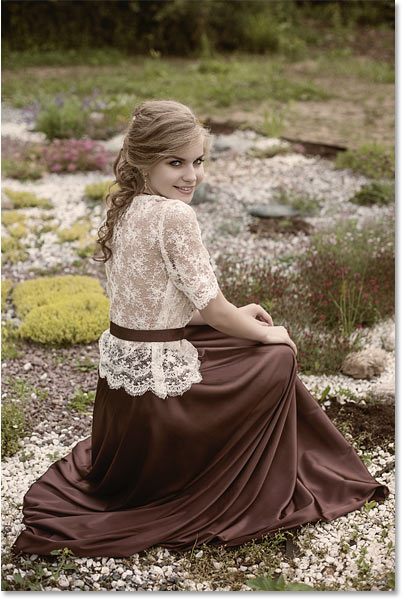
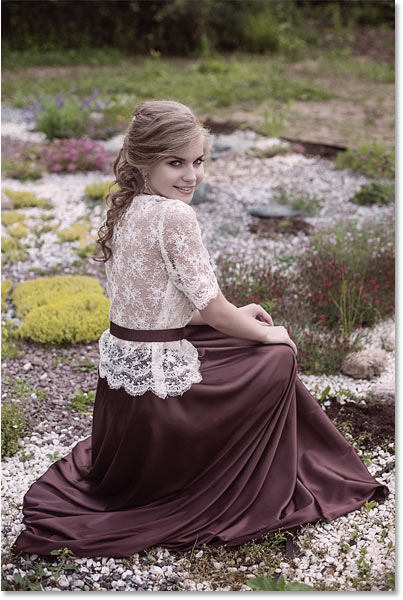
And here's the variation of the effect with the sepia tone mixing with the photo's original colors to unify and blend all the colors together:
Let's get started!
How to convert a photo to monochromatic color
Here's how to create the basic monochromatic color effect. Once we've learned how it works, I'll show you how to combine a few of the steps to speed things up.
Step 1: Add a Solid Color fill layer above the image
The easiest way to convert an image to monochromatic color is by using a Solid Color fill layer.
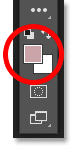
In the Layers panel, the original photo appears on the Background layer. Add a Solid Color fill layer above the image by clicking the New Fill or Adjustment Layer icon:
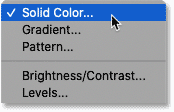
And choosing Solid Color from the list:
Step 2: Choose a main color from the Color Picker
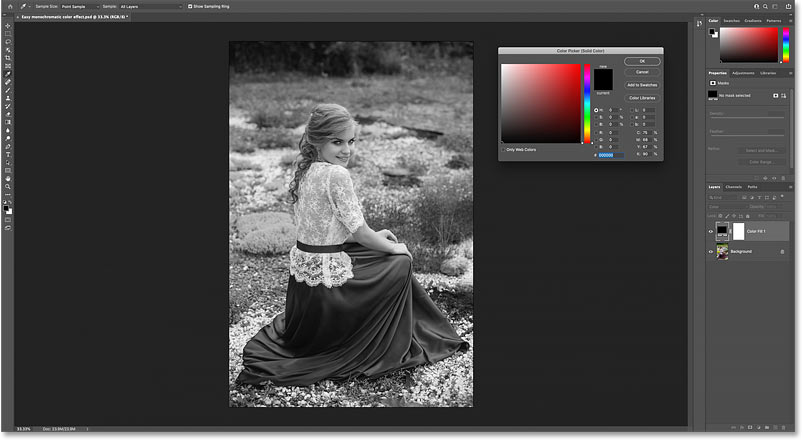
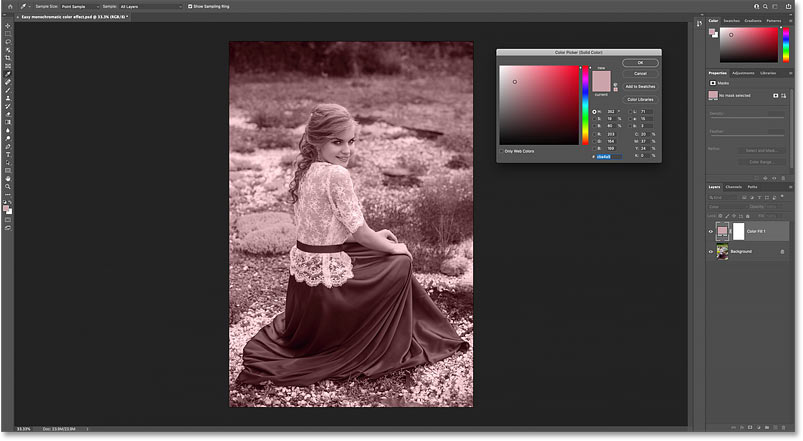
The Color Picker opens, and the image is temporarily blocked by whichever color is currently selected.
By default, it's black:
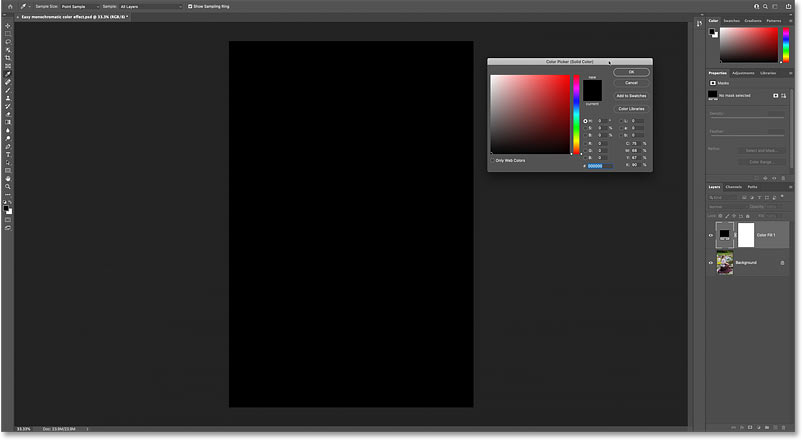
In the Color Picker, choose the color you want to use. At this point, we just need the hue (the main color). We'll come back and adjust the saturation and brightness in a moment.
I'll choose a reddish-pink:

Click OK to close the Color Picker, and now the new color blocks the image:

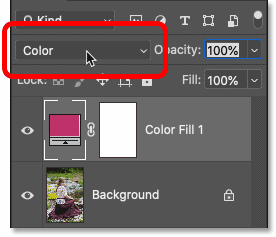
Step 3: Change the fill layer's blend mode to Color
Back in the Layers panel, the Solid Color fill layer sits above the Background layer.
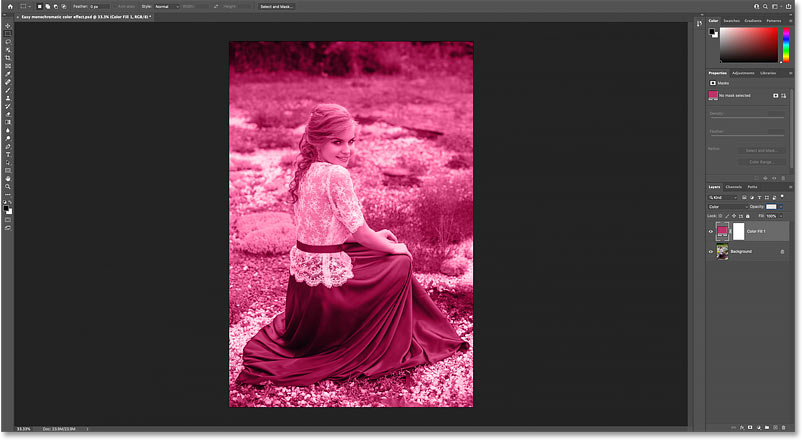
To blend the color from the fill layer with the image below it, change the fill layer's blend mode from Normal to Color:
The Color blend mode keeps the tonal (brightness) values of the image below but replaces the original colors with the color from the fill layer, creating the initial effect:
Get my Complete Guide to Layer Blend Modes in Photoshop!
Step 4: Re-open the Color Picker
The only problem, at least in my case, is that the saturation of the color is too strong, and it's also too bright.
To fix that, re-open the Color Picker by double-clicking the fill layer's color swatch in the Layers panel:
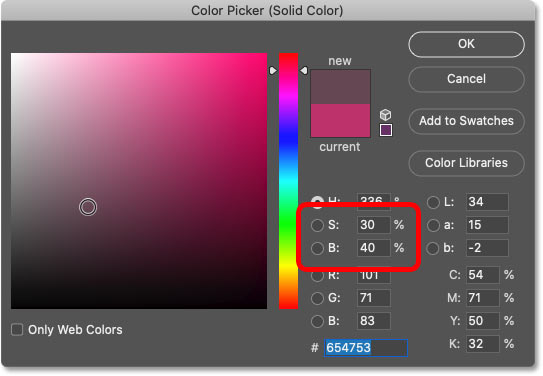
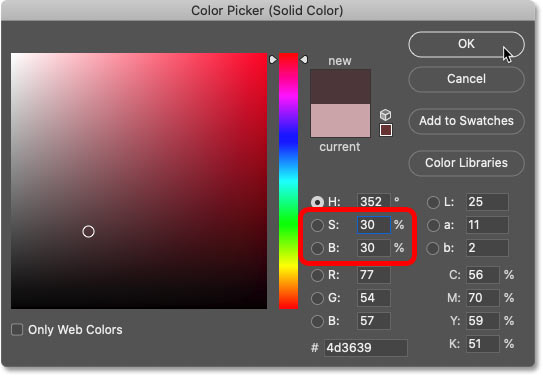
Step 5: Adjust the color's saturation and brightness
And then adjust the saturation and brightness as needed.
I'll lower the Saturation (the S value) to 30 percent and the Brightness (the B value) to 40 percent. Click OK when you're done:
And with the saturation and brightness lowered, the effect is much more subtle:
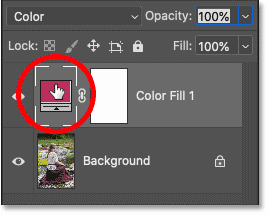
In the Layers panel, you can toggle the effect on and off to compare it with the original photo by clicking the fill layer's visibility icon:
And that's the basics of how to convert an image to monochromatic color using a Solid Color fill layer in Photoshop!
A faster way to create the monochromatic color effect
So now that we know how it works, here's how to combine a few steps and create the monochromatic color effect even faster!
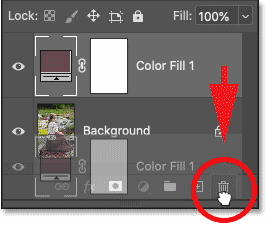
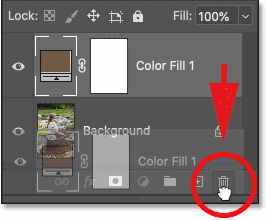
Before we continue, I'll delete my fill layer by dragging it down onto the trash bin:
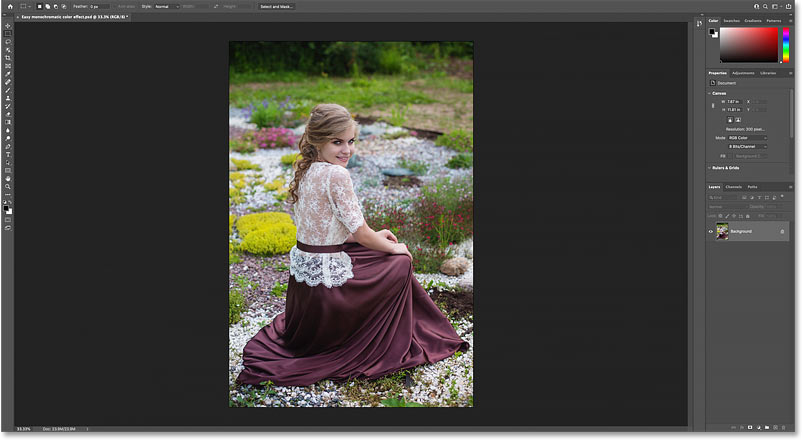
And now I'm back to the original image:
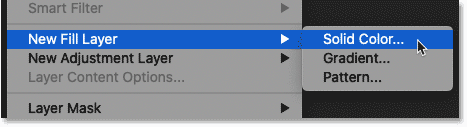
Step 1: Go to Layer > New Fill Layer > Solid Color
Instead of adding a Solid Color fill layer from the Layers panel, a better way is to go up to the Layer menu in the Menu Bar, choose New Fill Layer, and then choose Solid Color:
Step 2: Set the Mode to Color
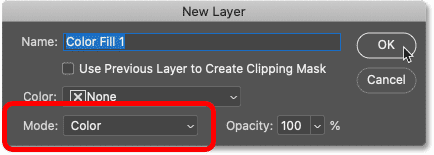
The reason it's better is because this time, Photoshop first opens the New Layer dialog box. And from here, we can change the blend mode of the fill layer before it's added.
Change the Mode (short for Blend Mode) option from Normal to Color:
Step 3: Choose a color from the Color Picker
Then click OK to close the dialog box, and the Solid Color fill layer appears above the image, just like before. But this time, because Photoshop automatically set the blend mode to Color, the fill layer is not blocking the image from view. Instead, the color and the image are already blending together.
Since the default color is black, the initial result is a black and white effect:
But you can choose any color you like from the Color Picker. I'll go with a sepia tone this time by setting the Hue (H) to 30 degrees, the Saturation (S) to 40 percent and the Brightness (B) to 45 percent:
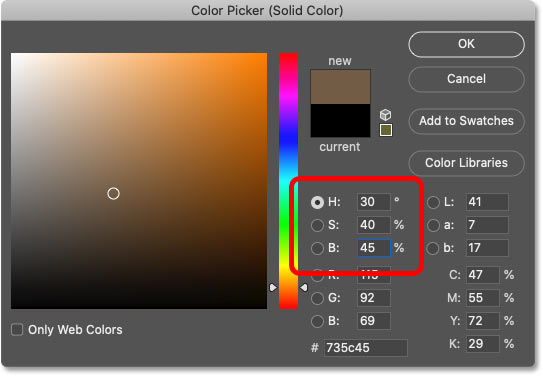
Click OK to close the Color Picker, and here's the result:
Variation: How to unify the colors in an image
Instead of creating a true monochromatic effect by replacing the original image colors completely, we can also just mix the new color in with the originals. This is a great way to simplify an image and create a unified color theme, especially when the original colors are too different and distracting.
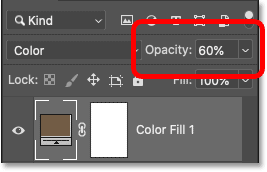
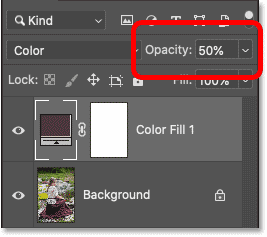
In the Layers panel, simply lower the opacity of the Solid Color fill layer. The more you lower the opacity below 100 percent, the more the original image colors will show through.
I'll lower mine to 60 percent:
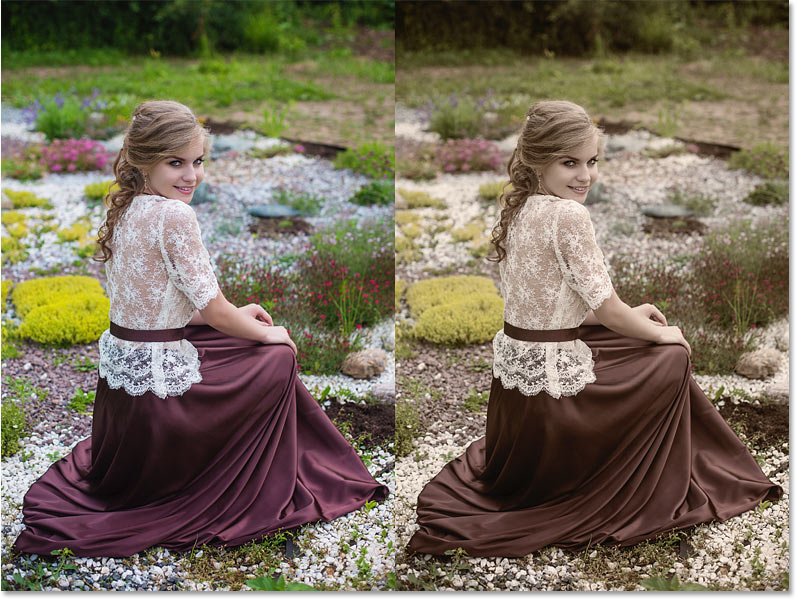
With the opacity lowered, the fill layer's color is mixing with the original image colors and blending everything together.
For comparison, the original photo is on the left and the blended version is on the right:
How to choose a monochromatic color from the image
Finally, instead of choosing a color for your monochromatic effect from the Color Picker, what if you want to choose one from the image itself? Here's how to do it.
First, in the Layers panel, I'll drag my existing Solid Color fill layer down onto the trash bin so I'm starting once again with the original image:
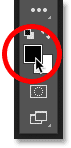
Step 1: Click the Foreground Color swatch
You may have noticed that every time we added a Solid Color fill layer, the Color Picker was initially set to black. That's because the Color Picker was using Photoshop's current Foreground color, which is black by default.
To change the color, click on the Foreground color swatch in the toolbar:
Step 2: Click on a color in the image to sample it
When the Color Picker appears, move your mouse cursor over the image and click on a color to sample it.
I'll sample a skin tone by clicking on the woman's cheek:
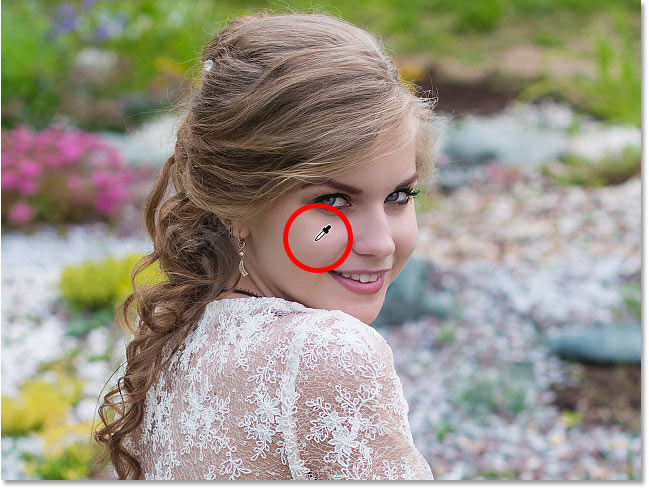
Click OK to close the Color Picker, and now the sampled color has become our new Foreground color:
Related: How to create color swatches from images in Photoshop
Step 3: Go to Layer > New Fill Layer > Solid Color
Add a Solid Color fill layer by going up to the Layer menu, choosing New Fill Layer and then Solid Color:
Step 4: Set the Mode to Color
In the New Layer dialog box, change the blend mode to Color:
Then click OK, and the original colors are replaced with the sampled color from the image:
Step 5: Adjust the brightness and saturation in the Color Picker
Before closing the Color Picker, adjust the color's saturation and brightness if needed. I'll lower both to 30 percent:
Then click OK, and here's the result:
Step 6: Lower the fill layer's opacity (optional)
Of course, you can also lower the opacity of the fill layer to blend the sampled color with the rest of the colors in the image.
I'll lower the opacity to 50 percent:
And here's my final result:
Where to go next...
And there we have it! That's how easy it is to add a monochromatic color effect to an image with Photoshop!
Visit my Photo Effects section for more tutorial ideas. And don't forget, all of my tutorials are available to download as PDFs!