Using the new Adjustment Brush Tool in Photoshop
Photoshop's new Adjustment Brush Tool makes local image adjustments simple and intuitive, especially for Photoshop beginners. Learn how it works with this step-by-step tutorial.
Download the PDF: Using the Adjustment Brush Tool
The new Adjustment Brush Tool, available in the Photoshop beta, is a simple and intuitive way to make tonal or color changes to specific areas of your image.
The Adjustment Brush Tool combines the flexibility of adjustment layers with Photoshop’s Brush Tool so it’s easy to choose an adjustment and paint over the area in your image where you want the adjustment to appear.
Beginner Photoshop users will benefit the most from the Adjustment Brush Tool, especially if you are not comfortable using layer masks. But more advanced users will find that it saves time by streamlining some of the steps. So let’s see how it works.
Which Photoshop version do I need?
For now, the Adjustment Brush Tool is only available in the Photoshop beta. It was added in February 2024.
If you have an active Creative Cloud subscription, you can install, update and open the Photoshop beta from the Creative Cloud Desktop app.
Let's get started!
How to use the Adjustment Brush Tool
Here are the steps for using the Adjustment Brush Tool to add local adjustments to your image. Once we cover the basics, I’ll share a few tips to speed up your workflow.
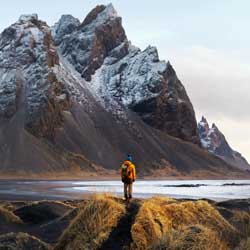
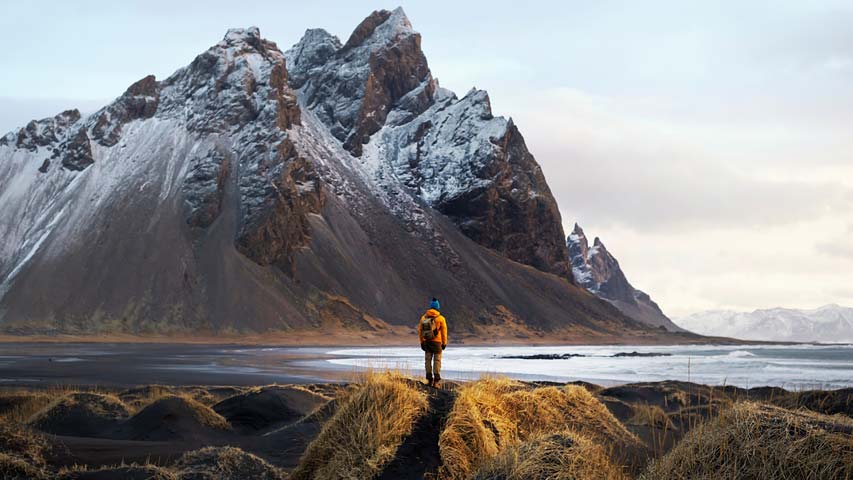
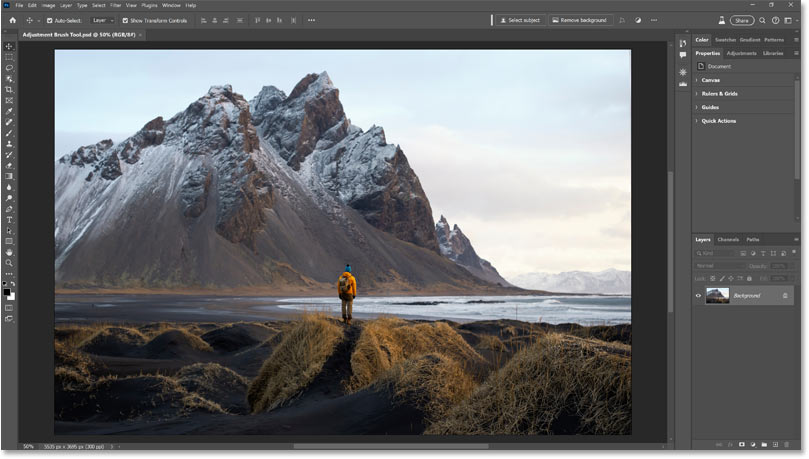
For this tutorial, I’ll use this image from Adobe Stock.
1. Select the Adjustment Brush Tool
In the toolbar, click and hold on the standard Brush Tool. Then choose the Adjustment Brush Tool from the menu.

2. Choose an image adjustment
In the Options Bar, click the Adjustment drop-down box and choose an image adjustment from the list.
Only six adjustments are available for now but more should be added later.
I’ll choose Brightness/Contrast.

3. Paint over an area to reveal the adjustment
Selecting the Adjustment Brush Tool automatically sets your Foreground color (the brush color) to white, as shown near the bottom of the toolbar.
This means that the adjustment will be revealed in the area where we paint.

Before you paint, resize your brush if needed using the left and right bracket keys on your keyboard.
- The right bracket key ( ] ) makes the brush larger.
- The left bracket key ( [ ) makes it smaller.
Windows users: If nothing happens when you press the bracket keys, press the Esc key on your keyboard to deselect the Adjustment drop-down box in the Options Bar. The bracket keys should now work.
Then paint over the area of your image where you want the adjustment to appear.
I’ll paint a brush stroke along the bottom of the mountains. This reveals the Brightness/Contrast adjustment in that area, making it brighter.

The adjustment is added as an adjustment layer
As soon as you release your mouse button, Photoshop applies the image adjustment as an adjustment layer which appears above your image in the Layers panel.
Adjustment layers are a non-destructive way to apply adjustments because they keep the adjustment separate from your image.

Photoshop converts the brush stroke to a layer mask
It also converts your brush stroke into a layer mask for the adjustment layer.
- The black areas of the mask are where the adjustment is hidden in the image.
- The white area (where we painted) is where the adjustment is visible.

Continue painting over more areas of the image to add them to the adjustment as needed.
I’ll paint over the grassy areas near the bottom to brighten them.

And those new areas are filled with white on the layer mask.

Tip: To better see which areas of your image are affected by the adjustment, toggle the adjustment layer on and off by clicking the visibility icon.

4. Edit the adjustment settings
The settings for the adjustment appear in the Properties panel.
Since I added a Brightness/Contrast adjustment, I can edit the look by dragging the Brightness and Contrast sliders.

5. Subtract unwanted areas from the adjustment
If you need to remove an area from the adjustment, click the Subtract from adjustment icon in the Options Bar.
This sets your Foreground color to black, which means that the adjustment will be hidden in the areas where you paint.

I’ll again paint along the bottom of the mountains, but this time to hide the Brightness/Contrast adjustment from that area.

And the area where I painted, which was previously filled with white on the layer mask, is now filled with black.

Tip: After subtracting an area, be sure to reselect the Add to adjustment icon in the Options Bar. Otherwise the Subtract option will remain selected and could cause unexpected results the next time you use the Adjustment Brush Tool.
6. Add more adjustments if needed
With the Adjustment Brush Tool still active, you can add more adjustments by selecting them from the Options Bar and painting over the areas you want to affect.
Each adjustment will appear as its own adjustment layer in the Layers panel.

But there’s one catch. If you want to add the same type of adjustment (in my case Brightness/Contrast), you first need to select the Background layer in the Layers panel. Otherwise you will just paint on your current adjustment layer.

Then paint over the area you want to adjust. I’ll start painting in the upper right of the sky.
The initial Brightness/Contrast settings are making the sky too bright but I’ll fix that next.

I’ll release my mouse button, and the new Brightness/Contrast adjustment layer appears. In this case it appears below the original adjustment layer because the Background layer was selected.

Tip: Another way to add the same type of adjustment is to click the Add a new adjustment button (+ Adjustment) in the Contextual Task Bar. Then choose the same adjustment from the drop-down menu.
I keep my Task Bar pinned to the upper right of the interface but yours may be located somewhere else on the screen.

In the Properties panel, I’ll lower the Brightness value for my new adjustment.

This brings out more detail in the sky where I painted.

Then I’ll continue painting over the remaining areas of the sky to add them to the adjustment.

Tips for working with the Adjustment Brush Tool
Now that we’ve covered the basics of using the Adjustment Brush Tool, here are a few tips to make things easier and speed up your workflow.
1. Turn on the overlay
If you’re having trouble seeing where you painted, turn on the Overlay in the Options Bar.

With the overlay on, the areas where you painted appear in magenta. Uncheck the Overlay option to turn it off.

2. Avoid choosing Subtract from selection in the Options Bar
Instead of choosing the Subtract from adjustment icon in the Options Bar and then needing to reselect Add to adjustment when you’re done, just press the X key on your keyboard to swap your Foreground and Background colors.
- Paint with white to reveal the adjustment.
- Paint with black to hide the adjustment.
The X key cycles between the two colors.
3. Start with a selection
Finally, instead of painting over areas to add them to the adjustment, you can start with a selection and then instantly convert the selection into your layer mask.
For example, a faster way to adjust the sky would be to go up to the Select menu and choose Sky.

Photoshop automatically selects the sky for us.

To convert the selection into the layer mask, simply click once anywhere inside the selection.

In the Layers panel, we see that Photoshop added the new Brightness/Contrast adjustment layer, and it used my selection to create the layer mask, filling the sky area with white.

So now when I go to the Properties panel and lower the Brightness value like I did before, the entire sky is adjusted at once.

And there we have it! That’s how to add adjustments to specific areas of your image using the new Adjustment Brush Tool in the Photoshop beta.
Related tutorials:
- Image Adjustments vs Adjustment Layers
- The new Adjustment Layer Presets in Photoshop
- Using Auto Image Adjustments as Adjustment Layers
Don't forget, all of my Photoshop tutorials are now available to download as PDFs!