
Rotate And Straighten Images With The Crop Tool In Camera Raw 8
In the previous tutorial, we learned the basics of cropping images in Camera Raw using the Crop Tool. In these related tutorials, we'll learn a couple of ways Camera Raw can be used to straighten an image non-destructively.
We'll start in this tutorial by learning how to rotate and straighten an image using the Crop Tool itself (along with a handy feature found in the Crop Tool's menu). Then, in the next tutorial, we'll learn how to combine the Crop Tool with Camera Raw's Straighten Tool to straighten photos quickly and easily.
As with the previous tutorials in this Adobe Camera Raw series, I'll be looking specifically at Camera Raw 8, part of Photoshop CC (Creative Cloud) and available as a free upgrade (from Camera Raw 7) for Photoshop CS6 users.
Here's an image I've opened in Camera Raw. It's just a fun photo I snapped one evening while my two dogs enjoyed a relaxing moment in the park. Now, these dogs are not the type to sit still for long, and I was so concerned with getting the shot before one (or both) of them took off down the field that I didn't realize I was holding the camera on an angle, causing the image to appear crooked. Plus, I had to crouch way down to get the shot and, well, anyway, that's my excuse:
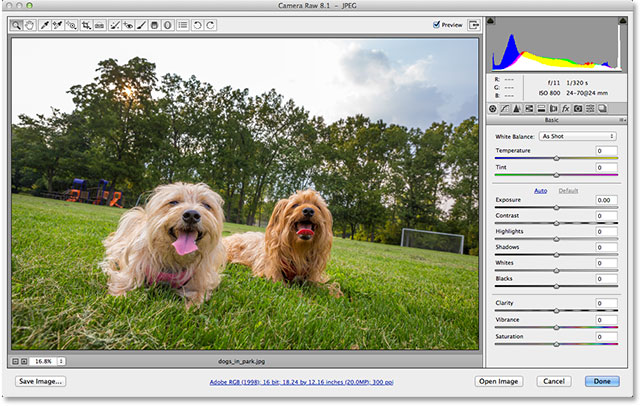
Fortunately, straightening the image afterwards in Camera Raw is easy, and as I mentioned, there's a couple of ways to go about it. The way we'll look at here is by using the Crop Tool. I covered the Crop Tool in detail in the previous tutorial. The Crop Tool is located in the toolbar along the top left of the Camera Raw dialog box:
You can simply click on the Crop Tool icon to select it, but I'm going to click on it and hold my mouse button down for a second or so to display the Crop Tool's menu so I can select a preset aspect ratio for my crop. If I select Normal at the very top of the list, I'll be able to freely crop the image to any aspect ratio I like, but I want my final image to appear as a standard 4x6 so I'll select the 2 to 3 ratio. Of course, you can choose any aspect ratio you like for your image:

With the Crop Tool and my aspect ratio selected, I'll click inside my image and drag out an initial cropping box. As we learned in the Crop Tool tutorial, the area inside the crop box is what I'll keep, while everything surrounding the box (in the grayed out area) is what will be cropped away:

So far so good. Now that we have an initial crop box, to straighten the image, we can simply rotate the box. To rotate it, move your mouse cursor anywhere outside the crop box (into the grayed out area). You'll see your cursor change into a curved, double-sided arrow. Click and with your mouse button still held down, drag your mouse to rotate the box. Unlike how the Crop Tool works in Photoshop CS6 and CC, rotating the crop box in Camera Raw actually rotates the box itself while the image remains locked in place. In Photoshop, the opposite happens. The image rotates on the screen while the cropping box remains in place:

Of course, without any sort of visual guides or cues to help us out, it can be tough to judge the correct angle we need to straighten the image. Fortunately, Camera Raw's Crop Tool includes a feature that makes straightening things much easier. Click and hold on the Crop Tool icon in the toolbar to display its menu, then choose Show Overlay from the list:

You can also Right-click (Win) / Control-click (Mac) directly inside the image itself to bring up the same Crop Tool menu and then select Show Overlay:

Either way displays a grid overlay inside the crop box. At first, the overlay appears as a 3x3 grid designed to help us compose our image using the classic Rule of Thirds, which states that we can add more interest to our image if we place our subject at or near one of the spots where the horizontal and vertical grid lines intersect:

I'm not going to worry about my composition for now because what I'm really interested in here is straightening the image. With the overlay visible, as soon as we start rotating the crop box again, the 3x3 grid changes to a much more detailed grid designed to help us straighten the image. Simply rotate the crop box to line the grid lines up with something in the photo that should be straight, either vertically or horizontally. With outdoor photos, the horizon line is often a great choice for lining things up, but with my image here, the horizon isn't quite as straight as I'd like it to be (it's more of a grassy hill than a horizon) so I'll also use the goal posts on the far right of the image to help me out:

Once you have everything lined up, you can then resize your crop box as needed by clicking and dragging any of its handles. Since I'm using a preset aspect ratio, I can drag any of the four corner handles to resize the box. If you're using Normal mode to freely crop the image to any aspect ratio, you'll find additional handles on the top, bottom, left and right of the crop box. You'll notice that you can only resize the box within the boundaries of the image itself which can seem a bit confusing when working on an angle. You may find it helps to move and reposition the crop box, which you can do by clicking anywhere inside the box and, with your mouse button held down, dragging it with your mouse:

Once you've rotated and resized your crop box, press Enter (Win) / Return (Mac) on your keyboard to crop and straighten the image in one shot:

As with everything we do in Camera Raw, our cropping and straightening is entirely non-destructive which means if we decide we don't like the crop, or we didn't get the rotation angle quite right and the image is still not straight, we can easily go back and try again. Simply press the letter C on your keyboard to quickly reselect the Crop Tool and your crop box will reappear just as you left it. You can then rotate or resize it again as needed. In my case, the image now appears straight but I think I'll try a tighter crop around my two subjects to reduce and simplify the image:

Press Enter (Win) / Return (Mac) on your keyboard when you're done to re-crop the image:

And there we have it! That's how to rotate and straighten an image using the Crop Tool and the Show Overlay option in Adobe Camera Raw 8! Check out our Photo Retouching section for more Photoshop image editing tutorials!