
Sharpen Images in Photoshop with the High Pass filter
Learn how to sharpen your images in Photoshop quickly and easily with the High Pass filter, and how to find the best sharpening settings for your image! For Photoshop CC and CS6.
When it's time to sharpen an image, most Photoshop users turn to one of two sharpening filters, either Unsharp Mask or Smart Sharpen. But the High Pass filter is also great for sharpening images, and it's much easier to use, with none of the confusing options you'll find with those other two filters.
In this tutorial, I'll explain what it means to sharpen an image in Photoshop, and why the High Pass filter is such a powerful sharpening tool. You'll learn how to find the best settings to use with your image, and I'll show you how to apply the High Pass filter non-destructively so you can sharpen your image without making any permanent changes. I'll be using Photoshop CC but everything you'll learn is fully compatible with Photoshop CS6. You can get the latest Photoshop version here.
Let's get started!
What does "image sharpening" mean?
To understand why Photoshop's High Pass filter is so good at sharpening images, it helps to understand how image sharpening works in general.
Much like a good magic trick, image sharpening is an illusion. It works by increasing contrast along the edges in your image. Photoshop considers an edge to be any area where there's a big, sudden change in brightness between neighboring pixels.
Increasing contrast along the edges makes the light side of the edge lighter and the dark side darker. Your brain then interprets the increased contrast as "sharper". The more we boost edge contrast, the sharper the image appears.
Why is the High Pass filter great for image sharpening?
So sharpening an image is all about increasing edge contrast. But what does that have to do with Photoshop's High Pass filter? Well, before we can increase contrast along the edges, we first need to find those edges. And High Pass is an edge-detection filter. It looks for edges in the image and highlights them. Areas that are not an edge are ignored.
Once the edges are highlighted, we can then combine the High Pass results with one of Photoshop's contrast-boosting blend modes to easily increase edge contrast without affecting other parts of the image!
How to sharpen images in Photoshop with High Pass
So now that we know that sharpening an image means increasing contrast along the edges, and that Photoshop's High Pass filter detects those edges, let's learn how to sharpen an image with High Pass!
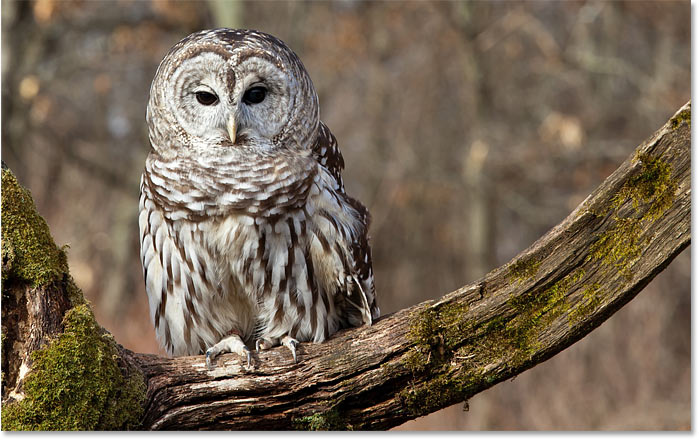
To follow along, you can use any image in need of some sharpening. I'll use this photo from Adobe Stock:
Step 1: Convert the Background layer into a smart object
Start by converting your image layer into a smart object. That way, the High Pass filter can be applied as a non-destructive smart filter.
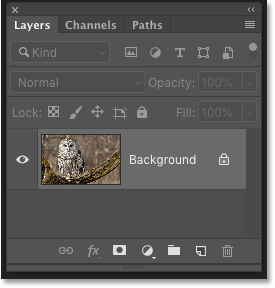
In the Layers panel, the image sits on the Background layer:
To convert the layer to a smart object, click the menu icon in the top right corner of the Layers panel:
And choose Convert to Smart Object from the menu:

A smart object icon appears in the lower right of the preview thumbnail, telling us that the image is now safely inside a smart object.
Any sharpening we add with the High Pass filter will now be applied to the smart object itself, leaving the original image unharmed:
Step 2: Select the High Pass filter
Next, select the High Pass filter by going up to the Filter menu in the Menu Bar, choosing Other, and then choosing High Pass:

As soon you select High Pass, your image will turn gray:
Step 3: Adjust the Radius value to highlight the edges
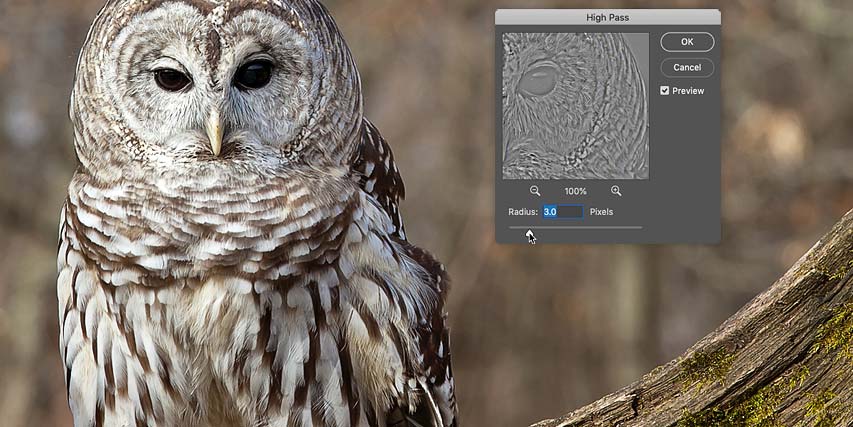
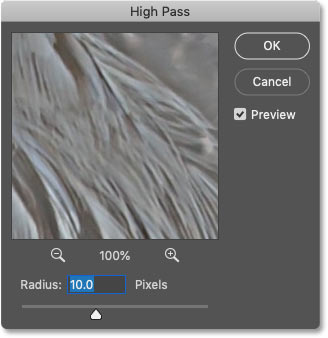
The High Pass filter dialog box is very simple to use, with just a preview window and a Radius slider below it. Let's look at how the High Pass filter works:
How Photoshop's High Pass filter works
High Pass works by filling the entire image with flat, neutral gray. It then looks for edges in the image (areas with an abrupt change in brightness between neighboring pixels) and highlights them by making the light side of the edge lighter and the dark side darker. Non-edge areas remain flat gray.
The Radius value affects the width of the edge highlighting by controlling the number of pixels extending outward from the edge that should be included and highlighted as part of the edge.
In other words, a Radius value of 1 pixel would mean that the High Pass filter is highlighting only a single pixel along either side of an edge. But increasing the Radius value to 10 pixels would extend the highlighting outward to include 10 pixels on either side.
How to find the best Radius value for image sharpening
Since the goal of image sharpening is to increase contrast only along the edges, we want to keep the width of the highlighting to a minimum, which means that lower Radius values work best.
And the easiest way to find the best Radius value for your image is to start by dragging the Radius slider all the way to the left, to a value of 0.1 pixels:

At the lowest setting, the entire image is filled with solid gray and no edges are visible.
This does not mean there are no edges in the image, or that the High Pass filter is not able to detect them. It just means that the Radius value is too low at the moment for the edges to be seen:

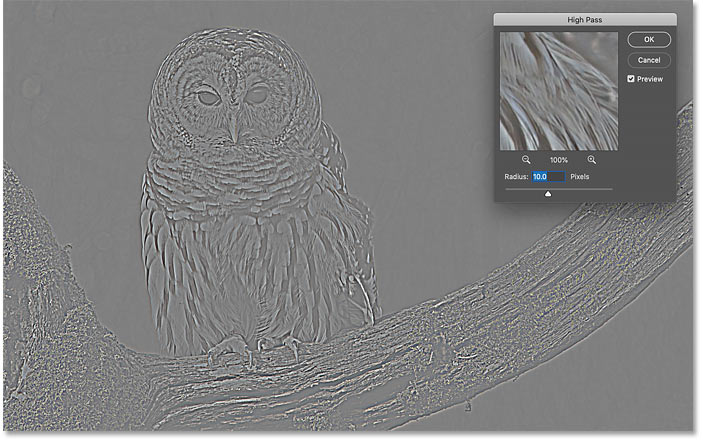
To bring the edges into view, slowly increase the Radius value by dragging the slider to the right. I'll increase mine to 5 pixels:

And notice that we now see thin but obvious highlighting around the edges.
Here, the highlights appear around the owl's face and feathers, and in the tree branch. But other areas of the image that are not part of an edge remain solid gray:
Setting the Radius value too high
Be careful not to push the Radius value too far, or else too much of the image will be highlighted.
For example, I'll increase the Radius value to something extreme, like 40 pixels:
This tells Photoshop to extend the width of the edges out to 40 pixels on either side. And now almost every part of the image is considered an edge. Even the blurred objects in the background, which we would normally not want to sharpen, are now highlighted as edges:
The Radius value sweet spot
For the best sharpening results, choose a Radius value that's large enough to highlight the edges while still keeping those highlights as close to the edges as possible.
The exact Radius value you need will depend both on the size of your image and on the amount of detail. In general, values of between 2 and 5 pixels work best.
For my image, I'll lower the Radius down to 3 pixels:
And at this lower setting, the edge highlighting is much more subtle yet still visible. This is the result we're looking for:
Step 4: Close the High Pass filter
When you're done, click OK to close the High Pass filter's dialog box:

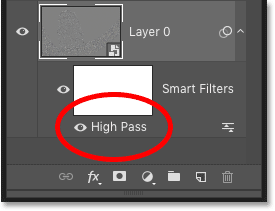
And in the Layers panel, we see High Pass listed as a smart filter below the image:
Step 5: Sharpen the image by changing the filter's blend mode
With the edges highlighted, we can now sharpen the image just by changing the High Pass filter's blend mode.
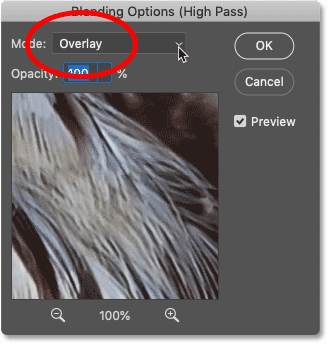
Double-click on the Blending Options icon to the right of the filter's name:
And then in the Blending Options dialog box, change the Mode (short for Blend Mode) to one of Photoshop's contrast-boosting blend modes.
The blend modes you'll want to try are Overlay, Soft Light, Hard Light, and Linear Light:
How the blend modes affect image sharpness
All of Photoshop's contrast blend modes hide areas of neutral gray, which means that the flat gray, non-edge areas from the High Pass filter disappear. And since they've disappeared, they have no effect at all on our image sharpening.
Meanwhile, the highlights from the filter are used to increase contrast along the edges by making the light side of the edges lighter and the dark sides darker.
Sharpening with the Overlay and Soft Light blend modes
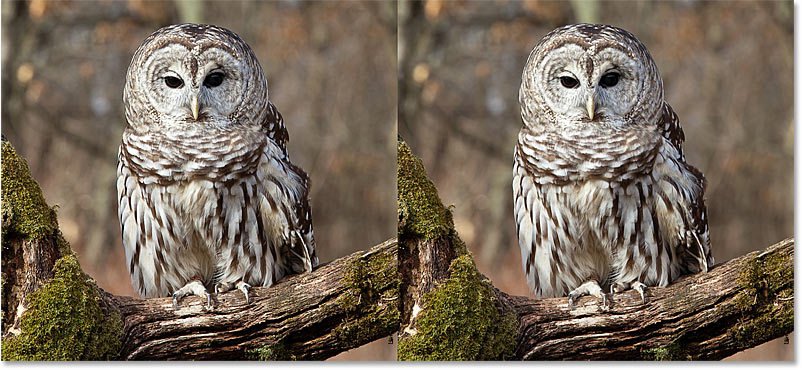
The two most commonly-used blend modes for sharpening images with High Pass are Overlay and Soft Light.
Overlay produces a higher contrast effect, resulting in a stronger amount of sharpening, while Soft Light gives you lower contrast and more subtle sharpening.
On the left is the result using Overlay, and on the right is the sharpening with Soft Light. Keep in mind that the differences in sharpness are not as noticeable in these smaller screenshots as they will be with your own, larger image:
Sharpening with the Hard Light and Linear Light blend modes
If Overlay still produces less sharpening than you need, try the Hard Light or Linear Light blend modes. Both will result in even stronger sharpening, with Linear Light being the strongest.
On the left is the sharpening with Hard Light, and on the right is Linear Light:
Learn Photoshop's essential Blend Mode Tips and Tricks!
Step 6: Fine-tune the sharpening by lowering the filter's opacity
Once you've chosen a blend mode, you can then fine-tune the amount of sharpening by adjusting the Opacity of the High Pass filter.
The more you lower the opacity, the more you'll reduce the sharpening effect:

Step 7: Close the Blending Options dialog box
Click OK to close the Blending Options dialog box, and you're done:

Learn how to smooth and soften skin in Photoshop
How to toggle the image sharpening on and off
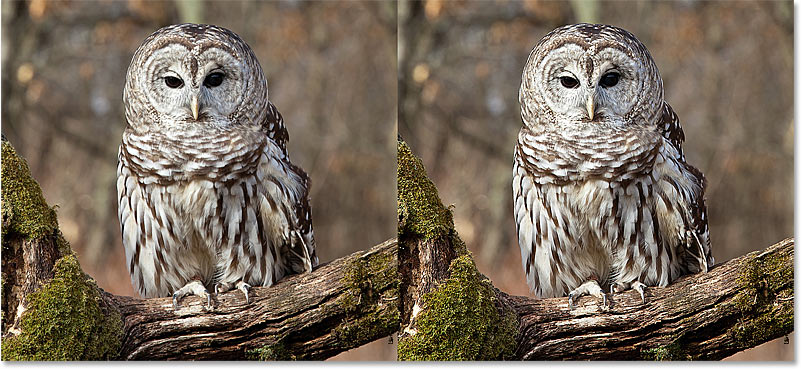
To compare the original, unsharpened image with the sharpened version, simply toggle the High Pass smart filter on and off by clicking its visibility icon in the Layers panel:
On the left is my original image, and on the right is the sharpened version:

More ways to sharpen images in Photoshop
And there we have it! To learn more ways to sharpen images in Photoshop, each with their own advantages, check out my tutorials on easy sharpening with Unsharp Mask and using Smart Sharpen for the pro-level sharpening!
Or visit our Photo Editing section for more Photoshop tutorials. And don't forget, all of our tutorials are now available to download as PDFs!