
Comparing The Levels And Curves Adjustments In Photoshop
In this Photo Editing tutorial, we'll look at the similarities between two of Photoshop's most important image editing tools - the Levels and Curves adjustments. At first glance, the Curves adjustment may seem less like an image editing tool and more like something only a scientist would know what to do with, especially when compared with the much simpler Levels adjustment which we looked at earlier.
Don't let it fool you, though. Curves may be extremely powerful, going far beyond what can be accomplished with Levels, but once you understand how it works, Curves is actually very simple. In fact, it's as simple as, well, drawing curves!
In this first look at Curves, we'll compare it with the Levels command to see just how similar the two really are. This will give us a good starting point for a more in-depth look at Curves later, including how the Curves adjustment has changed and improved in more recent versions of Photoshop (CS3 and CS4). You may want to read through the Improving Image Tone With Levels tutorial before continuing on if you're completely unfamiliar with Levels. It may also help to read through the How To Read A Histogram tutorial if you're unsure of how histograms work in Photoshop.
As I mentioned, we'll save the discussion on the newer features of the Curves dialog box in Photoshop CS3 and CS4 for later. We're just going to look here at the basics of Curves and how it compares with the Levels command. For that, I'll use Photoshop CS2, but any recent version will work.
Here's the image I have open on my screen:
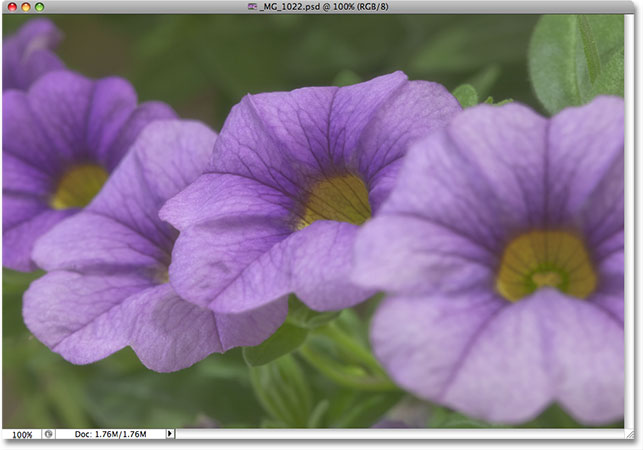
A quick look at Photoshop's Histogram palette, which by default is grouped in with the Navigator and Info palettes (you can also select the Histogram palette from the Window menu if it's not appearing on your screen), shows us that there's definitely some room for improvement with the image. The main part of the histogram does not extend to either the far left (pure black) or far right (pure white), which tells us that we currently have no real shadows or highlights in the photo. Everything is bunched up in the midtones, resulting in a lack of overall image contrast:
Let's quickly improve the tonal range of the image using Photoshop's Levels adjustment. When we're done, we'll see how to make the exact same changes and more with Curves. First, I'll bring up a Levels adjustment layer by clicking on the New Adjustment Layer icon at the bottom of the Layers palette and selecting Levels from the list of adjustment layers that appears. As always, we're using adjustment layers rather than Photoshop's standard image adjustments because adjustment layers allow us to work flexibly and non-destructively on our images:

This brings up the Levels dialog box. As we looked at previously in the Levels tutorial, the Levels adjustment allows us to make three basic changes to improve overall image tone. We can brighten the highlights by setting a new white point, we can darken the shadows by setting a new black point, and we can lighten or darken the midtones in the image. The Levels dialog box makes these changes easy because it contains the exact same histogram that we saw a moment ago in the Histogram palette, and all we need to do to make adjustments to the image is drag the white point, black point and midtone sliders directly below the histogram:

The Levels dialog box also contains a handy black-to-white gradient below the histogram, making it easy to see exactly where the tonal range of the image falls. The higher the spike in the histogram directly above a certain brightness level in the gradient, the more pixels we have in the image at that brightness level compared with the number of pixels at other brightness levels. If no part of the histogram appears over a brightness level in the gradient, we know that we currently have no pixels in the image at that brightness level.
If you look directly above the histogram, you'll see three input boxes. These boxes show us the current black, white and midtone levels. The box on the left, with a default value of 0, shows us the current black point level. The box on the right, with a default value of 255, shows us the current white point level:

Photoshop divides the maximum tonal range of an image into 256 different brightness levels, with pure black being 0 and gradually increasing in brightness until you reach pure white at 255. By dragging the black and white point sliders below the histogram, we can change which brightness values become pure black or white. This stretches the current tonal range of the image, basically pulling the darkest areas to pure black and pushing the lightest areas to pure white, improving the photo's overall appearance. I'm going to set a new black point by clicking on the black point slider and dragging it in to the left edge of the histogram. Then I'll set a new white point by clicking on the white point slider and dragging it in to the right edge of the histogram. If we look again at the input boxes above the histogram, we can see that the values for the black point and white point have now changed, with the black point having increased from 0 to 20 and the white point now lowered from 255 down to 232:

What this means is that any areas in the image that were originally at a brightness level of 20 (a dark gray) have been pulled down to pure black. Any areas that were originally at a brightness level of 232 (a light gray) have been pushed up to pure white. The rest of the brightness values in the image have also shifted accordingly as the entire tonal range of the image is stretched to the full 0-255 range.
If we look in the Histogram palette, we can see what's happened. The histogram now extends all the way from the far left to the far right, which means we now have a full range of tonal values from pure black to pure white. The only downside is that by stretching the tonal information, we've lost some image detail, represented by a comb-like pattern of white vertical bars in the histogram. Each white vertical bar means that we no longer have any pixels in the image at that brightness level, but that's okay since we haven't lost enough detail for there to be any visible problems in the image itself:

In fact, not only are there no visible problems in the image, we've managed to improve its overall tone and contrast quite a bit simply by setting new black and white points in the Levels dialog box. The colors have also become more saturated:

The Levels command also allows us to lighten or darken the middle brightness levels in the image by dragging the midtone slider. Dragging the midtone slider towards the left will lighten the midtones, while dragging the slider towards the right will darken them. Technically, the middle slider is known as the gamma slider, and if you look in the middle input box above the histogram, you'll see that by default, it shows a value of 1.00, whereas you may have expected it to show a value of 127 or 128 (directly between black at 0 and white at 255). That's because it's telling us the current gamma value rather than the middle brightness value. Don't let the terminology confuse you, though. Gamma is just a strange sounding word meaning the overall brightness of an image. All you need to know is that no matter what you prefer to call it, the middle slider in the Levels dialog box lightens or darkens the midtones. I'm going to darken my midtones just a little to add a bit more contrast to the image by dragging the slider towards the right, lowering the gamma value from 1.00 down to 0.88:

To help make it easier to see just how much of an improvement we've been able to make with the three sliders in the Levels dialog box, here's a "before and after" view of the photo. The left half shows the original, unedited image, while the right half shows the adjusted version:

Now that we've seen how easy it is to correct overall image tone problems with Levels, let's see how we can make the exact same corrections and more using Photoshop's Curves command!
Before we begin our look at Curves, I'm going to reset my image back to its original state by temporarily turning off my Levels adjustment layer. To do that, I simply need to click on the Layer Visibility icon (the "eyeball" icon) on the far left of the adjustment layer in the Layers palette:
With the effects of the Levels adjustment now hidden, my image returns to its original, unedited state:
To access the Curves adjustment, I'll once again click on the New Adjustment Layer icon at the bottom of the Layers palette, and this time, I'll select Curves from the list of adjustment layers that appears:

This brings up the Curves dialog box. Again, I'm using Photoshop CS2 here since we're only looking at the basics of how Curves works. The Curves dialog box has a few additional features in Photoshop CS3 and higher which we'll save for another tutorial.
The Levels and Curves commands are actually very similar in that they both allow us to adjust the shadows, highlights and midtones of an image, but you'd be forgiven for not seeing any similarity between them just by looking at their dialog boxes. Levels seems fairly straightforward with its histogram, gradient bar and sliders, whereas Curves looks like something you'd find in a science lab. It may be called Curves, but where are they? There are no curves to be found anywhere! Instead, we see a 4x4 grid with a diagonal line running through it from the bottom left corner to the top right corner. The only similarity with Levels seems to be that there is a black-to-white gradient bar running along the bottom of the grid, but there's also a second gradient bar running up and down along the left side of the grid:

With no curves to be found, why is it called Curves? The reason has nothing to do with what you start with and everything to do with what you end up with. Curves is all about taking that straight diagonal line running through the grid and reshaping it into a curve! At first, the line is straight because we haven't yet made any changes. As we bend the line to create a curve (or curves), we make adjustments to the various brightness levels in the image. Before we get ahead of ourselves, let's first look at what it is we're actually seeing in the Curves dialog box and how similar it really is to Levels.
Levels vs Curves - The Histogram
One of the most obvious differences between the Levels and Curves dialog boxes, at least in Photoshop CS2 and earlier, is that Curves does not contain a histogram. In Photoshop CS3 and higher, Adobe did add the option to view the histogram inside the Curves grid, but I still find that the best way to view the histogram while working on an image is with the Histogram palette, since it gives you an updated view of the histogram as you're working. In both Levels and Curves (in Photoshop CS3 and higher), the histogram remains static, showing you only what the image looked like before making your adjustments, so you're really not missing all that much without the histogram in Curves as long as you keep your Histogram palette open as you're working. There are a couple of benefits to having the histogram displayed in the Curves grid, but nothing we need to worry about here.
Levels vs Curves - The Gradient Bar
The Curves dialog box contains the same black-to-white horizontal gradient bar below the grid that the Levels dialog box shows us below the histogram. In both cases. this gradient represents the various brightness levels in the image from pure black to pure white. With Curves, we get a second gradient bar as well, this time running vertically along the left side of the grid. The difference between the two gradient bars in Curves is that the bottom one shows us the Input levels while the gradient along the left shows us the Output levels. Think of "Input" and "Output" as "Before" and "After". The bottom gradient represents the original brightness levels in the image before making any changes, while the left gradient shows us what the new brightness levels will be after making the adjustments. We'll see how this works in a moment:

Levels vs Curves - The Black And White Point Sliders
In Levels, we had a black point slider below the left side of the histogram and a white point slider below the right side of the histogram. These sliders allowed us to set new black and white points in the image, darkening the shadows and brightening the highlights. If you look closely at the diagonal line in Curves, you'll see a small square on either end, one in the bottom left corner directly above pure black in the gradient below it and one in the top right corner directly above pure white in the gradient. These squares, or points, are the Curves equivalent of the black and white sliders in the Levels dialog box. We can click on either point to select it, and by dragging the point either left or right, we can set new black and white points for the image:

Let's see if we can use what we've learned so far about Curves to make the same basic tonal adjustments to the image that we made with Levels. To darken the shadow areas with Levels and set a new black point, I clicked on the black point slider and dragged it in to the left edge of my histogram. If you recall, this raised the black point from a default brightness level of 0 to level 20, which meant that any pixels that were originally at a brightness level of 20 were pulled down to pure black. We can do the exact same thing with Curves. To set a new black point, I simply need to click on the point on the left end of the diagonal line and drag it towards the right, just as I did with the black point slider in Levels. Since I'm using Photoshop CS2 and don't have a histogram displayed in the Curves dialog box, I'll keep an eye on the Histogram palette to see what's happening.
Notice that as soon as you click on the point, both the Input and Output readings below the bottom gradient bar show a value of 0, letting us know that the black point is currently set to a brightness value of 0 and we haven't yet made any changes. As you drag the point horizontally towards the right, the Input reading increases while the Output reading remains at 0. This tells us that whichever original brightness level we select with the point (the Input level) is being pulled down to level 0, or pure black (the Output level). I'm going to drag my black point to level 20, the same value I set it to in Levels:

To set a new white point in Levels and brighten the highlights, I dragged the white point slider in to the right edge of the histogram, lowering the white point from it's original value of 255 down to 232. This pushed any areas in the image that were originally at a brightness level of 232 up to pure white. Once again, I can do the exact same thing with Curves. The point on the right end of the diagonal line works exactly the same way as the white point slider in Levels. I simply need to click on the point and drag it horizontally towards the left. Again, the Curves dialog box in Photoshop CS2 does not contain a histogram, but I can easily view the histogram in the Histogram palette as I drag the point.
As soon as you click on the point in the top right corner, you'll see the Input and Output readings display a value of 255, indicating that our white point is currently set to its maximum brightness value of 255 and we haven't yet made any adjustments. As you drag the point towards the left, the Input reading changes while the Output reading remains at 255, telling us that whichever brightness level we select with the point is being pushed up to pure white. I'm going to drag the point towards the left until the Input reading is displaying a value of 232, the same value I set the white point to in Levels:

If I look at my Histogram palette once again, I can see that I've successfully made the exact same adjustments to the image with Curves that I made with the black and white point sliders in Levels. The histogram now extends all the way from the far left to the far right, showing a full range of tonal values from pure black to pure white, except of course for the detail we've lost by stretching the tonal range, indicated by the same comb-like pattern we saw earlier:

And if we look at the image itself in the document window, we can see that its overall tone has been improved:

What about the midtone slider? We'll look at that next!
Levels vs Curves - The Midtone Slider
What about the midtones? This is where Photoshop's Curves adjustment starts to get interesting. In Levels, we have a midtone slider that we can drag left or right to lighten or darken the middle brightness values in the image, but at first, Curves doesn't seem to have anything like that. We've already seen that the points on either end of the diagonal line are the Curves equivalent of the black point and white point sliders in Levels, but there are no other points on the line anywhere to be found. At least, not yet there isn't!
What makes Curves so incredibly powerful and useful, far more than the Levels command, is that it allows us to add points wherever we want! For example, let's say we want a point that will give us the same control over the midtones that we get with the midtone slider in Levels. All we need to do is add it! To add a point, simply click on the line at the spot where you want the point to be added. To gain the same control over the middle brightness values that I'd get with the midtone slider in Levels, I'll click to add a point directly in the center of the line. Notice that as soon as I add the point, both the Input and Output readings show a value of 128, which tells me that I've just added a point at brightness level 128 and since both readings are showing the same value, I haven't yet made any changes:

So far, we've been dragging the points either left or right. This changed the brightness level we selected in the image (the Input level) but left the Output level unchanged. Dragging the black point to the right allowed us to select every brightness value up to level 20 (the Input level) and force it down to level 0 (the Output level), while dragging the white point to the left allowed us to select every brightness value down to 232 (Input level) and force it up to 255 (Output level). For our midtone point, we want the exact opposite. We want to leave our Input value at 128 (or something close to 128 if you didn't click exactly in the middle) and change the Output level. We do that by dragging the point up or down! Drag the point up to increase the Output value, which will lighten the brightness level you selected, or drag it down to darken the brightness level.
I want to darken my midtones, just as I did with the Levels command, so I'm going to drag my new point straight down. Like the midtone slider in Levels, you don't need to drag points very far to get noticeable results so you'll definitely want to keep an eye on your image as you drag points around. Unlike the midtone slider in Levels which deals with gamma values, Curves keeps things simple by dealing only with brightness levels, so you can safely forget all about gamma values when working in Curves. I'm going to drag my middle point from an original value of 128 down to around 110:

This takes any areas of the image that were originally at a brightness level of 128 and darkens them to a new level of 110. Notice that by dragging the middle point, our diagonal line is now bending into a curve (which finally explains why this is called the Curves command). The curve tells us that every other brightness level along the line is also being adjusted as we drag points around to reshape the curve. So even though we haven't actually selected any other brightness levels, they've all been affected to some degree by the adjustment.
Here's my image after darkening the midtones with Curves. The effect is exactly the same as if I had darkened them with the midtone slider in Levels:

Going Beyond Levels With Curves
At this point, we've seen how we can accomplish the exact same basic tonal adjustments with Curves that we can with Levels. We can drag the black point in Curves to darken the shadows, drag the white point to brighten the highlights, and add our own point in the middle of the line to lighten or darken the middle brightness values. You may be wondering what the big deal is with Curves if we can make the same adjustments with Levels, especially when Levels seems so much easier to understand. Well, the big deal is that we can go even further with Curves! A lot further! Levels gives us only three adjustments - a black point, a white point and a single midtones slider. Curves, on the other hand, gives us as much control as we want. We can add up to 16 individual points along the curve for pinpoint accuracy when adjusting brightness values!
For example, one of the most common uses for Curves is to improve contrast in an image by adding what's called an "S" curve, meaning that we reshape the curve into something that resembles a letter S. For that, we'll need to add a couple more points, one around the 3/4 tone mark to darken the shadows even further and one around the 1/4 tone mark to brightness the highlights more. There's no way we could do this with Levels, but with Curves, it's easy. First, I'll click on the line roughly half way between the black point and the middle point I added earlier. This adds a fourth point. Then I'll drag the new point downward a short distance to darken the shadow areas even more:

I'll do the same thing with the highlights. I'll click on the line roughly half way between the middle point and the white point, which adds a fifth point to the curve. Then, to brighten the highlights even further, I'll drag the new point a short distance upward:

If you need to re-adjust any of the points you've already added, simply click on the point to select it, then drag it up, down, left, right, or even diagonally as needed. Dragging a point diagonally will affect the Input and Output levels at the same time. In my case, I think my middle brightness values are now a little too dark, so I'm going to click on my middle point to re-select it and drag it back up to its original brightness value of 128:

With the curve now looking similar to a letter S (sort of), we've managed to increase contrast in the image even further:

Depending on the image you're working on, you may be able to lighten the highlights and darken the shadows even more than I've done here, creating a more pronounced S curve. In my case though, increasing the contrast further would have made the image look too harsh, so I made only minor adjustments.
By default, the Levels and Curves commands affect both the luminosity (brightness) and color saturation of an image. In most cases, this is what you want, but if you find that your colors are becoming too saturated and you want to limit the effect of the adjustments to just the brightness values, simply go up to the top of the Layers palette and change the blend mode for the adjustment layer from Normal to Luminosity:

With the blend mode set to Luminosity, the colors have returned to their original saturation values while the increased contrast remains:

And there we have it! That's our first look at Photoshop's Curves command! We've seen how to make basic tonal adjustments to an image with Levels, how to make the same adjustments with Curves, and how we can then go even further with Curves by adding additional points to the shadows and highlights. We've also seen how to limit the effects of the Levels and Curves commands to just the brightness levels by changing the blend mode to Luminosity. We'll continue to explore the full power of Curves in more tutorials, including a look at the added features available in Photoshop CS3 and CS4.