Photo Edit Quick Tip: Boost Contrast with Photoshop Blend Modes
In this tutorial, I’ll show you how to quickly boost contrast and bring your images to life using simple blend modes and adjustment layers in Photoshop! For Photoshop CC and CS6.
Photoshop gives us lots of ways to improve the contrast in our photos, from a simple Brightness/Contrast image adjustment to working with Levels, Curves, and of course, Camera Raw. But did you know that certain blend modes in Photoshop can also boost contrast? In fact, not only can they do it, it's the whole reason they exist!
The advantage of using blend modes to boost contrast is that blend modes are incredibly easy to use. And as we'll see, by combining blend modes with one of Photoshop's adjustment layers, we can not only increase contrast, but we can also control how the colors in our image are affected.
Usually, increasing contrast also increases color saturation, resulting in colors that look oversaturated. But by choosing the right adjustment layer, and the right blend modes, we can adjust the contrast and the color separately. Let's see how it works. I'll be using Photoshop CC but you can also follow along with Photoshop CS6.
Let's get started!
How to boost image contrast with blend modes
We'll start by learning how to quickly improve the contrast in the image using blend modes, and then I'll show you how to correct any color problems that result from it.
To learn much more about Photoshop's blend modes, download my Layer Blend Modes Complete Guide PDF.
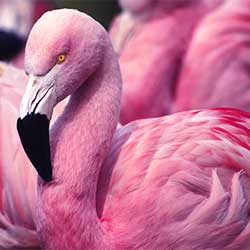
Here's an image I've opened in Photoshop, and while it's a great shot, it's also looking a bit flat. Let's see how blend modes and adjustment layers can quickly make this image pop:

Step 1: Add a Vibrance adjustment layer
In the Layers panel, we see the image on the Background layer, currently the only layer in the document:

The first thing we need to do is add a Vibrance adjustment layer above the image. Click on the New Fill or Adjustment Layer icon at the bottom of the Layers panel:
And choose Vibrance from the list:

The adjustment layer appears above the Background layer. We'll see why we're specifically choosing Vibrance a bit later on:

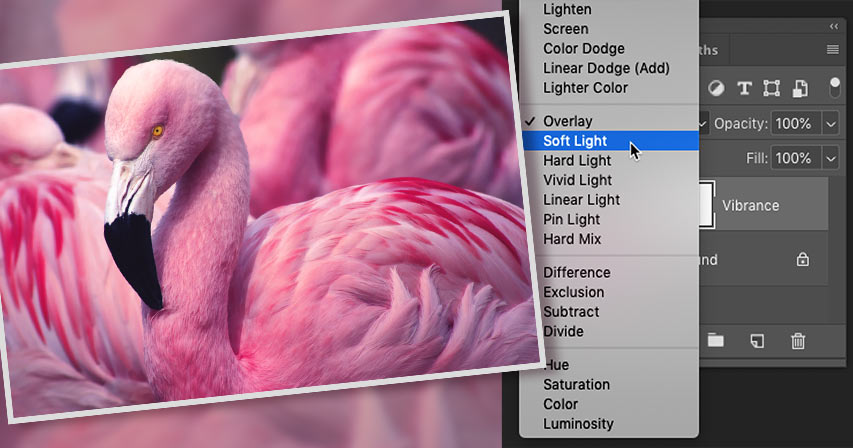
Step 2: Change the layer blend mode to Overlay or Screen
To increase contrast in the image, all we need to do is change the blend mode of our adjustment layer to one that increases contrast.
Still in the Layers panel, click on the Blend Mode option in the upper left. By default, the blend mode is set to Normal:

Photoshop includes a whole group of blend modes designed specifically for increasing contrast. The group starts with Overlay and ends with Hard Mix. Every blend mode in this group will boost the contrast and produce a different result.
The Overlay blend mode
For most images, the two blend modes that work best are Overlay and Soft Light. Start by choosing Overlay:

And just by changing the blend mode, we've increased the contrast. On the left is the original image, and on the right is the result using Overlay:

The Screen blend mode
If the Overlay result is too strong, try the Soft Light blend mode instead:

As the name suggests, Soft Light produces a softer and more subtle effect. On the left is the result using Overlay, and on the right is the result using Soft Light. For this image, Soft Light works best, but for others, Overlay may work better:

Related: Check out our Blend Mode Tips and Tricks!
Step 3: Fine-tune the contrast with the Opacity option
You can also fine-tune the result of either blend mode by adjusting the opacity of the adjustment layer. You'll find the Opacity option in the upper right of the Layers panel.
The more you lower the opacity from its default value of 100%, the more you'll dial back the contrast by letting the original image on the Background layer show through:

How to fix the color after boosting contrast
So why did we choose a Vibrance adjustment layer for increasing the contrast? If all we needed to do was change the blend mode, why did we need Vibrance? Why not Levels, or Curves, or something else? The reason is that when we increased the contrast, we also increased the color saturation of the image. And a Vibrance adjustment makes it easy to correct it.
If we look again at a comparison between the original image and the higher contrast version, we see that the colors in the higher contrast version are now oversaturated. Here I'm comparing the original (left) with the result from the Overlay blend mode (right), just to make the problem easier to see. But Soft Light can also produce oversaturated colors to a lesser extent:

Step 4: Drag the Saturation slider to -100
So how do we reduce the color saturation? It's easy. In the Properties panel, we see that the Vibrance adjustment includes a Saturation slider. There's also a Vibrance slider above it, but the one we want is Saturation.
To restore the photo's original saturation levels, simply drag the Saturation slider all the way to the left, to a value of -100:

On the left is how the image looked initially after changing the blend mode to Overlay. And on the right is the image with the same increase in contrast but with the color saturation no longer affected:

Bringing back some of the saturation
Now depending on your image, you may want to keep some of the added color saturation. In that case, just drag the Saturation slider back towards the right until you find the setting you like best. I'll increase mine from -100 to -70:

Comparing the original and higher contrast versions
To switch between your original image and the new, higher contrast version, toggle the Vibrance adjustment layer on and off by clicking its visibility icon in the Layers panel:
With the adjustment layer turned off, we see the original low contrast image:
And with the adjustment layer back on, we see the final, higher contrast result (using the Soft Light blend mode):

And there we have it! That's how to quickly increase the contrast in your photos using simple blend modes and adjustment layers in Photoshop! Visit our Photo Editing section for more editing and retouching tutorials! And don't forget, all of our tutorials are now available to download as PDFs!