
Sync Photoshop’s Color Settings With All Creative Cloud Apps
Using Photoshop as part of the larger Creative Cloud or Creative Suite? Learn how to synchronize Photoshop’s color settings with your other Adobe apps, like Illustrator and InDesign, to keep the colors in your images accurate and consistent.
In the previous tutorial in this Getting Started series, we looked at Photoshop's Color Settings. We learned about color spaces and how they determine the range of colors we have to work with. And we learned that by default, Photoshop sets its working color space to sRGB. We explored the reasons why Adobe chose sRGB as the default color space, and why sRGB is not the best choice for editing images because of its relatively small color gamut. A better choice is Adobe RGB with its greatly expanded range of colors. We learned how to change Photoshop's working space from sRGB to Adobe RGB. And finally, we saved our custom settings as a new preset so we can quickly choose them again when needed.
If Photoshop is the only app you use in the Adobe Creative Cloud or Creative Suite, then changing Photoshop's color settings is all you need to do. But if you use other Adobe apps as well, like Illustrator and InDesign, then maintaining accurate colors between apps becomes very important. As we'll learn in this tutorial, Adobe made it easy to synchronize Photoshop's color settings with the entire Creative Cloud or Creative Suite. But you won't find the option to do so anywhere in Photoshop. Instead, we synchronize our color settings using Adobe Bridge.
This is lesson 6 of 8 in Chapter 1 - Getting Started with Photoshop.
Let's get started!
Before we begin...
If you're a Creative Cloud subscriber, you'll want to make sure that you've downloaded and installed Adobe Bridge CC before you continue. In Photoshop CS6 and earlier, Adobe Bridge installs automatically with Photoshop so there's no need to install Bridge separately. Also, if you have not done so already, be sure to read through the previous Essential Photoshop Color Settings tutorial. That's where we changed Photoshop's color settings and saved them as a new preset. This tutorial uses the preset we created.
Viewing Your Custom Photoshop Color Settings
Opening The Color Settings Dialog Box
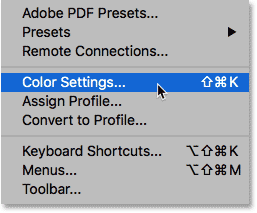
Let's quickly recap the color settings we changed in the previous tutorial. To access Photoshop's color settings, go up to the Edit menu at the the top of the screen and choose Color Settings:
Choosing Your Custom Preset
The Color Settings dialog box will open. If you followed along with the previous tutorial, your Settings option at the top should already be set to your custom preset. In my case, I named my preset "My Color Settings":

If, for some reason, your custom preset is not already selected, click on the name of the current preset. Then choose your custom preset from the list:

The RGB Working Space
With the custom preset active, we see that our RGB working space has been changed from sRGB to Adobe RGB:

The Color Management Policies
And in the Color Management Policies section, we've made sure that the RGB option (along with CMYK and Gray) is set to Preserve Embedded Profiles. Also, the Profile Mismatches and Missing Profiles checkboxes are all unchecked. We learned about these options in the previous tutorial:

Notice that the Color Settings dialog box is telling us that, at the moment, our custom settings only apply to Photoshop. They have not yet been synchronized with our other Creative Cloud or Creative Suite apps:

Closing The Color Settings Dialog Box
To close Photoshop's Color Settings dialog box, click OK:

How To Sync Your Color Settings
Step 1: Open Adobe Bridge
Let's synch our custom Photoshop color settings with the rest of the Creative Cloud or Creative Suite. To do that, we'll need Adobe Bridge. To open Adobe Bridge from within Photoshop, go up to the File menu at the top of the screen and choose Browse in Bridge:

Step 2: Open The Color Settings Dialog Box
Then in Bridge CC, go up to the Edit menu and choose Color Settings. In Bridge CS6, go up to the Edit menu and choose Creative Suite Color Settings. This opens the Color Settings dialog box:

Step 3: Choose Your Custom Color Settings Preset
Notice that the Color Settings dialog box in Bridge looks different from the one we saw back in Photoshop. Rather than choosing individual color settings, here we choose a color settings preset. The preset will then be synchronized across every app in the Creative Cloud or Creative Suite. By default, the North America General Purpose 2 preset is selected. This is the same preset Photoshop was using before we changed it. At the top of the dialog box, we see another message telling us that our color settings are not yet synchronized:

Choose your custom preset (the one you created in Photoshop) from the list. I'll choose the "My Color Settings" preset. Notice that the description we added for the preset back in Photoshop appears below the preset's name:

Step 4: Click "Apply"
To sync your preset across every app in the Creative Cloud or Creative Suite, click Apply at the bottom of the dialog box:

Bridge closes the Color Settings dialog box after you click the "Apply" button. To see what has actually happened, let's quickly re-open it. Go up to the Edit menu and choose Color Settings (CC) or Creative Suite Color Settings (CS6). This time, the Color Settings dialog box opens with our custom preset already selected. And, the message at the top of the dialog box now tells us that we've successfully synced the preset will every app in the Creative Cloud / Creative Suite:

Where to go next...
And there we have it! In the next lesson in this chapter, we'll learn how to improve Photoshop's performance, customize the interface, save backups of your work, and more with some essential options in Photoshop's Preferences!
Or check out any of the other lessons in this chapter:
- 01. How to keep Photoshop CC up to date
- 02. How to install Adobe Bridge CC
- 03. How to download photos from your camera with Adobe Bridge
- 04. How to manage and organize your images with Adobe Bridge
- 05. Essential Photoshop Color Settings
- 06. Sync Photoshop’s Color Settings with all Creative Cloud apps
- 07. Essential Photoshop Preferences for beginners
- 08. How to reset Photoshop Preferences
For more chapters and for our latest tutorials, visit our Photoshop Basics section!