
How To Open Images Into Photoshop From Adobe Bridge
Learn how to open images into Photoshop using Adobe Bridge, the free companion app included with Photoshop and with all Creative Cloud subscriptions. We learn how to install Bridge CC using the Creative Cloud app, along with everything you need to know to start using Bridge right away!
In the previous tutorial, we learned how to open images from within Photoshop itself using the new Start workspace in Photoshop CC. But while the Start workspace makes it easy to choose images from a list of recently-opened files, it isn't very helpful when it comes to finding and opening new images. That's because the Start workspace still forces us to use our computer's operating system to navigate through our files.
We did learn how to set Photoshop as our default image editor. But while that's great for opening images, it still doesn't help us find the images we need.
That's where Adobe Bridge comes in. Many people don't realize that Photoshop includes a free companion program known as Adobe Bridge. Bridge is essentially a file browser, similar to your operating system's file browser, but with a lot more features. It may not share the same image organizing and editing capabilities as Adobe Lightroom (in fact, Bridge has no image editing features at all). But Bridge is still an incredibly powerful and useful program that makes finding our images and opening them into Photoshop both easy and intuitive.
In this tutorial, we won't cover every single feature of Adobe Bridge. Instead, we'll look at the essential features you need to know about so you can say goodbye to your operating system's file browser and start opening your images from Bridge!
This lesson is part of my Getting Images into Photoshop Complete Guide.
Let's get started!
How To Install Adobe Bridge CC
In Photoshop CS6 and earlier, Adobe Bridge installed automatically with Photoshop. But now that Adobe has switched everything over to the Creative Cloud, that's no longer the case. Bridge is still included with every Creative Cloud subscription, but even if you've installed Photoshop CC, Bridge CC needs to be installed separately.
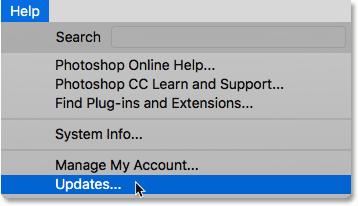
We install Bridge CC using the Creative Cloud app. To open the Creative Cloud app from within Photoshop, go up to the Help menu in the Menu Bar along the top of the screen and choose Updates:
When the Creative Cloud app opens, switch to the Apps section at the top:

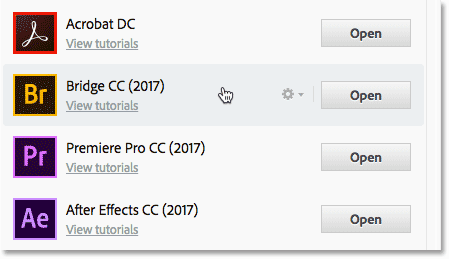
Scroll through the list of apps that you've installed on your computer. If you see Bridge CC in the list (and it has an Open button beside it), then Bridge CC is already installed and you're good to go:
If you don't see Bridge CC in the list of installed apps, scroll down to the list of additional apps. When you find Bridge CC, click the Install button. Then just sit back and relax for a few minutes while it installs. That's all there is to it:

How To Open Adobe Bridge
Now that we know that Bridge is installed, to open Bridge from within Photoshop, go up to the File menu and choose Browse in Bridge:

This opens Bridge, which is made up of a collection of panels. We have panels for navigating to our images, panels for viewing our images, panels for viewing additional information about our images, and more:

Finding Our Images Using Bridge
To navigate to our images in Bridge, we use the Folders panel. You'll find it in the upper left, nested in with the Favorites panel. By default, the Favorites panel is the one that's open. To switch to the Folder's panel, click on the Folders tab at the top:

The Folders panel displays the folders and directories on your computer in a top-down view, starting with main directories like our Desktop and our computer's hard drive.
A triangle to the left of a folder or directory's name means there are sub-folders inside of it. Click on the triangle to twirl the folder open and view its sub-folders. Continue making your way down through your folders until you get to the one that holds your images.
In my case, I know that my images are in a folder named "Open from Bridge" which is inside a folder named "Photos" on my Desktop. To get to my "Open from Bridge" folder, I'll start by clicking the triangle next to my Desktop to twirl the Desktop open. Then, I'll click on the triangle next to my "Photos" folder to twirl it open, where I find my "Open from Bridge" folder sitting inside it:

Viewing Your Images In Bridge
To view the images inside a folder, click on the folder's name in the Folders panel. In my case, I'll click on my "Open from Bridge" folder:

The contents of the folder appear as thumbnails in the Content panel in the middle of the Bridge interface. Here we see that I have five images in the folder, each displayed as a thumbnail:

Changing The Thumbnail Size
By default, the thumbnails are fairly small. We can change their size using the slider along the bottom right of the Bridge interface. Drag the slider to the right to make the thumbnails larger, or to the left to make them smaller:

Here we see that after dragging the slider to the right, my thumbnails are now much bigger:

Selecting An Image
To select an image, simply click on its thumbnail in the Content panel. Here I'm clicking on my "flowers.jpg" image, second from the left, top row:

A preview of the selected image appears in the Preview panel in the upper right of Bridge. Note that the Preview panel is nested in with the Publish panel. You may need to click the Preview panel's tab at the top to open it:

Along with the preview in the Preview panel, you'll find lots of additional information about the selected image, including the exposure settings, the pixel dimensions and file size, the type of camera and lens that were used, and lots more, in the Metadata panel directly below the Preview panel. Use the scroll bar along the right to scroll through all of the information:

Viewing A Fullscreen Preview
Along with the thumbnails in the Content panel and the preview in the Preview panel, we can also view a fullscreen preview of our selected image. Simply press the spacebar on your keyboard. This will hide the Bridge interface and display your image fullscreen. To exit fullscreen mode, press the spacebar once again:

How To Open An Image Into Photoshop
Finally, to open an image from Bridge into Photoshop, double-click on its thumbnail in the Content panel. I'll double-click on my "flowers.jpg" image:
And here we see my image now open in Photoshop, ready for editing:

Closing The Image And Returning To Bridge
To close the image in Photoshop and return to Bridge, go up to the File menu and choose Close:

Then, to return to Bridge, go back up to the File menu and choose Browse in Bridge:
Or, to close your image and return to Bridge both in one shot, go up to the File menu and choose Close and Go to Bridge:

This returns you to Bridge where you can choose the next image you want to open into Photoshop:

Where to go next...
And there we have it! That's a quick look at the essential features we need to know about to start navigating through our files and opening our images into Photoshop from Bridge! You can use Adobe Bridge to open any type of image that Photoshop supports (which is pretty much any type of image). Usually, Bridge will send the image to Photoshop without any problems.
However, depending on the type of file you're opening (JPEG, PNG, TIFF, etc.), you may run into a situation where Bridge is sending the image not to Photoshop but to some other program that's installed on your computer. Or, it may be sending it to Photoshop but to an earlier version rather than the latest and greatest version. In the next lesson, we learn how to easily fix the problem using the File Type Associations option in the Bridge Preferences.
You can also skip to one of the other lessons in this Complete Guide to in Getting Images into Photoshop. Or visit my Photoshop Basics section for more tutorials!