
Worn And Torn Text In Photoshop
In this Photoshop text effects tutorial, we're going to learn how to create a "worn and torn" effect with our text.
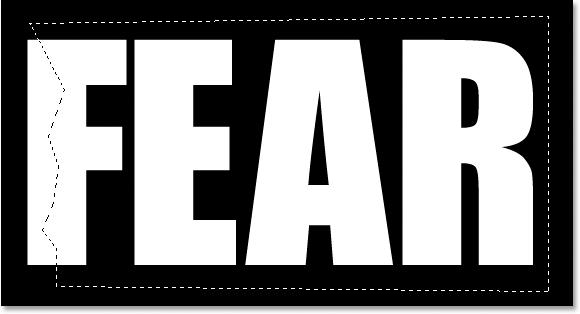
Here's the effect we're going for:

Let's get started!
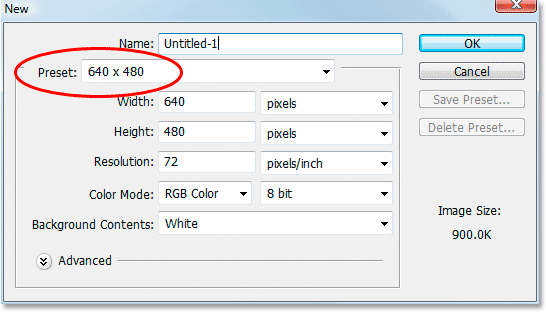
Step 1: Open A New Photoshop Document
I'm going to start by going up to the File Menu at the top of screen and choosing New... to create a new Photoshop document. I'll choose a preset size of 640x480, and then I'll click OK to have Photoshop create my new document for me:
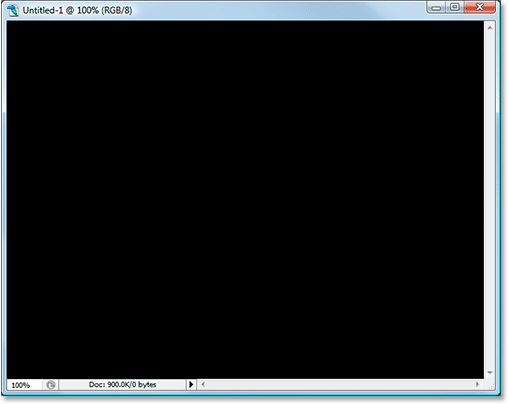
Step 2: Fill The Background Layer With Black
Press D on your keyboard to quickly set black as your foreground color. Then use the keyboard shortcut Alt+Backspace (Win) / Option+Delete (Mac) to fill the Background layer with black:
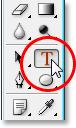
Step 3: Set Your Foreground Color To White And Add Your Text
Press X on your keyboard this time to swap your Foreground and Background colors, so white becomes your Foreground color. Then grab your Type tool from the Tools palette or by pressing T on your keyboard:
Then with the Type tool selected, choose your font up in the Options Bar at the top of the screen and add your text. I'm going to use "Impact" for my font, and I'll type the word "FEAR". Then I'll press Ctrl+T (Win) / Command+T (Mac) to bring up Photoshop's Free Transform box and handles around my text and while holding down Shift+Alt (Win) / Shift+Option (Mac), I'll drag out a corner handle to resize my text and make it larger. Holding Shift constrains the proportions of the text as I drag, and holding Alt/Option forces the text to resize from the center. Here's my text after resizing it:

Step 4: Rasterize The Text
We need to convert the text into pixels at this point, so once you're happy with your text, go up to the Layer menu at the top of the screen, choose Rasterize, and then choose Type. Your text won't look any different in the Document Window, but if you look at your Type layer in the Layers palette, you'll see that it has now become a normal layer:

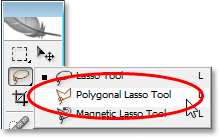
Step 5: Make A Jagged Selection Through The First Letter, Then Select The Rest Of The Word
Grab your Polygonal Lasso tool from the Tools palette. It's hiding behind the Lasso tool, so just click and hold your mouse down on the Lasso tool icon and then select the Polygonal Lasso tool from the fly-out menu that appears:
Then, with the Polygonal Lasso tool selected, make a jagged selection through the first letter from top to bottom. Notice I didn't say drag a selection, and that's because you don't drag with the Polygonal Lasso tool. All you do is click inside the document once with your mouse, then release the mouse button and move your mouse to create a line. Click again, move the mouse again. Click, move, click, move, and so on. Make sure you create a jagged line through the letter, not a straight line, since this is going to be our first tear point.
Once you have your jagged line through the letter, finish your selection by clicking and moving your mouse around the rest of the word to the right of your selection line, so you end up with the entire word selected except for the left part of the first letter, as I have here:
Step 6: Cut The Selection Onto A New Layer
When you're happy with your selection, press Ctrl+Shift+J (Win) / Command+Shift+J (Mac) to cut the selection onto a new layer. You won't see much happen yet in your Document Window, but in your Layers palette, you'll see that your selection is now on a new layer, and the only part of the word remaining on the original text layer below it is the left part of the first letter which wasn't selected:

Step 7: Rotate The Letters Using The Free Transform Command
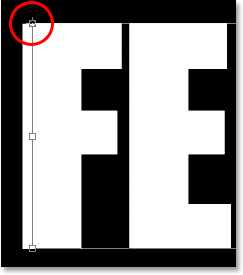
We're going to create our first tear in the text. With the new layer selected in the Layers palette, press Ctrl+T (Win) / Command+T (Mac) to bring up the Free Transform box and handles around the letters (minus the left half of the first letter, which is on the layer below). Look in the center of the Free Transform box and you'll see a small target icon:
We're going to rotate the text a little to create the tear, and this target icon represents the spot where everything is going to rotate around. We don't want the letters to rotate around the center. We want them to rotate from the top left corner, so to fix that, simply click on the target icon with your mouse and drag it up to the top left corner. It will snap into place as you approach the corner:
Once you've dragged the target icon to its new location, simply move your mouse anywhere outside of the Free Transform box, then click and drag your mouse up or to the left to rotate the letters counterclockwise, creating a tear through the first letter as I'm doing here:

Press Enter or Return when you're happy with the tear you've created to accept the transformation. Here's my text so far with a nice big tear through the letter "F":

Step 8: Make A Jagged Selection Through The Second Letter, Then Select The Rest Of The Word
With the Polygonal Lasso tool still selected, make another jagged selection, this time through the second letter, then include the rest of the word to the right of the jagged line in your selection:

Step 9: Cut The Selection Onto A New Layer
With your selection created, press Ctrl+Shift+J (Win) / Command+Shift+J (Mac) to cut the selection onto a new layer:
Step 10: Rotate The Letters Using The Free Transform Command
We're going to rotate the contents on the new layer once again, so press Ctrl+T (Win) / Command+T (Mac) to bring up the Free Transform box and handles. This time, drag the center target icon down into the bottom left corner so we can rotate the letters from the bottom left:
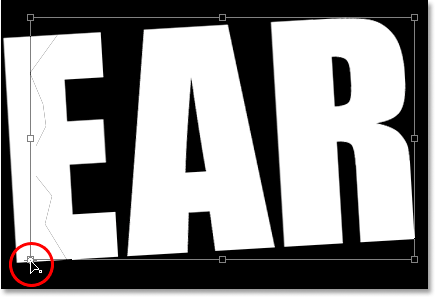
Then move your mouse anywhere outside of the Free Transform box and click and drag either down or to the right to rotate the letters clockwise, creating a tear through the second letter:

Press Enter (Win) / Return (Mac) to accept the transformation. Here's my text after tearing the second letter:

Step 11: Repeat The Process For The Rest Of The Letters
Repeat the same steps for the remaining letters. First make a jagged selection through the letter with the Polygonal Lasso tool, then include the rest of the word to the right of the jagged line in the selection. Press Ctrl+Shift+J (Win) / Command+Shift+J (Mac) to cut the selection onto a new layer. Then press Ctrl+T (Win) / Command+T (Mac) to bring up the Free Transform box and handles. Drag the center target icon into either the top left or bottom left corner to rotate from that spot, then click and drag anywhere outside of the Free Transform box to rotate the layer contents.
Here's my word "FEAR" after creating my tears through the remaining two letters. I rotated the "A" from the top left and the "R" from the bottom left:

Step 12: Merge All Text Layers Into One
Select all of your text layers in the Layers palette, first by clicking on the top layer to select it and then Shift-clicking on the original text layer directly above the Background layer. This will select all your text layers at once:

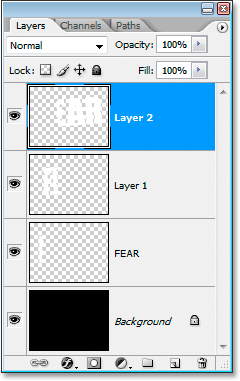
With all of your text layers selected, press Ctrl+E (Win) / Command+E (Mac) to merge them all onto one layer. You should now have only two layers in the Layers palette:
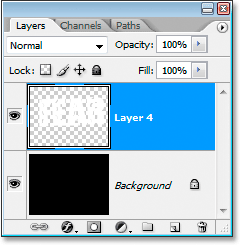
Step 13: Add A Layer Mask To The New Merged Layer
We're going to add a layer mask to the new merged layer, but before we do, hold down your Ctrl (Win) / Command key and click directly on the merged layer's thumbnail in the Layers palette to quickly select the text in the Document Window:
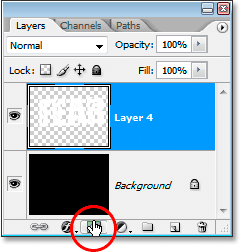
You'll see a selection appear around your text. With your text now selected, click on the Add A Layer Mask icon at the bottom of the Layers palette:
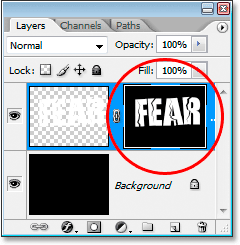
You'll see the layer mask appear to the right of the merged text layer's thumbnail in the Layers palette, with your text appearing in white and all of the empty area around it appearing in black:
Step 14: Apply The "Spatter" Filter To The Layer Mask
We're going to give our text a nice worn look to it at this point using the "Spatter" filter. To do that, with the layer mask selected, go up to the Filter menu at the top of the screen, choose Brush Strokes, and then choose Spatter, which brings up Photoshop's massive Filter Gallery set to the Spatter options (circled in red on the right):
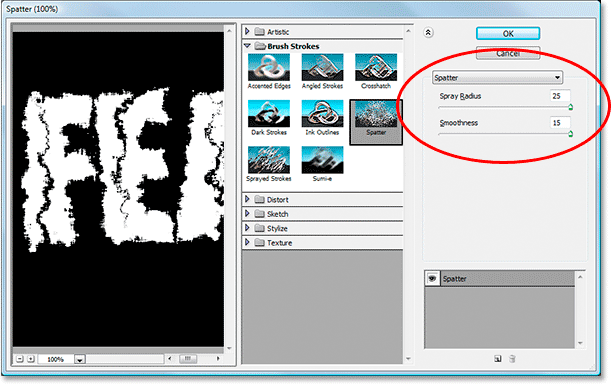
There's only two options for the Spatter filter, Spray Radius and Smoothness. Feel free to play around with both sliders to see which settings work best for your text, which you can view in the large preview window on the left of the Filter Gallery. I've just gone and dragged both slider bars all the way to the right to set both options to their maximum values of 25 for the Spatter Radius and 15 for the Smoothness, which gives me the effect I'm looking for:

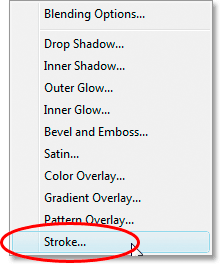
Step 15: Apply A Stroke To The Text To Complete The Effect
To finish things off, I'm going to add a stroke to my text. With my text layer selected, I'm going to click on the Layer Styles icon at the bottom of the Layers palette:
Then I'll select Stroke from the list that appears:
This brings up the Layer Style dialog box set to the Stroke options in the middle column. By default, Photoshop uses a solid color for the stroke, but I'm going to use a gradient instead. To change it, click on the down-pointing arrow to the right of the Fill Type option, then select Gradient from the list:
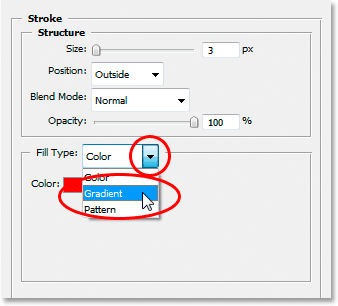
The Fill Type options will then change to options for the gradient. Click on the gradient preview area to bring up Photoshop's Gradient Editor to choose new colors for the gradient:
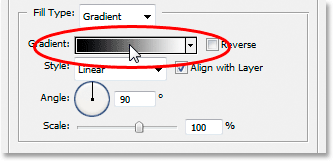
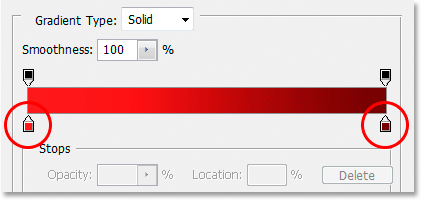
When the Gradient Editor appears, double-click on the black color marker on the bottom left of the gradient preview bar in the middle of the Gradient Editor, which will bring up the Color Picker, and choose a bright red color. Click OK to exit out of the Color Picker, then double-click on the white color marker on the bottom right of the gradient preview bar. The Color Picker will re-appear. Choose a dark red color this time, then click OK to once again exit out of the Color Picker. Here's my colors below:
Click OK to exit out of the Gradient Editor, then click OK to exit out of the Layer Style dialog box to apply the stroke to the text (no need to make any other changes to the Stroke options), and you're done! Here, with my gradient stroke applied, is my final "worn and torn" text effect:
Where to go next...
And there we have it! Check out our Text Effects or Photo Effects sections for more Photoshop effects tutorials!