
Text Reflection Effect in Photoshop
In this Photoshop text effects tutorial, we're going to create a simple text reflection effect. This effect has been used everywhere in advertising, and as we'll see, it's very easy to do.
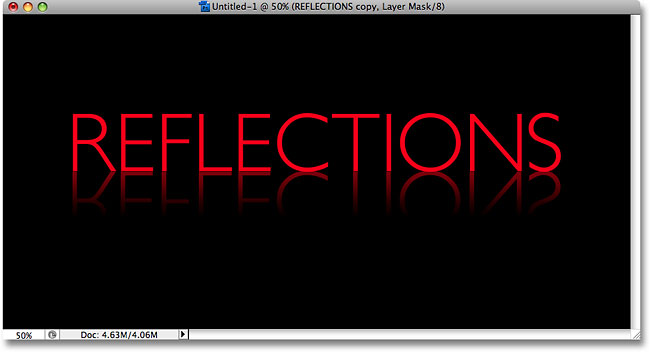
Here's the reflection we'll be creating:
Let's get started!
Step 1: Create A New Photoshop Document
Create a new blank Photoshop document by going up to the File menu at the top of screen and choosing New. You can also create a new document with the keyboard shortcut Ctrl+N (Win) / Command+N (Mac). Either way brings up Photoshop's New Document dialog box. Enter the dimensions you need for your document. For this tutorial, I'm going to enter 6 inches for my document's Width, 3 inches for the Height, and a Resolution of 300 pixels/inch. Click OK when you're done to exit out of the dialog box. Your new blank document will appear on your screen:
Step 2: Fill The New Document With Black
This step is optional, but I'm going to use black as the background color for my document rather than the default white. If you'd prefer to stick with white, you can skip this step. To fill the document with black, go up to the Edit menu at the top of the screen and choose Fill to bring up Photoshop's Fill command:
You can also select the Fill command with the keyboard shortcut Shift+F5. Either way brings up the Fill dialog box. At the top of the dialog box is the Contents section, with one option simply named Use. Select Black from the list to the right of the word Use:
Click OK when you're done to exit out of the dialog box, and Photoshop fills the document with black:
Step 3: Select The Type Tool
To add text to the document, we need Photoshop's Type Tool. You can either click on it in the Tools palette to select it, or for a faster way, press the letter T on your keyboard to select it with the shortcut:
Step 4: Select A Font
With the Type Tool selected, go up to the Options Bar at the top of the screen and choose the font you'd like to use for the effect. Your choice of fonts will depend on which fonts you currently have installed on your computer. I'll stick with something simple and choose Gill Sans Light for my effect. Don't worry about the size of the font for now:
Step 5: Select A Color For The Text
Next, we need to choose a color for our text. There's a few different ways to choose a text color in Photoshop. For this tutorial, I'm going to use a very simple and quick way, which is to select a ready-made color from the Swatches palette. Switch over to your Swatches palette, which by default is grouped in between the Color and Styles palettes. The Swatches palette contains a collection of color swatches that are installed by default with Photoshop. To choose one of the colors, simply move your mouse cursor over its color swatch. You'll see the cursor change into an eyedropper. Click on the swatch with the eyedropper to select the color. I'm going to choose the red swatch in the top left corner:
Step 6: Add Your Text
Once you've chosen a color, click anywhere inside the document and add your text. I'm going to type the word "REFLECTIONS", all in capital letters:
When you're done, click on the checkmark in the Options Bar to accept your text and exit out of text editing mode:

Step 7: Resize The Text If Needed With Free Transform
If you need to resize your text, go up to the Edit menu at the top of the screen and choose Free Transform, or press the keyboard shortcut Ctrl+T (Win) / Command+T (Mac). Either way brings up Photoshop's Free Transform command which will allow us to easily resize the text and move it as well if we need to:
Once you've selected it, you'll see the Free Transform box and handles appear around your text in the document. To resize the text, hold down your Shift key, which will prevent you from accidentally distorting the width-to-height aspect ratio of the text as you resize it, then simply click on any of the four corner handles (the little squares) and drag them inward to make the text smaller or outward to make it larger. To move the text, click anywhere inside the Free Transform box and drag the text to a new location. Just don't click on the small target symbol in the very center of the box, otherwise you'll move the target symbol, not the text. I'm going to make my text a bit larger by holding Shift and dragging the handle in the bottom right corner outward. I'm also going to drag the text down a little bit so that the bottom of the text appears closer to the horizontal center of the document:
When you're done, press Enter (Win) / Return (Mac) to accept the transformation and exit out of the Free Transform command.
Step 8: Duplicate The Text Layer
Now that we have our text, we can begin creating the reflection effect. The first thing we'll need is a copy of our text, so let's duplicate the text layer by going up to the Layer manu at the top of the screen, choosing New, and then choosing Layer via Copy. Or, for a much faster way to duplicate a layer, simply press the keyboard shortcut Ctrl+J (Win) / Command+J (Mac):
Either way tells Photoshop to make a copy of our text layer. Nothing will seem to have happened in our document, but if we look at our Layers palette, we can see that we now have a copy of the layer sitting directly above the original (notice that the copy has the word "copy" in its name):
Step 9: Flip The Text Layer Vertically
Next, we need to flip our copied text layer upside down, and Photoshop just happens to come with a command designed specifically for such a task. Go up to the Edit menu once again, choose Transform, and then choose Flip Vertical:
The copied text layer will appear flipped upside down in front of the original text layer, creating an interesting, although entirely unreadable, visual effect:
Step 10: Drag The Copied Text Below The Original
Select the Move Tool from the Tools palette, or press the letter T to select it with the keyboard shortcut:
Then, with the copied text layer still selected in the Layers palette (selected layers are highlighted in blue), hold down your Shift key, then click inside the document and drag the copied, upside down text below the original text. Holding the Shift key as you drag makes it easier to drag the text straight down, since it prevents you from accidentally moving left or right:
Step 11: Add A Layer Mask To The Flipped Text
At this point, all that's left to do in creating our reflection effect is to make our upside-down text fade from top to bottom into transparency. For that, we'll use a layer mask. To add a layer mask to our copied text layer, make sure you still have the copied text layer selected, then simply click on the Layer Mask icon at the bottom of the Layers palette:
Nothing will happen in the document, but you'll notice that a small white rectangle has appeared on the right of the text layer in the Layers palette. This is the layer mask preview thumbnail, letting us know that we now have a layer mask on this layer, even though we haven't actually done anything with it yet:
Step 12: Select The Gradient Tool
To make the text on this layer fade into transparency, we need to draw a black-to-white gradient on our layer mask (for more information on how layer masks work, be sure to check out our complete Understanding Layer Masks tutorial in the Photoshop Basics section of the website). To draw a gradient, we'll need to use Photoshop's Gradient Tool, so either select it from the Tools palette or simply press the letter G on your keyboard to select it with the shortcut:
With the Gradient Tool selected, you'll see that the Options Bar at the top of the screen has changed to show you options specifically for the Gradient Tool. Over on the left of the Options Bar, you'll see a gradient preview area showing you the currently selected gradient. In my case, it's already showing the black to white gradient that I need. If yours is also showing the black to white gradient, you can skip this step. If you're seeing different colors in your preview area, click directly on the preview area:
This brings up Photoshop's Gradient Editor, which shows us a collection of gradients that we can choose from. The one we want is the black to white gradient, third from the left, top row. Click on it to select it, then click OK in the top right corner of the dialog box to exit out of it:
Step 13: Draw A Vertical Gradient From Bottom To Top Along The Upside Down Text
With the Gradient Tool and the black to white gradient selected, all we need to do now is draw a vertical gradient along our upside down text. First, make sure you have the layer mask selected, not the layer itself. You should see a white highlight border around the layer mask thumbnail in the Layers palette which tells us that the layer mask is selected. Click on the layer mask preview thumbnail to select it if you don't see the highlight border around it.
To draw the gradient, click inside the document roughly 3/4 of the way down towards the bottom of the upside down text. Then hold down your Shift key and drag up to the point where the upside down text meets the original text. Holding the Shift key as you drag prevents you from moving left or right as you drag upward:
Release your mouse button when you're done, which is when Photoshop actually draws the gradient, and you'll see that the upside down text now fades away as you move further down towards the bottom of the letters:
Since we drew the black to white gradient on the layer mask, we can't actually see it in the document, but we can see it if we look at the layer mask preview thumbnail in the Layers palette:
Step 14: Adjust the Opacity Of The Layer To Fine Tune The Effect
If you want your text reflection to appear a little more faded, simply go up to the Opacity option in the top right corner of the Layers palette and lower the opacity of the layer. I'm going to lower mine down to 50%:

Here, after lowering the opacity, is my final text reflection effect:
Where to go next...
And there we have it! Visit our Text Effects or Photo Effects sections for more Photoshop effects tutorials!