
Create Silky Smooth Waterfalls In Photoshop
In this Photoshop Effects tutorial, we're going to look at how to give waterfalls a silky smooth appearance, as if the photo was taken with a longer exposure which would normally require the use of a neutral density filter.
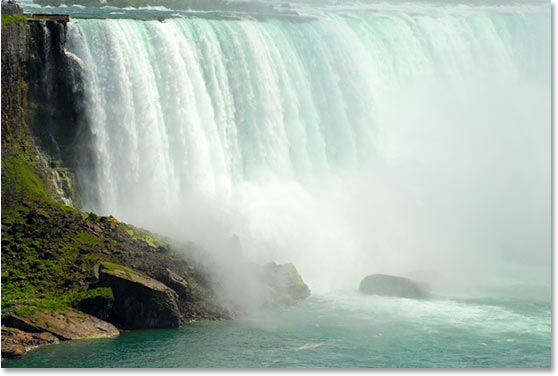
Here's the photo I'll be starting with:
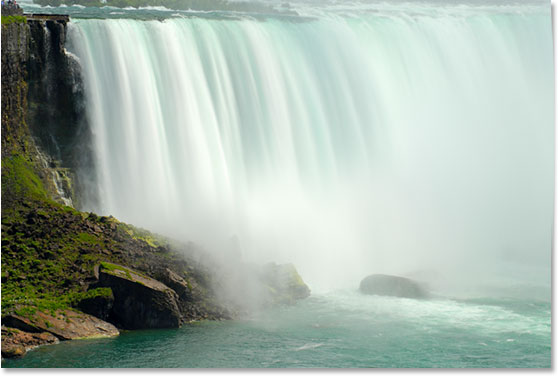
And here's the finished "silky smooth" effect:
This tutorial is from our Photo Effects series. Let's get started!
Step 1: Draw A Selection Around The Waterfall
With your image open in Photoshop, grab your Lasso Tool from the Tools palette:
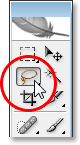
You can also press the letter L on your keyboard to quickly select it.
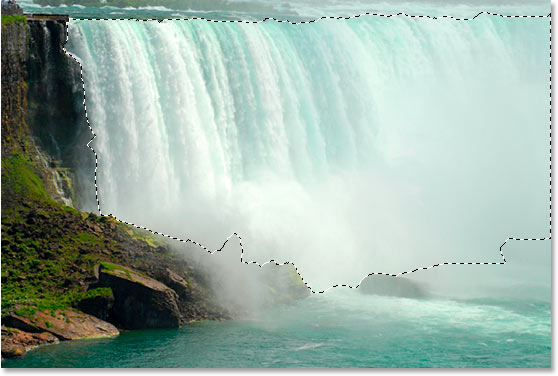
Then, with the Lasso tool selected, drag a selection around your waterfall. It doesn't have to be surgically precise, but try not to stray too far from the edges of the waterfall:
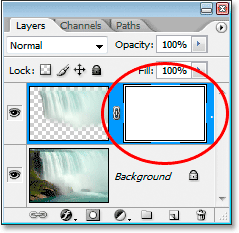
Step 2: Copy the Selection Onto Its Own Layer
With the waterfall selected, use the keyboard shortcut Ctrl+J (Win) / Command+J (Mac) to copy it onto its own layer above the Background layer. You won't see anything happen in the document window, but if you look in the Layers panel, you'll see the waterfall on a new layer:

Step 3: Apply The Motion Blur Filter To The New Layer
With our waterfall now copied to its own layer, we can create our "silky smooth" effect by applying the Motion Blur filter to it. To do that, go up to the Filter menu at the top of the screen, select Blur, and then select Motion Blur. This brings up the Motion Blur dialog box:
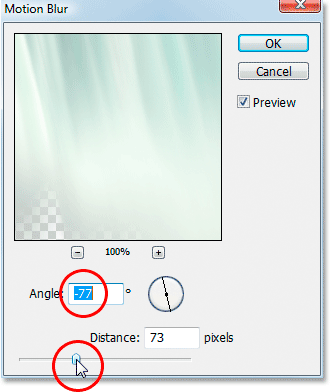
Adjust the Angle of the blur so it matches the angle at which the water is falling. In most cases, this would be 90°, since water would normally fall straight down. In my case, since the water is rushing so quickly over the edge, it's actually falling at a bit of an angle, so I've set my blur angle to -77°. The easiest way to match your blur angle to the water is to click inside the Angle value box and then increase or decrease the value one degree at a time using the up or down arrow keys on your keyboard, which is what I've done.
Once you've set the correct angle, drag the Distance slider at the bottom until your waterfall looks nice and silky. I've dragged mine to a value of 73 pixels, which gives me a nice effect.
Here's my image after applying the Motion Blur filter:

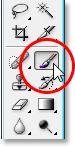
Step 4: Add A Layer Mask To The Waterfall Layer
The motion blur effect looks nice, but it needs a little cleaning up since the blur is extending outside the edges of the waterfall. We can clean it up easily using a layer mask. To do that, with the waterfall layer selected, click on the Layer Mask icon at the bottom of the Layers panel:

This adds a layer mask to the layer, and you can see the layer mask thumbnail on the layer:
Step 5: Paint With Black On The Layer Mask To Clean Up The Blur Effect
Press D on your keyboard to quickly reset your Foreground and Background colors, so black becomes your Foreground color. Then grab your Brush Tool from the Tools panel:
You can also press B on your keyboard to quickly select it.
Then, with black as your foreground color, which is the color your brush paints with, paint away any unwanted blurred areas around the waterfall, most of which will be along the top and bottom. Use a soft-edged brush for best results. You can resize your brush as needed using the left and right bracket keys ( [ and ] ) on your keyboard, and you can soften or harden the brush by holding down the Shift key and using the bracket keys. With the Shift key down, pressing the left bracket key softens the brush edge, and pressing the right bracket key hardens it. Paint over any unwanted blurred areas. Since we're using a layer mask, any areas you paint over with black will disappear.
Here's my image after painting along the top and bottom of the waterfall to remove the blur from those areas:

In most cases, you could stop here and your effect would be complete, but in my case, there's a bit of a problem. The water is rushing so quickly and powerfully over the edge that it's not falling straight down. It's actually falling on a bit of a curve. We can't create curved blurs with the Motion Blur filter, but if you're using Photoshop CS2 or later, we can still add a curve quite easily, which I'll do next.
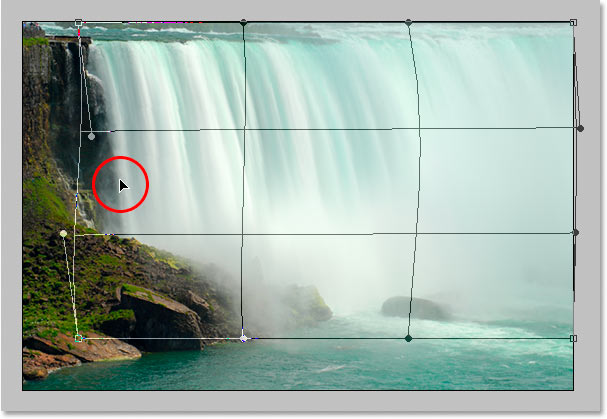
Step 6: Use The Warp Tool To Curve The Blur Effect If Needed
In Photoshop CS2, Adobe introduced us to the Warp tool, which as the name implies allows us to easily warp and distort images. I'm going to use it to give my blur effect a bit of a curve so it more closely follows the path of the water as it rushes over the edge of the cliff. To do that, with my waterfall layer still selected in the Layers panel, I'll go up to the Edit menu at the top of the screen, then I'll choose Transform, and then Warp. A grid appears over my waterfall, with a hollow square (called a "corner point") in each corner and a handle sticking out from either end of the corner points:
To create a bit of a curve in my blurring effect, I'm first going to click on the handle that's extending out below the top left corner point and drag it down and to the right:

That adds a slight curve to the left side. To add a curve to the right side as well, I'll just click inside the right middle grid section and drag towards the right. You can see the vertical grid lines bending as I drag:

My blur effect how has a curve to it, but after creating the curve, the left edge of my blur effect no longer reaches the left edge of the waterfall itself. It's been pushed in a bit too far to the right. To compensate for that, all I need to do is click my mouse anywhere inside the left middle grid section and drag back towards the left until the edge of my blur reaches the edge of the waterfall once again:
The warp grid takes a bit of practice before you'll really get the hang of it, but it can be lots of fun to play around with so don't be afraid to give it a try. If you make a mistake, simply press Ctrl+Z (Win) / Command+Z (Mac) to undo the warp and try again.
When you're happy with the curve and your warp grid, press Enter (Win) / Return (Mac) to accept it and apply the warp, and you're done! Here is my finished "silky smooth waterfall" effect after adding a bit of a curve to the blur using the Warp tool:
And there we have it! That's how to create silky smooth waterfalls in Photoshop! Check out our Photo Effects section for more Photoshop effects tutorials!