Worn, Torn Photo Edges Effect In Photoshop
In this Photoshop tutorial, we'll learn how to give a photo a worn, torn edges effect. Creating the effect is easy, requiring nothing more than a few layers, the Eraser Tool, one of Photoshop's built-in brushes, and some layer styles to help finish things off.
This version of our Worn, Torn Photo Edges tutorial is for Photoshop CS5 and earlier. If you're using Photoshop CS6 or Photoshop CC (Creative Cloud), check out our fully updated version.
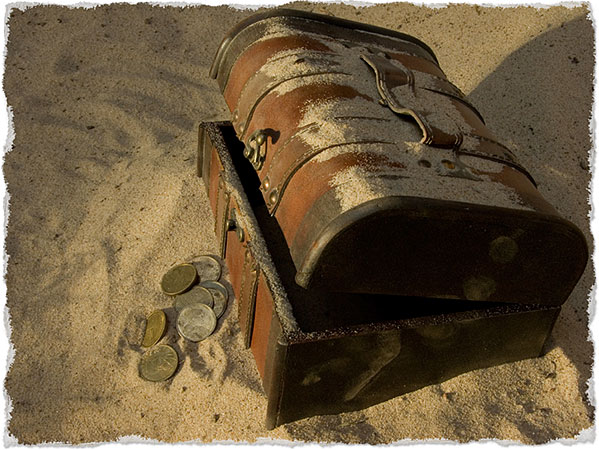
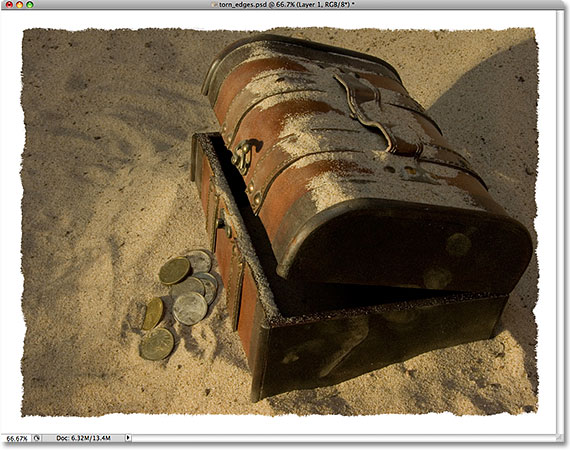
Here's the torn edges effect we'll be creating:
How To A Worn, Torn Photo Edges Effect
Step 1: Duplicate The Background Layer
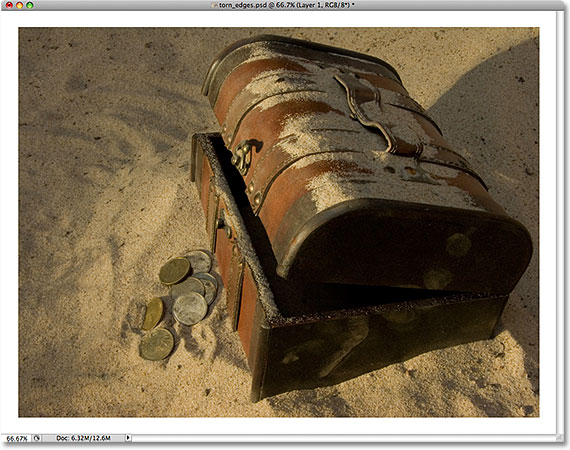
With our image newly opened in Photoshop, let's begin by duplicating the Background layer. Go up to the Layer menu in the Menu Bar at the top of the screen, choose New, and then choose Layer via Copy. Or, for a faster way to duplicate a layer, press the keyboard shortcut Ctrl+J (Win) / Command+J (Mac):
If we look in the Layers panel, we can see that our document now contains two layers. The original Background layer sits on the bottom, while our newly added copy of the Background layer, which Photoshop has automatically named "Layer 1", sits above it:

Step 2: Add Extra Canvas Space
Let's give ourselves a bit more room to work by adding a little extra canvas space around the image. Go up to the Image menu at the top of the screen and choose Canvas Size:
This brings up Photoshop's Canvas Size dialog box. I'm going to add an extra 100 pixels around the image by entering 100 for both the Width and Height options in the center of the dialog box and making sure the measurement type is set to pixels for both. Also make sure the Relative option is checked so the extra space is added to the existing canvas, otherwise we'll be changing the canvas size to 100 x 100 pixels, which isn't what we want. Click the center square in the Anchor grid so that the extra space is added evenly around all edges of the canvas:
Click OK when you're done to exit out of the Canvas Size dialog box. If we look at the image in the document window, we can see that we now have extra space around the image. We'll be trimming away the extra space when we're finished creating the torn edges effect. This is simply to give us some extra room to work with the Eraser Tool, which we'll be using in a moment:
Step 3: Add A New Blank Layer Between The Two Existing Layers
With "Layer 1" selected in the Layers panel (it should be highlighted in blue), hold down your Ctrl (Win) / Command (Mac) key and click on the New Layer icon at the bottom of the Layers panel:
Normally, Photoshop adds new layers directly above the currently selected layer, but by holding down the Ctrl / Command key as we click on the New Layer icon, we tell Photoshop to add the new layer below the selected layer. We now have a new blank layer named "Layer 2" sitting between the Background layer and "Layer 1".
Step 4: Fill The New Layer With White
Go up to the Edit menu at the top of the screen and choose Fill:

This brings up Photoshop's Fill dialog box, which we can use to fill a layer or a selection with color. Choose White for the Use option in the Contents section at the top of the dialog box:
Click OK when you're done to exit out of the dialog box. Photoshop fills the new layer with white, although we can't actually see it in the document window since the image on "Layer 1" above it is blocking the new layer from view. However, if we look at the layer preview thumbnail for "Layer 2" in the Layers panel, we can see that the thumbnail is now filled with white, which tells us that the layer itself is filled with white:
Step 5: Select "Layer 1"
We're ready to begin creating the torn edges effect, but first, we need to make sure we're working on the correct layer. At the moment, we have "Layer 2" selected, which we know because "Layer 2" is highlighted in blue in the Layers panel. We need to be working on the image on "Layer 1", so click on "Layer 1" to make it the currently active layer:
Step 6: Select The Eraser Tool
Select Photoshop's Eraser Tool from the Tools panel. You can also quickly select the Eraser Tool by pressing the letter E on your keyboard:
Step 7: Select The 100 Rough Round Bristle Brush
We can use any of Photoshop's brushes with the Eraser Tool, just as we could if we were using the actual Brush Tool. Click on the Brushes panel toggle icon in the Options Bar at the top of the screen:
This opens the Brushes panel. Click on the menu icon in the top right corner of the Brushes panel to bring up a list of menu options for the panel. I'm using Photoshop CS4 here. In earlier versions of Photoshop, the menu icon looks like a small arrow. When the menu appears, select Large List:
This changes how the brushes are displayed in the Brushes panel, making it easier to see exactly which brush we're selecting. With the brushes now displayed in the Large List format, scroll down to the bottom of the list and click on the 100 Rough Round Bristle brush to select it:
If you want to switch back to the way the brushes were displayed originally, click on the Brushes panel's menu icon and select Small Thumbnail from the list.
Click again on the Brushes panel toggle icon in the Options Bar once you've chosen the brush to close out of the Brushes panel.
Step 8: Erase Around The Edges Of The Image
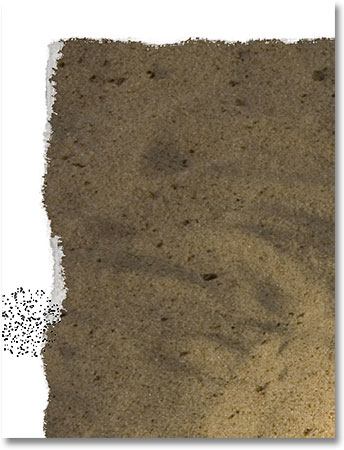
Let's begin by creating our initial torn edges effect along the left side of the image. I say "initial" because once we've worked our way around the entire image once, we're going to go back around a second time, but we'll get to that later. Position the Eraser Tool so that it's in the top left corner of the document with only about 25-30% of the brush extending in to the image. The rest of the brush should be outside of the image in the white space we added back in the beginning of the tutorial. Click once, then with your mouse button still held down, drag a short brush stroke down along the upper left edge of the image. You'll see sections of the edge being erased away as you drag, creating the beginning of our torn edges effect:
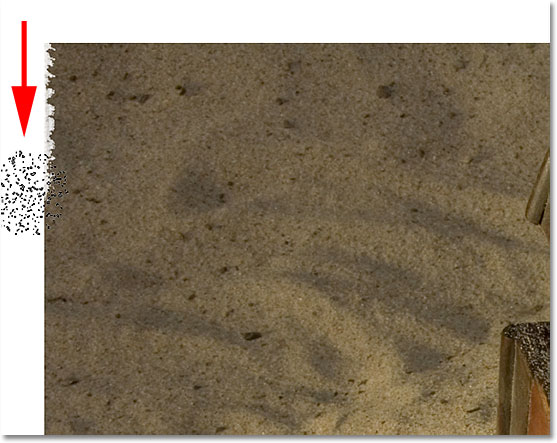
As we can see in the screenshot above, the initial brush stroke didn't completely remove the initial straight edge. There's still a faint part of it visible, and that's due to the shape of the bristle brush we're using. You'll probably need to go back over the same area two or three times before the straight edge is completely gone.
Continue working your way down the left side of the image by clicking and dragging out short brush strokes, always keeping 70-75% of the brush shape outside of the image in the white area so we don't erase too much of the edge. If you make a mistake and need to undo your last brush stroke, press Ctrl+Z (Win) / Command+Z (Mac) to undo it, or press Ctrl+Alt+Z (Win) / Command+Option+Z (Mac) repeatedly to undo multiple brush strokes:
If you find that the default brush size is too large for your image, you can change the size of the brush on the fly with the left and right bracket keys. Press the left bracket key ( [ ) to make the brush smaller, or press the right bracket key ( ] ) to make it larger.
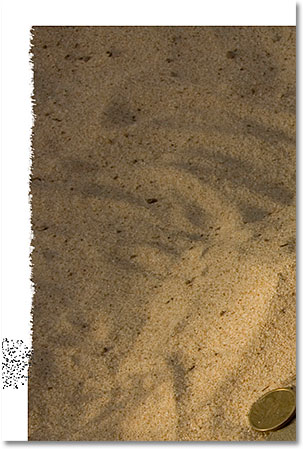
Once you reach the bottom left corner of the photo, continue moving around the rest of the image until you're back in the top left corner where you began. When you're done, your edges should look something like this:
Step 9: Duplicate The Layer
Now that we have our initial torn edges effect, we need to make a copy of the layer. With "Layer 1" selected in the Layers panel, press Ctrl+J (Win) / Command+J (Mac) to quickly duplicate it. We now have a copy of the layer, which Photoshop has appropriately named "Layer 1 copy", at the top of the Layers panel. Normally, we should be renaming layers to avoid seeing names like "Layer 1 copy", but since this effect is fairly simple and we have all the layers we need at this point, we'll leave them with their default names to save time:
Step 10: Turn The Top Layer Off
Click on the top layer's visibility icon (also known as the "eyeball") to temporarily turn the layer off and hide it from view in the document window so we can see the original "Layer 1" below it:
Step 11: Select "Layer 1"
With the top layer now hidden from view temporarily, click once again on "Layer 1" in the Layers panel to select it:

Step 12: Add A Color Overlay Layer Style
With "Layer 1" selected, click on the Layer Styles icon at the bottom of the Layers panel and choose Color Overlay from the list that appears:
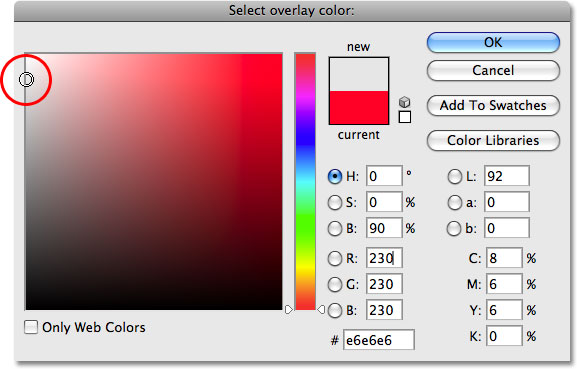
This brings up Photoshop's Layer Style dialog box set to the Color Overlay options in the middle column. By default, Photoshop sets the color of the overlay to red, and your photo will suddenly be filled with red in the document window. To change the color, click on the color swatch:
Photoshop's Color Picker will appear. Choose a light gray from the Color Picker, then click OK to exit out of it. Your photo should now be filled with light gray in the document window:
Step 13: Add An Inner Glow Layer Style
Don't close out of the Layer Style dialog box just yet. We still have a couple more layer styles to add. Click directly on the words Inner Glow on the left side of the dialog box. Don't simply click inside the checkbox to the left of the words. We need to click directly on the words themselves to access the options for the Inner Glow style:
The Inner Glow options now appear in the center of the Layer Style dialog box. Even though the name of the style is Inner Glow, we're going to change the glow to a shadow so we can use it to darken the edges around the photo a little bit.
First, to change the style from a glow to a shadow, change the Blend Mode option at the top of the dialog box from Screen to Multiply. Then click on the small color swatch directly below the word "Noise" to change the color of the style. By default, it's set to yellow. When you click on the color swatch, Photoshop's Color Picker will appear, just as it did when we changed the color of the Color Overlay style a moment ago. Select black from the Color Picker, then click OK to exit out of it.
Lower the Opacity down to around 10% so the shadow is very subtle. Finally, increase the Size of the shadow to around 24 px (pixels):
Your image should now look similar to this:
Step 14: Add A Drop Shadow
Click directly on the words Drop Shadow at the top of the list of layer styles on the left of the dialog box. Again, we need to click directly on the words themselves to access the options for the Drop Shadow:
The Drop Shadow options will appear in the center column of the Layer Style dialog box. Lower the Opacity of the shadow down to around 30% so it's much less intense than it is with the default opacity setting of 75%. Then set the Angle of the shadow to 120° if it isn't set to that already:
Click OK when you're done to exit out of the Layer Style dialog box. Here's my image after applying the drop shadow:
Step 15: Select The Top Layer And Turn It Back On
Click on the top layer in the Layers panel ("Layer 1 copy") to select it, then click on the layer visibility icon on the left of the layer to turn the layer back on so it's visible again inside the document window. The photo will once again appear and will block the gray-filled image that we were just working on from view:
Step 16: Erase Parts Of The Edges On The Top Layer To Reveal The Layer Below
With the top layer selected, go back around the edges of the image with the Eraser Tool using short brush strokes, just as we did initially on "Layer 1", to remove more of the edge. Remember to keep most of the brush shape outside of the image so that no more than 25-30% of it extends into the image. As parts of the edge are erased, the light gray image below it is revealed, creating the illusion that the photo itself has worn off around the edges and only the back layer of the paper remains:
Again, you can change the size of the brush if needed by pressing the left bracket key ( [ ) to make it smaller or the right bracket key ( ] ) to make it larger. If you make a mistake, press Ctrl+Z (Win) / Command+Z (Mac) to undo the last area you erased, or press Ctrl+Alt+Z (Win) / Command+Option+Z (Mac) to undo multiple brush strokes.
Here, after working my way around the edges of the photo once again, is my final "worn, torn photo edges" effect:
Step 17: Trim Away The Extra Canvas Space (Optional)
If you want to remove the extra canvas space we added earlier, go up to the Image menu at the top of the screen and choose Trim:
This brings up the Trim dialog box. Select the Top Left Pixel Color option. Since the pixel in the top left corner of the document is white, Photoshop will trim away all of the white area around the image. Make sure the Top, Bottom, Left, and Right options are selected in the bottom half of the dialog box, then click OK to exit out of it, at which point Photoshop will trim away the extra canvas space we added: