
Classic Starburst Background Effect In Photoshop
In this Photoshop Effects tutorial, we're going to learn how to create a classic "starburst" background, the same effect you've undoubtedly seen hundreds of times in grocery stores, department stores, and in those weekly flyers that flood your mailbox. Creating the effect is easy. We'll be using Photoshop's Polygon Tool, a Solid Color fill layer, the Free Transform command, and one of Photoshop's little known but very useful features, Transform Again. Along the way, we'll learn how to find the exact center of a Photoshop document using rulers and guides, and how to make objects snap to your guides!
Here's an example of the "starburst" background we'll be creating:
Once we've created the background, we'll learn how to easily change the colors used in the effect, and we'll even see how to save it as a Custom Shape so you'll be able to use it again any time you want!
Step 1: Create A New Photoshop Document
The first thing we need to do is create a new Photoshop document. Go up to the File menu at the top of the screen and choose New..., or use the keyboard shortcut Ctrl+N (Win) / Command+N (Mac). Either way brings up Photoshop's New dialog box. For this tutorial, I'll create a 10 inch by 10 inch document at 300 pixels per inch, although there's no particular reason why I'm choosing these dimensions. You can create the same size document if you wish, or feel free to create whatever size document you need:

Click OK when you're done to exit out of the dialog box. Your new document will appear in a document window:
Step 2: Show Rulers
To have the effect appear to "burst out" from the center of the image, we need to know where the center of our image is. The easiest way to find the exact center of the image is by using Photoshop's Rulers and Guides. Let's first turn on the rulers. To do that, go up to the View menu at the top of the screen and choose Rulers:
By default, the rulers are turned off in Photoshop. The way you can tell whether they're on or off, besides looking in your document window, is by looking for a checkmark to the left of the word "Rulers" in the View menu. If you see a checkmark beside the word, it means the rulers are already turned on, in which case there's no need to select them here. If you do not see a checkmark, it means the rulers are currently turned off, so you'll need to click on the Rulers option to turn them on.
You can also turn the rulers on and off by pressing Ctrl+R (Win) / Command+R (Mac). With the rulers now on, you'll see them appear along the top and left of your document window:

Depending on how you have your rulers set up in Photoshop's Preferences, your rulers may be showing inches, pixels, centimeters, or some other form of measurement. It makes no difference which measurement type you're using for this effect.
Step 3: Make Sure The "Snap" Option Is Turned On
The reason we turned the rulers on was so that we can drag guides out from them, and in a moment, we're going to drag out a couple of guides, one horizontal and one vertical. Before we do that, though, we need to make sure the Snap option is enabled. With "Snap" enabled, our guides will automatically snap to the horizontal and vertical centers of the document for us. The spot where the two guides intersect is the exact center of the image!
To turn the Snap option on, go back up to the View menu at the top of the screen. You'll see the Snap option directly below the Rulers option. By default, the Snap option is enabled, so you should see a checkmark to the left of the option. If you see the checkmark, it means that Snap is already enabled and there's no need to click on it. If you do not see the checkmark, it means the Snap option is currently disabled, so click on the option to enable it. In my case (and most likely yours as well), Snap is already enabled:
Step 4: Make Sure "Snap To Guides" Is Enabled
While we're here, we should make sure one other option is also enabled, Snap To Guides. This will cause anything we drag near a guide to snap directly on to it, which will make it easy for us to place something directly in the center of our document, as we'll see a bit later on. To enable the Snap To Guides option, go back up to the View menu. You'll see an option that says Snap To directly below the Snap option we just looked at in the previous step. Hover your mouse over the Snap To option for a second or two and a sub menu will appear. At the top of the sub menu, you'll see the Guides option. If you see a checkmark to the left of the word "Guides", it means the option is already enabled and there's no need to click on it. If there is no checkmark, click on Guides to enable the option:
Step 5: Drag A Horizontal Guide Into The Middle Of The Document
We're ready to find the exact center of our document. As I mentioned earlier, we need to drag out two guides, one vertical and one horizontal. The "Snap" option that we enabled in Step 3 will force the guides to automatically snap into place as soon as we're close enough to the middle of the document, and the point where the two guides intersect will be the exact center. Let's drag out our first guide. We'll start with the horizontal guide.
Click anywhere inside the ruler that runs along the top of the document, then drag down towards the middle of the document. As you drag, you'll see that you're dragging a horizontal guide which will appear as a black dotted line while you have your mouse button held down. Continue dragging downward until you get close to the middle of the document, and as soon as you're close enough to the middle, Photoshop will automatically snap the guide into place. Release your mouse button at that point, and you'll see your first guide running left to right along the exact middle of the document. By default, guides appear in cyan unless you changed the color in Photoshop's Preferences:
Step 6: Drag A Vertical Guide Into The Middle Of The Document
We have our horizontal guide in place. Now let's add our vertical guide. Click anywhere inside the ruler that runs along the left side of the document, then drag towards the right into the middle of the document. You'll see that you're dragging a vertical guide which will appear at first as a black dotted line. Continue dragging the guide towards the middle of the document, and as soon as you're close enough to the middle, Photoshop will snap the guide into place. Release your mouse button, and you'll now have a vertical guide running up and down along the middle of the document. The point where the two guides intersect is the exact center (circled in red):
Now that we've dragged out our two guides, we no longer need to have the rulers turned on. You can leave them on if you wish, but I'm going to turn mine off by pressing the keyboard shortcut Ctrl+R (Win) / Command+R (Mac).
Step 7: Add A Solid Color Fill Layer
With our guides now in place, let's begin creating our "starburst" background effect. We're going to create the effect in a way that will make it easy for us to change the colors any time we want, so let's add a Solid Color Fill layer which will serve as the background color for the effect. Click on the New Fill Or Adjustment Layer icon at the bottom of the Layers palette:
Then select Solid Color from the top of the list that appears:
Step 8: Choose A Color For The Background
This will bring up Photoshop's Color Picker. Choose a color to use for the background of the effect. I think I'll choose a light yellow. It doesn't really matter which color you choose here since you can easily change it later, so pick whichever color you want for now:
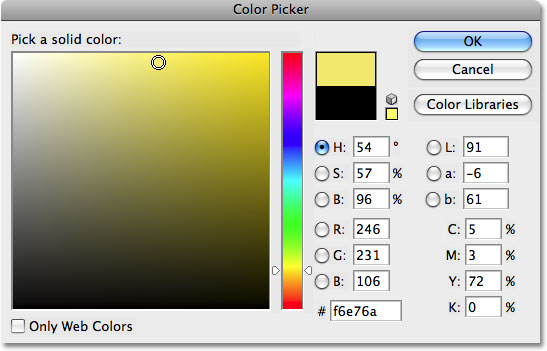
Click OK when you're done to exit out of the Color Picker. You'll see the color you chose now filling your entire document:
If we look in our Layers palette, we can see that we now have two layers - the Background layer on the bottom and our newly added Solid Color fill layer, named "Color Fill 1", sitting above it:
Step 9: Select The Polygon Tool
Next, we need to draw a simple triangle, and the easiest way to draw a triangle in Photoshop is by using the Polygon Tool. By default, the Polygon Tool is hiding behind the Rectangle Tool in the Tools palette, so click on the Rectangle Tool, then hold your mouse button down for a second or two. A fly-out menu will appear showing you the other tools that are available. Click on the Polygon Tool to select it:
Step 10: Set The Number Of Sides For The Polygon Tool To 3
A triangle, as everyone knows, has 3 sides, so we need to tell Photoshop that we want to draw a 3-sided polygon. With the Polygon Tool selected, look up in the Options Bar at the top of the screen. You'll see a Sides option that is set to 5 by default. Change the number of sides to 3:
Step 11: Make Sure The Polygon Tool Is Set To Draw Shapes
As with all of Photoshop's shape tools, the Polygon Tool gives us three different options for how we use it. We can draw a vector shape, we can draw a path, and we can draw a pixel-based shape. We want to draw a vector shape, which will allow us to make our triangle any size we want without any loss of image quality. To draw a vector shape, make sure the Shape option is selected in the Options Bar:

Step 12: Draw A Triangle
We're ready to draw our triangle. With the Polygon Tool selected, the number of sides set to 3 and the Shapes option selected in the Options Bar, click somewhere in the top left of your document and drag out a triangle. Any size will do for now. It doesn't really matter where you draw your triangle either, I'm just trying to keep us both on the same page since I'm drawing mine in the top left. You want to make sure that your triangle appears to be pointing downward. By that, I mean that the top side appears perfectly horizontal. The easiest way to do that is to hold down your Shift key as you drag out the triangle. This will force the triangle to snap to specific angles. Move your mouse left or right as you drag (with the Shift key held down) until the triangle snaps into the "pointing downward" position.
As you're dragging out the shape, your triangle will appear simply as an outline (also known as a "path"). When you release the mouse button, the triangle will appear filled with color. In my case, it's filled with black:
Don't worry about the color of your triangle for now. We can change it easily later.
Step 13: Select The Move Tool
Now that we have our triangle, we need to move it into position so that the bottom point is sitting at the exact center of the document. To move it, select the Move tool from the Tools palette, or press the letter V on your keyboard to access it with the shortcut:
Step 14: Move The Triangle Into The Center Of The Document
With the Move tool selected, click on the triangle in the document window and drag it into the center of the document so that the bottom point is touching the exact center (the spot where the two guides intersect). As soon as you get close to the center, the triangle will snap into place, and that's because we enabled the Snap To Guides option back in Step 4:
Step 15: Switch To "Full Screen Mode With Menu Bar"
In a moment, we're going to be stretching the triangle upward beyond the boundaries of our canvas, which means we're going to need a bit more room to work if we want to be able to see what we're doing. If you're working with your document inside a document window, which is the default way to work in Photoshop, press the letter F on your keyboard to switch your view mode to Full Screen Mode with Menu Bar. As the name implies, this switches you to a full screen mode in Photoshop while leaving the Menu Bar in place at the top of the screen. Then, to give yourself even more room to work, press Ctrl+- (Win) / Command+- (Mac) a couple of times to zoom out. You should now have quite a bit of empty gray space around your document:
Step 16: Clear The Guides
Since we've already positioned our triangle where we want it in the exact center of the document, our guides have served their purpose and we can safely remove them. Go up to the View menu at the top of the screen and choose Clear Guides. This will clear the guides from the document:
Step 17: Stretch The Triangle Up Beyond The Top Of The Canvas With Free Transform
Press Ctrl+T (Win) / Command+T (Mac) on your keyboard to bring up Photoshop's Free Transform box and handles around the triangle. Click on the handle (the little square) in the top center of the Free Transform box and drag upward to stretch the triangle, making it longer and more narrow. Continue dragging until the triangle goes well beyond the top of the canvas, like so:
The reason why we're stretching the triangle beyond the top of the canvas will become clear in a moment. Press Enter (Win) / Return (Mac) when you're done to accept the transformation and exit out of the Free Transform command. You'll notice that even though we've stretched the triangle beyond the top of the canvas, only the part that falls within the boundaries of the canvas area remains visible in the document. The rest of the triangle above the canvas is currently visible only as an outline.
Step 18: Bring Up The Free Transform Box Around The Triangle Once Again
Press Ctrl+T (Win) / Command+T (Mac) to once again bring up the Free Transform box and handles around the triangle. I know, we just had Free Transform open a moment ago and I told you to close it, and now I'm telling you to open it again. What gives? Well, the reason is because this time, we're going to use Free Transform to rotate the triangle, and when we're done, we're going to use a little known command called Transform Again to have Photoshop repeat the rotation over and over again all around the document for us, which will create our starburst effect!
Step 19: Drag The Center Point Of The Free Transform Box Down To The Bottom Center Handle
If you look closely in the center of the Free Transform box, you'll see a small icon that looks like a little target symbol. This icon represents the rotation center point for the Free Transform command. Everything rotates around this icon, wherever the icon happens to be positioned. If we were to rotate the triangle with this icon in the center of the Free Transform box, the triangle would rotate around its center. That's usually what we want, but it's not what we want here. We want our triangle to rotate around the center of the document, which means we need to move the target icon into the center of the document.
To do that, click on the target icon, then drag it down on to the handle (the little square) in the bottom center of the Free Transform box, which will place it in the exact center of the document directly above the bottom point of the triangle. As soon as you get close enough to the handle, the icon will snap into place:
Step 20: Rotate The Triangle
With the target icon now positioned in the center of the document, we're ready to rotate the triangle. Move your mouse outside the top right corner of the Free Transform box. You'll see your mouse cursor change into a little rotation icon (a curved line with an arrow on both ends). Hold down your Shift key, which will force the triangle to rotate in increments of 15 degrees, making things much easier for us. Then, with your Shift key held down, click and drag your mouse down and to the right to rotate the triangle in a clockwise direction. You'll notice two things as you drag. One, the triangle is rotating around the center of the image, and two, it's snapping into 15 degree increments rather than rotating smoothly.
Rotate your triangle a total of 45 degrees clockwise (three increments of 15 degrees), at which point it will be extending out beyond the top right corner of the canvas:
The reason why we stretched the triangle so far beyond the top of the canvas back in Step 17 was so that it would be large enough to still extend out beyond the boundaries of the canvas even in these corner sections. Press Enter (Win) / Return (Mac) when you have your triangle rotated to accept the transformation and exit out of the Free Transform command.
Now that we've used Free Transform to rotate the triangle once, we're going to let Photoshop do the rest of the work for us, repeating the rotation all around the document to create the starburst effect!
Step 21: Use "Transform Again" To Repeat The Rotation All Around The Document
A little known and therefore rarely used feature in Photoshop is Transform Again, which allows Photoshop to repeat the last transformation we made. We're going to use it to create the rest of our starburst background effect.
Any time you've used the Free Transform command, you have the option of repeating the transformation with Transform Again. If you go up to the Edit menu at the top of the screen and choose Transform, you'll see an option at the top of the next sub menu that says Again. Notice that the keyboard shortcut for the Transform Again command is Shift+Ctrl+T (Win) / Shift+Command+T (Mac). We're going to be using the keyboard shortcut because we need to access the command several times in a row in order to create our starburst. However, we also need to create a copy of our triangle each time we rotate it. To create the copy, we'll need to add the Alt (Win) / Option (Mac) key into the keyboard shortcut. So, to create a copy of the triangle and rotate it at the same time using Transform Again, press Shift+Ctrl+Alt+T (Win) / Shift+Command+Option+T (Mac). A copy of the triangle will appear in the document and it will be rotated an additional 45 degrees:
Continue pressing Shift+Ctrl+Alt+T (Win) / Shift+Command+Option+T (Mac), adding another rotated copy of the triangle each time, until you've created the starburst effect all around the document:
If we look in our Layers palette, we can see that we now have a Shape layer named "Shape 1" above the "Color Fill 1" layer, and we can see our starburst shape inside the layer's preview thumbnail:
Step 22: Hide The Shape Outlines
Notice how each of the triangles that makes up the starburst shape has an outline appearing around it? That's because the shape is currently active. To deactivate the shape and hide the outlines, simply click directly on the Shape layer's preview thumbnail (circled in red in the previous step). When a shape is active, you'll see a white highlight border around the shape layer's preview thumbnail, as you can see in the screenshot above. When you click on the preview thumbnail, the highight border disappears and the outlines will also disappear, leaving us with a much cleaner looking starburst effect.
I'm going to switch Photoshop back to the Standard View Mode, which will place my image back inside a floating document window, by pressing the letter F twice on my keyboard. If you're using Photoshop CS3, you'll need to press F three times to get back to the Standard View Mode, since CS3 includes an additional view mode that you'll need to cycle through. I'm also going to press Ctrl++ (Win) / Command++ (Mac) a couple of times to zoom in to my image and fill up the document window, removing all that extra gray area around the canvas:
Step 23: Change The Color Of The Shape Layer
At this point, the starburst effect itself is complete, but I'm not too happy with the color. I'd like to change the black to something a bit more exciting, like maybe a bright orange. Fortunately, changing the colors in the effect is easy. To change the color of the starburst shape, simply double-click directly on the Shape layer's color swatch:
This bring's up Photoshop's Color Picker. Choose a different color for your starburst shape. If you keep an eye on your image in the document window, you'll see a preview of what the colors will look like as you select them. I'm going to choose a bright orange:
Click OK once you've chosen a new color to exit out of the Color Picker. Here's my starburst effect after having swapped the black for orange:
You can change the background color for the effect just as easily. Simply double-click directly on the "Color Fill 1" color swatch in the Layers palette:
This will again bring up the Color Picker, allowing you to choose a new color for the background. My background is currently yellow, but I think I'm going to change it to green. In fact, I'm also going to go back and change the color of the starburst shape by double-clicking on its color swatch once and choosing a new color from the Color Picker. I'll choose a blue this time. Here's the exact same starburst background effect again, this time using green for the background color and blue for the starburst shape:
You can also try using two shades of the same color, rather than two separate colors:
As you can see, you can easily change the look of the background any time you want by selecting whichever colors work best for the project you're working on.
Since we've created our starburst background effect as a shape in Photoshop, why not make things really easy on ourselves and save it as a Custom Shape! That way, we'll be able to reuse the shape any time we need it without having to redo all the steps! We'll look at how to do that next.
Step 24: Make Sure The Starburst Shape Is Active
To save a shape as a Custom Shape in Photoshop, we first need to make sure that the shape is currently active. As I mentioned, when a shape is active, outlines appear around the shape in the document window and a white highlight border appears around the Shape layer's preview thumbnail in the Layers palette. At the moment, our starburst shape is not active. We purposely deactivated it back in Step 22 in order to hide the shape outlines. We need to activate it again. To do that, simply click on the shape's preview thumbnail in the Layers palette:
You'll see a highlight border appear around the preview thumbnail and the outlines will re-appear around the shape in the document window:
Step 25: Define A Custom Shape
With the shape now active, go up to the Edit menu at the top of the screen and choose Define Custom Shape:
Note: If you forgot to make the shape active first, you'll find that the Define Custom Shape option is grayed out and unavailable. You'll need to make the shape active and then try again.
Once you've selected the Define Custom Shape option, Photoshop will pop up a small dialog box asking you to enter a name for your new custom shape. I'm going to name mine "Starburst":

Click OK when you're done to exit out of the dialog box and save the custom shape. We can now use our "Starburst" shape any time we need it! Simply select the Custom Shape Tool from the Tools palette. It's grouped in with all of the other Shape tools in the same place where we found the Polygon Tool:
Then, with the Custom Shape Tool selected, go up to the Options Bar at the top of the screen, click on the Shape preview area to bring up the Custom Shape selection box and select your "Starburst" shape from the list. If you have "Show Tool Tips" enabled in Photoshop's Preferences, you'll see the name of the shape appear when you hover over it:
With the "Starburst" shape selected, simply click anywhere near the center of your document and begin dragging out the shape! Once you've started dragging, hold down your Shift key to constrain the proportions of the shape so you don't distort the look of it, and hold down your Alt (Win) / Option (Mac) key to drag the shape out from its center rather than from the corner. Here, I've created a new document, same size as last time, and I've already added a Solid Color Fill layer (see Steps 7 and 8) to use as the background color for my effect. I'm dragging the "Starburst" shape out from somewhere near the center of the document:
Continue dragging out the shape until it fills your entire document, then release your mouse button, at which point the shape will appear filled with a solid color. To change the color, double-click on the Shape layer's color swatch in the Layers palette, just as we did in Step 23, and choose a new color from the Color Picker. Here's my effect after dragging out my shape and changing its color:

If you want to make sure the starburst is aligned perfectly with the exact center of the document, go up to the Select menu at the top of the screen and choose All, or use the keyboard shortcut Ctrl+A (Win) / Command+A (Mac). This will place a selection marquee around the entire document:
With the entire document selected, grab the Move tool from the Tools palette, or press V on your keyboard to select it with the shortcut:
Then, with the Move tool selected, go up to the Options Bar at the top of the screen and click on the Align Vertical Centers and Align Horizontal Centers icons. Photoshop will automatically align the center of the starburst shape with the center of the document:
Go back up to the Select menu and choose Deselect to remove the selection from around your document, or use the keyboard shortcut Ctrl+D (Win) / Command+D (Mac). The selection outline will disappear and your starburst shape will be perfectly aligned with the center of the document:
And there we have it! That's how to create a classic starburst background in Photoshop! Visit our Photo Effects section for more Photoshop effects tutorials!