
Add A Realistic Rainbow To A Photo With Photoshop
Version note: This tutorial is for Photoshop CS5. Using Photoshop CC 2020 or later? Check out the updated version.
In this Photoshop Effects tutorial, we'll learn how to easily add a rainbow, and even a double rainbow, to a photo! As we'll see, Photoshop ships with a ready-made rainbow gradient for us to use. We'll learn where to find it and how to load it in. We'll also learn how to flip the order of the colors in a gradient, which we'll need to do to create a more realistic double rainbow effect.
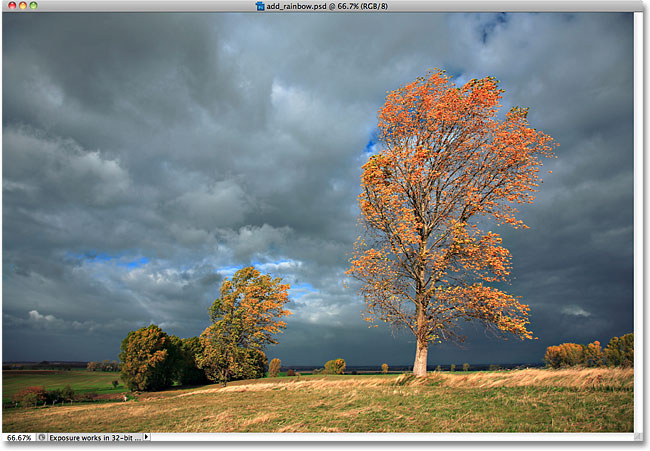
Of course, as with most photo effects, it helps if you start with the right type of image. In this case, a photo taken outdoors is a good place to start. If it happens to be a landscape photo taken after a rain storm, even better!
I'll be using Photoshop CS5. Please note that Photoshop CC 2020 (or later) users will want to check out the updated version.
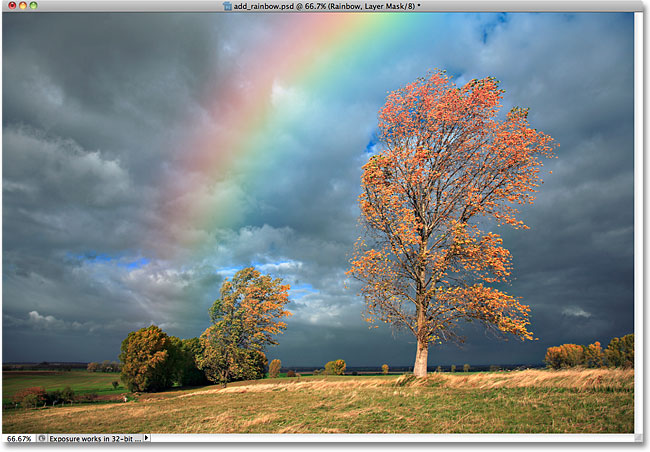
Here's the photo I'll be starting with:
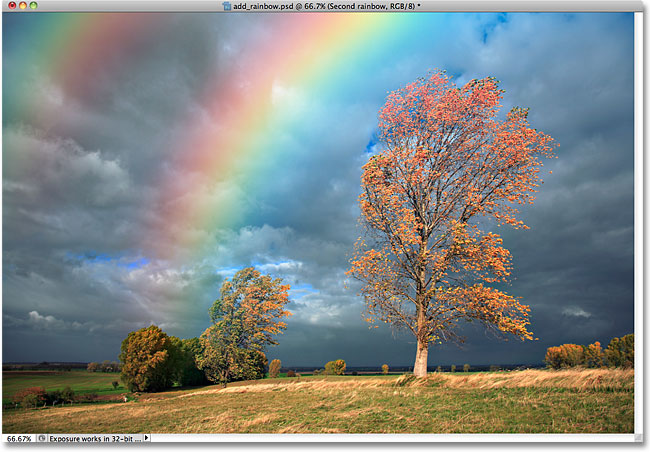
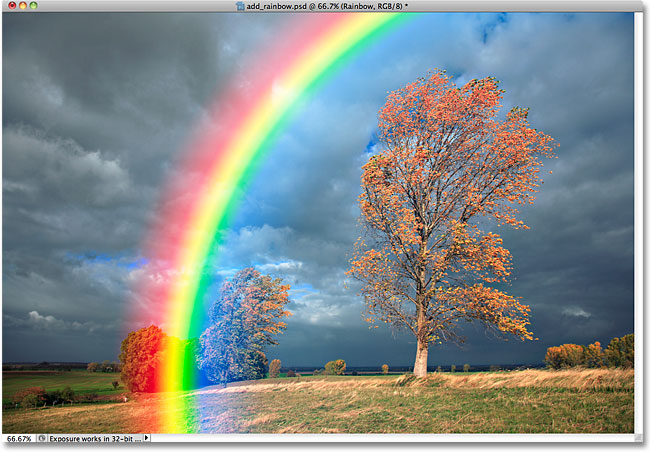
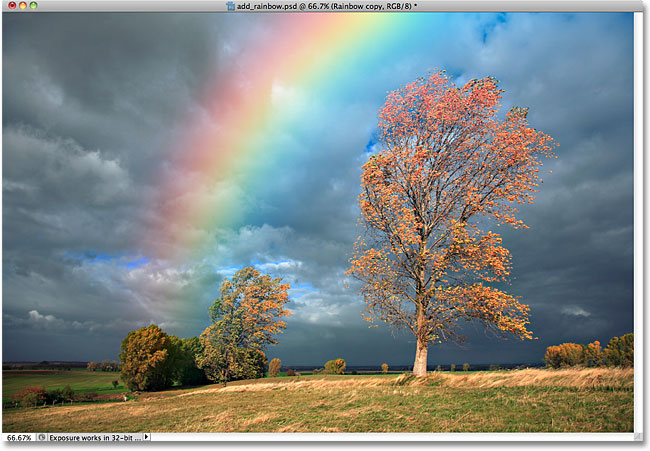
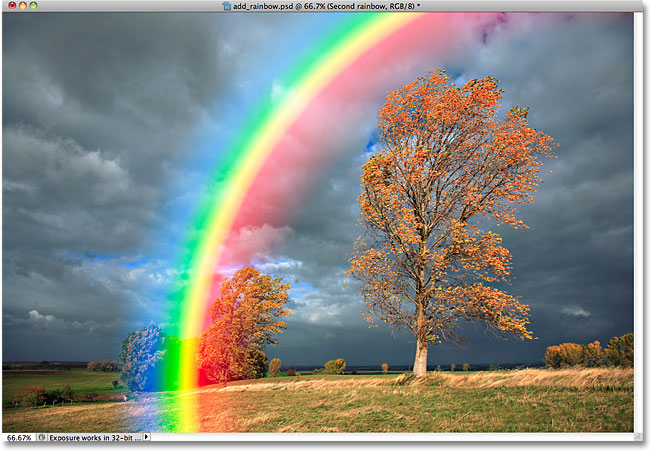
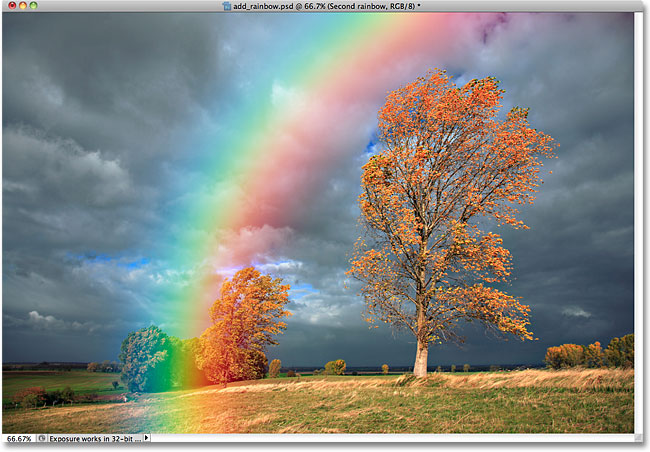
Here's what the image will look like after adding a double rainbow:
How To Add A Rainbow To A Photo
Step 1: Add A New Blank Layer
With the image newly opened in Photoshop, if we look in the Layers panel, we see that we currently have one layer, the Background layer, which contains our image:
The first thing we need to do is add a new blank layer above the Background layer. To do that, click on the New Layer icon at the bottom of the Layers panel:
Photoshop adds a new blank layer named "Layer 1" above the Background layer. Double-click directly on the name of the layer and change it to "Rainbow", since we'll be adding our initial rainbow to this layer. Press Enter (Win) / Return (Mac) when you're done to accept the name change:
Step 2: Select The Rainbow Gradient
As I mentioned, Photoshop ships with a ready-made rainbow gradient for us to use. It's not one of the gradients that Photoshop makes available to us by default, but all we need to do is load it in manually. To do that, select the Gradient Tool from the Tools panel:

Then, with the Gradient Tool selected, click on the Gradient Picker in the Options Bar at the top of the screen:

This opens Photoshop's Gradient Editor which shows us small thumbnails of the gradients we can choose from. By default, the rainbow gradient isn't one of them, so let's load it in. Click on the right-pointing arrow in the top right of the Gradient Editor:
A list of additional gradient sets appears. The one we want is Special Effects. Select it from the list:
Photoshop will ask you if you want to replace the original gradients with the Special Effects gradients or simply append them to the bottom of the list. Click Append so you'll still have the original gradients available, and the new Special Effects ones will be added below them:
With the new Special Effects gradients added, the one we want - Russell's Rainbow - is the last one at the bottom. If you have Photoshop's Tool Tips enabled in the Preferences (they're enabled by default), you'll see the name "Russell's Rainbow" appear when you hover your mouse over the gradient's thumbnail. Click on the thumbnail to select the gradient, then click OK to exit out of the Gradient Editor:
Step 3: Select "Radial Gradient" From The Options Bar
To make the rainbow gradient appear as an arc when we draw it, go back up to the Options Bar at the top of the screen and click on the Radial Gradient option:

Step 4: Drag Out A Rainbow With The Gradient Tool
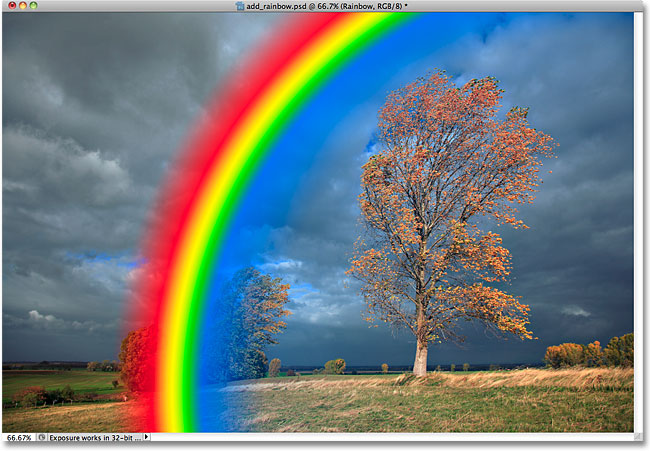
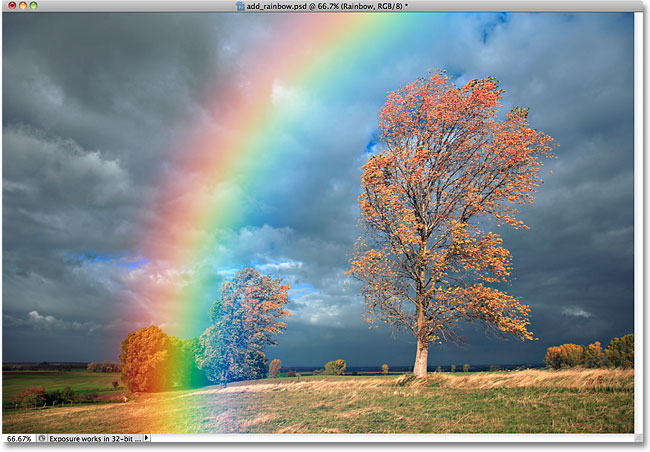
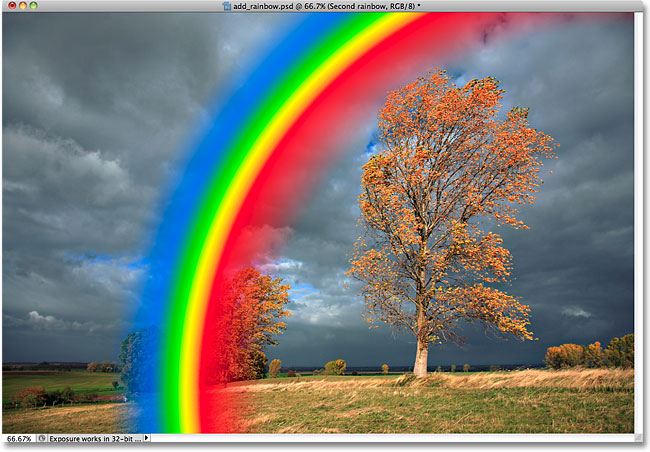
To add the rainbow colors to the image, all we need to do is drag out a gradient. I want my rainbow to appear as if it's touching the ground behind the group of trees on the left of my photo and then arching high above the larger tree on the right. To do that, I'll position my mouse almost at the edge of the photo near the bottom right corner, in line horizontally with the bottom of the trees on the left. I'll click on that spot to set the starting point for my gradient, and with my mouse button still held down, I'll drag all the way across the image to a point just beyond the left of the trees. Holding my Shift key down as I drag will limit the direction I can drag in, making it easy to drag horizontally:

When you release your mouse button, Photoshop draws the rainbow gradient. It doesn't look terribly realistic just yet, but it's a start:
Step 5: Change The Blend Mode Of The Rainbow Layer To "Screen"
Go up to the blend mode options in the top left of the Layers panel (it's the drop-down box set to "Normal" by default) and change the blend mode of the Rainbow layer to Screen:
The colors of the rainbow will now blend in better with the photo behind them:
Step 6: Apply The Gaussian Blur Filter
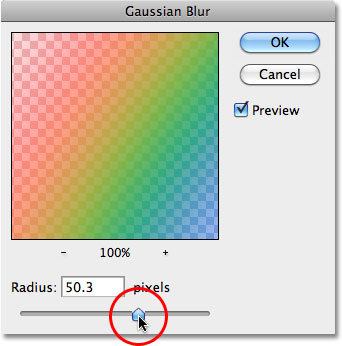
Let's blur the colors of the rainbow together so it looks more realistic. Go up to the Filter menu in the Menu Bar at the top of the screen, choose Blur, then choose Gaussian Blur:
This opens Photoshop's Gaussian Blur dialog box. Drag the Radius slider at the bottom of the dialog box towards the right to increase the amount of blurring being applied to the rainbow, keeping an eye on the image as you drag the slider so you can see a preview of what's happening. Continue dragging the slider to the right until the transitions between the colors look more soft and natural. The actual Radius value you end up choosing will depend a lot on the size and resolution of your image. For me, a value of around 50 pixels works well. Click OK when you're done to close out of the dialog box:
Here's my image after applying the Gaussian Blur filter:
Step 7: Add A Layer Mask
Click on the Layer Mask icon at the bottom of the Layers panel:
Nothing will happen yet in the document window, but Photoshop adds a layer mask thumbnail to the right of the main preview thumbnail on the Rainbow layer. If you look closely, you'll see a white highlight box appearing around the layer mask's thumbnail. This tells us that the mask, not the layer itself, is selected:
Step 8: Choose The Black To White Gradient
With the Gradient Tool still selected, right-click (Win) / Control-click (Mac) anywhere inside the document window to quickly access the gradient presets thumbnails, the same ones we saw a moment ago in the full Gradient Editor dialog box. Select the Black to White gradient by clicking on its thumbnail (third from the left, top row). Press Enter (Win) / Return (Mac) when you're done to close out of the gradient list:
Step 9: Choose "Linear Gradient" From The Options Bar
Go back up to the Options Bar and this time, click on the Linear Gradient option:

Step 10: Drag A Black To White Gradient On The Layer Mask
A real rainbow would usually appear to get brighter as it reaches higher into the sky, so we're going to give our Photoshopped rainbow that same effect by dragging a black to white gradient from the base of the rainbow (the point where the rainbow and the ground should meet) to the top of the image. To do that, with my Gradient Tool selected, I'll click my mouse somewhere along the bottom of the trees on the left. Then, with my mouse button still held down, I'll hold down my Shift key as well and drag straight up to the top of the image. Holding down Shift makes it easy to drag in a vertical direction:

When I release my mouse button, Photoshop draws the black-to-white gradient. Since the gradient was drawn on the layer mask, not on the layer itself, we don't see the actual gradient in the image. Instead, the rainbow now appears to start near the bottom of the trees on the left and gets brighter as it reaches higher into the sky:
Step 11: Duplicate The Rainbow Layer To Increase Its Brightness
To increase the brightness of the rainbow, simply press Ctrl+J (Win) / Command+J (Mac) to duplicate the layer. If, after duplicating the layer, you find the rainbow is now too bright, dial it back a few notches by lowering the opacity of the duplicated layer. You'll find the Opacity option directly across from the blend mode option at the top of the Layers panel. I'm going to lower mine down to around 70%:
Here's my image after duplicating my rainbow layer and then lowering the opacity:
Step 12: Group The Two Rainbow Layers
Let's do a little housekeeping in the Layers panel by grouping the two rainbow layers together. Grouping related layers makes it easier to keep the Layers panel organized. With the top layer selected, hold down your Shift key and click on the original Rainbow layer directly below it to select both layers at once. You'll see them both highlighted in blue, letting you know they're both selected:
Then go up to the Layer menu at the top of the screen and choose Group Layers:
Photoshop will group the two layers together in the Layers panel. Photoshop names the new group "Group 1". By default, the layer group will be closed, preventing us from seeing the two layers inside of it, which is fine for now:
Step 13: Add A New Blank Layer
We have our initial rainbow. Now let's add a second one to create a double rainbow effect! First, we'll need a new layer, so click once again on the New Layer icon at the bottom of the Layers panel:
The new layer will appear above the layer group in the Layers panel. Double-click on the new layer's name and change it to "Second rainbow", then press Enter (Win) / Return (Mac) to accept the name change:
Step 14: Re-Select The Rainbow Gradient
Click once again on the Gradient Picker in the Options Bar at the top of the screen:

When the Gradient Editor opens, click again on the Russell's Rainbow thumbnail to select the rainbow gradient, but don't close out of the Gradient Editor yet. We need to make some changes to it:
Step 15: Flip The Order Of The Colors In The Gradient
Whenever we see a double rainbow in nature, the colors in the second rainbow are always in reverse order, which means we need to reverse the order of the colors in our gradient. With the Gradient Editor still open, click on the blue color stop directly below the gradient preview bar and drag it towards the left. Then do the same thing with the green and yellow color stops, dragging them towards the left. It doesn't matter how far you drag them as long as there's some space between them. This is just to make sure they don't overlap each other as we reposition them. Leave the red color stop in place:
Click on the red color stop to select it, then enter a value of 82% into the Location option. This will place the red color stop in the same location that the blue color stop was in originally:
Next, click on the yellow color stop to select it, then set its Location value to 85%. This moves yellow into the spot originally held by green:

Click on the green color stop to select it, then set its Location value to 88%, which moves green into yellow's original location:
Finally, click on the blue color stop and change its Location value to 92%, placing it in red's original spot:
Directly above the gradient preview bar are more stops, filled with white, black or some shade of gray. These stops control the transparency levels (opacity) of the colors throughout the gradient. Click on the light gray opacity stop (second from the left) to select it, then change its Opacity value from its original 20% to 0%. Click OK when you're done to exit out of the Gradient Editor:

Step 16: Drag Out Another Rainbow Gradient
With the colors in the gradient now reversed, we're ready to create our second rainbow. First, I'm going to hide my original rainbow from view temporarily by clicking on the layer group's visibility icon (the eyeball) in the Layers panel:
Then I'll drag out a rainbow gradient just as I did back in Step 4: First, I need to re-select the Radial Gradient option in the Options Bar so the gradient will appear as an arc:

Then I'll click and drag out my second rainbow in the same location as the first one:
When I release my mouse button, Photoshop draws the gradient, looking very much like the first one except that this time, the order of the colors is reversed:
Step 17: Change The Blend Mode To Screen
Just as we did with the first rainbow, change the blend mode of the new rainbow from Normal to Screen:
The colors of the rainbow now blend in better with the image:
Step 18: Apply The Gaussian Blur Filter
Since the Gaussian Blur filter was the last filter we applied, we can quickly re-apply it with the same settings by pressing Ctrl+F (Win) / Command+F (Mac). Just as before, the color transitions now appear softer and more natural:
Step 19: Copy The Layer Mask Onto The Second Rainbow Layer
We need to add a layer mask at this point and draw a black to white linear gradient on the mask to hide the the rainbow below the point where it should be touching the ground and have it appear to increase in brightness as it reaches further into the sky, just as we did back in Steps 7-10 with the original rainbow. But why go through all that hassle again when we can just copy one of the layer masks we've already created onto the second rainbow's layer! To do that, I'll first need to open my layer group by clicking on the small triangle to the left of the group's name:

With the layer group open and the two layers that make up the original rainbow now visible, hold down your Alt (Win) / Option (Mac) key, click on the layer mask thumbnail for the "Rainbow copy" layer and drag it up to the second rainbow's layer:
When you see a highlight bar appear around the second rainbow's layer (shown in the previous thumbnail), release your mouse button. Photoshop copies the layer mask onto the second rainbow's layer:
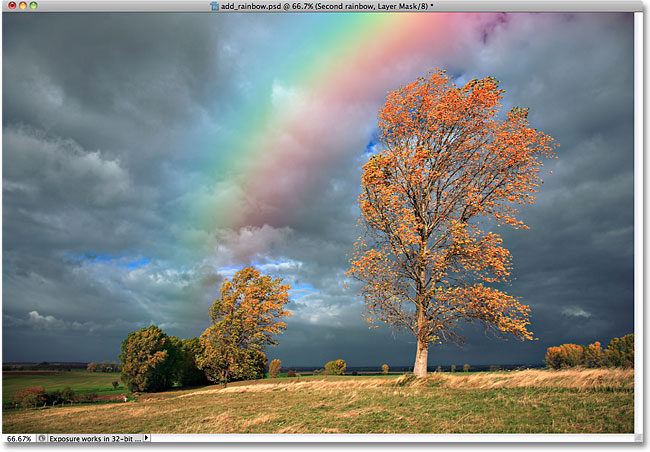
If we look at the image in the document window, we see that the bottom of the rainbow now fades out just above the trees, just like the original rainbow:
Step 20: Move The Second Rainbow Into Position
All that's left to do now is to move the second rainbow into position. Select Photoshop's Move Tool from the Tools panel, or press the letter V on your keyboard to quickly select it with the shortcut:
Before I move anything, I'll turn the original rainbow back on in the document by clicking once again on the layer group's visibility icon in the Layers panel:
Then, with the Move Tool selected and both rainbows now visible in the document, click inside the document window and, with your mouse button still held down, drag the second rainbow into place. I'm going to drag mine up and to the left so only a small part of it appears in the top left corner of the photo:

Step 21: Lower The Opacity Of The Second Rainbow
Finally, since I don't want my second rainbow to appear as bright as the original, I'll lower its opacity down to around 70% at the top of the Layers panel:
And with that, we're done! Here, after lowering the opacity, is my final Photoshop double rainbow effect: