
Radial Zoom Enhanced Eyes Effect In Photoshop
In this Photoshop Effects tutorial, we'll learn how to give someone's eyes a fun, easy to create "zoom" effect, with blur streaks that appear to zoom out from the center of the eyes. We'll also bump up the brightness and color saturation of the eyes at the same time, all using Photoshop's Radial Blur filter, a basic selection tool, a simple layer mask, and a layer blend mode!
This version of the tutorial is compatible with Photoshop CS5 and earlier. For Photoshop CS6 and CC (Creative Cloud), check out our fully updated version.
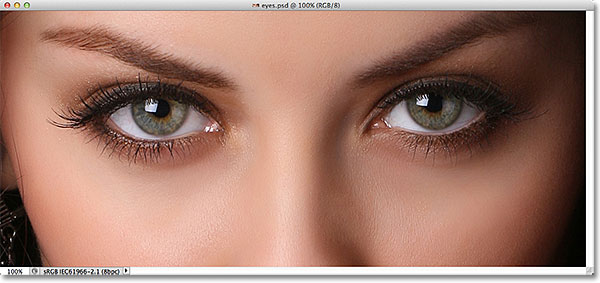
Here's the photo I'll be starting with:
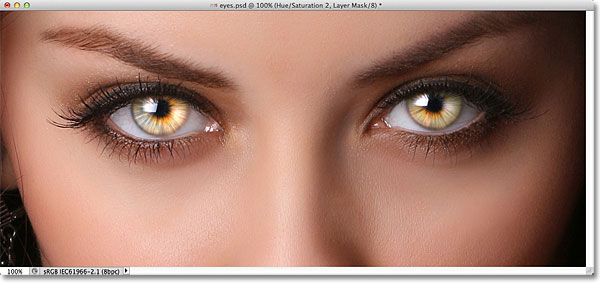
Here's what the final result will look like:
Create A Radial Zoom Enhanced Eyes Effect
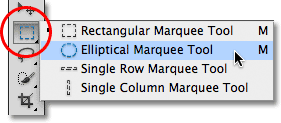
Step 1: Select The Elliptical Marquee Tool
I'm going to start with the eye on the left of the photo. We'll go through the steps needed to create the effect in one eye, then it's simply a matter of repeating the same steps for the other eye. To begin, select the Elliptical Marquee Tool from the Tools panel. By default, it's hiding behind the Rectangular Marquee Tool, so click on the Rectangular Marquee Tool and hold your mouse button down until a fly-out menu appears listing the other tools that are available in that same spot. Choose the Elliptical Marquee Tool from the list:
Step 2: Select The Iris
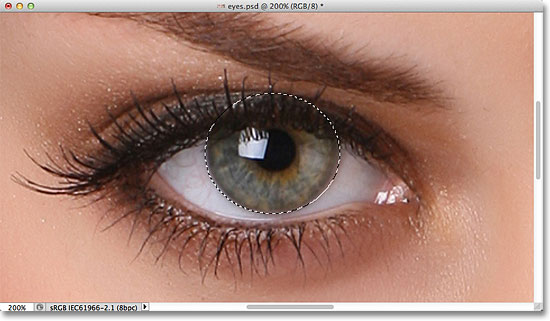
We're going to use the Elliptical Marquee Tool to draw a selection around the iris (the colored part of the eye). In my case, because the upper part of the iris is covered by the woman's eyelid, selecting the iris with the Elliptical Marquee Tool will be a two-step process.
I'll begin by clicking and dragging out a selection outline around the iris, ignoring for the moment that the top of my selection is extending up into the eyelid. You can reposition the selection outline as you're drawing it, which is often helpful for getting the selection exactly where you need it, by holding down your spacebar, dragging the selection outline into position, then releasing your spacebar and continuing to drag out the selection:
To remove the part of the selection that extends over the eyelid, with the Elliptical Marquee Tool still selected, I'll choose the Intersect With Selection option in the Options Bar by clicking on its icon:

A small "x" will appear in the lower right of my mouse cursor, letting me know I'm in the Intersect With Selection mode. Then, with my initial selection still active, I'll click and drag out a second selection around just the part of my initial selection that I want to keep, which is everything except for the top area that extends over the eyelid. We can see in the screenshot that the top of my second selection is cutting off the unwanted top area of my initial selection:

With my second selection outline in place, I'll release my mouse button, and because I was in the Intersect With Selection mode, Photoshop keeps only the part of the initial selection that was surrounded by the second selection. The unwanted top area over the eyelid is now gone:

Step 3: Copy The Selection To A New Layer
Next, we'll copy our selection to a new layer. Hold down your Alt (Win) / Option (Mac) key and, with the key still held down, go up to the Layer menu in the Menu Bar along the top of the screen, choose New, then choose Layer via Copy:
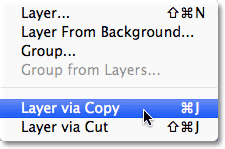
Holding down the Alt (Win) / Option (Mac) key as we select the command tells Photoshop to first pop open the New Layer dialog box for us so we have a chance to name the new layer before it's added. Name the layer "Left Eye" (or "Right Eye" if you're working on the right eye):
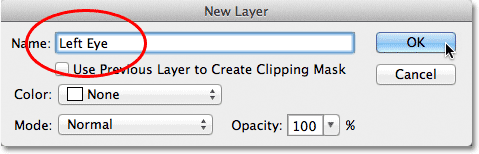
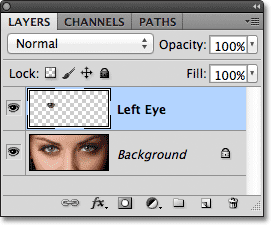
Click OK when you're done to close out of the dialog box. Nothing will seem to have happened in the document window (except that the selection outline will disappear), but we can see in the Layers panel that our selection is now sitting on its own layer directly above the main photo on the Background layer:
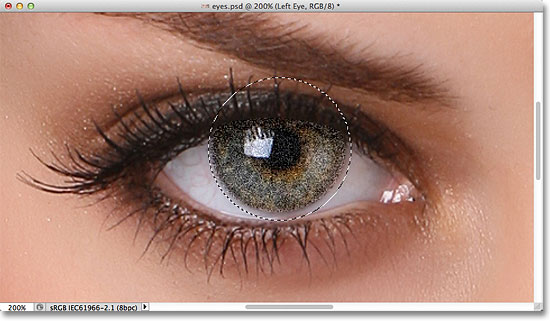
Step 4: Draw A Circular Selection Around The Iris
With the Elliptical Marquee Tool still selected in the Tools panel, click in the very center of the pupil (the black area in the center of the eye), then begin dragging out another elliptical selection outline. Once you've started dragging, press and hold Shift+Alt (Win) / Shift+Option (Mac) on your keyboard, then continue dragging. Holding the Shift key down as you drag will force the selection into a perfect circle, while the Alt (Win) / Option (Mac) key tells Photoshop to draw the selection outward from the point you clicked on. Draw your circular selection outward until it's just a bit larger than the iris. When you're done, release your mouse button, then release your Shift and Alt (Win) / Option (Mac) keys (make sure you release your mouse button before releasing the keys, otherwise you won't end up with a circular selection):

Step 5: Add Noise To The Selection
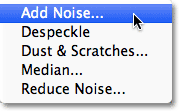
Let's add some noise to our selection, which will help to create our blur streaks. For that, we'll use Photoshop's Add Noise filter. Go up to the Filter menu at the top of the screen, choose Noise, then choose Add Noise:
This opens the Add Noise dialog box. Set the noise Amount to around 10%, then make sure the Gaussian and Monochromatic options are both selected at the bottom of the dialog box:
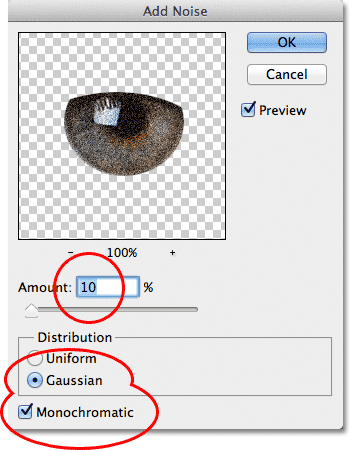
Click OK to close out of the dialog box. The area inside the selection is now filled with noise:
Step 6: Apply The Radial Blur Filter
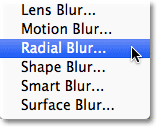
With the noise added, go back up to the Filter menu at the top of the screen and this time choose Blur, then Radial Blur:
This opens the Radial Blur filter's dialog box. Increase the Amount value at the top of the dialog box to around 80 or so, then set the Blur Method to Zoom and the Quality to Best. Don't touch the Blur Center box in the lower right of the dialog box. We want to leave the blur center exactly where it is (in the center) so that our blur streaks will appear to be zooming out from the center of our selection:
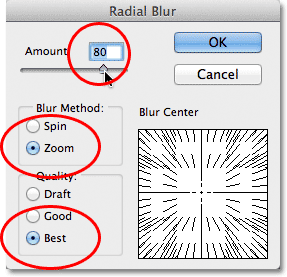
Click OK to close out of the dialog box. Photoshop applies the blurring to the selection which creates a "zoom" effect from the center of the eye:

Step 7: Turn The Selection Into A Layer Mask
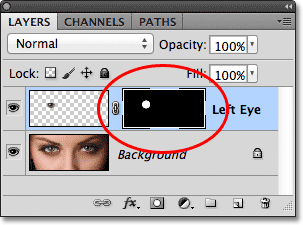
We need to clean up the area around the iris to remove the blur streaks that are extending into the white part of the eye, and for that, we'll use a layer mask. With your selection outline still active, click on the Layer Mask icon at the bottom of the Layers panel:
This adds a layer mask to the "Left Eye" layer, and because we had a selection active, Photoshop used the selection to create the mask. If we look at the layer mask thumbnail in the Layers panel, we see that the mask is filled with black except for a small area of white, which is the area that was inside of our selection outline. White areas on a layer mask represent the areas on the layer that are visible in the document, while black represents areas that are hidden:
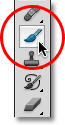
Step 8: Select The Brush Tool
We're going to paint away the unwanted blurred areas around the iris, which means we need Photoshop's Brush Tool. Select the Brush Tool from the Tools panel:
Step 9: Paint Away Any Unwanted Areas
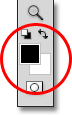
Photoshop uses the Foreground color as the color of the brush, so let's make sure the Foreground color is set to black by pressing the letter D on the keyboard, which will reset the Foreground and Background colors to their defaults, making the Foreground color white and the Background color black (the normal default colors are reversed when we have a layer mask selected). Then press the letter X on the keyboard to swap the colors, which sets the Foreground color to black. You can see the current Foreground and Background colors in the color swatches near the bottom of the Tools panel:
With black as the Foreground color, use a small, soft-edge brush and paint around the outer edge of the iris to clean up the unwanted blur streaks in the white part of the eye. Since we're painting on the layer mask, not on the layer itself, any areas we paint over with black will disappear from the image. You can adjust the size and edge hardness of the brush directly from the keyboard. Pressing the left bracket key ( [ ) will make the brush size smaller by 5 pixels each time you press the key, while pressing the right bracket key ( ] ) will make the brush larger by 5 pixels. If you hold down your Shift key while pressing the left bracket key, you'll make the brush edge softer by 25% each time you press the key. Holding Shift and pressing the right bracket key will make the edge harder by 25% each time :

If you make a mistake and accidentally paint over the iris, simply press the letter X on your keyboard to swap the Foreground and Background colors, which makes your Foreground color white. Paint over the mistake to bring back the blur effect, then press X again to change your Foreground color back to black and continue painting around the iris.
We also want to remove the blur streaks inside the pupil, so again using a small, soft-edge brush, paint with black over the pupil to clean up that area. When you're done, the blur streaks should be visible only inside the iris itself:

Step 10: Add A Hue-Saturation Adjustment Layer
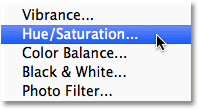
We've created our zoom effect, so now let's brighten the iris and increase its color saturation. Hold down your Alt (Win) / Option (Mac) key and click on the New Adjustment Layer icon at the bottom of the Layers panel:
Choose Hue/Saturation from the list of adjustment layers that appears:
Holding down the Alt (Win) / Option (Mac) key while selecting the adjustment layer tells Photoshop to first pop open the New Layer dialog box, the same dialog box we saw back in Step 3. You can leave the adjustment layer's name set to its default, but select the option directly below the name, Use Previous Layer to Create Clipping Mask, by clicking inside its checkbox. Then change the Mode (the layer blend mode) of the adjustment layer from Normal to Screen:

Click OK to close out of the dialog box, at which point Photoshop adds the new Hue/Saturation adjustment layer directly above the "Left Eye" layer. Notice in the Layers panel that the adjustment layer is indented to the right with a small arrow pointing down at the layer below it. This tells us that the adjustment layer is clipped to the "Left Eye" layer, which means it will affect only the contents of the "Left Eye" layer. The original photo on the Background layer will not be affected. Also, note that the adjustment layer's blend mode has been set to Screen in the top left corner of the Layers panel:
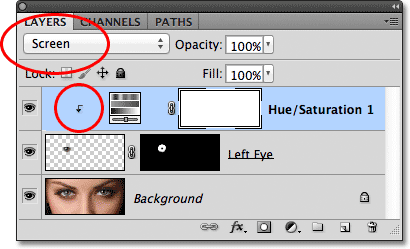
The Screen blend mode is one of several layer blend modes in Photoshop that has the effect of lightening the image, and with the Hue/Saturation adjustment set to Screen, the iris in the eye is now much brighter:
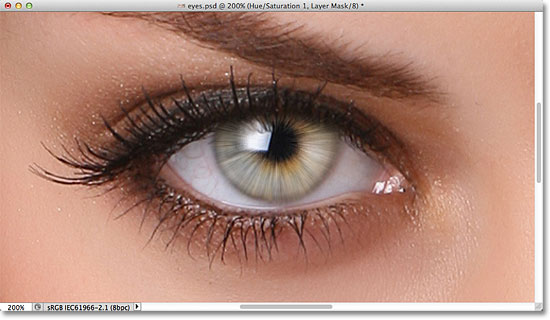
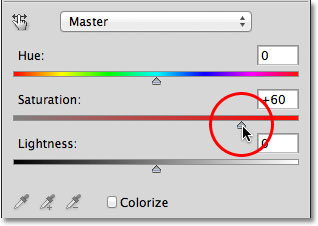
We can increase the color saturation in the iris as well. If you're using Photoshop CS4 or higher, you'll find the controls and options for the Hue/Saturation adjustment layer in the Adjustments Panel which was first introduced in CS4. For Photoshop CS3 and earlier users, a separate Hue/Saturation dialog box will be open on your screen. To increase color saturation in the iris, drag the Saturation slider towards the right. Keep an eye on the effect in the document window as you drag the slider so you don't push the Saturation level too far. I'm going to set my Saturation value to around 60:
For Photoshop CS3 and earlier users, click OK when you're done to close out of the Hue/Saturation dialog box. Photoshop CS4 and higher users can leave the Adjustments Panel open. Here's my image after boosting color saturation in the iris. Depending on the original eye color, the increased saturation may appear subtle, as it is here, or more intense:

Step 11: Try A Different Lightening Blend Mode (Optional)
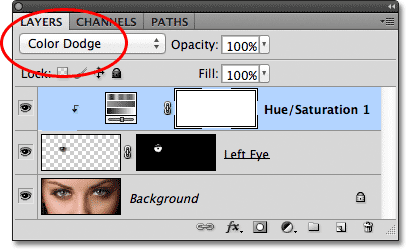
As I mentioned, the Screen blend mode is just one of several layer blend modes in Photoshop designed to lighten the image, and it's by far the most commonly used of the lightening modes. However, for a different result, try changing the blend mode of the Hue/Saturation adjustment layer to either Color Dodge or Linear Dodge, both of which will give a stronger, more intense result. I'll change my blend mode from Screen to Color Dodge:
Here's the result that Color Dodge gives me:
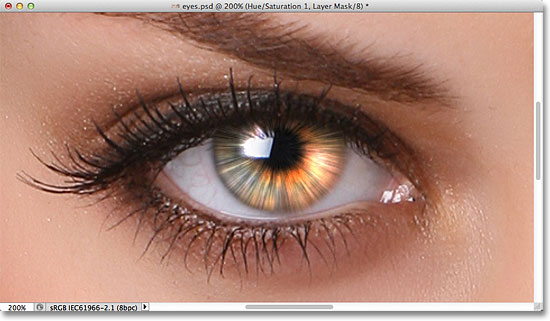
Next, I'll try changing the blend mode from Color Dodge to Linear Dodge:
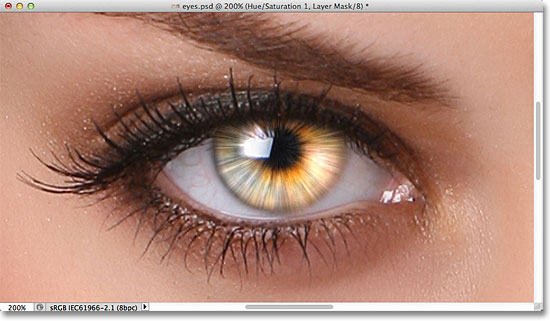
And here's the result. In my case with this image, I think the Linear Dodge blend mode gives me the best result, but be sure to try all three blend modes and choose the one that works best for your image:
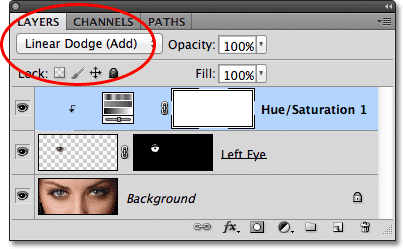
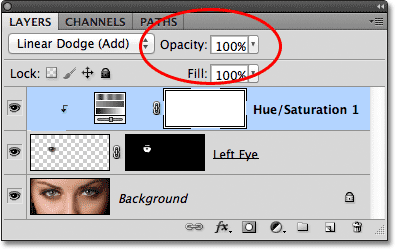
Step 12: Fine-Tune The Result With The Layer Opacity Option
Once you've decided on a blend mode to use, you can further fine-tune the results by lowering the adjustment layer's opacity value which controls the layer's level of transparency. You'll find the Opacity option directly across from the Blend Mode option at the top of the Layers panel. I'm going to leave mine set to 100%, but if needed, you can reduce the intensity of the brightening effect simply by lowering the opacity value:
After you've completed the effect in one eye, simply repeat the same steps with the other eye. However, before you begin, make sure you re-select the original image by clicking on the Background layer in the Layers panel to make it active:

With the Background layer re-selected, you can repeat the same steps to add the effect to the other eye. Here's what my final result looks like: