Faded Pixels Photo Border Effect In Photoshop
In this Photoshop Effects tutorial, we'll learn how to create a "faded pixels" photo border, with the image appearing through randomly-sized and scattered square pixel shapes that gradually fade into a solid colored background.
To create the effect, we'll be loading in one of the additional brush sets included with Photoshop, and we'll use some of the Brush Dynamics options to randomly resize and scatter the brush as we paint. We'll start with white as our background color, but at the end of the tutorial, we'll learn how we can easily change the color, including how to sample a color directly from the image itself!
I'll be using Photoshop CS5 for this tutorial but any recent version of Photoshop will work.
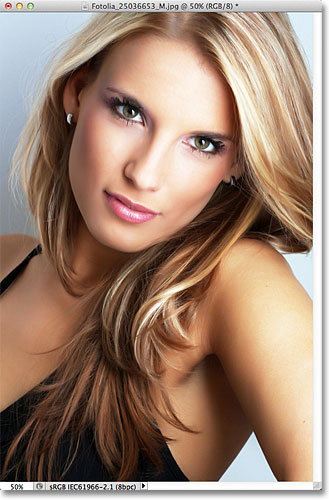
Here's the original image I'll be starting with:
And here's how it will look when we're done:
How To Create A Faded Pixels Photo Border
Step 1: Duplicate The Background Layer
With the photo newly opened in Photoshop, let's begin by making a copy of the image so we can leave the original untouched in case we ever need it again. If we look in the Layers panel, we see that we're starting with just the original photo sitting on the Background layer:

To quickly duplicate the layer, press Ctrl+J (Win) / Command+J (Mac) on your keyboard. Photoshop makes a copy of the layer, names the copy "Layer 1", and places it above the original:

Step 2: Add A White Solid Color Fill Layer Between The Existing Layers
Select the Background layer by clicking on it in the Layers panel:

With the Background layer selected, click on the New Fill or Adjustment Layer icon at the bottom of the Layers panel:
Choose a Solid Color fill layer from the top of the list that appears:

We're going to use this Solid Color fill layer as the background color for our effect. Photoshop will pop open the Color Picker so we can choose the color we want. Choose white for now, either by clicking on white in the top left corner of the color selection box on the left or by entering 255 for the R, G and B values near the bottom center of the dialog box. At the end of the tutorial, we'll learn how we can easily change the background color, but white will do for now:

Click OK when you're done to close out of the Color Picker. We won't be able to see the white background color just yet in the document, but if we look again in the Layers panel, we see the new Solid Color fill layer, which Photoshop has named "Color Fill 1", sitting between Layer 1 and the Background layer:

Step 3: Add A Black-Filled Layer Mask To Layer 1
Click on Layer 1 in the Layers panel to select it:

With Layer 1 selected, press and hold the Alt (Win) / Option (Mac) key on your keyboard and click on the Layer Mask icon at the bottom of the Layers panel:
This adds a layer mask to Layer 1, and because we held down the Alt (Win) / Option (Mac) key as we clicked on the Layer Mask icon, Photoshop filled the layer mask with black, which completely hides the photo on the layer from view. We can see the black-filled layer mask thumbnail on Layer 1 in the Layers panel:

With the photo on Layer 1 hidden, we can now see the white Solid Color fill layer in the document:

Step 4: Duplicate Layer 1 Three Times
Press Ctrl+J (Win) / Command+J (Mac) on your keyboard three times to make three more copies of Layer 1. We won't be able to see anything happening in the document window, but when you're done, you should have four copies of the photo, each with its own black-filled layer mask, sitting above the Solid Color fill layer in the Layers panel:

Step 5: Select The Brush Tool
Select Photoshop's Brush Tool from the Tools panel:

Step 6: Load The Square Brushes Set
We're going to use one of Photoshop's brushes to create our pixel effect, but the brush we need isn't loaded in for us by default so we first need to load it manually. With the Brush Tool selected, right-click (Win) / Control-click (Mac) anywhere inside the document to quickly open the Brush Picker, then click on the small arrow icon in the top right corner:

This opens a menu with various options, including a list at the bottom of additional brush sets we can load in. Choose the Square Brushes set:

Photoshop will ask if you want to replace the original brushes with the new ones. Click Append to keep the originals and simply add the new brushes in after them:

With the new brushes loaded, scroll through the brush thumbnails in the Brush Picker until you come to the square brushes (which should be at the very bottom of the list). Double-click on the 24 pixel square brush to select it and close out of the Brush Picker:
Step 7: Set The Brush Size Jitter To 100%
Press the F5 key on your keyboard to quickly open Photoshop's main Brushes panel, then click directly on the words Shape Dynamics on the left side of the panel. Make sure you click on the words themselves, not just in the checkbox to the left of the words:

Increase the Size Jitter option all the way to 100%, which will create randomly-sized squares as we paint with the brush. Make sure the Minimum Diameter option is set to 0%, and that the Angle Jitter and Roundness Jitter options are also set to 0%:

Step 8: Add Scattering To The Brush
Click directly on the word Scattering below Shape Dynamics on the left side of the Brushes panel. Again, make sure you click on the word itself, not inside the checkbox:

Increase the Scatter value to around 700% or so, which will scatter the squares as we paint. Select the Both Axes option by clicking inside its checkbox, then make sure the Count option is set to 1 and Count Jitter is set to 0%. When you're done, press F5 again on your keyboard to close out of the Brushes panel:

Step 9: Select The Top Layer's Mask
With our square brush ready to go, click on the top layer's mask thumbnail in the Layers panel. This way, we'll be painting on the layer mask itself, not on the photo. A white highlight box will appear around the thumbnail letting you know the mask is selected:

Step 10: Paint Over The Main Areas Of The Photo
Make sure the Opacity value for the top layer is set to 100%, which it should be by default:

Also, before you start painting, press the letter D on your keyboard to quickly make sure your Foreground and Background colors are set to their defaults of white (Foreground color) and black (Background color). Photoshop uses the Foreground color as the color of the brush, and we want to be sure we're painting on the layer mask with white so we can reveal the photo as we paint:

With the square brush in hand, the layer opacity set to 100% and your Foreground color set to white, begin painting over just the main, important areas of your photo. Of course, since all we can see at the moment is the solid white background, you'll need to take a "best guess" at where these important areas are. If you don't get it right the first time, simply press Ctrl+Z (Win) / Command+Z (Mac) to undo your brush stroke, then try again.
As you paint, you'll see the photo appearing through a series of randomly-sized and scattered squares, creating the first stages of our pixel effect:

If you're not happy with the size of your square brush, press Ctrl+Z (Win) / Command+Z (Mac) to undo the brush stroke (or press Ctrl+Alt+Z (Win) / Command+Option+Z (Mac) repeatedly to undo multiple brush strokes), then resize your brush using the left and right bracket keys on your keyboard. Each time you press the left bracket key ( [ ), you'll make the brush a bit smaller, while the right bracket key ( ] ) will make it larger. Begin painting again once you're happy with the brush size.
Continue painting over the main part(s) of your image. Here's my document so far. Normally, I would make my brush size a bit smaller than what I'm using here, which would give me smaller squares, but smaller squares could be hard to see in the screenshots so for the sake of this tutorial, I'm leaving the brush set to its original 24 pixel size:
Step 11: Select The Layer Mask On The Next Layer
Click on the mask thumbnail for the layer directly below the top layer. Again, a white highlight border will appear around the thumbnail letting you know the layer mask is selected:

Step 12: Lower The Layer's Opacity To 70%
Lower the Opacity value for this layer down to around 70%:

Step 13: Paint Around The Initial Area To Reveal More Of The Photo
With the layer's opacity lowered, paint around the initial area to reveal more of the photo. Since the layer's opacity is set to only 70%, this new area will appear a bit faded compared to the previous area we painted over:
Step 14: Select The Next Layer's Mask
Click on the mask thumbnail for the third layer from the top:

Step 15: Lower The Layer's Opacity To 35%
Lower the opacity for this third layer down to around 35%:

Step 16: Paint To Reveal More Of The Photo
Continue painting around the previous area to reveal more of the photo. This new area will appear even more faded than the last thanks to the 35% opacity value:
Step 17: Select The Next Layer's Mask
Finally, click on the original Layer 1's mask thumbnail to select it:

Step 18: Lower The Layer's Opacity To 10%
Lower the opacity of Layer 1 all the way down to 10% or so:

Step 19: Paint In The Remaining Areas Of The Photo
Paint inside the remaining white areas around the image to reveal the rest of it. This last part will appear very faint with the layer's opacity at only 10%:
Step 20: Change The Background Color (Optional)
At this point, the effect is complete, but if you want to change the background color to something other than white, just double-click on the color swatch for the Solid Color fill layer in the Layers panel:

This will re-open the Color Picker. You can select a new color from the Color Picker, but what I like to do is sample a color directly from the image itself. To do that, with the Color Picker still open, move your mouse cursor over the image. You'll see your cursor temporarily change into the Eyedropper Tool icon. Click on an area of the image that contains the color you want for your background. I'll click on an area in the woman's forehead:

Click OK when you're done to close out of the Color Picker. The Solid Color fill layer instantly updates to the newly sampled color, giving us our new background color for the effect: